
Complete Guide to Tiger’s Nest Monastery (Paro Taktsang) Hike: Altitude, Difficulty & What to Expect
Introduction
Paro Taktsang Monastery (popularly known as Tiger’s Nest) is not just Bhutan’s most iconic landmark. It is the hike that most visitors to Bhutan will remember long after the country’s dzongs, festivals, and mountain vistas fade from memory.
Tiger’s Nest is one of the few places in the world that has earned its reputation. One of the reasons for said reputation is the fact that the monastery is perched 900 metres above the floor of Paro Valley on a sheer granite cliff.
But here’s what most travellers won’t tell you upfront: Tiger’s Nest is as much a physical experience as it is a cultural one. The altitude is real, the trail is steep, and the final reward is nothing short of extraordinary. This guide exists to help you prepare honestly, so that you can hike with confidence, not guesswork.
Ready to hike Tiger’s Nest? Far Out’s Bhutan tour packages include a guided Tiger’s Nest hike with expert local guides who know every step of the trail, and every story behind it.
About Tiger’s Nest Monastery (Paro Taktsang)
This is one of Buddhism’s Most Sacred Cliffside Monasteries. Paro Taktsang is a 17th-century Buddhist monastery complex built into a vertical cliff face at 3,120 metres (10,240 feet) above sea level, in the Paro district of western Bhutan.
According to Bhutanese religious tradition, Guru Rinpoche (the saint credited with introducing Vajrayana Buddhism to Bhutan) arrived on the back of a tigress and meditated in a cave at this very site in the 8th century CE. The cave, and later the monastery built around it, became one of the holiest pilgrimage sites in the Himalayan Buddhist world.
Today, Paro Taktsang is both a living monastery and a UNESCO tentative list site. Monks reside and pray within its walls. Pilgrims from across Bhutan and the world make the climb not just as a hike, but as an act of devotion. For travellers, it is the single most-visited site in the country.
Why It’s Unmissable on Any Bhutan Tour
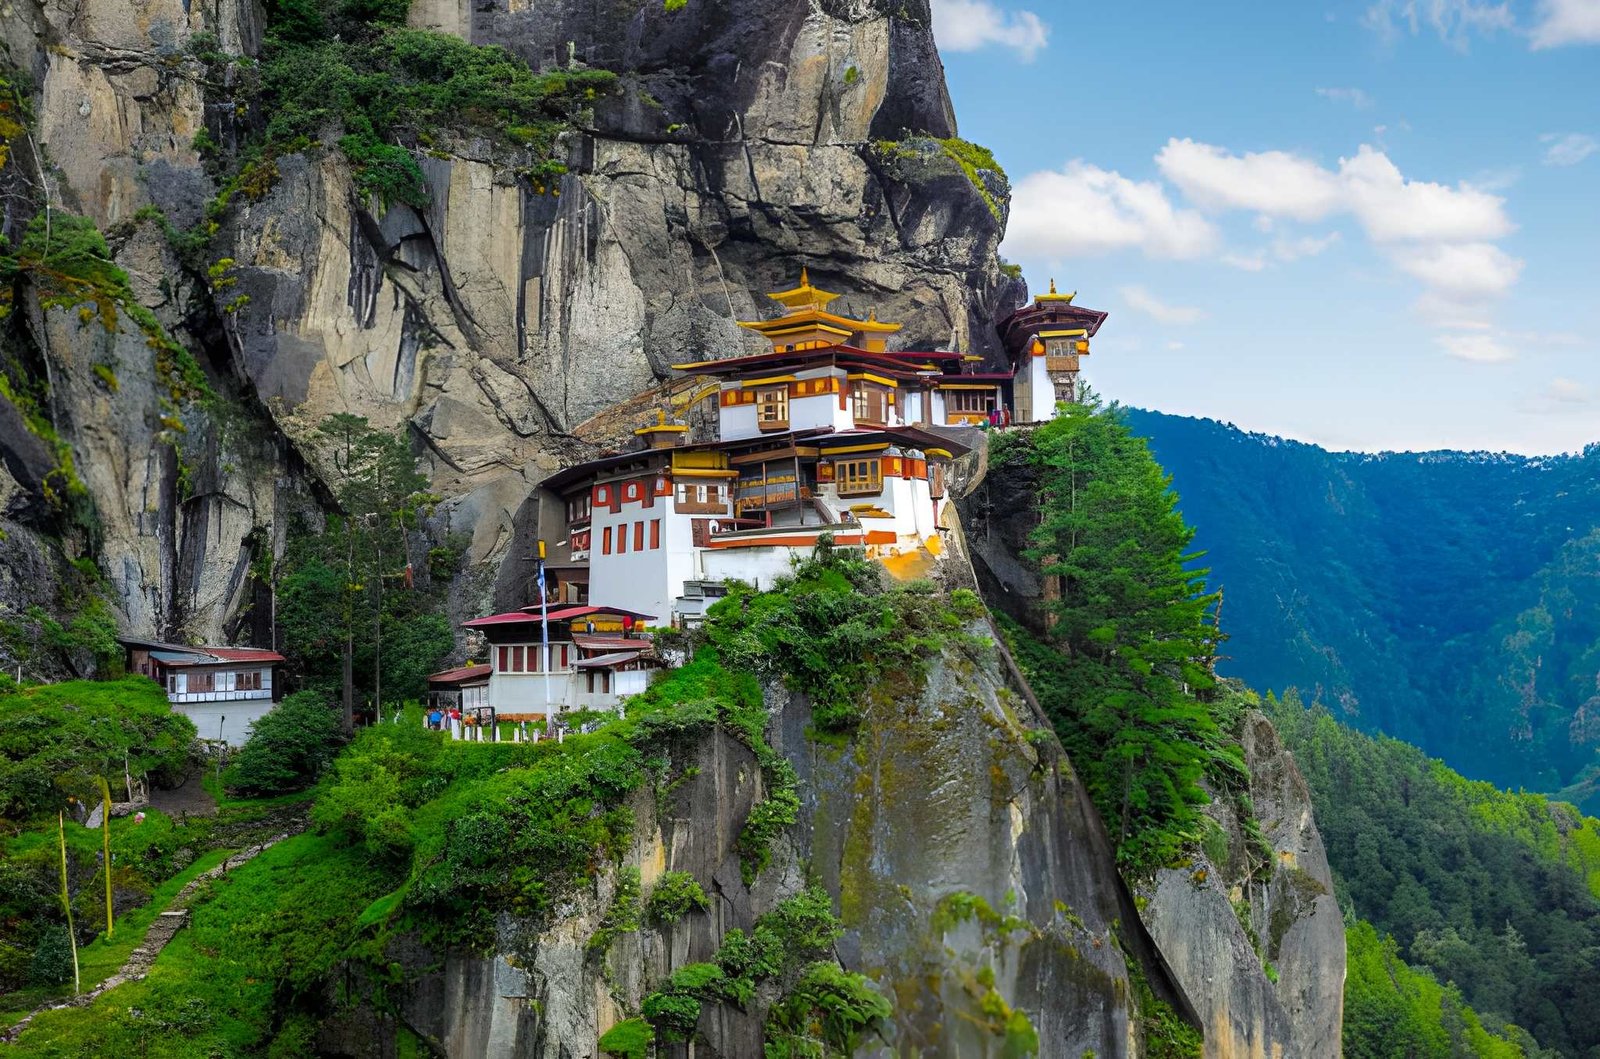
No other site in Bhutan combines natural drama, spiritual depth, and physical achievement the way Tiger’s Nest does. The monastery clings to a rockface so steep that it seems impossible by any pre-modern standard of construction.
Its white-walled temples, golden rooftops, and prayer flag-draped cliffs appear almost suspended in midair. The view from the wide ledge roughly halfway up the trail (or the main viewpoint) is one of the most photographed images in all of Asia.
It is, simply, the kind of place that changes how you see a country.
Where Is Tiger’s Nest Located?
Paro Taktsang sits above Paro Valley in the Paro district, which is about 10 km north of Paro town in Western Bhutan. The valley itself sits at roughly 2,200 metres (7,218 feet), making the climb to the monastery a consistent elevation gain of approximately 900 metres. The surrounding landscape is a mix of blue pine forest, alpine scrub, and open ridgelines with sweeping views of the valley below.
Paro is also home to Bhutan’s only international airport, making it the entry and exit point for most visitors. This geographical convenience means Tiger’s Nest is accessible from day one of most Bhutan itineraries, though allowing a day of acclimatisation first is strongly recommended.
Getting to the Trailhead
The hike begins at a car park at the base of the mountain, about a 10-minute drive from Paro town. Your tour operator or hotel can arrange transport. Entry requires a valid Bhutan Sustainable Development Fee (SDF) clearance, which your licensed tour operator will handle. Solo independent hiking is not permitted in Bhutan as all visits must be arranged through a licensed Bhutanese tour operator.
Tiger’s Nest Altitude & Elevation
| Metric | Detail |
| Monastery elevation | 3,120 m (10,240 ft) |
| Paro Valley base (trailhead) | ~2,400 m (7,874 ft) |
| Total elevation gain | ~720 m (2,362 ft) |
| Paro town elevation | ~2,200 m (7,218 ft) |
| Highest point on the trail | ~3,140 m before final descent |
The altitude of Tiger’s Nest (3,120 metres above sea level) is high enough to cause mild altitude-related discomfort in visitors who are not acclimatised. However, it is not at the level that poses a serious altitude sickness risk for most healthy adults who ascend at a reasonable pace.
Elevation Gain on the Hike
From the car park at roughly 2,400 metres, the trail climbs steadily through pine forest, ascending approximately 720 metres before reaching the monastery. This is a sustained uphill effort, not a stroll. The elevation gain occurs primarily in the first two-thirds of the trail, with a short descent followed by a steep stone staircase for the final approach.
The trail does not have sharp altitude spikes. Instead, it is a long, consistent climb that rewards a steady pace over a rushed one.
How Altitude Affects Your Hike
Altitude Awareness: If you are flying directly from sea-level cities (Bangkok, Delhi, Singapore, Kathmandu) into Paro, your body has had very little time to adjust. Even if you feel fine the first morning, your oxygen efficiency is reduced. This matters on the climb.
At 3,000+ metres, the air holds roughly 30% less oxygen than at sea level. For most people, this manifests as slightly heavier breathing and a slower pace, but no dramatic illness. However, if you rushed your journey into Bhutan or are particularly sensitive to altitude, you may experience headaches, fatigue, or mild nausea on the upper section of the trail.
The practical fix is simple: Go slow. The monks who climb this trail regularly do not rush. Neither should you.
- Spend at least one night in Paro before attempting the hike
- Drink 2–3 litres of water the day before and the morning of
- Avoid alcohol the night before. This accelerates dehydration at altitude
- Carry a light snack for energy on the upper section
Tiger’s Nest Hike: Overview
| Factor | Details |
| Total distance | ~9–10 km (round trip) |
| Average hiking time | 4–6 hours (up and back) |
| Ascent time | 2–3 hours |
| Descent time | 1.5–2 hours |
| Difficulty rating | Moderate to Moderately Challenging |
| Trail surface | Dirt path, stone steps, forest trail |
The hike is classified as moderate, not beginner, but far from technical. There are no ropes, no scrambling, and no elevation zones that require mountaineering experience. What it does require is sustained cardio fitness and the willingness to go at a deliberate pace.
Who Can Complete the Tiger’s Nest Hike?
This is the question most guides skip past. Here’s an honest answer:
- Healthy adults of most fitness levels can complete this hike if they pace themselves and take breaks
- Children aged 8 and above with reasonable fitness regularly complete it
- Older adults (60s and 70s) successfully hike Tiger’s Nest. Many old people trek with trekking poles
- Visitors with heart or lung conditions should consult a doctor before attempting
- Those with severe knee problems may find the descent challenging due to the stone stair sections
Horses are available for the lower section of the trail (up to the viewpoint café) for an additional fee. This is a really good practical option for those with mobility concerns or who want to conserve energy for the upper trail.
Step-by-Step Hiking Route
Stage 1: Trailhead to Viewpoint Café (The Main Climb)
The hike begins through a dense forest of blue pine and rhododendron. The trail is wide and well-maintained, switchbacking steadily upward. This section takes most walkers 1.5 to 2 hours. It’s consistent but manageable. It’s the kind of climb where a slow, steady rhythm carries you further than bursts of speed.
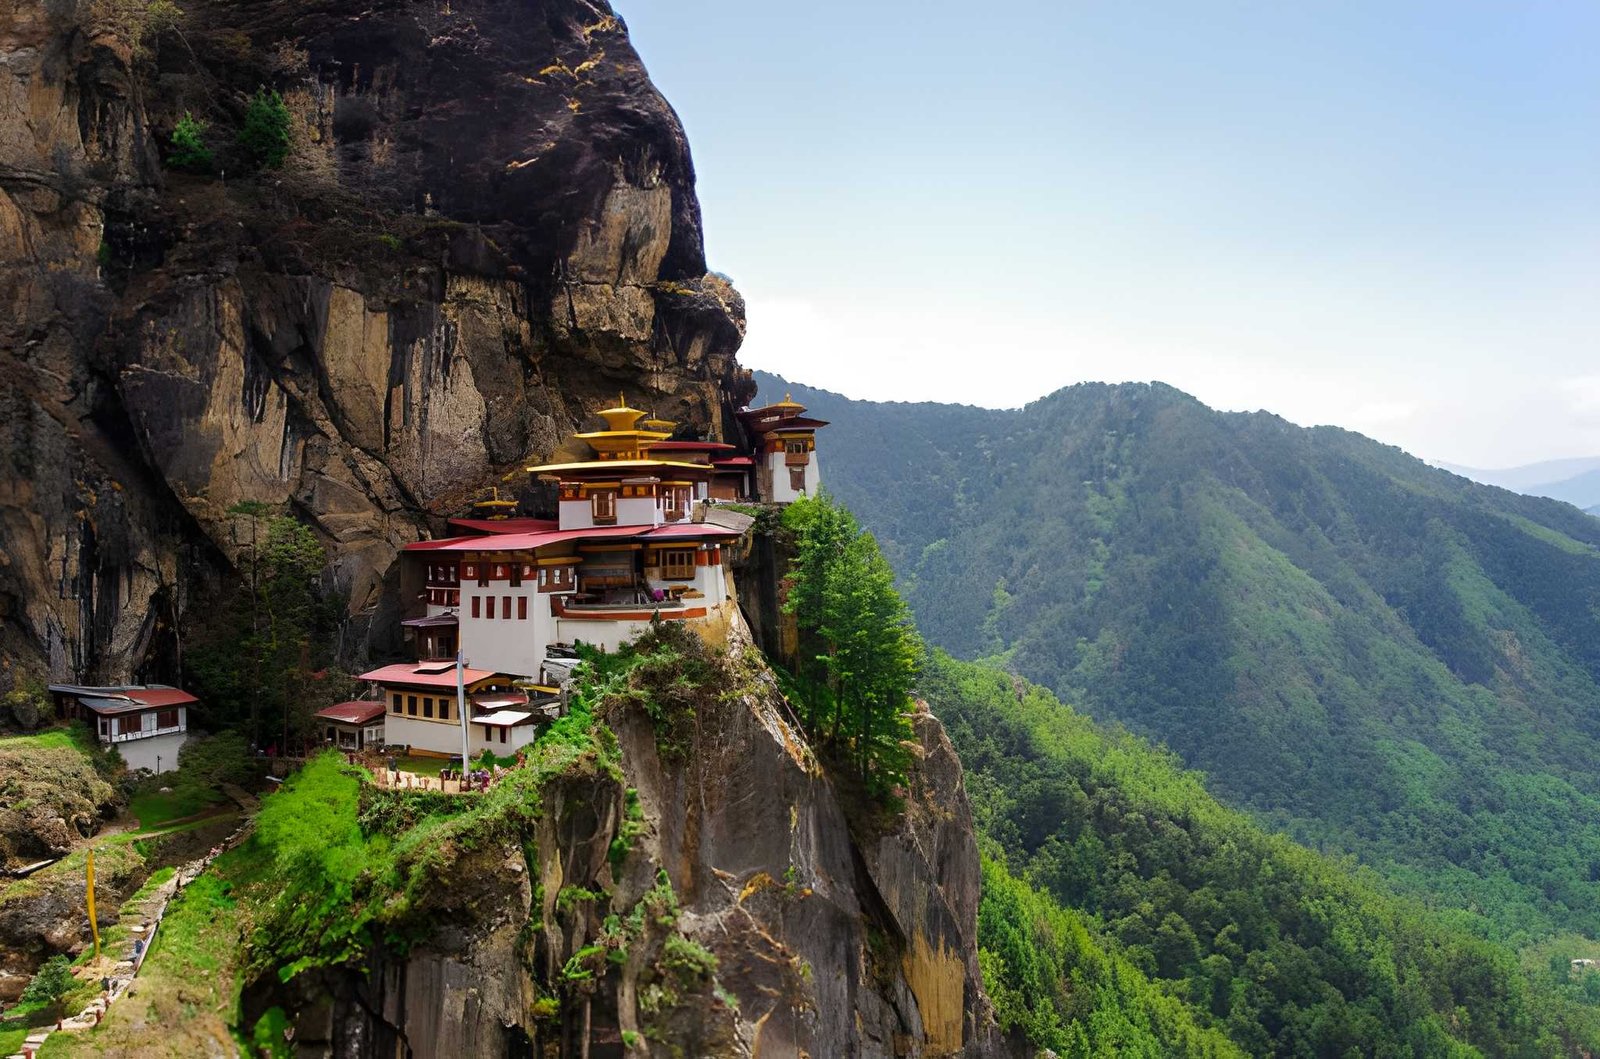
As you ascend, the trees thin and you begin catching glimpses of the valley below. Paro town appears as a patchwork of rooftops and paddy fields far beneath you. Then, as you crest a ridgeline, Tiger’s Nest comes into full view for the first time. You will see the monastery plastered impossibly to the cliff face across a narrow gorge. Most people stop here involuntarily. It has that effect.
Stage 2: The Viewpoint Café
At roughly the halfway point (elevation ~2,900 m), a small café offers tea, light snacks, and a bench with what is arguably Bhutan’s finest single view. This is your natural rest stop. Take 20–30 minutes here. Drink water, eat something, take your photographs, and let your legs recover.
The monastery visible from here looks close. It is not. At least not in terms of effort. The trail ahead descends sharply into the gorge before climbing again via several hundred stone steps.
Stage 3: The Final Descent and Stone Staircase
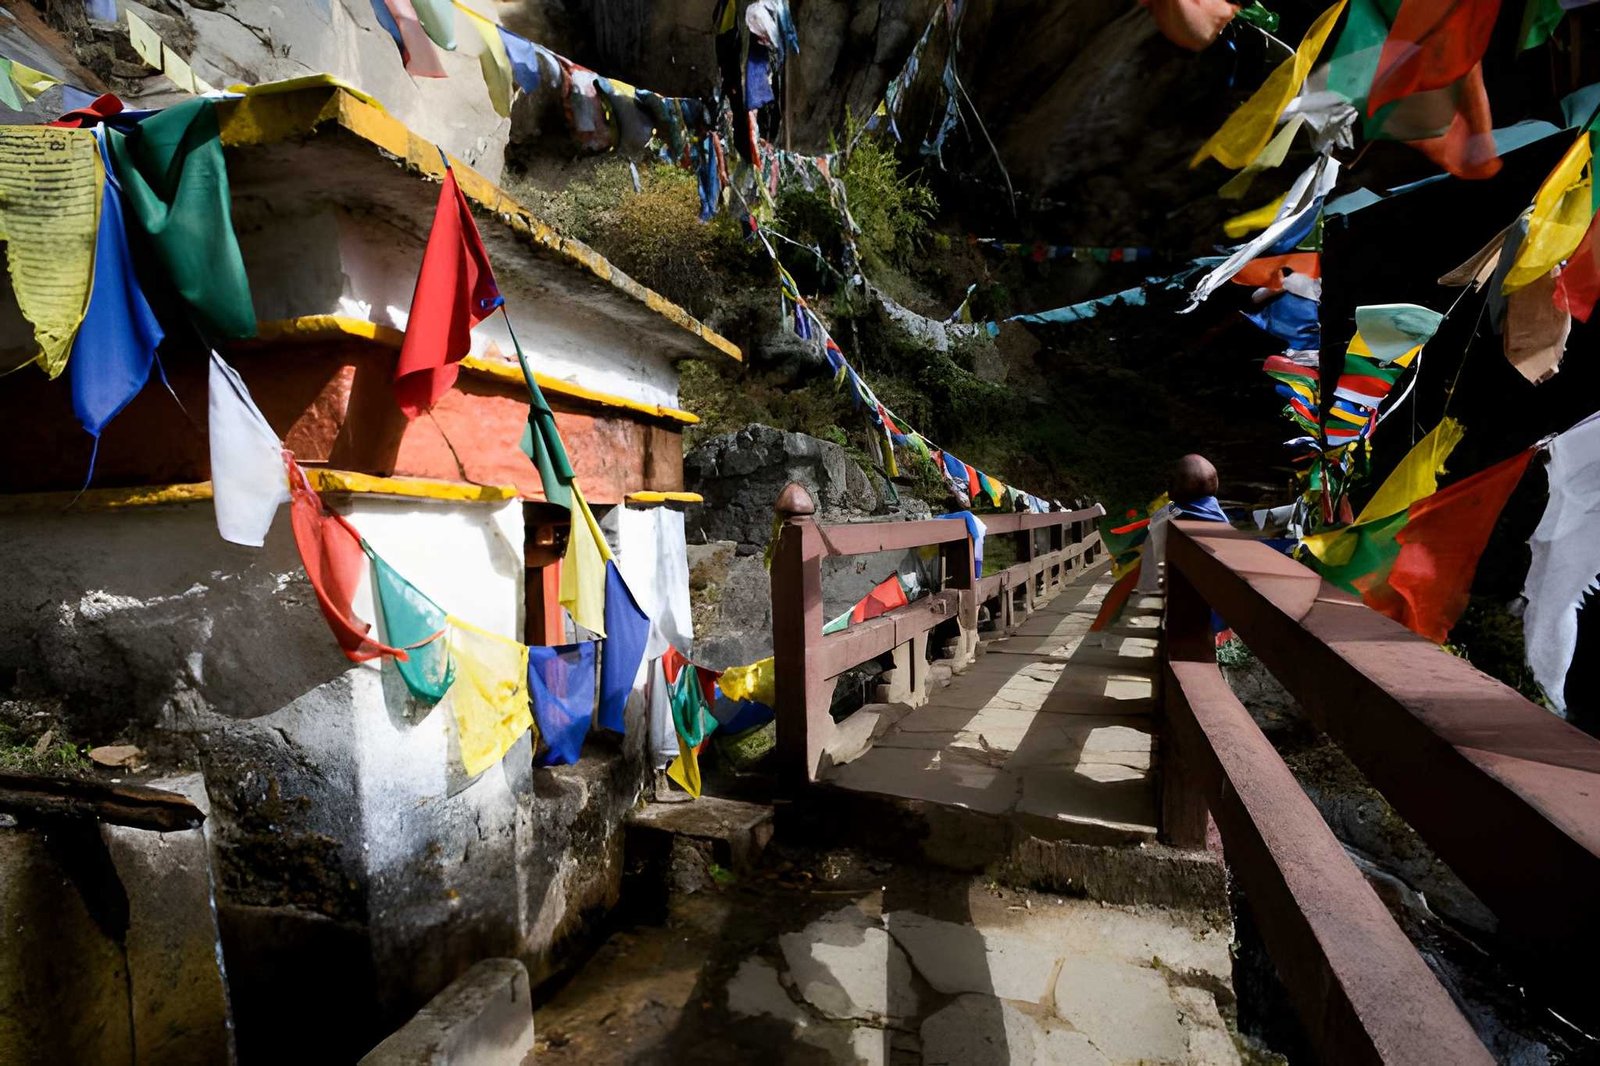
From the viewpoint café, the trail drops steeply into a gorge where a waterfall cascades beside the path. This descent is the steepest section of the entire hike, and your knees take the load here. Cross the bridge at the bottom, and you face the final climb: a long series of stone stairs carved directly into the cliffside, leading up to the monastery entrance.
This final push is the hardest 20 minutes of the hike. It is also the most dramatic. By the time you pass through the monastery gate, the physical effort and the sheer improbability of what you are standing inside combine into something difficult to describe.
Inside Paro Taktsang Monastery
Entry requires removing your shoes and leaving bags (including camera bags) at the entrance. You should also know that photography is not permitted inside the monastery complex. The interior is a series of interconnected temples and shrines, some built directly into the cave where Guru Rinpoche is said to have meditated. Monks may be present and in prayer. Dress respectfully: covered shoulders and legs are required.
Allow 30–45 minutes inside before beginning the descent.
Best Time to Visit Tiger’s Nest
Tiger’s Nest can be visited year-round, but two seasons stand out:
- Spring (March–May): Rhododendrons bloom along the trail in vivid reds and pinks. Skies are generally clear. This is peak season, expect other hikers on the trail.
- Autumn (September–November): Post-monsoon clarity delivers the sharpest mountain views. Cool temperatures make for ideal hiking conditions. Equally popular.
- Winter (December–February): Quieter, with occasional snow on the upper trail and monastery roof. Cold but strikingly beautiful. Fewer tourists. The hike remains doable on snow-free days.
- Monsoon (June–August): Rain makes the trail muddy and slippery. Visibility is reduced. Not recommended unless you don’t mind wet hiking.
Essential Tips for the Tiger’s Nest Hike
You should wear and carry the following:
- Footwear: Sturdy trail shoes or light hiking boots with grip. The stone stairs and forest path require ankle stability.
- Layers: Mornings start cool at altitude; temperatures rise mid-hike. A removable layer is essential
- Water: Carry at least 1.5 litres from the trailhead. The café sells water, but at altitude you’ll need more than you think
- Trekking poles: Optional but genuinely useful, particularly on the steep descent
- Snacks: Energy bars, nuts, or fruit for the upper section
- Sun protection: Hat and sunscreen as UV intensity increases significantly at altitude
Mistakes to Avoid
- Starting too fast: The first section feels easy. Burning energy early means struggling on the staircase
- Skipping the café stop: Even 20 minutes of rest changes the experience of the upper section entirely
- Underestimating the descent: Many hikers report that tired legs on the steep return trail are harder than the climb. Pace your energy accordingly.y
- Leaving too late: Start by 8–9 AM. Early starts mean cooler temperatures, better light for photography, and quieter trails
- Ignoring acclimatisation: This is the most common mistake for travellers on tight itineraries. One night in Paro before the hike makes a measurable difference
Is Tiger’s Nest Worth It? (Honest Answer)
Yes. Without reservation.
Tiger’s Nest is the kind of place that outlasts the trip it belongs to. The physical effort (a few hours of steady climbing) is entirely within reach for most travellers who pace themselves. The reward is not just a view or a photograph. It is the cumulative experience of earning your way up to a place that has no business existing where it does, and finding that it is every bit as extraordinary as promised.
Whether you are planning your first visit to Bhutan or building an itinerary for guests, the Tiger’s Nest hike belongs at the centre of any Paro itinerary. Not as an add-on. As the point.
Frequently Asked Questions
What is the altitude of Tiger’s Nest Monastery in Bhutan?
Paro Taktsang (Tiger’s Nest) sits at 3,120 metres (10,240 feet) above sea level. The trailhead begins at approximately 2,400 metres, making the total elevation gain roughly 720 metres.
How difficult is the Tiger’s Nest hike?
The hike is rated moderate to moderately challenging. It is manageable for most healthy adults at a steady pace, including older hikers and children above 8 years. The steepest section is the stone staircase on the final approach.
How long does it take to hike to Tiger’s Nest?
Most visitors complete the round trip in 4–6 hours, including time at the viewpoint café and inside the monastery. The ascent takes 2–3 hours; the descent 1.5–2 hours.
Can I hike Tiger’s Nest without a guide?
No. Bhutan requires all foreign visitors to travel with a licensed Bhutanese tour operator. Independent hiking is not permitted. Your guide will accompany you on the trail and manage all entry requirements.
Is altitude sickness a concern on the Tiger’s Nest hike?
Mild altitude effects (heavier breathing, slight fatigue) are common but manageable. Serious altitude sickness is uncommon at this elevation for visitors who have spent at least one night acclimatising in Paro. Staying hydrated and maintaining a slow, steady pace are the most effective preventive measures.
Contact us to start planning your Bhutan journey. We offer the best guidance for logistics and itineraries with 25+ years of experience exploring the Himalayas.