Tag: ebc
How Hard Is The Gokyo Lakes Trek for Trekkers?
Is the Gokyo Lakes Trek Difficult?
The Gokyo Lakes trek is moderately difficult. It’s not that the trails are technical, but because altitude is relentless. You will reach over 5,000m, and at that elevation, even a simple walk demands more from your body than you might expect. Trekkers with reasonable fitness and proper acclimatisation complete it successfully every season.

At a glance:
- The main challenge is altitude, not terrain. There are no ropes, ladders, or scrambling on the standard route
- Gokyo Ri summit (5,357m) is the hardest single day, requiring an early pre-dawn start
- Expect 5–7 hours of trekking per day on established trails through forest, alpine meadow, and glacial moraine
- Nights in Gokyo drop below freezing even in peak season
- Adding the Cho La Pass raises the difficulty to strenuous and introduces genuine technical terrain
- Best suited for trekkers with prior multi-day hiking experience
Wandering about the itineraries and logistics? Browse the main page: Gokyo Lakes and EBC via Gokyo→.
What Makes the Gokyo Lakes Trek Difficult?
Every year, thousands of trekkers reach Gokyo, and a meaningful number turn around before they get there. The reason is rarely the trails. It is the altitude. Understanding why this actually makes this trek hard will tell you more about your readiness than any difficulty label.
High Altitude and Acclimatisation
The Gokyo Lakes sit at 4,790m above sea level. Gokyo Ri, the viewpoint peak above the lakes, reaches 5,357m. At these elevations, you are breathing air that contains roughly 52–54% of the oxygen available at sea level, about half of what your lungs are used to.
That number sounds abstract until you feel it. A short walk to the teahouse bathroom leaves you slightly breathless. Your resting heart rate runs 15–20 beats higher than normal. Sleep is shallow and often interrupted. None of these indicates that something has gone wrong. It is simply how the human body responds when oxygen is scarce.
You also need to understand that from Namche Bazaar (3,440m), you reach Gokyo (4,790m) in roughly three days, gaining 1,350m in a very short window. This is a faster ascent profile than the classic Everest Base Camp route, which stages more gradually through Tengboche and Dingboche. Your body has less time to adapt.
This is why the acclimatisation day in Namche is non-negotiable, and why Machhermo (4,470m) is often where altitude sickness first announces itself.
Know the signs: Above Dole (4,038m), watch for persistent headache, loss of appetite, nausea, and disrupted sleep. These are early AMS signals, and resting should be prioritised.
The golden rule: Never go higher if you feel worse. Descending 300–500m brings faster relief than any medication.
Elevation profile of the standard Gokyo route:
| Checkpoint | Altitude | Notes |
| Lukla | 2,860m | Start |
| Namche Bazaar | 3,440m | Acclimatization stop |
| Dole | 4,038m | Watch for early symptoms |
| Machhermo | 4,470m | AMS risk zone |
| Gokyo Lakes | 4,790m | Base for Gokyo Ri |
| Gokyo Ri | 5,357m | Summit day |
Trekking Duration and Daily Distance
The standalone Gokyo Lakes trek covers around 100–110km over 12–14 days, including acclimatisation days.
On active trekking days, you walk 5–7 hours, covering 10–16km depending on the stage. Distance is a poor measure of effort here. A 10km day across glacial moraine at 4,700m is far harder than a 14km day on the forest trail below Namche.
Cumulative fatigue is real. By day eight or nine, your legs carry tiredness from every previous day. Trekkers who pace themselves conservatively in the lower sections consistently find the higher stages more manageable.
Terrain and Trail Conditions
The Gokyo route is not technically difficult, but it moves through four distinct terrain zones:
- Forest and lower valley (Lukla → Namche, 2,800–3,440m): Well-maintained stone-paved trail with a steep initial descent from Lukla, then a sustained 600m climb through pine and rhododendron forest. Suspension bridges over the Dudh Koshi gorge are narrow but solid.
- Alpine meadow (Namche → Machhermo, 3,440–4,470m): Open, exposed ridgeline walking with wide trails and sweeping views. Wind exposure increases noticeably. This is where altitude begins affecting your breathing on uphills. Steady pacing matters more than pace itself.
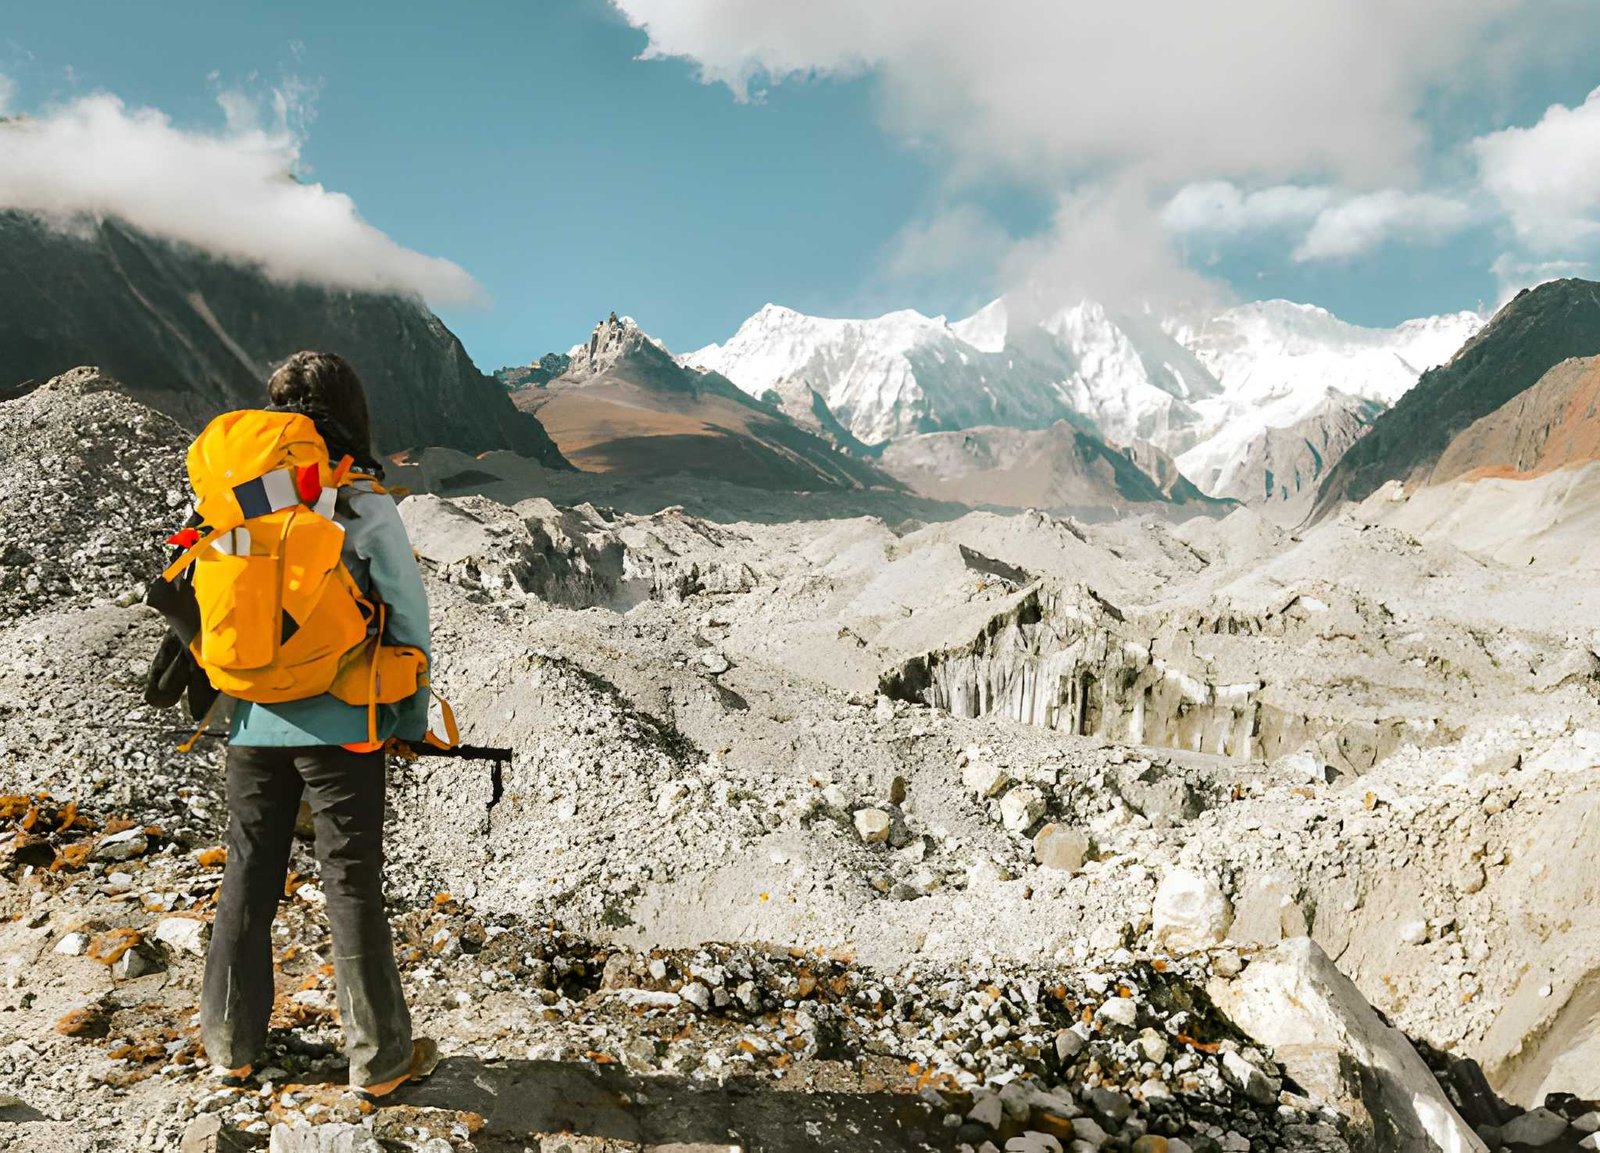
- Glacial moraine (Gokyo valley, 4,470–4,790m): The trail changes character significantly here. Walking across the rocky debris deposited by the Ngozumpa Glacier demands ankle stability and constant attention to footing. Rocks shift underfoot. Trail marking is less consistent. Trekking poles earn their place here.
- High-altitude summit (Gokyo Ri, 4,790–5,357m): Steep, loose, and unrelenting. Roughly 560m of vertical gain in about two hours. No technical equipment required, but mental resilience matters as much as physical fitness at this altitude.
Weather and Cold Conditions
The Gokyo Valley sits in a high mountain bowl that funnels wind and traps cold air. In peak season, daytime temperatures at the village run between 0°C and 10°C in sunshine. After dark, they drop to -10°C or colder. On Gokyo Ri before sunrise, expect -15°C with wind chill.
Afternoon cloud cover arrives reliably from mid-morning onward (target a pre-dawn summit). The weather can shift from clear to whiteout within two hours. Building contingency days into your schedule is sound planning, not pessimism.
Best seasons: Mid-October to November for clearest skies and stable weather. Mid-March through April for warmer conditions and rhododendron on the lower trails. Avoid monsoon (June–September) and deep winter (December–February).
Gokyo Ri Ascent: The Hardest Day
The Gokyo Ri summit push is the day that separates well-prepared trekkers from underprepared ones. The summit sits at 5,357m, roughly 560m above the village where you sleep the night before. The distance (3–4km) tells you almost nothing about the effort.
Most trekkers leave by 5:00–5:30 am to summit at sunrise before cloud builds. That means starting in darkness and cold, on legs already tired from several hard days. The gradient is steep and continuous, with no comfortable mid-section to recover your breathing. At 5,200m, your pace will be roughly a third of what it is at sea level for the same physical output. That is physiology, not weakness.
The reward is a 360° panorama of Everest, Cho Oyu, Lhotse, and Makalu rising above the Ngozumpa Glacier and the turquoise lakes below. For many trekkers, this is the finest mountain viewpoint in the Himalayas.
Cho La Pass: When the Trek Turns Technical
The Cho La Pass (5,420m) is not part of the standard Gokyo Lakes trek. It is an optional crossing connecting the Gokyo Valley to the Khumbu region, done by trekkers extending their route toward Everest Base Camp. The standard Gokyo route has no technical terrain, but Cho La changes the difficulty category entirely.
The 5-7 hours crossing involves glacier travel with potential ice and snow, loose scree, and a steep descent requiring careful footing. Crampons are sometimes necessary.
Who should skip Cho La: First-time high-altitude trekkers; anyone who experienced significant AMS symptoms on the approach to Gokyo; solo trekkers without a guide; anyone travelling between December and February.
Safe season window: Mid-October through November and late March through May. The pass can close without warning after snowfall at any time of year. So, check conditions with local guides the evening before.
Difficulty Level Explained: Who Is This Trek For?

The “moderately difficult” label is accurate but incomplete.
So, can Beginners Do the Gokyo Lakes Trek?
If you have never hiked a multi-day trail before, Gokyo is not the right starting point. Altitude magnifies every physical weakness you may have, and managing your body across multiple consecutive hard days requires experience.
If you have done multi-day hikes, are generally active, and are willing to invest in genuine preparation, the Gokyo Lakes route (without Cho La) is achievable. The critical factor is not just fitness, but the mental framework to pace yourself. Listen to your body at altitude, and choose rest over pushing.
Not suitable as a first trek for: Anyone who has never hiked with a loaded pack over multiple days; anyone with untreated cardiovascular conditions; anyone planning to complete it in under 12 days without prior altitude experience.
Required Fitness Level
The trek rewards aerobic endurance above raw strength.
The benchmark: If you can comfortably complete a 15km hike with 700m of elevation gain in under 5 hours, you have the base fitness required. Comfortably means finishing tired but not spent. If it takes everything you have, train for another six weeks first.
Cardiorespiratory fitness matters most above Namche. Trekkers who smoke, have asthma, or have any respiratory history should consult a doctor before departure.
Difficulty Scale: Where Do You Fit?
| Trekker Profile | Experience | Gokyo Suitability |
| First-time trekker | No multi-day hiking; new to altitude | Not recommended without significant prep. Consider the Everest Panorama Trek first. |
| Prepared beginner | Some multi-day hiking, 3–4 months specific training; never above 3,000m | Achievable on standard route with careful acclimatisation and 13–14 day schedule. Skip Cho La. Use a guide. |
| Intermediate trekker | Multi-day experience; comfortable at 6+ hours/day; some altitude exposure | Ideal. Challenging and rewarding without being overwhelming. Cho La is worth considering if the approach to Gokyo feels manageable. |
| Experienced trekker | Previous Himalayan trekking, above 4,000m before | Comfortable. Many combine Gokyo with EBC on the full circular route. |
Gokyo Lakes vs Everest Base Camp: Which Is Harder?
Neither is dramatically harder, but they are different kinds of difficult. EBC reaches a marginally higher maximum (5,545m at Kala Patthar vs 5,357m at Gokyo Ri) with a more gradual ascent profile, giving your body slightly more time to adapt. The Gokyo approach gains altitude faster from Namche, demanding quicker acclimatisation.
Without Cho La, the two routes sit at comparable overall difficulty. With Cho La, Gokyo is clearly the harder undertaking.

See our full Gokyo vs EBC route comparison → for a clear breakdown across scenery, crowds, and best-fit trekker profiles.
How to Make the Gokyo Trek Easier
Acclimatization Tips
Treat acclimatisation days as the trek working correctly, not as downtime. The two non-negotiable stops: two nights in Namche (with a day hike to 3,800m+ on the rest day) and one rest day at Machhermo or Gokyo before attempting Gokyo Ri.
Aim for 3–4 litres of water per day above 3,500m, while avoiding alcohol. Diamox (acetazolamide) is used by some trekkers as a prophylactic; consult your doctor before departure.
Training Before the Trek
Start at least 10–12 weeks before departure. The most effective training is also the most obvious: walk uphill with a loaded pack, repeatedly. Gym fitness helps but does not substitute for trail-specific endurance.
You can check out our “Training For the EBC Trek” to get a complete preparation guide for the Himalayas.
Packing for High Altitude
Target a daypack of 7–9kg; your main bag with a porter under 15kg. Non-negotiables: a down jacket rated to -15°C, a sleeping bag rated to -10°C minimum (teahouse blankets above Namche are unreliable), waterproof layers, and adjustable trekking poles with carbide tips. Carry altitude medication, blister care, and electrolytes. Everything else is negotiable.
Final Thoughts
The Gokyo Lakes trek is hard. That is part of its value. But “hard” means sustained effort at altitude across multiple days. No technical climbing, no life-threatening terrain, nothing that genuine preparation cannot overcome.
What it asks of you is honesty: about your fitness, your timeline, and your willingness to prepare in the months before you go. Trekkers who take that preparation seriously have a profoundly different experience from those who do not.
If Gokyo has been on your list, the question is not is this too hard for me? It is am I willing to prepare properly? If the answer is yes, the lakes are waiting.
Ready to plan your trek? Browse our Everest Via Gokyo package today.
Classic Everest Base Camp vs. Gokyo Lakes Trek: Which Route Should You Choose?
Introduction: EBC vs. Gokyo Lakes
Let’s be honest. If you’ve started searching up “EBC vs Gokyo,” you’re not looking for a casual trekking experience. You’re already deep in the trekking rabbit hole, probably with seven tabs open and hastily comparing trekking companies & packages.
We get it. This is one of the most exciting, yet also one of the most confusing, decisions you’ll make. Both routes are genuinely spectacular. Both routes also start at Lukla, and both put you in the shadow of the world’s highest peaks. The difference is what happens in between.
At Far Out Nepal, we’ve guided trekkers on both routes for over 25 years. We’ve seen first-timers moved to tears at Kala Patthar. We’ve watched photographers lose their minds completely at Gokyo Ri. And most importantly, we’ve forever guided trekkers who wanted the best of both, with our combined route circuit.
EBC or Gokyo: Two Routes, Two Completely Different Journeys
Before the comparison tables and altitude numbers, here’s the summary of each:
Classic EBC = The iconic route, which is a well-established and world-renowned pilgrimage. You will be face-to-face with the world’s highest peak, which is an euphoric experience in itself.
EBC via the Gokyo Circuit = The full picture. Sacred lakes, Nepal’s longest glacier, a 360° panorama of four eight-thousand-foot peaks, EBC itself, and a circuit route that never repeats a single step.
Now let’s go deeper.
The Classic Everest Base Camp Trek (14-17 Days)
The Classic EBC Trek welcomes over 40,000 trekkers every year to the Khumbu region, and the numbers don’t lie.
This is one of the world’s great trekking routes. Starting with a flight into Lukla (2,860 m), you follow the Dudh Koshi River through a string of legendary Sherpa villages: Phakding, Namche Bazaar, Phortse, Dingboche, etc., before arriving at Gorakshep and stepping onto the moraine of Everest Base Camp (5,340 m / 17,500 ft).
Our 17-day Classic EBC Trek covers approximately 130–140 km round trip, with two planned acclimatisation stops built in (Namche Bazaar and Dingboche). The summit moment (and yes, it feels like a summit) is Kala Patthar at 5,545 m / 18,192 ft, where Everest’s south face fills your entire field of vision roughly 9 km away.
One thing we are honest about that most agencies won’t tell you: the return trip retraces the same path. Same trail, same teahouses, same ridgelines, but in reverse. For some trekkers, that’s a meditative experience. For those seeking novelty, it’s a compelling reason to consider the Gokyo circuit. Worth knowing before you commit.
→ Ready to see the full day-by-day breakdown? View the Classic EBC Trek map here.
The EBC via Gokyo Lakes Route (18-20 Days)

This route shares the trail with the classic as far as Namche Bazaar, then turns northwest into the quieter, less-travelled Gokyo Valley. Instead of heading toward Lobuche, you trek through Dole and Machhermo before arriving at Gokyo village. Far Out Nepal’s 20-day EBC via Gokyo Lakes trek is a genuine circuit which combines both destinations, without backtracking, no repeated terrain, and new scenery every single day.
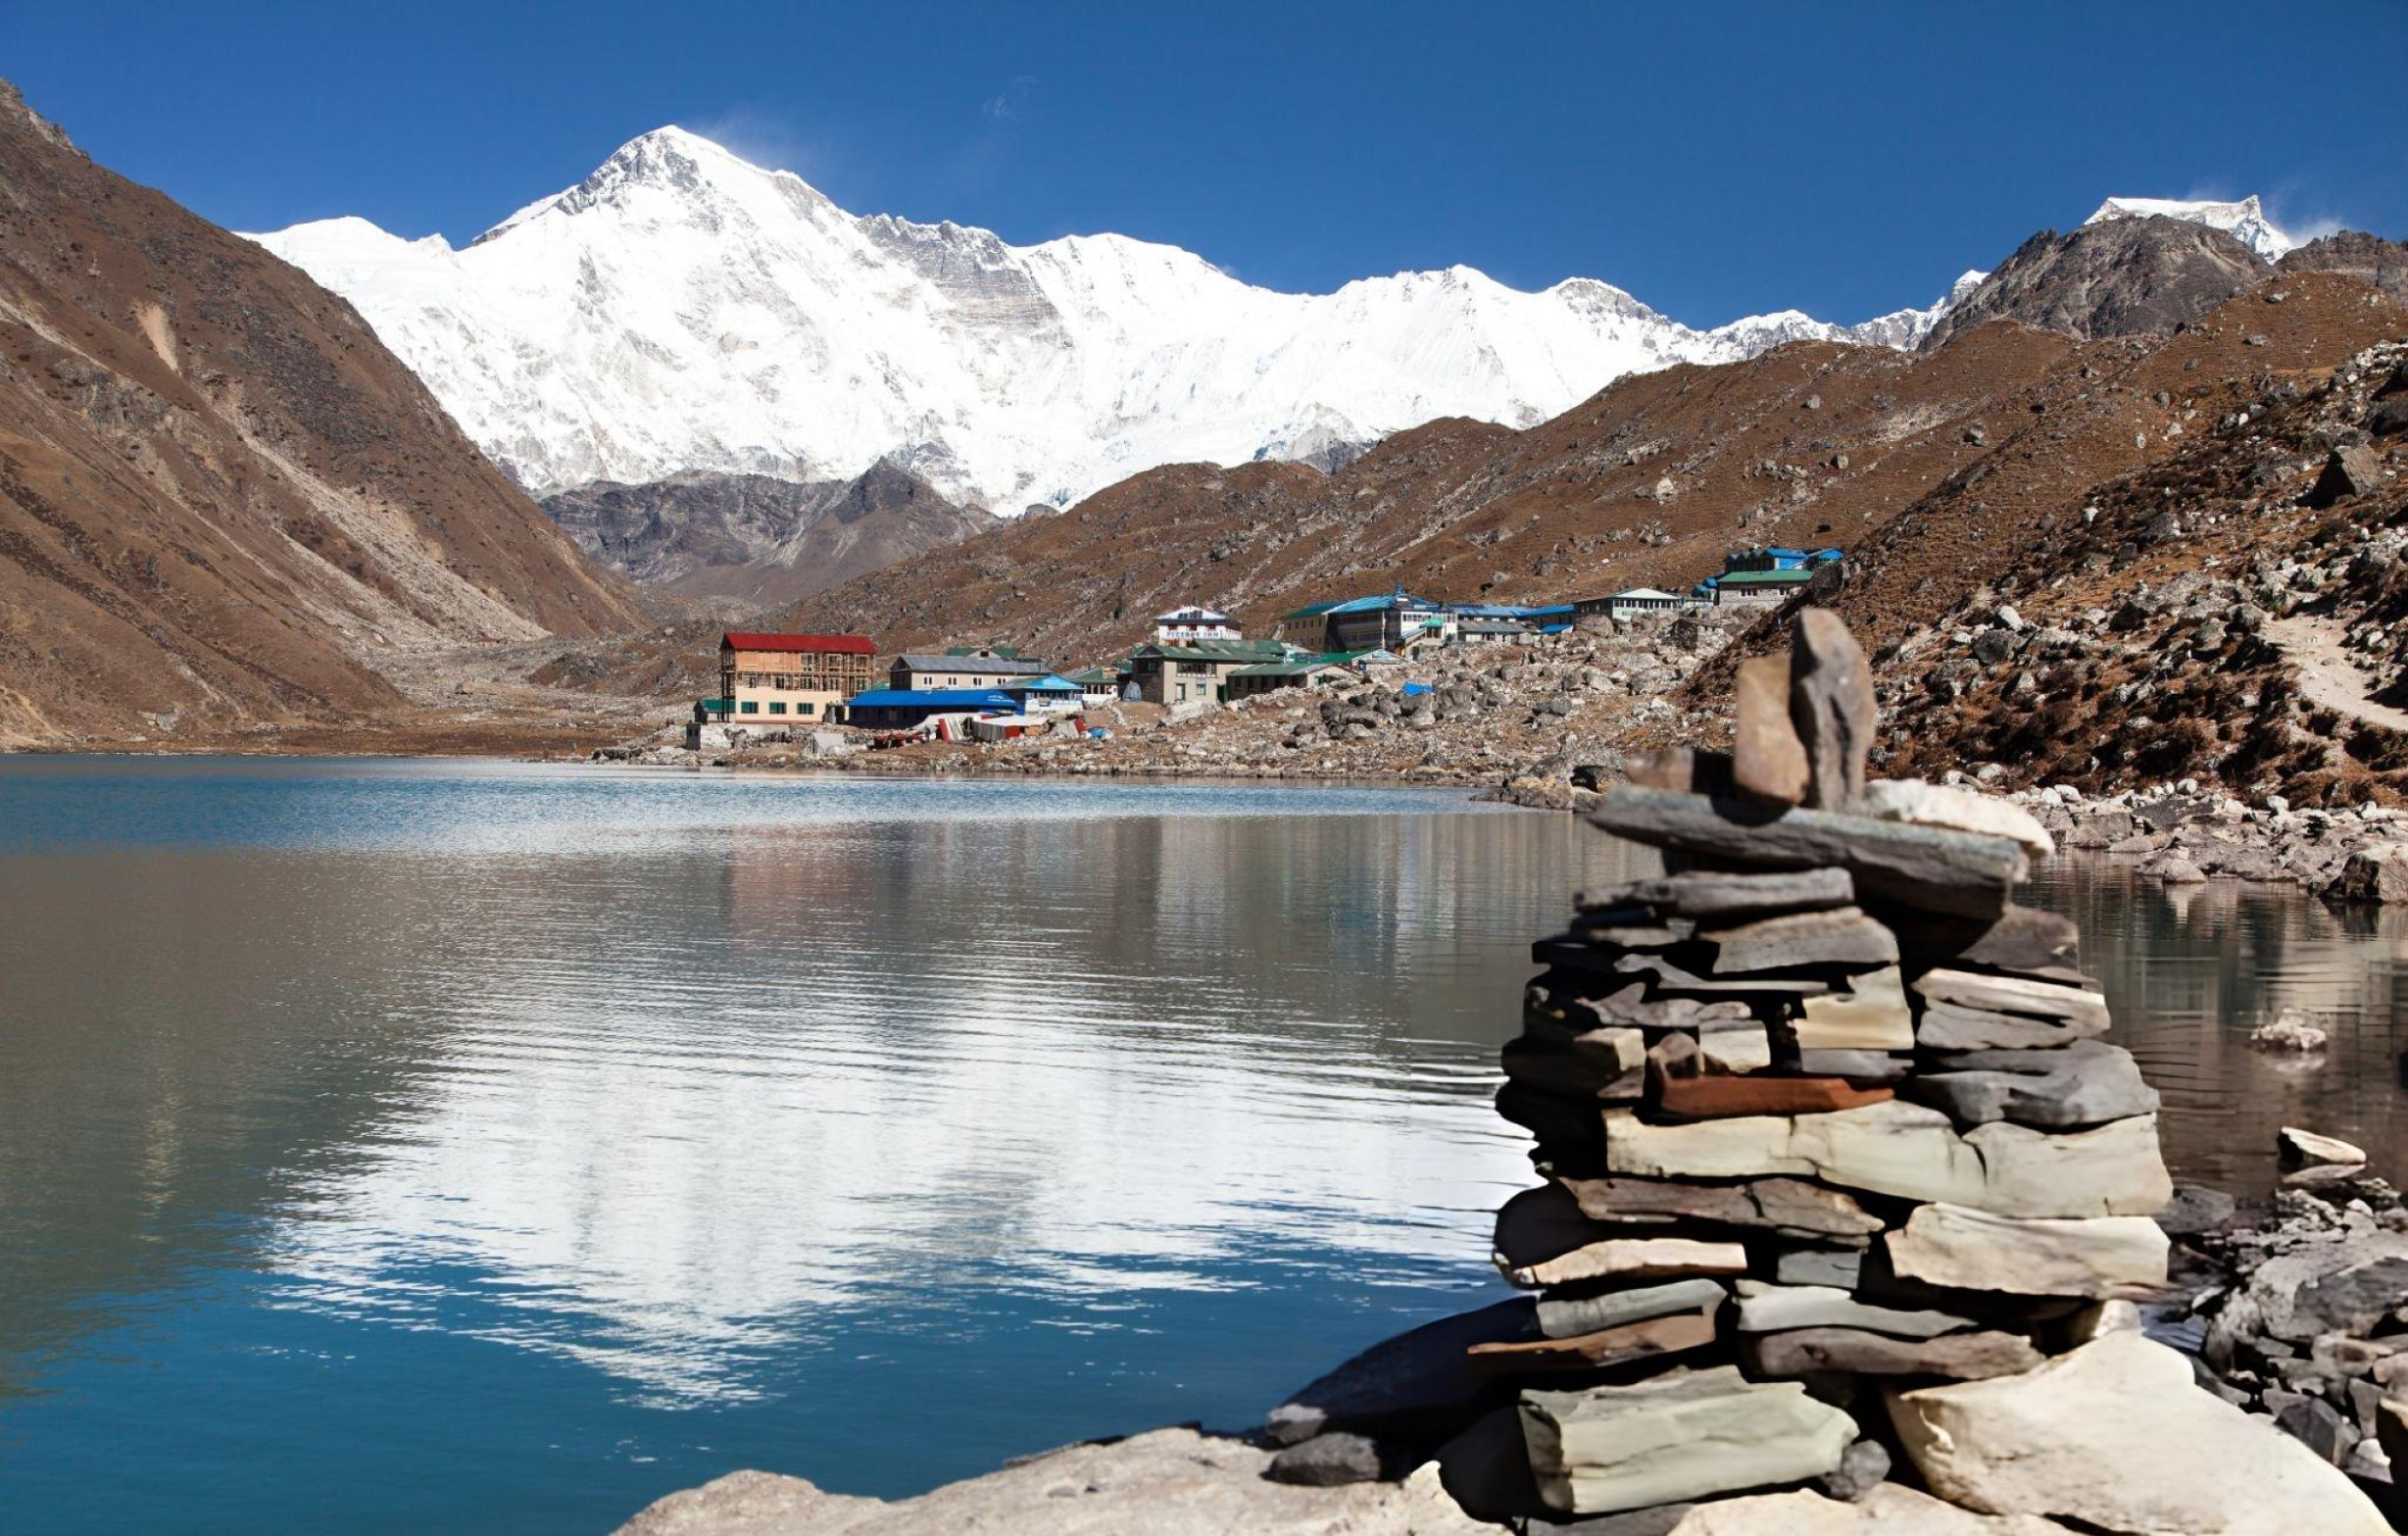
The village sits beside one of the most extraordinary landscapes in the Himalayas: a series of six turquoise glacial lakes, each shimmering at over 4,700 m, fed by the Ngozumpa Glacier (Himalaya’s longest glacier), stretching between 4,700 m and 6,000 m.
From Gokyo, you ascend Gokyo Ri (5,357 m), cross the dramatic Cho La Pass (5,420 m), and rejoin the classic EBC trail for the final push to Gorakshep, Base Camp (5,340 m), and Kala Patthar (5,645 m) on this route.
And about those lakes. The Gokyo Lakes aren’t just beautiful, they’re a Ramsar Wetland Site (No. 1692, designated in 2007), making them internationally recognised for their ecological significance. They are also sacred to both Hindus and Buddhists, with Sherpa communities honouring them for generations. Pilgrims still travel here for the annual Janai Purnima festival. You’re not just passing through a scenic valley. You’re walking through a living sacred landscape.
→ Curious about the full 20-day circuit? Explore the EBC via the Gokyo Lakes map here.
EBC or Gokyo: The Numbers That Matter
| Factor | Classic EBC | Everest Gokyo Circuit |
| Duration | 14-17 Days | 18-20 Days |
| Distance | ~130–140 km | ~160–175 km |
| Max Altitude | 5,545 m / 18,192 ft | 5,645 m / 18,520 ft |
| Grading | Difficult | Difficult |
| Crowds | High (40,000+ trekkers/year) | Moderate and noticeably quieter |
| Scenic Diversity | Mountains, glaciers, monasteries | Lakes, glaciers, passes, four 8,000m peaks |
| High Pass | None | Cho La Pass (5,420 m) |
| Glacier Walking | Limited | Extensive (Ngozumpa Glacier) |
| Route Type | Out-and-back | Full circuit without any repeated terrain |
| Group Size | 1–10 people | 2–10 people |
| Best Season | March–May / Oct–Nov | Mid-March–April / Mid-Oct–Nov |
| Best For | First-timers, bucket-list trekkers | Experienced trekkers, photographers, adventurers |
Route Differences Between Classic EBC vs. EBC via Gokyo Lakes Trek
Both treks start identically. Here’s where they diverge and how they eventually reunite:
| S.N. | Classic Everest Base Camp Trek Route | Gokyo Lakes and Cho La Pass Route |
| 1 | Arrive Kathmandu | Arrive Kathmandu |
| 2 | Drive → Ramechhap, fly → Lukla, trek → Phakding | Drive → Ramechhap, fly → Lukla, trek → Phakding |
| 3 | Phakding → Namche Bazaar (3,450 m) | Phakding → Namche Bazaar (3,450 m) |
| 4 | Namche acclimatisation | Namche acclimatisation |
| 5 | Namche → Tengboche (3,860 m) | Routes split: Namche → Dole (4,200 m) |
| 6 | Tengboche → Dingboche (4,360 m) | Dole → Machhermo (4,470 m) |
| 7 | Dingboche acclimatisation | Machhermo → Gokyo Lakes (4,790 m) |
| 8 | Dingboche → Lobuche (4,940 m) | Gokyo acclimatisation + Gokyo Ri ascent (5,357 m) |
| 9 | Lobuche → Gorakshep → EBC (5,340 m) | Gokyo → Thangnak (Cho La prep) |
| 10 | Kala Patthar → Pheriche | Cho La Pass crossing (5,420 m) → Dzongla |
| 11 | Pheriche → Namche | Dzongla → Lobuche (4,940 m) |
| 12 | Namche → Lukla | Lobuche → Gorakshep → EBC (5,340 m) |
| 13 | Fly → Ramechhap → Kathmandu | Gorakshep → Kala Patthar (5,645 m) → Pheriche |
| 15 | — | Descent → Namche → Lukla |
| 16 | — | Fly → Ramechhap → Kathmandu |
EBC or Gokyo: What Are You Actually Going to See?
Even if the region may be the same, what you’ll be seeing would be comparatively unique. While both routes are identical up to a certain point, they differ vastly in what they offer to trekkers, particularly in their destinations.
Classic EBC: Intimate, Epic, and Unforgettable
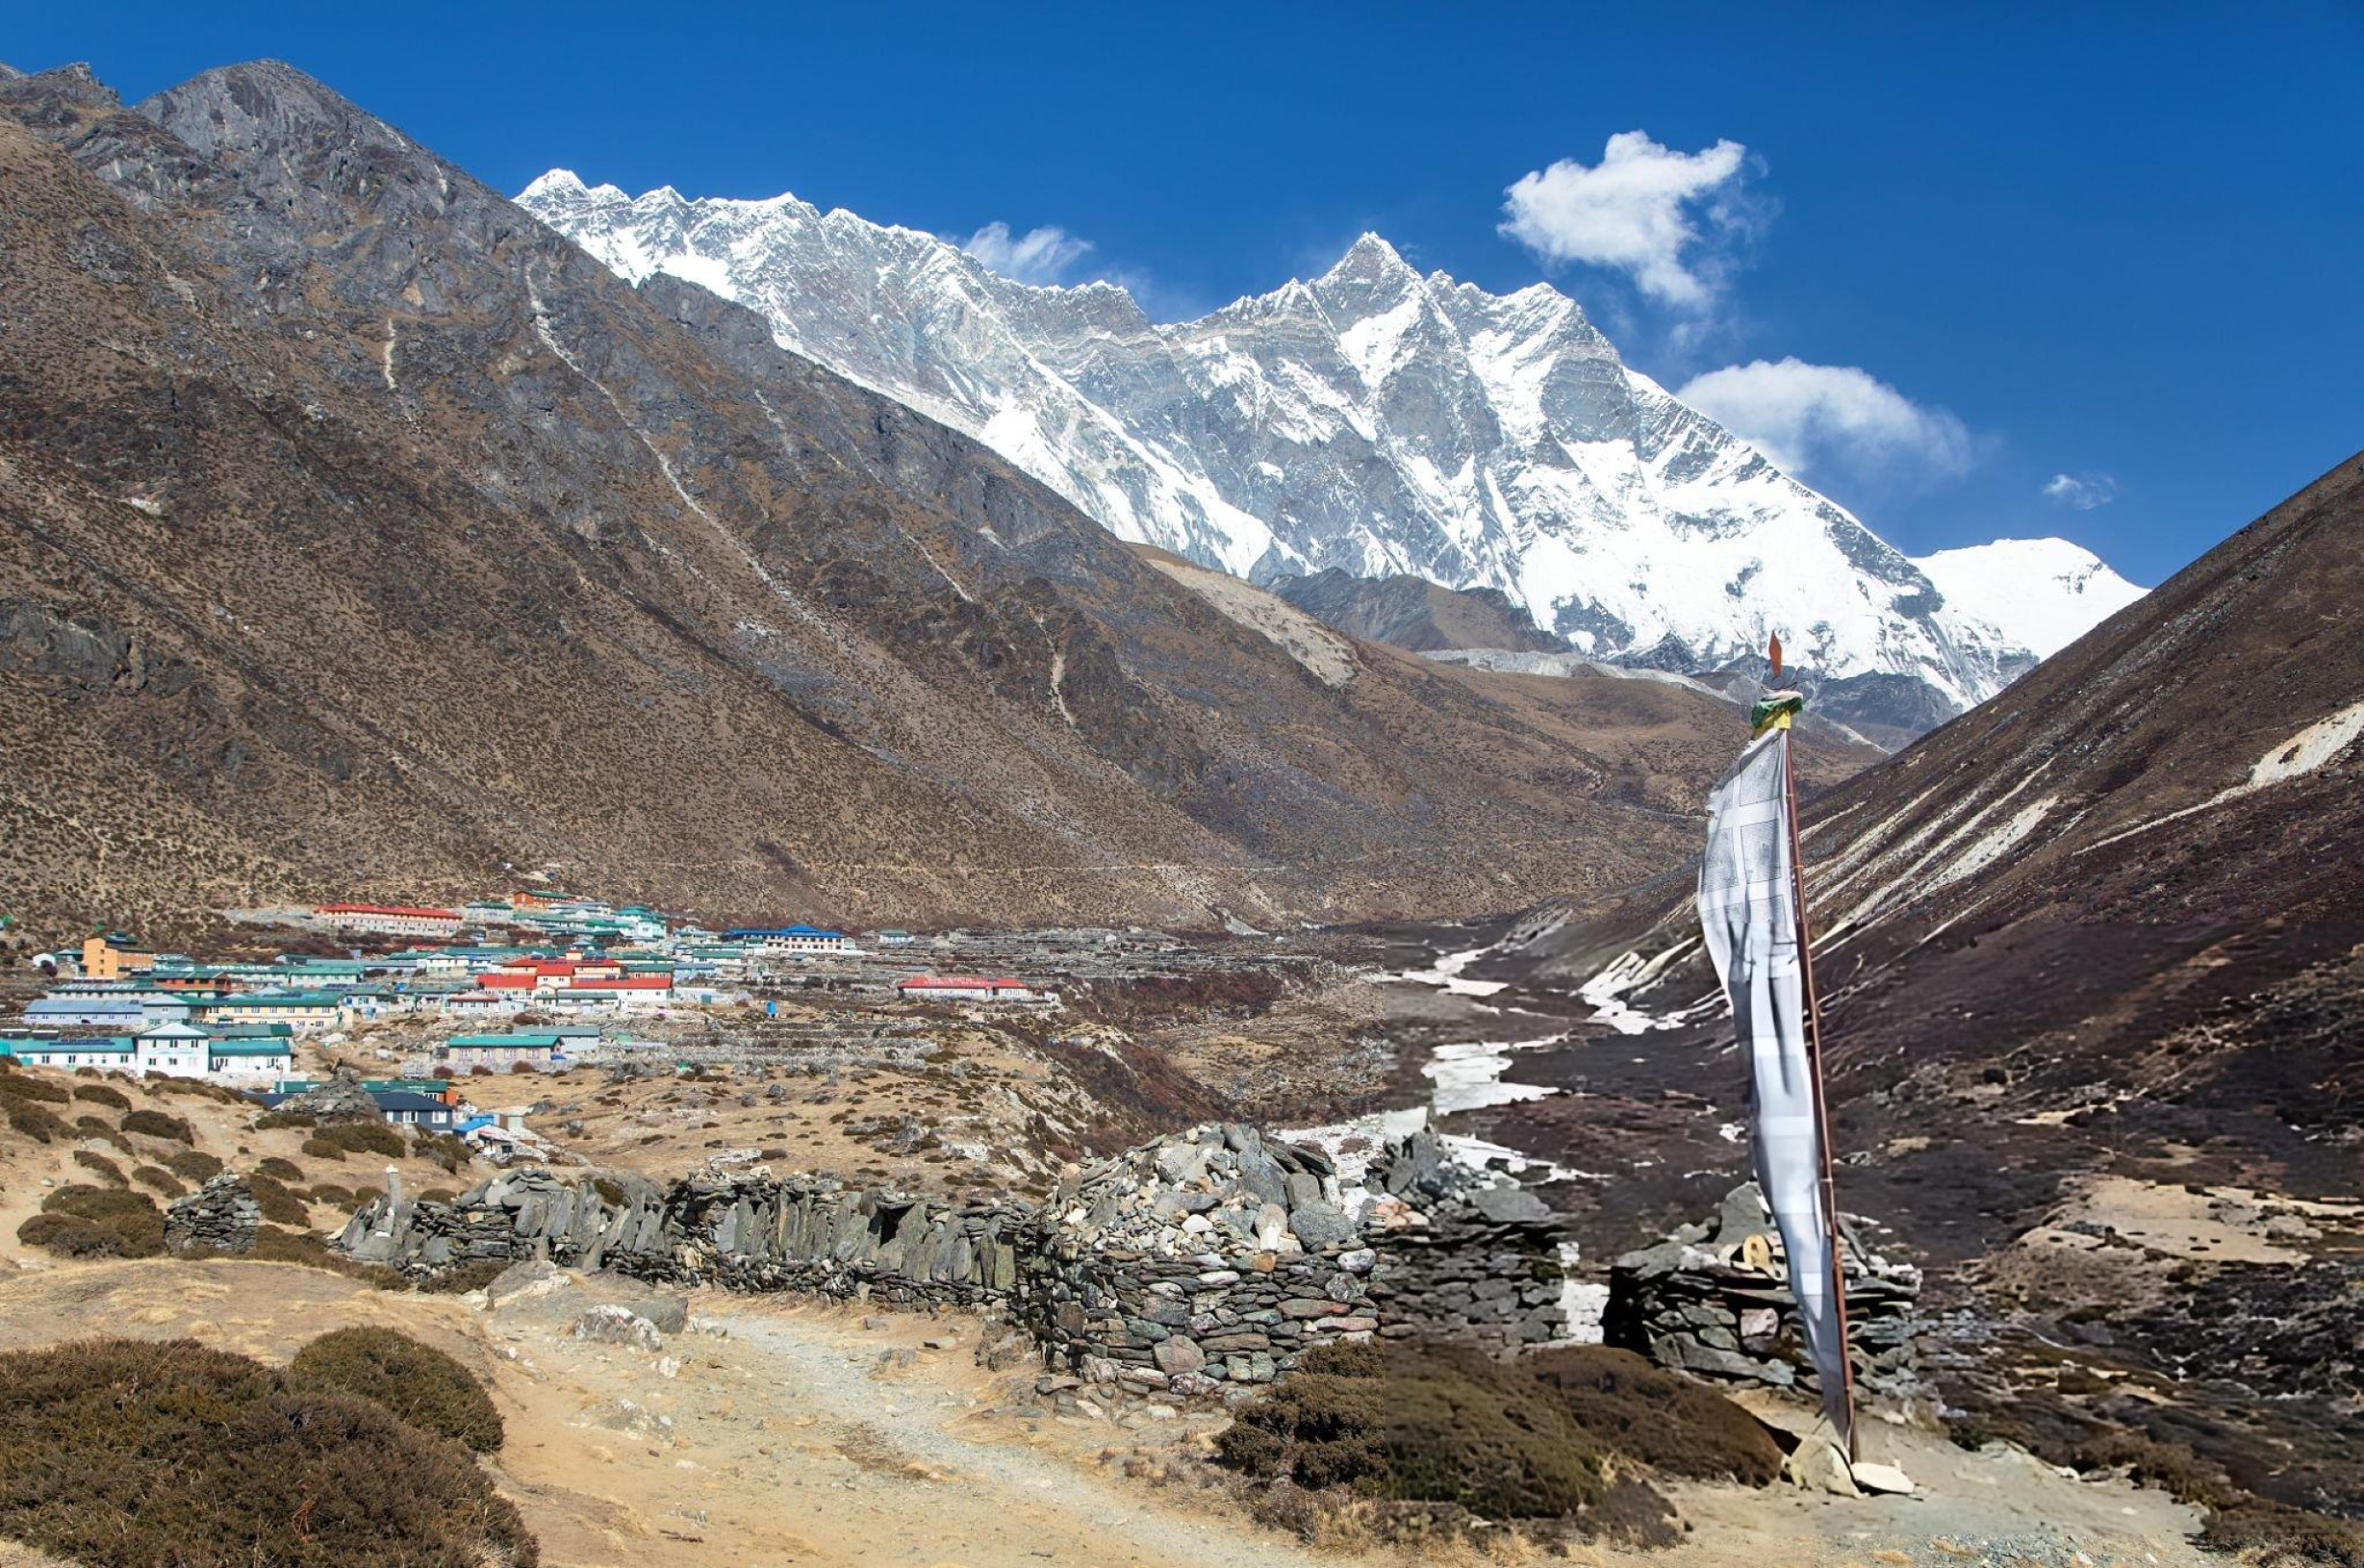
The classic route’s scenery doesn’t hit you all at once. It builds. Rhododendron forests give way to the magnificent Tengboche Monastery (3,860 m) with Ama Dablam (6,856 m) rising impossibly behind it. The trail passes through Phortse village, offering sweeping views of Kusum Kanguru (6,367 m), Thamserku (6,623 m), and Pumori (7,165 m), and gradually strips the landscape down to its raw glacial bones as you approach the Khumbu region.
Then comes Kala Patthar at sunrise.
Standing at 5,545 m, with Everest’s south face roughly 9 km in front of you. Nuptse, Lhotse, and the churning Khumbu Icefall are all visible as well. This is the kind of moment that rewires something in your brain permanently. This is what 40,000 people come for every year. And it delivers.
The Gokyo Circuit: The View That Changes Everything
Here’s the thing about Gokyo Ri. At 5,357 m, it is technically lower than Kala Patthar, but somehow offers what many experienced trekkers, Himalayan guides, and mountaineers describe as the better overall view of Everest.
Why? Because from Gokyo Ri, you see these eight-thousanders simultaneously: Cho Oyu (8,201 m), Mt. Everest (8,848 m), Lhotse (8,516 m), and Makalu (8,481 m). Let’s not forget Cholatse and Taboche, with the turquoise Gokyo Lakes shimmering directly below you and the Ngozumpa Glacier filling the valley between.
Kala Patthar puts you closer to Everest. Gokyo Ri shows you why Everest is the highest mountain in the world.
Comparing Difficulty and Altitude Between EBC & Gokyo
Both treks are graded “Difficult” by Far Out Nepal. Neither requires technical mountaineering skills, but both demand solid fitness, genuine respect for altitude, and a commitment to proper acclimatisation. This is not a weekend hike with a dramatic backdrop. It’s a multi-week high-altitude expedition.
On the Classic EBC, the challenge is sustained altitude accumulation across consecutive days above 4,000 m. The trail is well-established and well-marked, with teahouses spaced at regular intervals. Expect 5–7 hours of walking per day across steep trails, high ridges, and rugged Khumbu terrain. The two planned acclimatisation stops are non-negotiable and built into our itinerary.
On the EBC via Gokyo, the Cho La Pass (5,420 m) is the variable that changes everything. This is a steep, icy crossing with potential glacier walking with crampons. It is not technically difficult, but it demands strong fitness, proper acclimatisation, and ideally some prior high-altitude experience.
It also imposes a seasonal constraint: the Cho La Pass is generally unsafe between mid-December and mid-February due to the accumulation of snow and ice. That’s why our Gokyo trek’s best windows are mid-March to April and mid-October to November.
One counterintuitive advantage of the Gokyo route: the altitude profile through the Gokyo Valley is actually gentler in the early days. Trekking through Dole and Machhermo before reaching the lakes means more cumulative time above 4,000 m, building your altitude resilience before the Cho La and the final push to Kala Patthar.
💡 From Our Sherpa Guides: Never skip your acclimatisation days. Not even if you feel fine; altitude sickness doesn’t always announce itself early.
EBC or Gokyo: Who Should Choose Which Trek?
| Trekker Type | Best Choice | The Honest Reason |
| First-time Himalayan trekker | Classic EBC | Well-marked trail, dense teahouse network, simpler logistics |
| Experienced trekker wanting variety | EBC via Gokyo | True circuit, diverse terrain, the Cho La challenge |
| Photographer/content creator | EBC via Gokyo | Gokyo Ri’s lake-glacier-peak panorama is unmatched anywhere |
| Bucket-list / Everest-obsessed traveller | Classic EBC | Maximum time at Base Camp, closest proximity to Everest |
| Solo trekker craving solitude | EBC via Gokyo | Gokyo Valley trails are dramatically, blissfully quieter |
| Repeat Himalayan trekker | EBC via Gokyo | You’ve done EBC. Gokyo adds entirely new terrain and perspective |
| Short on time (under 18 days) | Classic EBC | The Gokyo circuit requires a minimum of 20 days with us |
Can’t Choose Between EBC or Gokyo? You Don’t Have To.
Here’s the thing nobody tells you at the start of your research: our combined route exists precisely for people who refuse to settle.
Our EBC Trek via Gokyo Lakes and Cho La Pass is the most complete trekking experience the Khumbu region offers. In 20 days, you get the sacred Gokyo Lakes, a sunrise on Gokyo Ri with four eight-thousanders in view, the drama of crossing Cho La at 5,420 m, Everest Base Camp (5,340 m), and Kala Patthar (5,645 m), with zero repeated trail. Every single day is new ground, and it’s the route we recommend to any trekker who has the time and the fitness for it.
EBC or Gokyo: Which is better for photography?
Gokyo, without much debate. The combination of turquoise lakes at 4,700–5,000 m, the Ngozumpa Glacier, Gokyo Ri’s multi-peak panorama, and the visual drama of the Cho La crossing provide photographers with a range of shots that the Classic EBC cannot match. Kala Patthar at sunrise is iconic, but Gokyo offers more depth, foreground, and variety across more shooting days.
So, Which One Should You Choose: EBC or Gokyo?
If you have 17 days or this is your first Himalayan trek, the Classic EBC is the ideal route. It is iconic for a reason. Standing at Kala Patthar with Everest in your face is one of those experiences that permanently divides your life into before and after.
If you have 20 days, some altitude under your boots, and you want a trek that keeps surprising you with sacred lakes, glaciers, four eight-thousanders in one place, a high-pass crossing, and zero repeated terrain, the EBC via Gokyo is the answer.
And if you’re sitting there thinking, “I want all of it.“ Well, that’s exactly the right instinct. The combined route was built for you.
Plan your Classic EBC Trek with Far Out Nepal →
Explore the EBC via the Gokyo Lakes circuit with Far Out →
Training for Everest Base Camp Trek: The Complete Preparation Guide
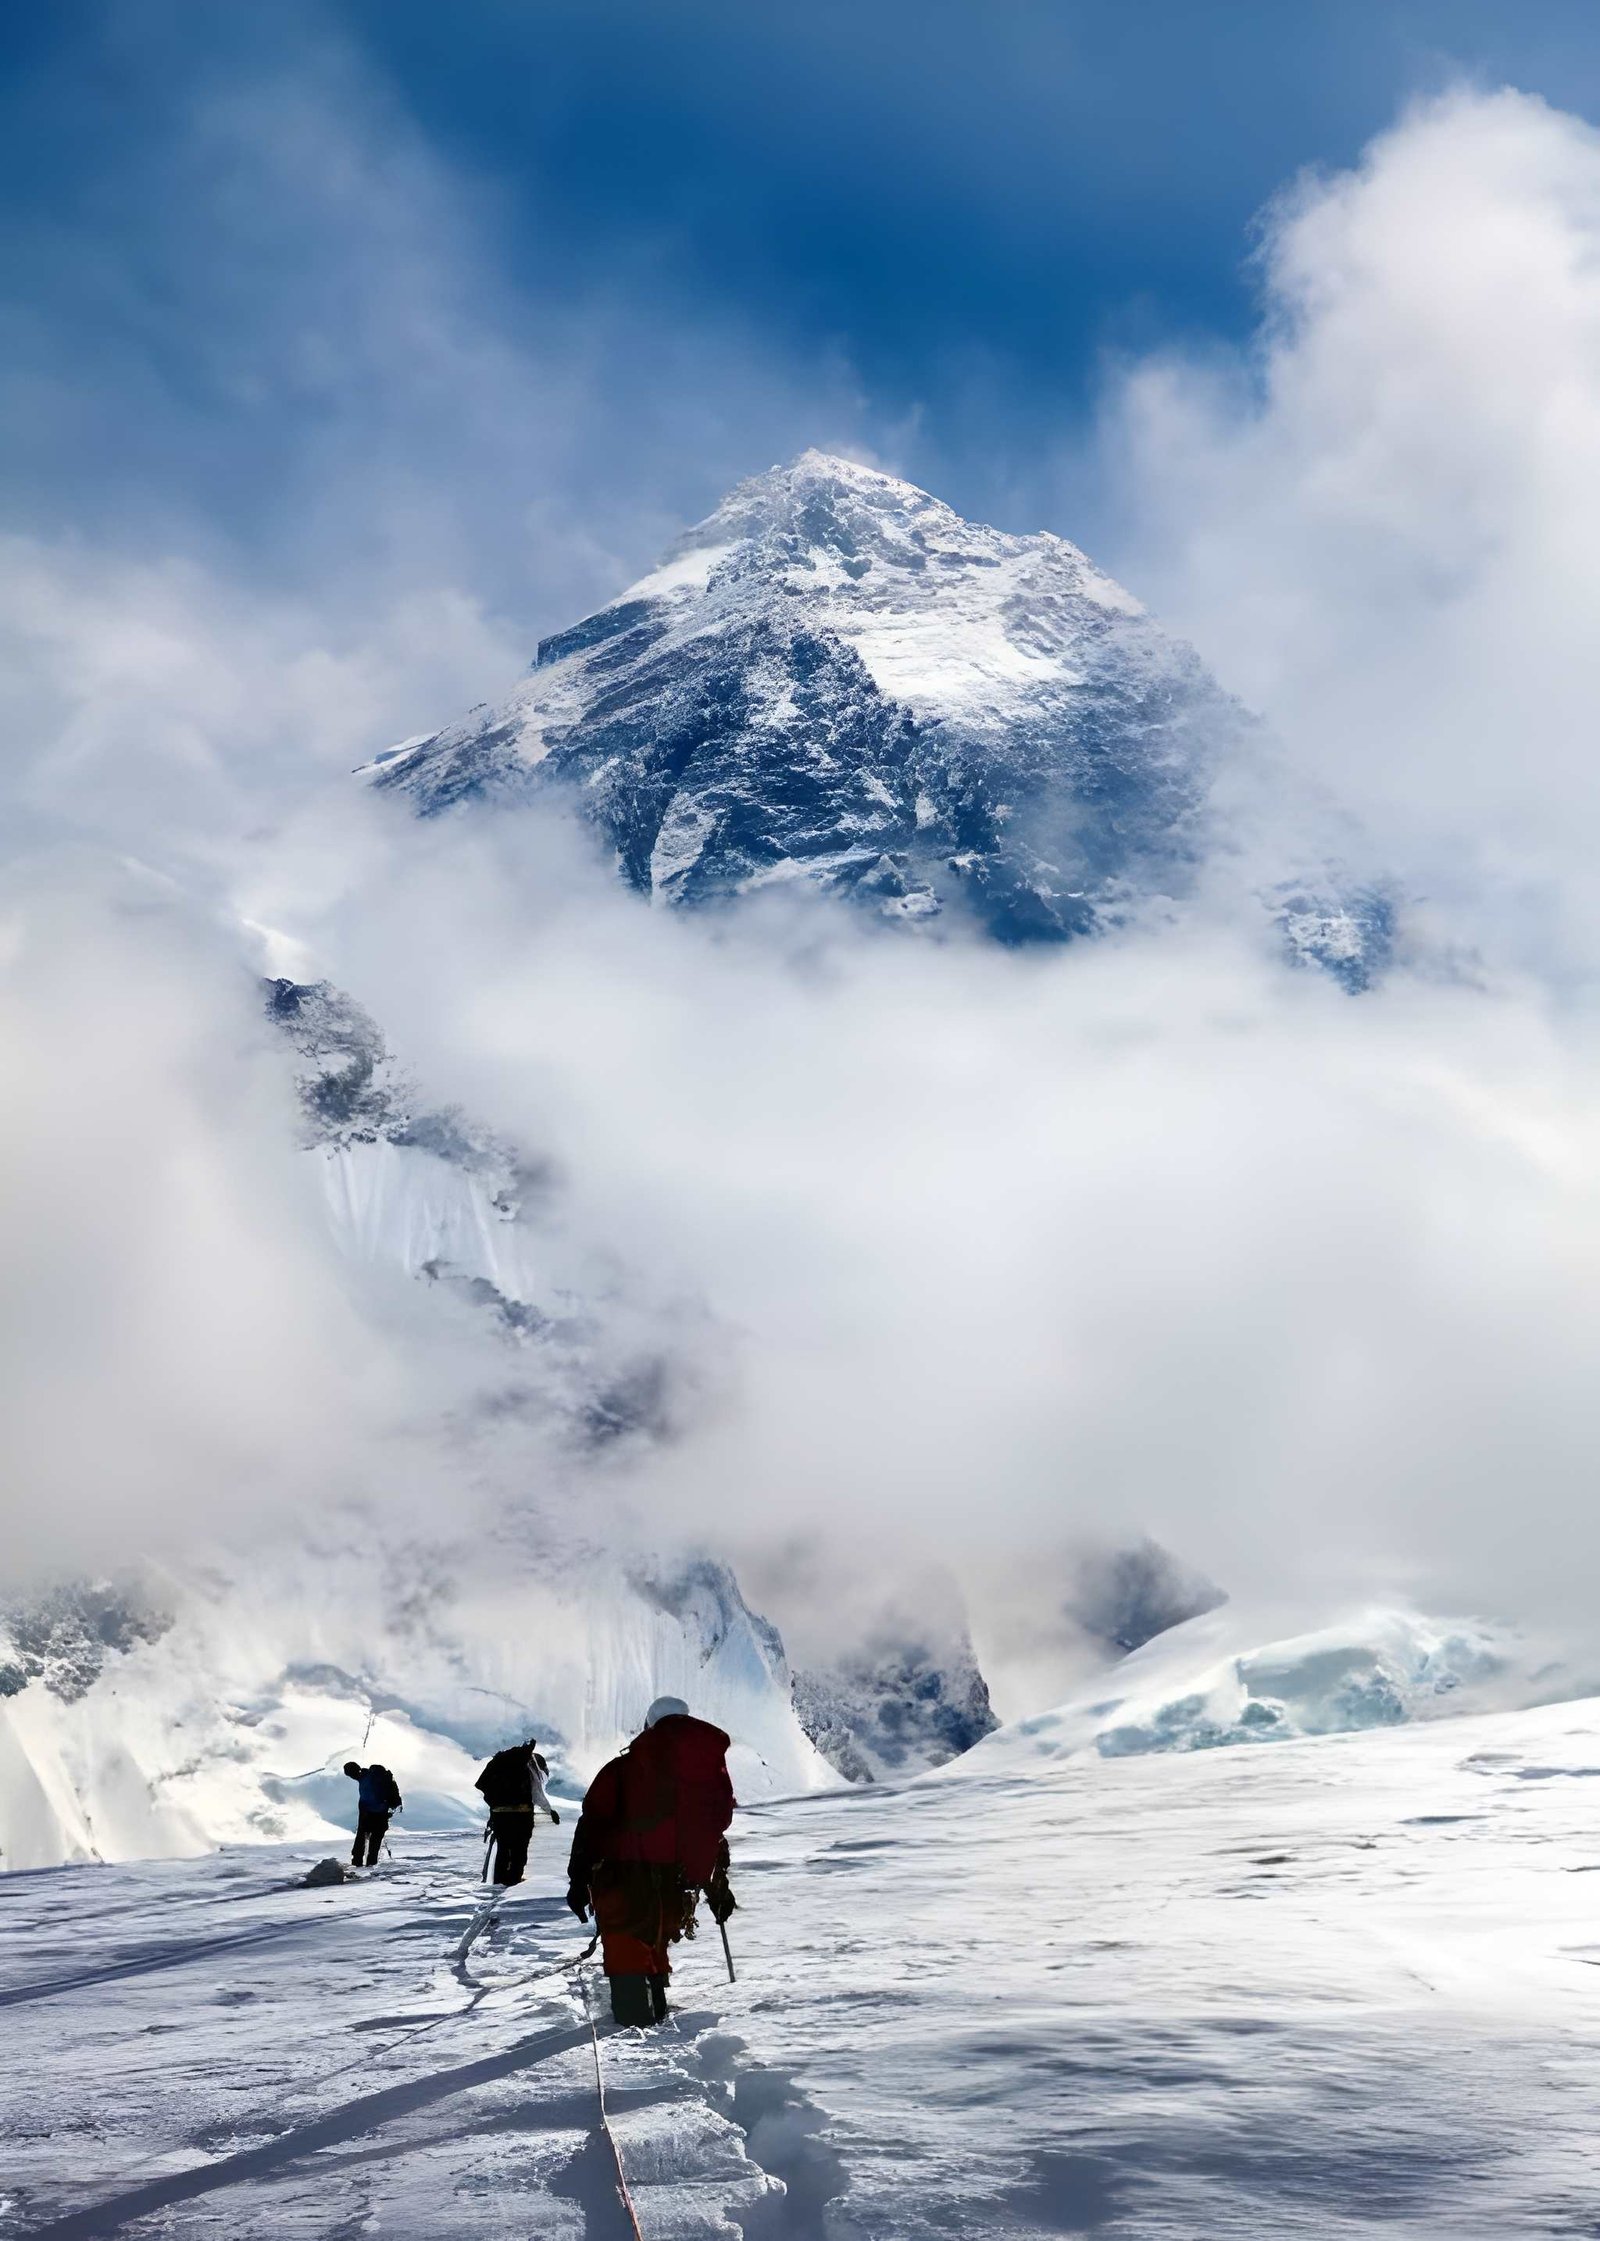
The Dream Is Real; But So Is the Climb
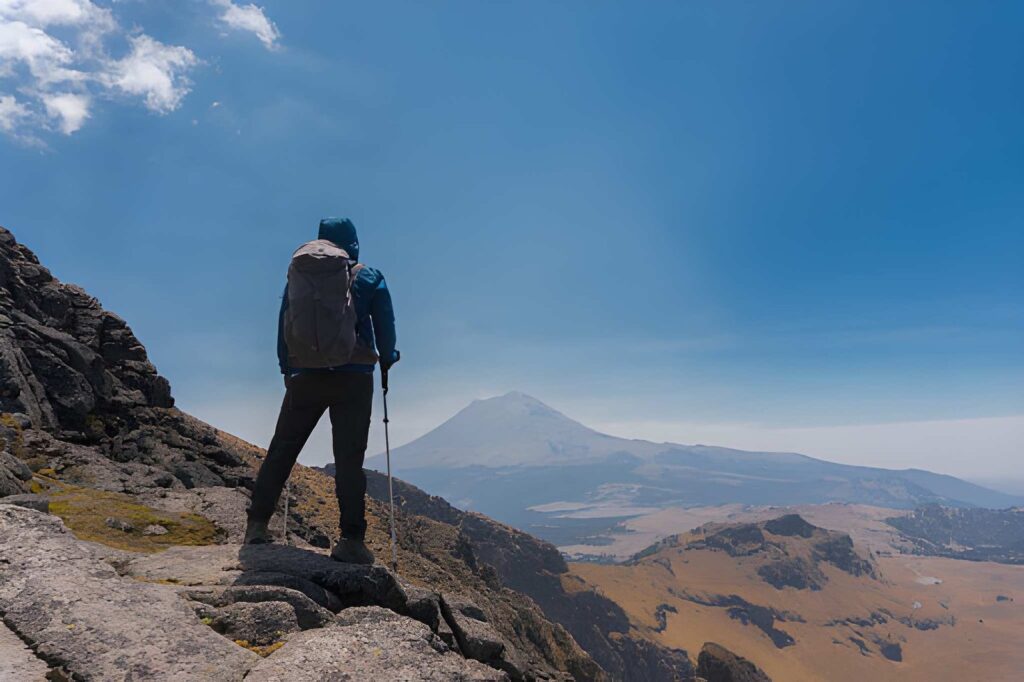
Standing at the foot of the world’s highest peak is one of those experiences that stays with you forever. The air is thin, the prayer flags are snapping in the wind, and the scale of the Himalayas is universal in a way no photograph can fully capture. But here’s the truth: reaching Everest Base Camp at 5,340m is not simply a matter of booking a flight to Lukla and showing up enthusiastic.
The trek covers roughly 130–140 km of rugged Himalayan terrain, with 5–8 hours of walking per day at altitudes that will genuinely test both body and mind. The encouraging reality? Most trekkers who adequately prepare complete the trek successfully. Those who fail typically underestimate the preparation required or attempt the trek without proper conditioning.
This guide gives you everything: a 12-week training plan, an easy-to-understand breakdown of what actually helps, a weight training guide built for trekking, altitude awareness, gear conditioning, and mental prep strategies. Consider this your complete preparation playbook.
Already convinced? Explore Far Out Nepal’s Classic EBC Trek. You can then come back and start training.
How Hard Is the Everest Base Camp Trek, Really?
The EBC trek is rated difficult, but not for the reasons most people assume. There’s no technical climbing, no rope work, no crampons. It’s hard because of three compounding factors: sustained daily effort over 13+ trekking days, significant altitude gain, and cumulative physical and psychological fatigue.
| Factor | What It Means on Trail | How Training Addresses It |
| Max Altitude | 5,545m at Kala Patthar (with variations at the Gokyo Route). This is roughly 50-55% of sea-level oxygen | Aerobic base training, acclimatisation schedule |
| Daily Trekking | 5–8 hours on rocky, uneven trail each day | Long hikes, back-to-back training days |
| Total Distance | ~130–140 km round trip | Progressive weekly mileage build-up |
| Terrain | Rocky, steep, often icy in higher sections | Weighted hikes, stair climbing, trail running |
| Technical Skill | None required. This is trekking, not peak climbing | Focus entirely on endurance and strength |
| Duration | 13+ days of consecutive trekking effort | Multi-week progressive training, not single-session fitness |
The altitude is the wildcard. At 5,000m+, your body works roughly 40% harder than at sea level to deliver oxygen to your muscles. This means that even well-conditioned trekkers, such as runners, swimmers, and footballers, can struggle without altitude-specific preparation. Fitness helps enormously. But it doesn’t make you immune.
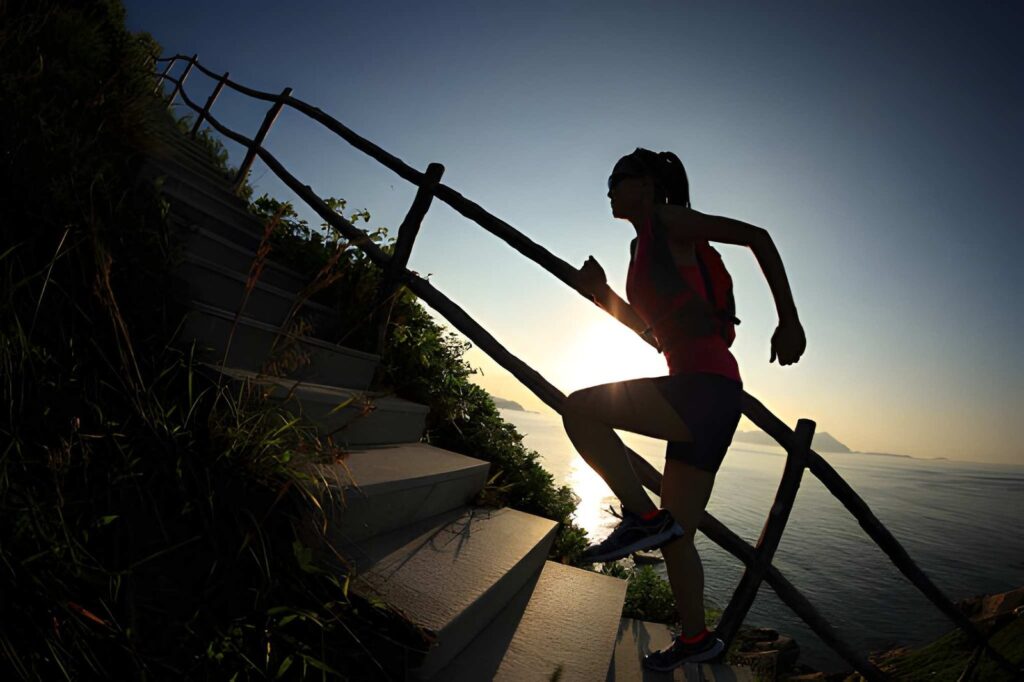
Cardio Training for EBC: What Each Activity Gives You
Not all cardio is equal when preparing for the Everest Base Camp trek. Different sports build different physiological qualities, where some map far more directly to the demands of the trail than others. Here’s an honest, sport-by-sport breakdown.
| Sport | Aerobic Base | Leg Strength | Downhill Control | Pack Load Simulation | Trek Specificity | Verdict |
| Hiking (loaded) | Very High | High | Very High | Very High | Very High | The gold standard. Non-negotiable. |
| Stair Climbing | High | High | Low | Moderate | High | Best gym substitute for the trail. |
| Running (trail) | Very High | Moderate | Moderate | Low | Moderate | Excellent aerobic base builder. |
| Cycling | Very High | Moderate | Very Low | Very Low | Moderate | Great base builder, low joint stress. |
| Swimming | High | Low | Very Low | Very Low | Low | Excellent recovery and lung training. |
| Football/Soccer | Moderate | Moderate | Low | Very Low | Low | Good base activity, not sufficient alone. |
| Basketball / Tennis | Moderate | Moderate | Low | Very Low | Low | Useful for general conditioning only. |
| Yoga / Pilates | Low | Moderate | Very Low | Very Low | Low | Excellent supplement. Never primary training. |
Hiking is irreplaceable. Loaded hiking builds leg strength, balance, cardiovascular endurance, and mental tolerance for long days simultaneously. Start flat and short; build to steep and long over 12 weeks.
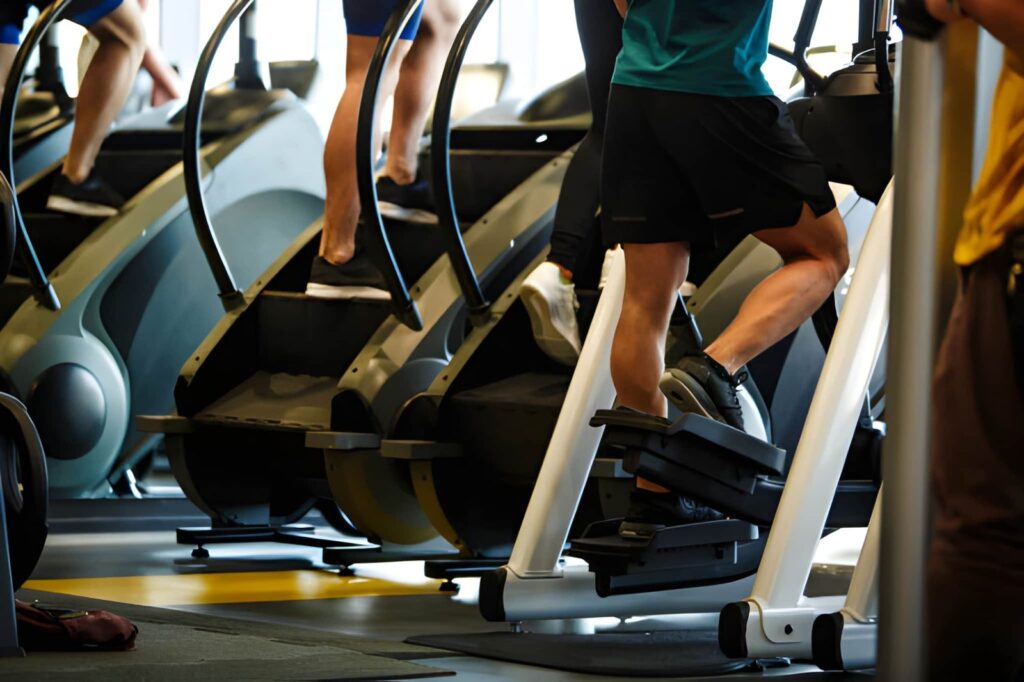
Stair climbing is the most underrated EBC tool. It replicates the rhythmic, sustained uphill effort of the trail better than any other gym machine. Thirty to 45 minutes daily over 8–10 weeks is what trekkers consistently credit for getting them to Base Camp.
Cycling is the best low-impact aerobic complement to hiking. It helps build the cardiovascular base that sustains you at altitude without the joint stress of running. Long rides of 90+ minutes in Zone 2 heart rate are the target.
Swimming builds exceptional lung capacity and diaphragmatic breathing control. These qualities pay real dividends at altitude when every breath matters. It won’t build your hiking legs, but it makes your lungs and heart significantly more efficient.
Football and other sports are more useful than most trekkers realise. A 90-minute football match covers 10–13 km of varied-intensity movement and builds leg power, cardiovascular capacity, and mental toughness. The limitation is its interval nature. Basically, it doesn’t build the long, sustained aerobic base EBC demands. Use it as your base activity and supplement with hiking and stair climbing.
The ideal cardio strategy: No single sport is sufficient on its own. The most effective preparation combines hiking (specificity), cycling or swimming (aerobic base with low injury risk), and stair climbing (trail simulation). If you play a sport like football or basketball, keep it, and build your specific EBC training around it.
Weight Training for the EBC Trek: What to Lift and Why
Weight training is essential, not optional. The trail demands sustained leg power for uphill climbs, core stability for uneven terrain, and shoulder endurance for carrying a loaded pack hour after hour.
Key Muscle Groups for EBC
| Muscle Group | Why It Matters on EBC | Primary Exercises | Priority |
| Quads and Glutes | Power for uphill climbs: the dominant trail movement. | Squats, step-ups, lunges, leg press | Critical |
| Hamstrings | Brake control on steep descents. Underrated by most trekkers | Romanian deadlifts, hamstring curls, Nordic curls | Critical |
| Calves | Absorb impact on rocky terrain across 8+ hours per day | Weighted calf raises, single-leg raises | High |
| Core (deep stabilisers) | Stabilise spine under pack weight on uneven ground | Planks, dead bugs, bird-dogs, pallof press | Critical |
| Glute Med / Hip Abductors | Lateral knee stability on uneven, rocky trail | Lateral band walks, clamshells, single-leg squats | High |
| Upper Back and Traps | Carry pack weight without fatigue or postural collapse | Rows, face pulls, shrugs | Moderate |
| Shoulders | Support pack straps over multi-hour trekking days | Overhead press, lateral raises, rear delt flys | Moderate |
| Ankles (stability) | Prevent ankle rolls on boulder-field terrain above 4,000m | Single-leg balance, Bosu ball, ankle circles | Moderate |
For structure, two to three strength sessions per week is the sweet spot. A sample week in the peak phase:-

- Monday: legs (squats, RDL, step-ups, calf raises)
- Wednesday: full body (rows, press, lunges, core)
- Saturday: long loaded hike. Rest or do yoga on the remaining days.
Your 12-Week EBC Training Plan
This plan integrates cardio, weight training, and hiking progressively across three phases: Build (Weeks 1–4), Peak (Weeks 5–10), and Taper (Weeks 11–12).
| Week | Phase | Cardio Focus | Weight Training | Hiking / Practice | Pack Weight | Rest Days |
| 1–2 | Build | 30 min jog or cycle x3/week | 2x full body: squats, lunges, rows, plank, calf raises | 1 flat day hike. You need to focus on duration, not pace | Day pack only | 2 |
| 3–4 | Build | 45 min run and stairs x3/week | 2x split: legs day (squats, RDL, step-ups) and upper/core day (rows, press, dead bugs) | 1–2 hikes with mild incline | 5–7 kg | 2 |
| 5–6 | Peak | 60 min trail run or stair climb x3/week | 3x split: heavy legs, upper back and shoulder, core and stability | 1 long hike (600m+ elevation gain) | 7–10 kg | 1–2 |
| 7–8 | Peak | 75 min trail run or stair master | 3x split: Bulgarian split squats, Nordic curls, weighted rows, loaded planks | 1 weekend multi-hour hike | 10–12 kg | 1–2 |
| 9–10 | Peak | Combo: run, stair, and short hike on the same day | 3x; maintain loads from Weeks 7–8, no new PRs | 2-day back-to-back hikes (simulate consecutive trek days) | 12–14 kg | 1 |
| 11–12 | Taper | Lighter cardio. 30–40 min, lower intensity | 2x maintenance only, reduce loads by 30%, full range of motion | 1 final long hike at trek pace | Trek pack weight | 2–3 |
Fitness level guide: Beginners start at Week 1. Regularly active individuals (3+ workouts per week) begin at Week 3. Advanced athletes can compress Weeks 1–6 into four weeks and move to the peak phase earlier.
Do not train to failure in the 3 weeks before departure. The goal in the taper phase is maintenance, not progress. Arriving at Lukla with sore muscles from a heavy leg day two days prior is a preventable mistake that undermines months of preparation.
Altitude and Acclimatisation: What You Need to Know
Altitude is the one variable that fitness alone cannot overcome. Above 3,000m, oxygen levels drop significantly, and your body adapts over days, not hours. The golden rule is simple: climb high, sleep low. Ascend during the day; descend to sleep at a lower elevation. This stimulates adaptation without triggering sickness, and it’s why a well-structured itinerary builds dedicated rest days into the schedule.
Watch for AMS symptoms above 3,500m. Common symptoms include headache, nausea, fatigue, and disrupted sleep. If they appear, stop ascending. Drink 3–4 litres of water daily. You should also consult your doctor about Diamox at least 4–6 weeks before departure.
Gear, Nutrition and Mental Prep
- Break in your boots 8–10 weeks out. New boots at altitude after six hours on a rocky trail is a reliable recipe for blisters that jeopardise your entire trek. Wear the same sock combination you’ll use on the trail (people choose the merino liner under a thicker hiking sock).
- Train with your actual pack, loaded progressively from 5 kg to 12–14 kg. This builds the specific endurance gym exercises that can’t be replicated and reveals gear problems before the trip.
- Eat consistently during training, even when not hungry. Many trekkers lose their appetite above 4,000m. Dal bhat is the trail staple: carb-heavy, calorie-dense, and available everywhere with unlimited refills. Pack trail mix, energy bars, and dried fruit as pocket fuel.
- Pace like a Sherpa, not a tourist. The most common first-timer mistake is starting too fast. Slow your pace to where you can hold a full conversation; that is the sustainable speed.
Mental Preparation: The Training You Should Not Miss Out
The mind quits before the body does. This is an observable pattern on the EBC trail, not a motivational cliché. By Day 9 or 10, when the altitude is disturbing your sleep, your legs carry accumulated weeks of fatigue, and the trail keeps ascending regardless, the gap between those who reach Base Camp and those who turn back is almost entirely psychological.
Mental resilience is trainable. Here is how.
Pacing practice: On long training hikes, deliberately resist the urge to push hard. Practice the Sherpa pace, which is slow, consistent, and sustainable enough to hold a full conversation. Sherpas overtake trekkers effortlessly because they have mastered energy conservation, not because they are superhuman.
Diaphragmatic breathing: Belly breathing is more oxygen-efficient than shallow chest breathing, which makes a meaningful difference at altitude. Practice it consciously during cardio training until it becomes automatic.
Mental chunking: On hard days, do not think about how far Base Camp is. Think about the next teahouse. Then the next village. Break the journey into achievable segments. It is deceptively simple and genuinely effective.
Mindfulness practice: Ten minutes of daily meditation builds the focus and equanimity that long, hard trekking days demand. The ability to stay present and non-reactive under physical duress is a tangible advantage at altitude.
Visualisation: Spend a few minutes each week imagining standing at Kala Patthar. Imagine the view of Everest at dawn and the feeling of finishing. This is sports psychology, not mysticism, and it measurably improves performance under stress.
Common Mistakes to Avoid During Training
- Skipping long hikes: Gym fitness and trail fitness are not the same thing
- Neglecting hamstrings and calves: The descent from Kala Patthar will expose this immediately
- Overtraining in the final two weeks: Arrive rested, not depleted
- Underestimating altitude: AMS doesn’t respect fitness levels; follow the acclimatisation schedule
- Testing new gear on the trail: Everything must be worn and proven during training
- Skipping rest days: Adaptation happens during recovery, not during effort
Tips from Experienced EBC Trekkers (Across Social Platforms)
“The stair master saved my trek.” Multiple experienced trekkers report that 30–45 minutes on the stair master daily (over 8–10 weeks) was the most effective single gym exercise for EBC prep. It replicates the trail’s sustained, rhythmic uphill effort better than anything else.
“Slow is fast.” First-time trekkers almost universally start too fast. Every experienced high-altitude trekker eventually says the same thing: slow your pace to where you can hold a comfortable conversation, and you will reach Base Camp. Race the trail, and the altitude will stop you.
“Train on tired legs.” Schedule back-to-back hiking days in Weeks 8–10. It is the cumulative fatigue of Days 2, 3, and 4 on the trail that breaks unprepared trekkers. Building this specific resilience is what separates those who reach Base Camp from those who don’t.
Ready to Trek? Your Final Preparation Checklist
The Everest Base Camp trek is one of the most transformative journeys on earth. It challenges you, humbles you, and rewards you in equal measure. Here is what every well-prepared trekker has in common:
- 12-week plan covering cardio, weight training, and hiking
- Hiking and stair climbing as primary cardio; cycling, swimming, and sports as supplements
- Hamstrings and calves are trained as seriously as quads
- Back-to-back hiking days in peak weeks
- All gear is broken in 8–10 weeks before departure
- AMS awareness and acclimatisation schedule understood
- Pacing, breathing, chunking, and visualisation practised
- 3–4 litres of hydration and calorie-dense food on the trail
The mountain will be there. The question is: will you be ready?
Book your Everest Base Camp Trek with Far Out Nepal. Get expert guides, an acclimatisation-optimised itinerary, and full support from Kathmandu to Base Camp.