Category: Blog
Complete Guide to Tiger’s Nest Monastery (Paro Taktsang) Hike in Bhutan
Introduction
Paro Taktsang Monastery (popularly known as Tiger’s Nest) is not just Bhutan’s most iconic landmark. It is the hike that most visitors to Bhutan will remember long after the country’s dzongs, festivals, and mountain vistas fade from memory.
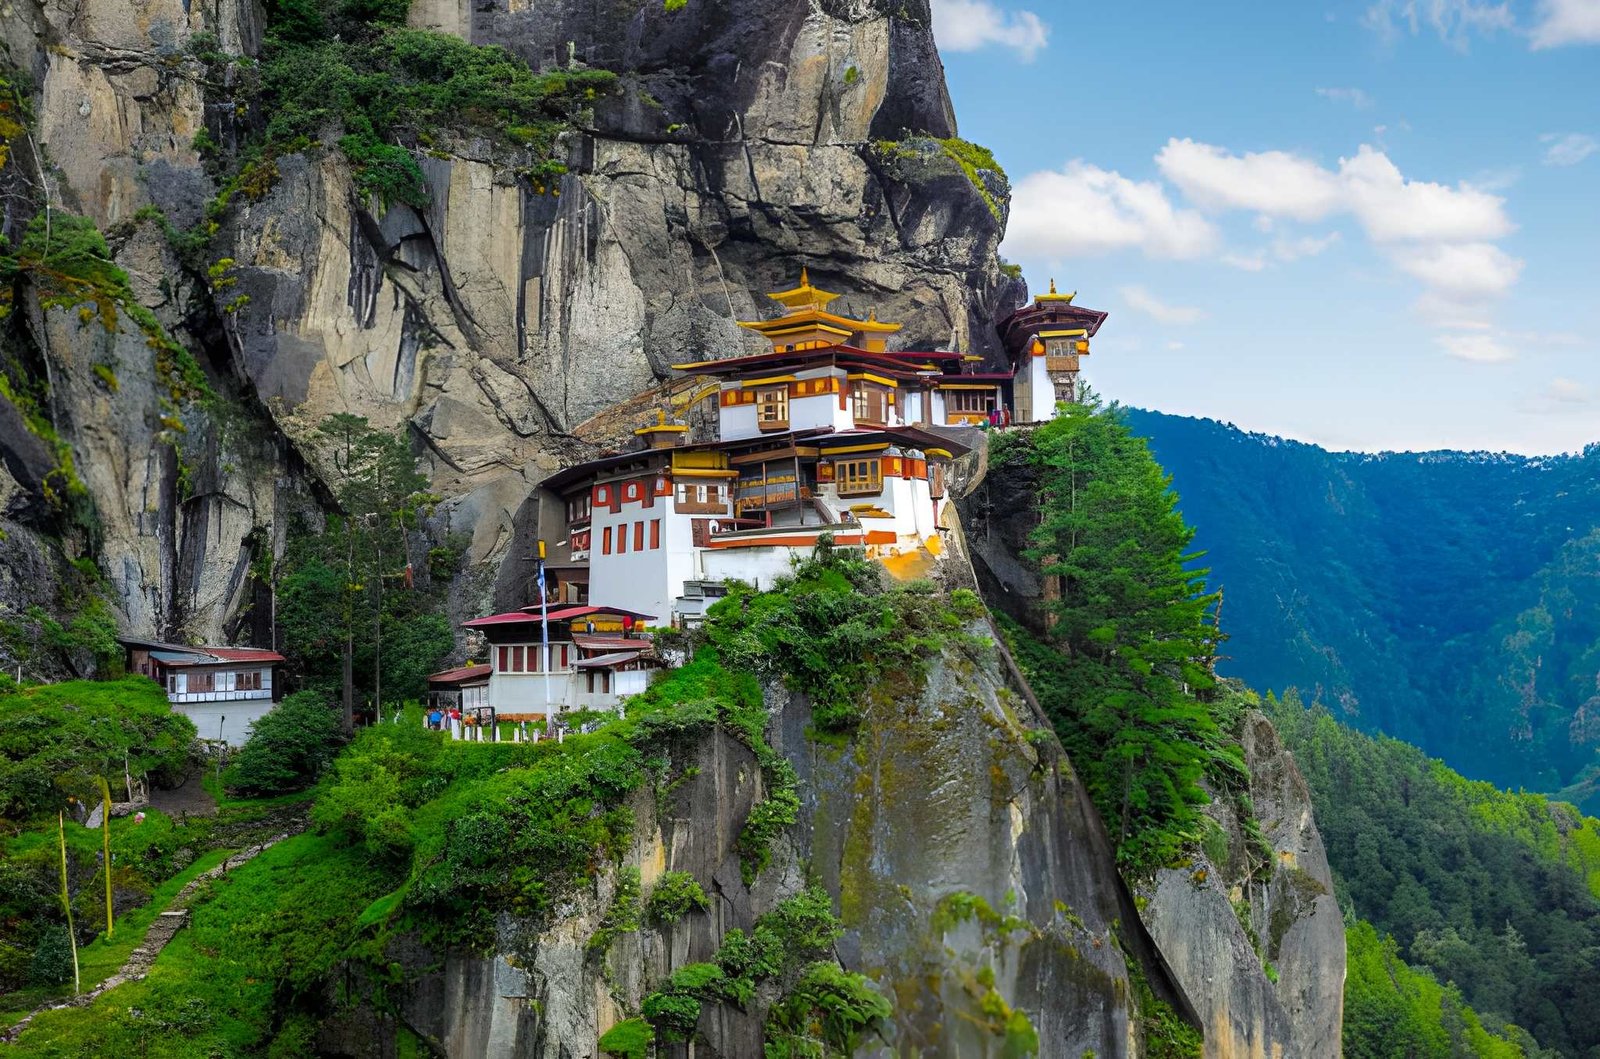
Tiger’s Nest is one of the few places in the world that has earned its reputation. One of the reasons for said reputation is the fact that the monastery is perched 900 metres above the floor of Paro Valley on a sheer granite cliff.
But here’s what most travellers won’t tell you upfront: Tiger’s Nest is as much a physical experience as it is a cultural one. The altitude is real, the trail is steep, and the final reward is nothing short of extraordinary. This guide exists to help you prepare honestly, so that you can hike with confidence, not guesswork.
Ready to hike Tiger’s Nest? Far Out’s Bhutan tour packages include a guided Tiger’s Nest hike with expert local guides who know every step of the trail, and every story behind it.
About Tiger’s Nest Monastery (Paro Taktsang)
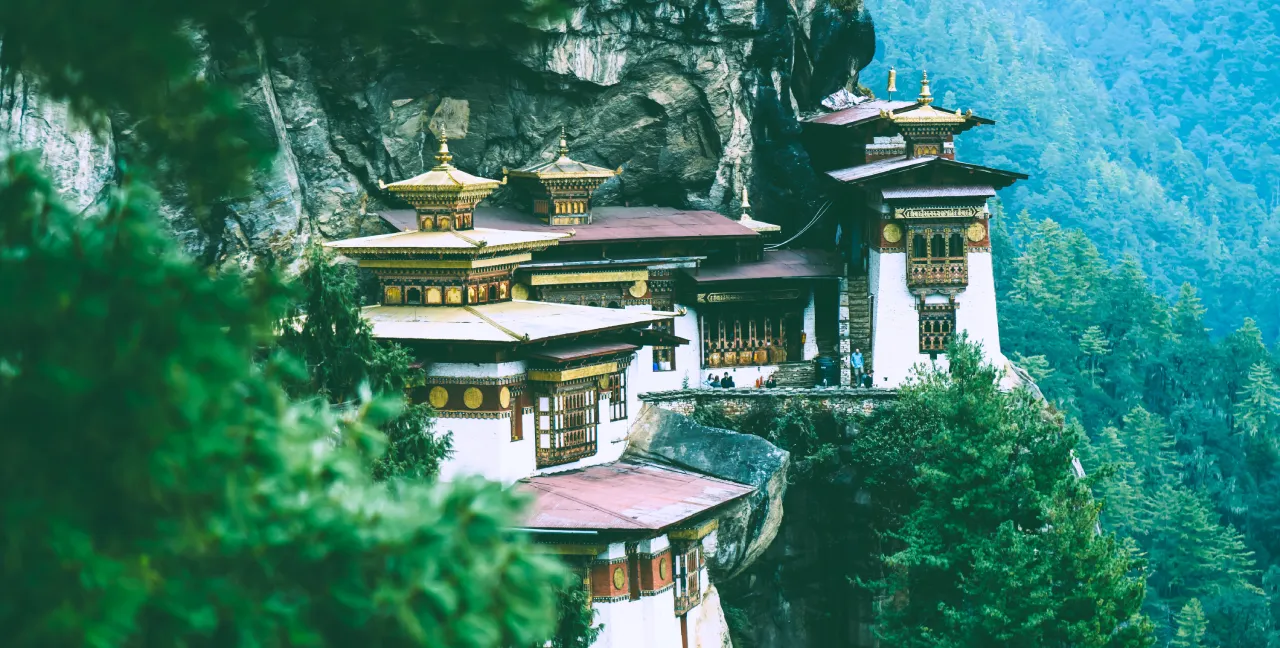
This is one of Buddhism’s Most Sacred Cliffside Monasteries. Paro Taktsang is a 17th-century Buddhist monastery complex built into a vertical cliff face at 3,120 metres (10,240 feet) above sea level, in the Paro district of western Bhutan.
According to Bhutanese religious tradition, Guru Rinpoche (the saint credited with introducing Vajrayana Buddhism to Bhutan) arrived on the back of a tigress and meditated in a cave at this very site in the 8th century CE. The cave, and later the monastery built around it, became one of the holiest pilgrimage sites in the Himalayan Buddhist world.
Today, Paro Taktsang is both a living monastery and a UNESCO tentative list site. Monks reside and pray within its walls. Pilgrims from across Bhutan and the world make the climb not just as a hike, but as an act of devotion. For travellers, it is the single most-visited site in the country.
Why It’s Unmissable on Any Bhutan Tour
No other site in Bhutan combines natural drama, spiritual depth, and physical achievement the way Tiger’s Nest does. The monastery clings to a rockface so steep that it seems impossible by any pre-modern standard of construction.
Its white-walled temples, golden rooftops, and prayer flag-draped cliffs appear almost suspended in midair. The view from the wide ledge roughly halfway up the trail (or the main viewpoint) is one of the most photographed images in all of Asia.
It is, simply, the kind of place that changes how you see a country.
Where Is Tiger’s Nest Located?
Paro Taktsang sits above Paro Valley in the Paro district, which is about 10 km north of Paro town in Western Bhutan. The valley itself sits at roughly 2,200 metres (7,218 feet), making the climb to the monastery a consistent elevation gain of approximately 900 metres. The surrounding landscape is a mix of blue pine forest, alpine scrub, and open ridgelines with sweeping views of the valley below.
Paro is also home to Bhutan’s only international airport, making it the entry and exit point for most visitors. This geographical convenience means Tiger’s Nest is accessible from day one of most Bhutan itineraries, though allowing a day of acclimatisation first is strongly recommended.
Getting to the Trailhead
The hike begins at a car park at the base of the mountain, about a 10-minute drive from Paro town. Your tour operator or hotel can arrange transport. Entry requires a valid Bhutan Sustainable Development Fee (SDF) clearance, which your licensed tour operator will handle. Solo independent hiking is not permitted in Bhutan as all visits must be arranged through a licensed Bhutanese tour operator.
Tiger’s Nest Altitude & Elevation
| Metric | Detail |
| Monastery elevation | 3,120 m (10,240 ft) |
| Paro Valley base (trailhead) | ~2,400 m (7,874 ft) |
| Total elevation gain | ~720 m (2,362 ft) |
| Paro town elevation | ~2,200 m (7,218 ft) |
| Highest point on the trail | ~3,140 m before final descent |
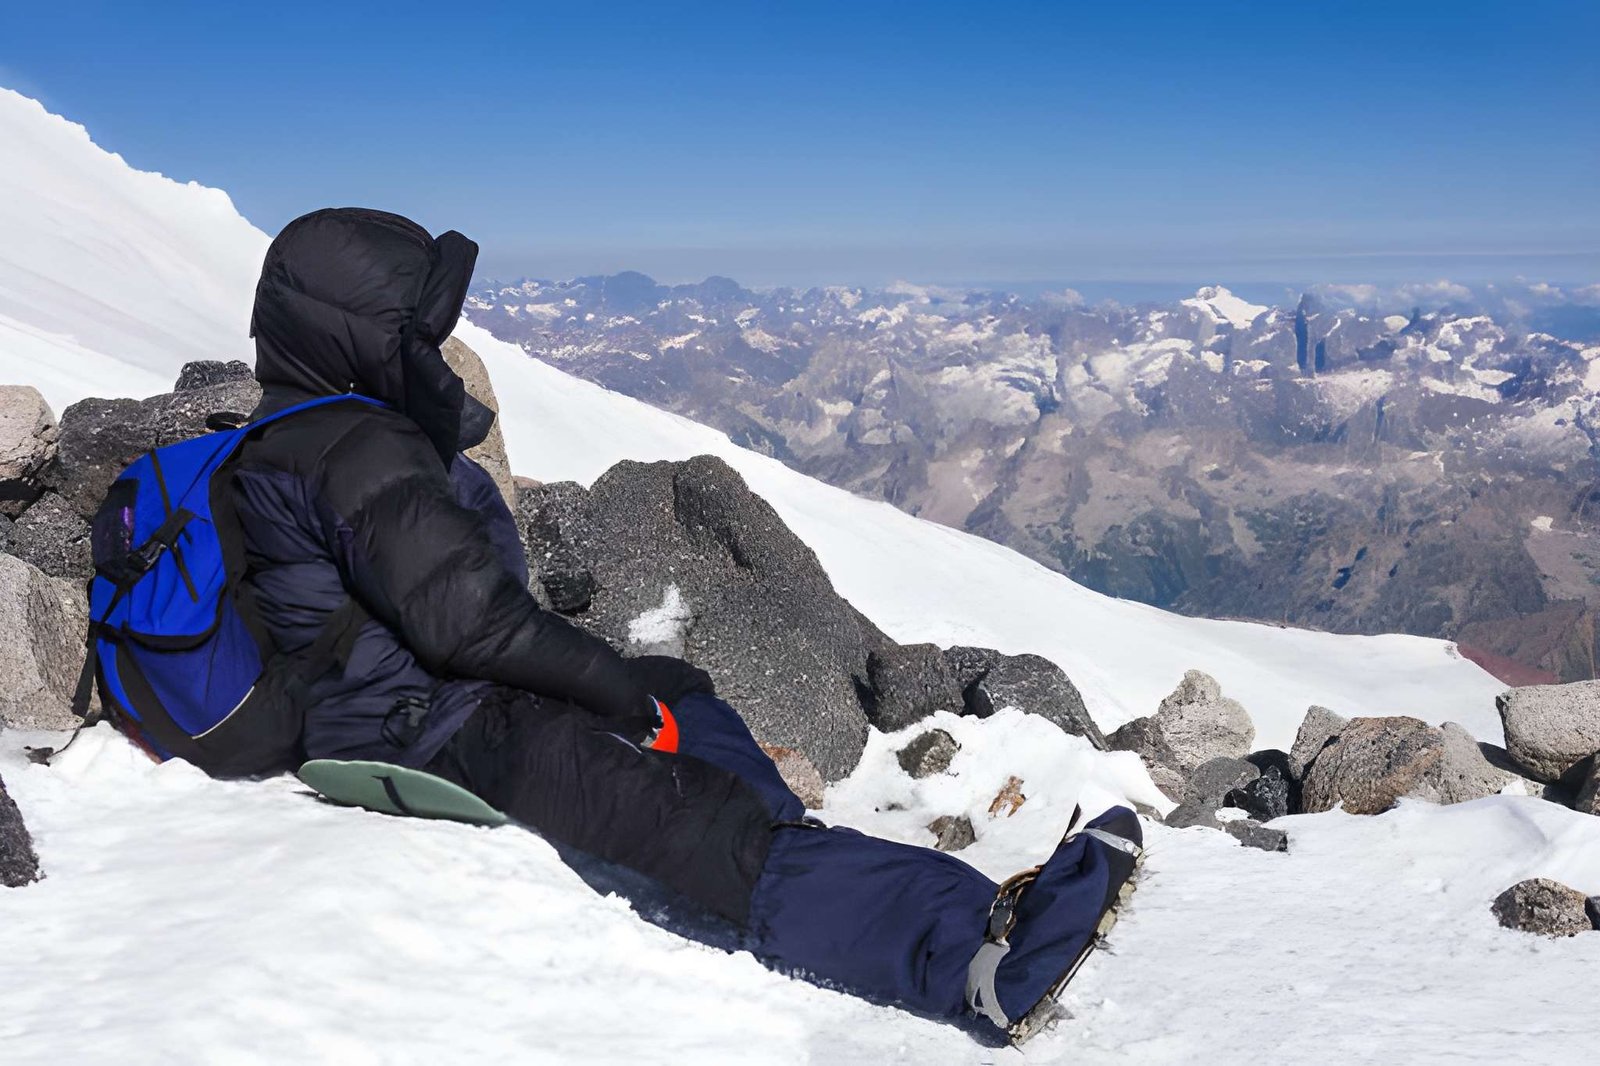
The altitude of Tiger’s Nest (3,120 metres above sea level) is high enough to cause mild altitude-related discomfort in visitors who are not acclimatised. However, it is not at the level that poses a serious altitude sickness risk for most healthy adults who ascend at a reasonable pace.
Elevation Gain on the Hike
From the car park at roughly 2,400 metres, the trail climbs steadily through pine forest, ascending approximately 720 metres before reaching the monastery. This is a sustained uphill effort, not a stroll. The elevation gain occurs primarily in the first two-thirds of the trail, with a short descent followed by a steep stone staircase for the final approach.
The trail does not have sharp altitude spikes. Instead, it is a long, consistent climb that rewards a steady pace over a rushed one.
How Altitude Affects Your Hike
Altitude Awareness: If you are flying directly from sea-level cities (Bangkok, Delhi, Singapore, Kathmandu) into Paro, your body has had very little time to adjust. Even if you feel fine the first morning, your oxygen efficiency is reduced. This matters on the climb.
At 3,000+ metres, the air holds roughly 30% less oxygen than at sea level. For most people, this manifests as slightly heavier breathing and a slower pace, but no dramatic illness. However, if you rushed your journey into Bhutan or are particularly sensitive to altitude, you may experience headaches, fatigue, or mild nausea on the upper section of the trail.
The practical fix is simple: Go slow. The monks who climb this trail regularly do not rush. Neither should you.
- Spend at least one night in Paro before attempting the hike
- Drink 2–3 litres of water the day before and the morning of
- Avoid alcohol the night before. This accelerates dehydration at altitude
- Carry a light snack for energy on the upper section
Tiger’s Nest Hike: Overview
| Factor | Details |
| Total distance | ~9–10 km (round trip) |
| Average hiking time | 4–6 hours (up and back) |
| Ascent time | 2–3 hours |
| Descent time | 1.5–2 hours |
| Difficulty rating | Moderate to Moderately Challenging |
| Trail surface | Dirt path, stone steps, forest trail |
The hike is classified as moderate, not beginner, but far from technical. There are no ropes, no scrambling, and no elevation zones that require mountaineering experience. What it does require is sustained cardio fitness and the willingness to go at a deliberate pace.
Who Can Complete the Tiger’s Nest Hike?
This is the question most guides skip past. Here’s an honest answer:
- Healthy adults of most fitness levels can complete this hike if they pace themselves and take breaks
- Children aged 8 and above with reasonable fitness regularly complete it
- Older adults (60s and 70s) successfully hike Tiger’s Nest. Many old people trek with trekking poles
- Visitors with heart or lung conditions should consult a doctor before attempting
- Those with severe knee problems may find the descent challenging due to the stone stair sections
Horses are available for the lower section of the trail (up to the viewpoint café) for an additional fee. This is a really good practical option for those with mobility concerns or who want to conserve energy for the upper trail.
Step-by-Step Hiking Route
Stage 1: Trailhead to Viewpoint Café (The Main Climb)
The hike begins through a dense forest of blue pine and rhododendron. The trail is wide and well-maintained, switchbacking steadily upward. This section takes most walkers 1.5 to 2 hours. It’s consistent but manageable. It’s the kind of climb where a slow, steady rhythm carries you further than bursts of speed.
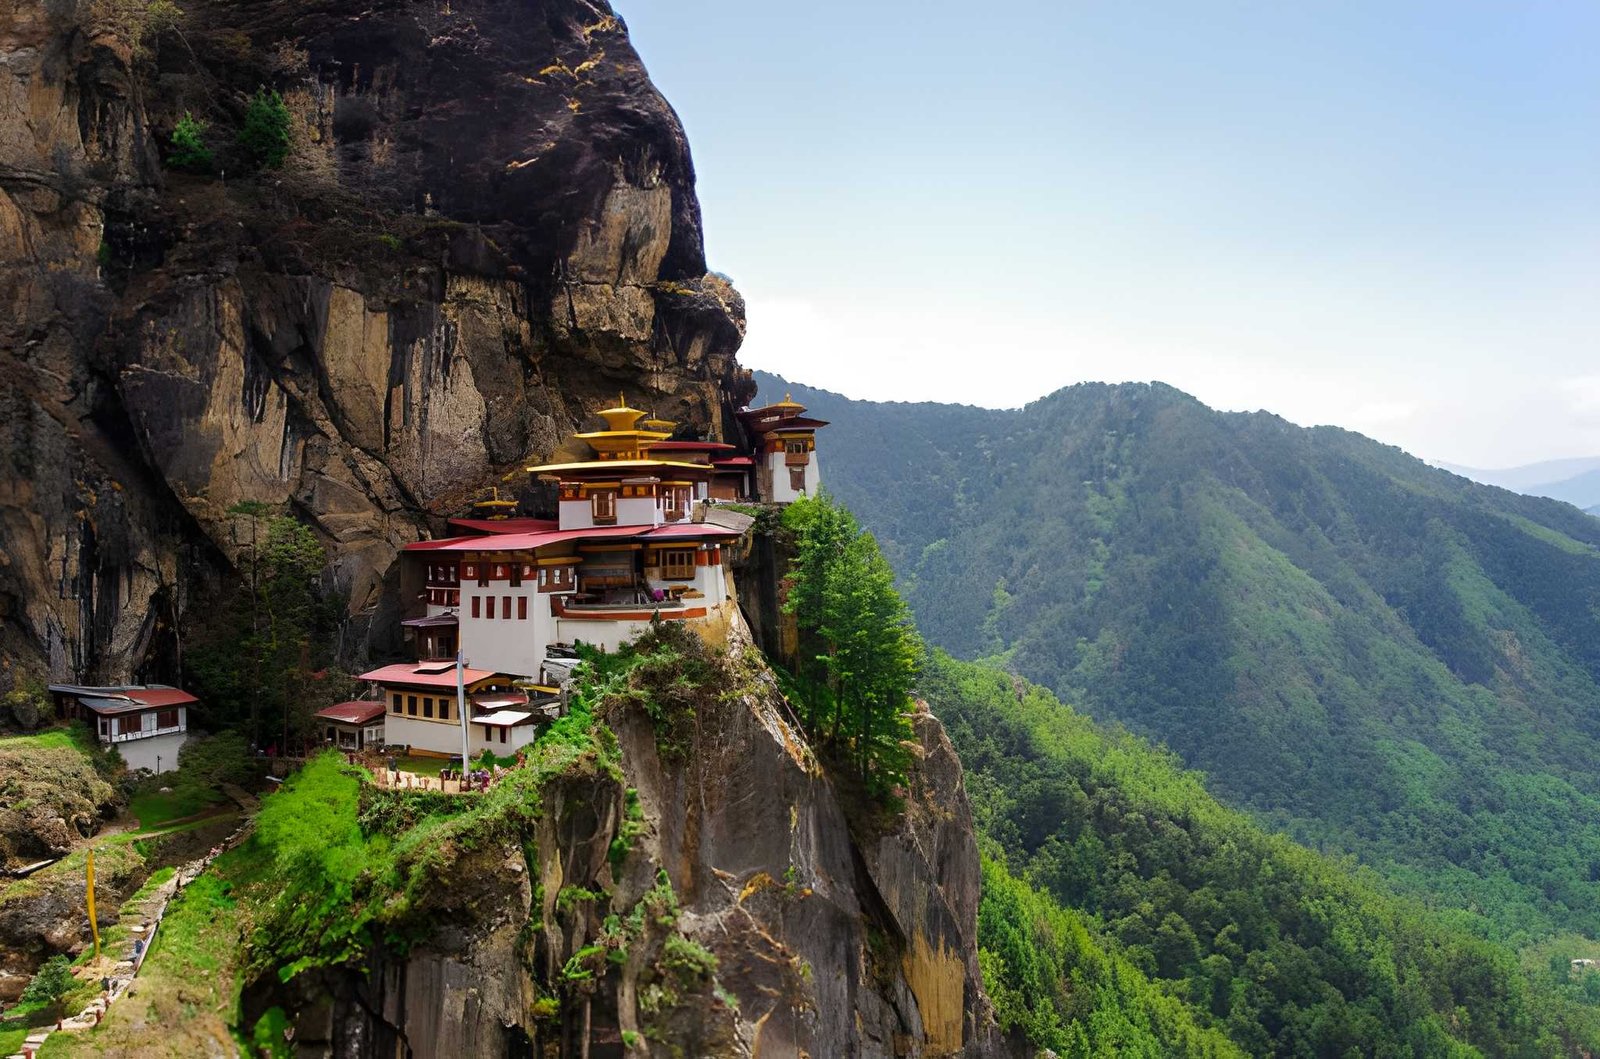
As you ascend, the trees thin and you begin catching glimpses of the valley below. Paro town appears as a patchwork of rooftops and paddy fields far beneath you. Then, as you crest a ridgeline, Tiger’s Nest comes into full view for the first time. You will see the monastery plastered impossibly to the cliff face across a narrow gorge. Most people stop here involuntarily. It has that effect.
Stage 2: The Viewpoint Café
At roughly the halfway point (elevation ~2,900 m), a small café offers tea, light snacks, and a bench with what is arguably Bhutan’s finest single view. This is your natural rest stop. Take 20–30 minutes here. Drink water, eat something, take your photographs, and let your legs recover.
The monastery visible from here looks close. It is not. At least not in terms of effort. The trail ahead descends sharply into the gorge before climbing again via several hundred stone steps.
Stage 3: The Final Descent and Stone Staircase
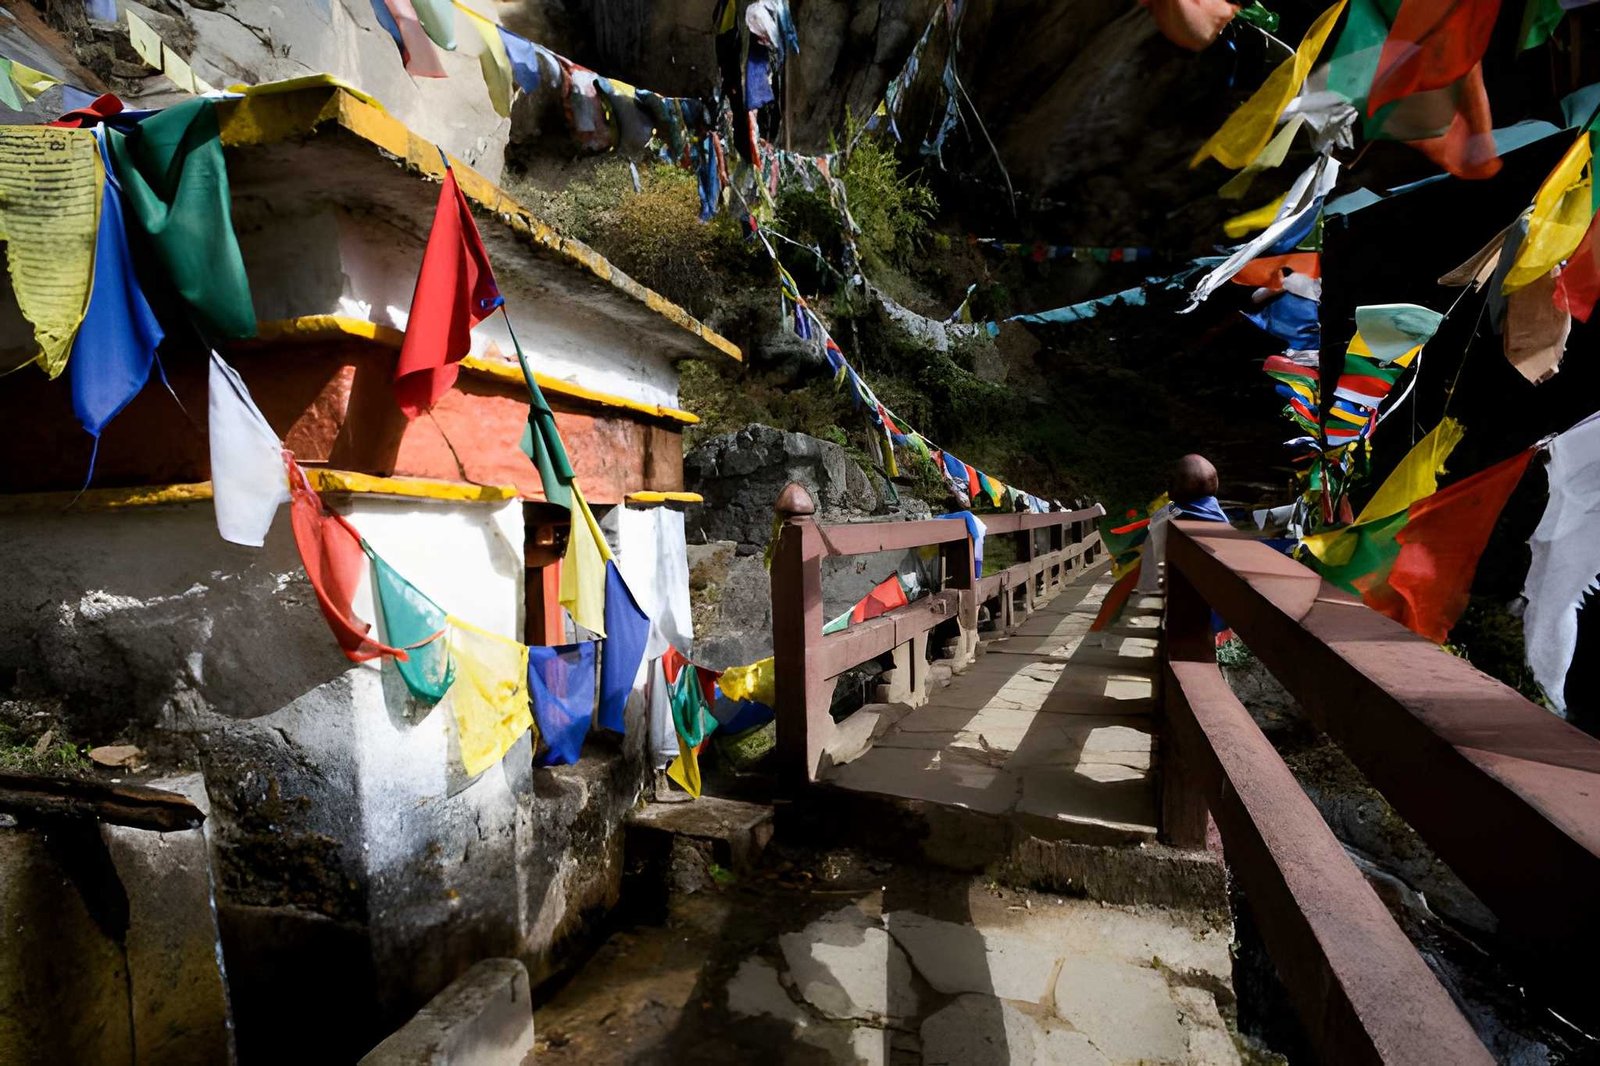
From the viewpoint café, the trail drops steeply into a gorge where a waterfall cascades beside the path. This descent is the steepest section of the entire hike, and your knees take the load here. Cross the bridge at the bottom, and you face the final climb: a long series of stone stairs carved directly into the cliffside, leading up to the monastery entrance.
This final push is the hardest 20 minutes of the hike. It is also the most dramatic. By the time you pass through the monastery gate, the physical effort and the sheer improbability of what you are standing inside combine into something difficult to describe.
Inside Paro Taktsang Monastery
Entry requires removing your shoes and leaving bags (including camera bags) at the entrance. You should also know that photography is not permitted inside the monastery complex. The interior is a series of interconnected temples and shrines, some built directly into the cave where Guru Rinpoche is said to have meditated. Monks may be present and in prayer. Dress respectfully: covered shoulders and legs are required.
Allow 30–45 minutes inside before beginning the descent.
Best Time to Visit Tiger’s Nest
Tiger’s Nest can be visited year-round, but two seasons stand out:
- Spring (March–May): Rhododendrons bloom along the trail in vivid reds and pinks. Skies are generally clear. This is peak season, expect other hikers on the trail.
- Autumn (September–November): Post-monsoon clarity delivers the sharpest mountain views. Cool temperatures make for ideal hiking conditions. Equally popular.
- Winter (December–February): Quieter, with occasional snow on the upper trail and monastery roof. Cold but strikingly beautiful. Fewer tourists. The hike remains doable on snow-free days.
- Monsoon (June–August): Rain makes the trail muddy and slippery. Visibility is reduced. Not recommended unless you don’t mind wet hiking.
Essential Tips for the Tiger’s Nest Hike
You should wear and carry the following:
- Footwear: Sturdy trail shoes or light hiking boots with grip. The stone stairs and forest path require ankle stability.
- Layers: Mornings start cool at altitude; temperatures rise mid-hike. A removable layer is essential
- Water: Carry at least 1.5 litres from the trailhead. The café sells water, but at altitude you’ll need more than you think
- Trekking poles: Optional but genuinely useful, particularly on the steep descent
- Snacks: Energy bars, nuts, or fruit for the upper section
- Sun protection: Hat and sunscreen as UV intensity increases significantly at altitude
Mistakes to Avoid
- Starting too fast: The first section feels easy. Burning energy early means struggling on the staircase
- Skipping the café stop: Even 20 minutes of rest changes the experience of the upper section entirely
- Underestimating the descent: Many hikers report that tired legs on the steep return trail are harder than the climb. Pace your energy accordingly.y
- Leaving too late: Start by 8–9 AM. Early starts mean cooler temperatures, better light for photography, and quieter trails
- Ignoring acclimatisation: This is the most common mistake for travellers on tight itineraries. One night in Paro before the hike makes a measurable difference
Is Tiger’s Nest Worth It? (Honest Answer)
Yes. Without reservation.
Tiger’s Nest is the kind of place that outlasts the trip it belongs to. The physical effort (a few hours of steady climbing) is entirely within reach for most travellers who pace themselves. The reward is not just a view or a photograph. It is the cumulative experience of earning your way up to a place that has no business existing where it does, and finding that it is every bit as extraordinary as promised.
Whether you are planning your first visit to Bhutan or building an itinerary for guests, the Tiger’s Nest hike belongs at the centre of any Paro itinerary. Not as an add-on. As the point.
Frequently Asked Questions
What is the altitude of Tiger’s Nest Monastery in Bhutan?
Paro Taktsang (Tiger’s Nest) sits at 3,120 metres (10,240 feet) above sea level. The trailhead begins at approximately 2,400 metres, making the total elevation gain roughly 720 metres.
How difficult is the Tiger’s Nest hike?
The hike is rated moderate to moderately challenging. It is manageable for most healthy adults at a steady pace, including older hikers and children above 8 years. The steepest section is the stone staircase on the final approach.
How long does it take to hike to Tiger’s Nest?
Most visitors complete the round trip in 4–6 hours, including time at the viewpoint café and inside the monastery. The ascent takes 2–3 hours; the descent 1.5–2 hours.
Can I hike Tiger’s Nest without a guide?
No. Bhutan requires all foreign visitors to travel with a licensed Bhutanese tour operator. Independent hiking is not permitted. Your guide will accompany you on the trail and manage all entry requirements.
Is altitude sickness a concern on the Tiger’s Nest hike?
Mild altitude effects (heavier breathing, slight fatigue) are common but manageable. Serious altitude sickness is uncommon at this elevation for visitors who have spent at least one night acclimatising in Paro. Staying hydrated and maintaining a slow, steady pace are the most effective preventive measures.
Contact us to start planning your Bhutan journey. We offer the best guidance for logistics and itineraries with 25+ years of experience exploring the Himalayas.
Altitude Sickness Prevention: How to Stay Safe on High-Altitude Treks
Medical Disclaimer: This guide about AMS prevention is for general educational purposes only and is not a substitute for professional medical advice. Always consult a qualified physician before your high-altitude trek.
Most people who develop altitude sickness on a trek did not get unlucky. They got ahead of their body.
Acute Mountain Sickness (AMS) affects an estimated 25–40% of trekkers above 3,500 m, and up to 75% above 5,000 m on rapid ascent profiles. It is not a sign of weakness or low fitness. It is a physiological response to ascending faster than your body can adapt. The good news: it is largely preventable. At 3,500 m, available oxygen is roughly 65% of sea level. Your body can still adapt fully, but only if you give it time.

This guide covers everything that actually works. For a full clinical overview of AMS, HAPE, and HACE, see our complete altitude sickness guide.
The One Rule That Prevents Most Cases of AMS
Ascend gradually. Limit sleeping altitude gain to 300–500 m per night once you are above 3,000 m.
That single rule, when applied consistently, eliminates the majority of AMS risk. Everything else in this guide supports it or fills the gaps around it. The Wilderness Medical Society and CDC both cite this as the most consistently supported guideline in altitude medicine.
The companion principle: Climb high, sleep low. Go for day hikes to higher elevations, followed by sleeping lower to accelerate acclimatization, while preventing overnight hypoxic stress simultaneously. This is why Namche Bazaar rest days on the EBC route include a hike up to the Everest View Hotel (3,880 m) before sleeping back at 3,440 m. It is not scenic padding; it is physiology.
Trek-Specific Acclimatization: What the Routes Actually Require
Generic advice says “go slow.” Here is what that means on some of the most popular trails.
Everest Base Camp (EBC)
The EBC route is well-designed for acclimatization when followed correctly. The mandatory rest days at Namche Bazaar (3,440 m) and Dingboche (4,360 m) are not optional stops. They are where your body does the physiological work that allows you to reach 5,364 m safely.
The most common mistake: shortening the Dingboche rest day because you feel good. Feeling fine at 4,360 m is the acclimatization working. Protect the rest days.
Annapurna Base Camp (ABC)
The ABC route has a steeper altitude gain profile than EBC and less built-in acclimatization time. Trekkers gain significant elevation quickly from Chhomrong (2,170 m) to ABC (4,130 m) in relatively few days, with limited descent options along the way.
The key mitigation: do not rush the lower sections. Time spent at Chhomrong (2,170 m) and Himalaya Hotel (2,900 m) pays dividends at ABC. A slower lower section beats a forced rest day at 3,500 m with symptoms already developing.
Manaslu Circuit
The Manaslu Circuit crosses Larkya La Pass at 5,106 m in a remote area where helicopter evacuation is far more difficult than on EBC. Rest days at Samagaun (3,530 m) and Samdo (3,875 m) are non-negotiable before even reaching the pass. The remoteness raises the stakes. So, be careful and plan accordingly.
Altitude Thresholds at a Glance
| Elevation Band | Typical Risk | Acclimatization Action Required |
| Below 2,500 m | Minimal | None |
| 2,500–3,000 m | Low–mild | Begin monitoring; no rushing |
| 3,000–4,000 m | Moderate | Max 500 m sleeping gain/night; rest days every 3rd day |
| 4,000–5,000 m | High | Rest day every 1,000 m gain; climb high, sleep low |
| Above 5,000 m | Very high | Strict acclimatization; medication consideration warranted |
Behavioural Prevention: The Habits That Move the Needle
Hydration and the Myths Around It
Target 3–4 litres of water per day at altitude. At high elevation, you lose water faster than you realise, through increased respiration rate and dry mountain air. Dehydration mimics and worsens AMS symptoms, particularly headache and fatigue.
The myth to dispel: More is not always better. Excessive water without electrolytes can cause hyponatremia, a condition that mimics AMS and can be serious. Plain water is fine; electrolyte tablets are a practical supplement on heavy days. Herbal teas in Nepal’s teahouses count toward your fluid target.
Urine colour is your simplest field test. Pale yellow is acclimatized and hydrated. Dark yellow means drink more. Clear throughout the day may mean you are overdoing it.
Alcohol: Leave It at Kathmandu
Avoid alcohol for the first 48–72 hours at every new elevation. This is not a general wellness tip, but specific physiology. Alcohol suppresses the hypoxic ventilatory response. It’s the mechanism by which your brain signals your lungs to breathe harder in low-oxygen conditions. At altitude, that mechanism is the entire acclimatization process. Blunting it during the most critical adaptation window significantly increases AMS risk.
One night of drinks at Namche before your rest day hike is not worth the next 36 hours of impaired adaptation. After your acclimatization is established at a given elevation, moderate consumption is less critical, but the first nights at each new altitude band are when it matters most.
Caffeine: More Nuanced Than You Think
Caffeine is not straightforwardly harmful at altitude. In fact, for regular coffee drinkers, stopping caffeine abruptly before a trek is a mistake. And caffeine withdrawal headache is clinically indistinguishable from an AMS headache and creates confusion at exactly the wrong moment.
The sensible approach: Maintain your normal caffeine intake. Do not dramatically increase it, as stimulants can disrupt sleep quality at altitude. But do not cut it out cold either. Nepal’s teahouses serve excellent tea and coffee. So, your morning cup is fine.
Sleep: The Underrated Prevention Tool
Most acclimatization happens during sleep. Specifically, the adjustments in ventilation, blood chemistry, and circulation that your body makes overnight. Poor sleep at altitude is both a symptom and a driver of AMS progression.
At higher elevations, Cheyne-Stokes respiration (an irregular stop-start breathing pattern) is nearly universal and disrupts sleep quality significantly. Acetazolamide reduces this substantially if you are already taking it. For those not on medication: avoid sleeping aids, alcohol, and sedatives at altitude, all of which suppress the breathing patterns your body is working hard to regulate.
Good sleep hygiene at altitude: Warm, well-ventilated room, consistent sleep schedule, and take poor sleep seriously as it can compound over days.
Overexertion: The Most Preventable Mistake
Fit trekkers are statistically just as susceptible to AMS as unfit ones. Sometimes, even more than average trekkers, because fitness breeds confidence and confidence leads to overexertion. Move at a conversational pace on ascent days. If you cannot speak comfortably while walking, slow down. On rest days, a short uphill walk and return beats complete inactivity, but it should feel easy.
Nutrition and Natural Remedies
What to Eat for Acclimatization
High-carbohydrate, lower-fat meals are physiologically sound at altitude. Carbohydrates require less oxygen per unit of energy produced than fats or proteins. This can be a real, if modest, advantage when oxygen is the limiting factor. Nepal’s dal bhat (rice, lentils, vegetables) is genuinely well-suited to altitude nutrition: high-carb, warm, easy to digest, and calorie-dense.
Practical guidance for the trail:
- Eat regularly even when your appetite drops. Reduced appetite is normal at altitude, but skipping meals impairs recovery.
- Prioritise warm, easily digestible food over heavy or fatty meals.
- Avoid large meals before sleep, which worsens the periodic breathing that disrupts rest at altitude.
Natural Remedies: What the Evidence Actually Says
This is an area where trekker culture and clinical evidence part ways. Here is an honest assessment:
Ginger — Has reasonable clinical evidence for reducing nausea, which is a common AMS symptom. It will not prevent AMS but may make mild symptoms more manageable. Ginger tea is widely available in Himalayan teahouses and is worth including.
Garlic — Traditional use in Sherpa and high-altitude communities is well-documented. Clinical evidence for AMS prevention is limited, but there is no downside to including it in meals. Garlic soup is a staple on most EBC teahouse menus.
Rhodiola rosea — An adaptogenic herb with some research interest for altitude adaptation. Early studies are inconclusive; it is not a substitute for acclimatization.
The honest summary: Natural remedies are supplements, not cures. None replaces acclimatization. Some (ginger, garlic) are worth including for comfort. None should change your itinerary decisions.
Pre-Trek Training: What Helps and What Doesn’t
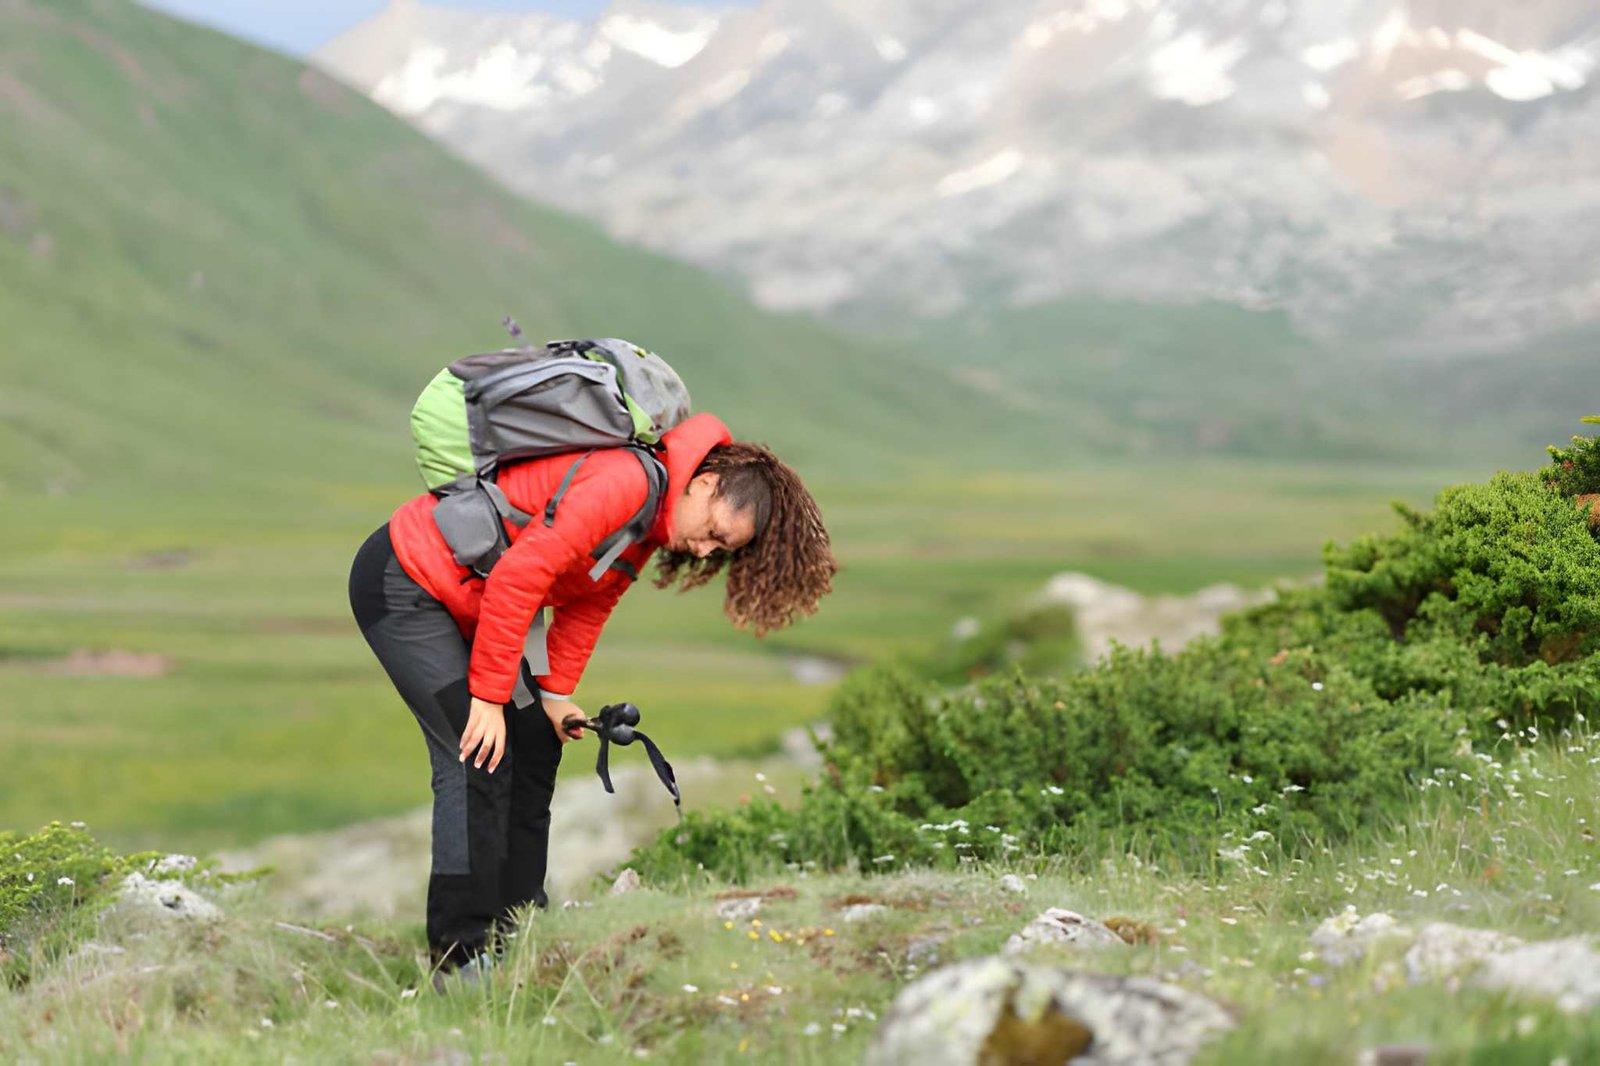
Fitness does not prevent AMS: This is the most important myth to dispel. Elite athletes get AMS at the same rate as casual trekkers. Neither prior success at altitude nor cardiovascular conditioning acclimatizes your respiratory system to hypoxia. What training does is it makes the trek less exhausting, which reduces the risk.
Practical pre-trek preparation (8–12 weeks out):
- Cardiovascular base: Regular aerobic exercise, such as hiking, stair climbing, cycling, etc. Three to four sessions per week at sustained moderate intensity is the best.
- Load-bearing practice: Train with a loaded pack on hills or stairs. Descent conditioning and ankle stability matter as much as uphill strength.
- Altitude exposure if accessible: A weekend at 2,000–3,000 m in the weeks before departure is genuinely useful, though not essential.
- Sleep: Consistent quality sleep in the build-up period supports recovery capacity on the trail.
Preventive Medication
Acetazolamide (Diamox) is the most commonly prescribed preventive medication for AMS. Taken the day before ascending above 3,000 m, it compresses the acclimatization process and reduces risk, particularly for trekkers with prior AMS history or compressed itineraries. It supports the prevention principles above; it does not replace them.
For dosage, side effects, and the CDC risk framework, see our altitude sickness medication guide.
Prevention Checklist
Before you leave:
- Book an itinerary with acclimatization days built in
- See a travel medicine physician 4–6 weeks out
- Discuss acetazolamide if indicated
- Complete 8–12 weeks of cardio conditioning
- Pack electrolyte tablets and a reliable hydration system
On the trail:
- Max 300–500 m sleeping altitude gain per night above 3,000 m
- Never ascend with active AMS symptoms
- 3–4 litres of water daily, monitor urine colour
- No alcohol for 48–72 hours at each new elevation
- Maintain normal caffeine intake
- High-carb warm meals; avoid heavy meals before sleep
- Rest days should include a short uphill walk, not full inactivity
- Know the early symptoms: headache, nausea, fatigue, disturbed sleep
The Bottom Line for AMS Prevention
Altitude sickness is not a lottery. The AMS symptoms follow predictable patterns and respond to predictable interventions. The trekkers who reach Everest Base Camp, Annapurna Base Camp, or the top of Larkya La without incident are not usually tougher or fitter, but are better prepared and better paced. Plan your ascent. Protect your rest days. Trust the process.
Planning a high-altitude trek in Nepal? Our itineraries are designed with acclimatisation built into every elevation gain — not as an afterthought, but as the foundation of a safe and successful trek. → Browse our Nepal trekking trips
Why a Short Tour in Nepal Is the Smartest Way to See the Country
Introduction to Short Tours
A short tour (3-6 days) is one of the best travel experiences in Asia and is centered around Nepal’s Golden Triangle, comprising Kathmandu, Pokhara, and Chitwan. There’s a reason more first-time visitors and budget-conscious travelers are choosing it over the classic long trek.
This is also a version of Nepal that most people never see. Not because it is hard to reach, but because the conversation about Nepal almost always starts and ends with trekking. Everest Base Camp. Annapurna Circuit. Weeks of mountain passes, teahouses, and altitude medication.
That version of Nepal is extraordinary. It is also not the only one.
Nepal also has ancient cities that have been ringing temple bells for over 2,000 years. It has a lakeside town set against the sharpest mountain skyline on earth. It has a jungle that is home to one-horned rhinoceroses, Royal Bengal tigers, and crocodiles basking on riverbanks. And none of it requires a single day of serious hiking to reach.
1. You See Three Completely Different Nepals in One Trip
This variation surprises first-time visitors the most. Nepal is not one landscape, but several, stacked on top of each other.
Kathmandu is a medieval city that somehow survived into the 21st century with its temples, courtyards, and ritual life largely intact. Seven UNESCO World Heritage Sites sit within the valley, including
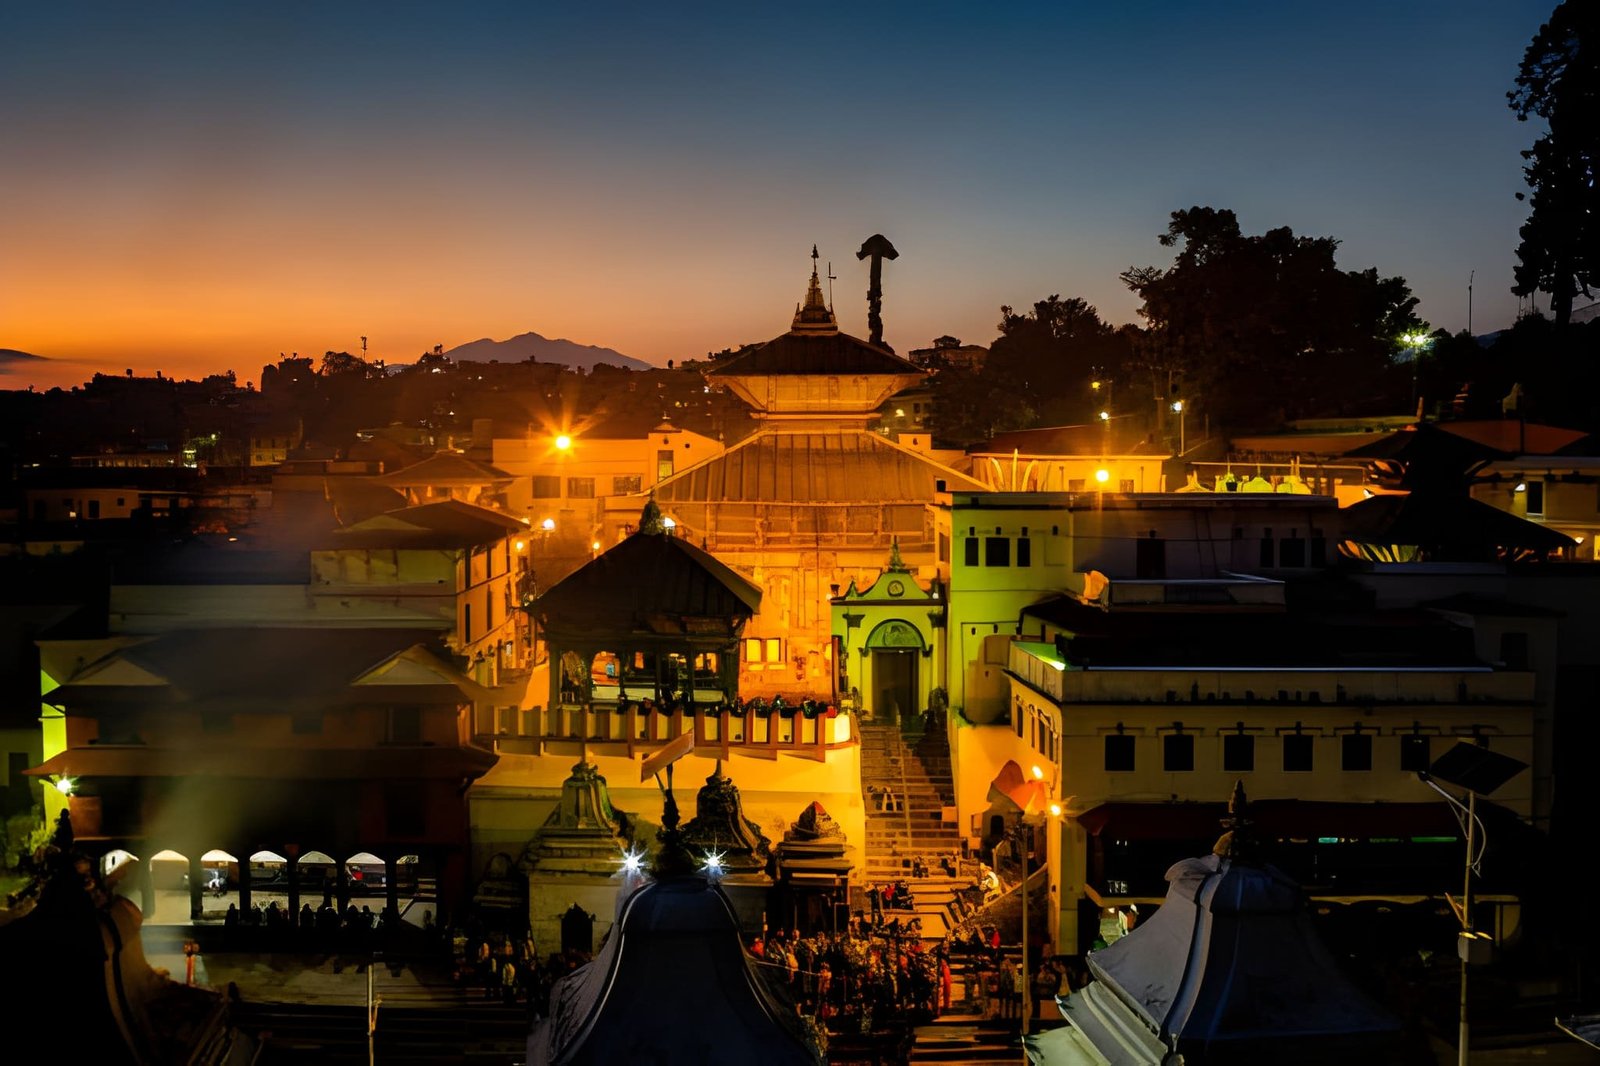
- Pashupatinath Temple, one of Hinduism’s most sacred sites
- Bouddhanath, one of the largest Buddhist stupas in the world.
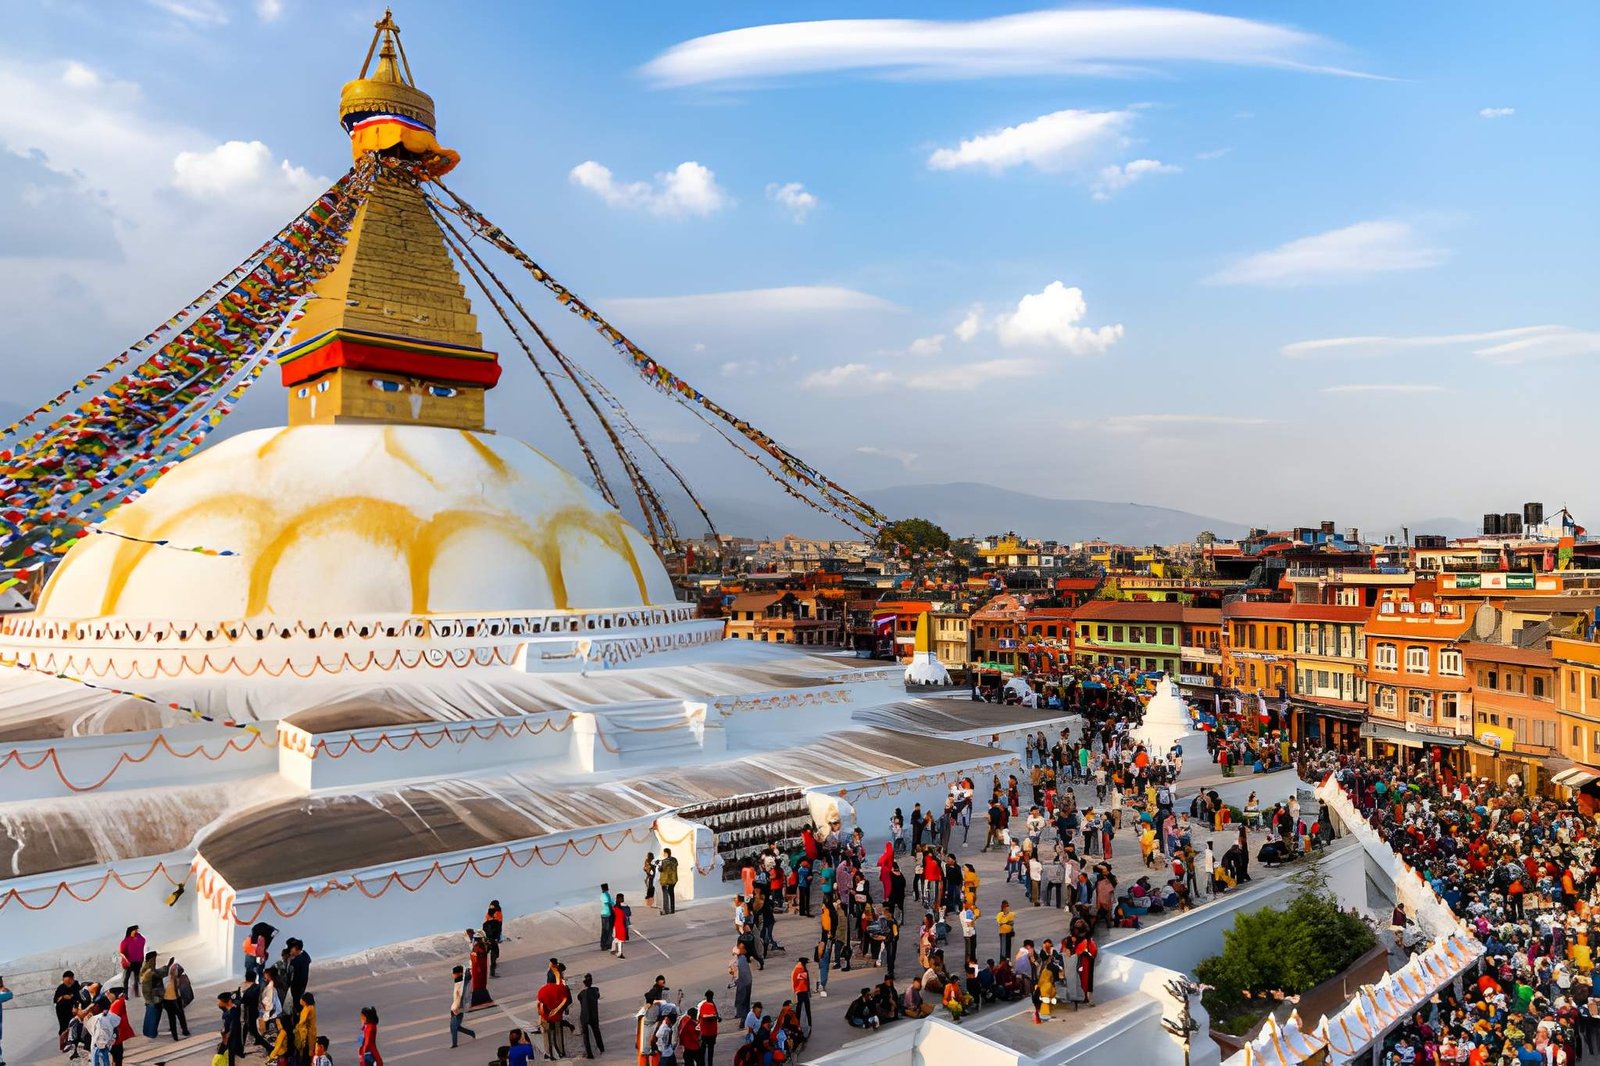
The streets around these monuments smell of incense and marigold garlands, and the devotional life happening in them is not performance. It is simply Tuesday in Kathmandu.
Drive west for six hours or fly for 25 minutes, and you are in Pokhara. This famous lakeside city, where the Annapurna range hangs so close, still stops travellers mid-sentence when they first see it. It is calm, beautiful, and built for lingering.
Drive south from Pokhara for five hours, and the entire geography changes. The Himalayas disappear behind you. The air gets warmer, the vegetation thicker. You have finally reached the Terai region, Nepal’s subtropical lowlands. You can pull up to the edge of Chitwan National Park, where one-horned rhinos graze in the early morning mist fifty meters from the road.
Three days, three worlds. No other country in Asia delivers that kind of variety in such a compact window.
2. No Trekking Experience Required Or Needed
The single biggest misconception about Nepal travel is that you need to be physically prepared for it. That assumption is built around trekking itineraries that involve weeks at altitude. This quietly discourages millions of travelers who would have a memorable time in the country without ever lacing up a hiking boot.
The Golden Triangle short tour is entirely vehicle and flight-based. The most demanding physical activity in Kathmandu is walking between heritage sites at 1,400 metres above sea level. In Pokhara, the optional sunrise hike up to Sarangkot viewpoint takes 45 minutes on a maintained path. In Chitwan, your naturalist guide leads you through the forest on a jungle walk at whatever pace suits the group.
Altitude sickness is simply not a factor anywhere. Kathmandu sits at 1,400 metres, Pokhara at 827 metres, and Chitwan at just 70 metres. No acclimatization days, no Diamox, no turning back at 4,500 metres because your head is splitting.
This matters particularly for families traveling with young children, for senior travelers, and for anyone who loves travel but does not identify as a hiker. Nepal, on a short tour, is as physically accessible as Paris or Kyoto, and more rewarding than either.
3. It Is One of the Best Value Trips in Asia
Nepal consistently ranks among the most affordable travel destinations in the world, and the short tour format amplifies that value considerably. You are getting UNESCO World Heritage Sites, genuine wildlife safaris, Himalayan mountain views, and guided cultural immersion within a week.
At the mid-range level, a well-organized 5–6 day Nepal short tour, including 3-star accommodation, private transport, domestic flights, and guided sightseeing ($500–$650 per person). Budget travelers who opt for tourist buses and guesthouses instead can do the same circuit for $300–$400.
To put that in context: a 3-night safari in Kenya’s Maasai Mara starts at $1,500 per person. A 4-day cultural tour of Kyoto with a licensed guide runs $800–$1,200. Nepal’s short tour delivers comparable quality of experience, and in some ways, considerably more variety, at a third of the price.
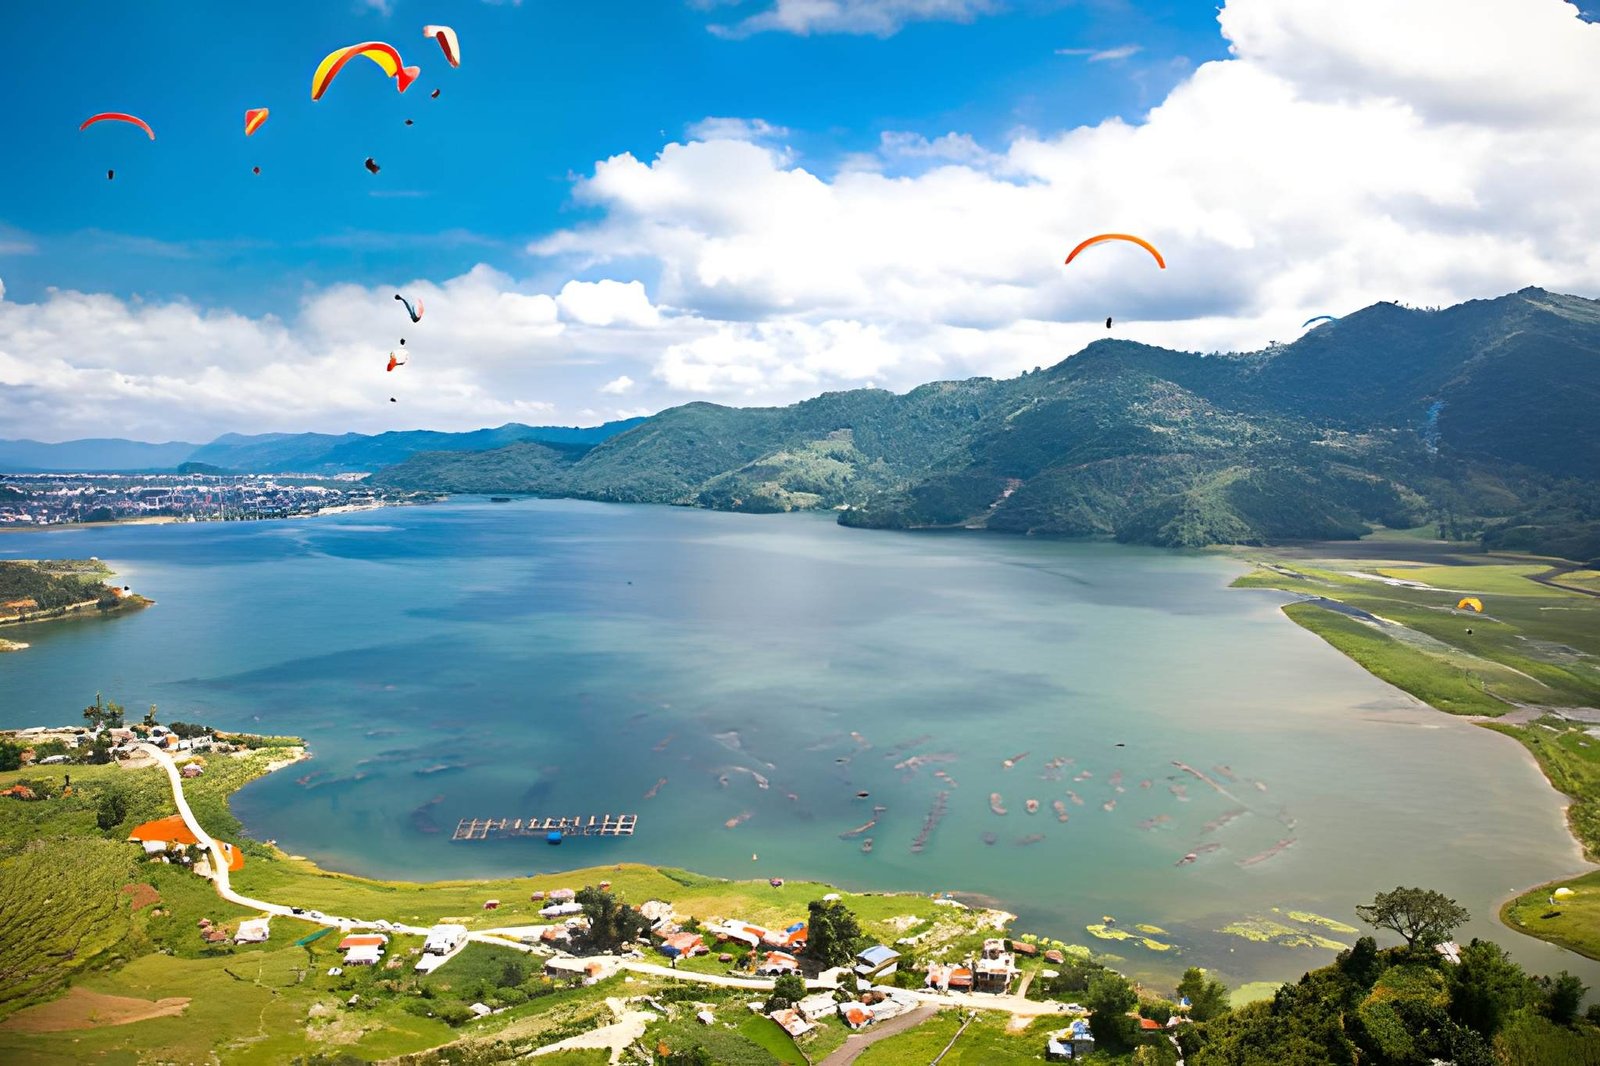
The daily on-the-ground costs are equally generous. A full meal at a good local restaurant in Kathmandu or Pokhara costs $5–$10. A rooftop dinner with mountain views runs $15–$20. Entry fees to all of Kathmandu’s major heritage sites combined come to under $40. A tandem paragliding flight over Pokhara, also one of the best paragliding sites in Asia, costs around $80–$100.
For budget travelers specifically, Nepal is the rare destination where stretching your money does not mean compromising the experience. The temples do not charge more for being beautiful.
4. You Get the Sunrise Moments Without Earning Them
There is a particular category of travel experience that most people associate exclusively with long, difficult journeys. These are also the kind of views that feel like they must be earned through days of physical effort. Nepal’s short tours deliver several of these without the week-long approach march.
You can experience the Sarangkot sunrise above Pokhara. The Annapurna range (Machhapuchhre, Annapurna South, Hiunchuli, & Dhaulagiri) catches the first light of morning while Phewa Lake reflects the sky below. You get there by jeep at 5 am, stepping out into the cold dark alongside a few dozen other travelers, and then the mountains appear. It costs nothing except an early alarm.
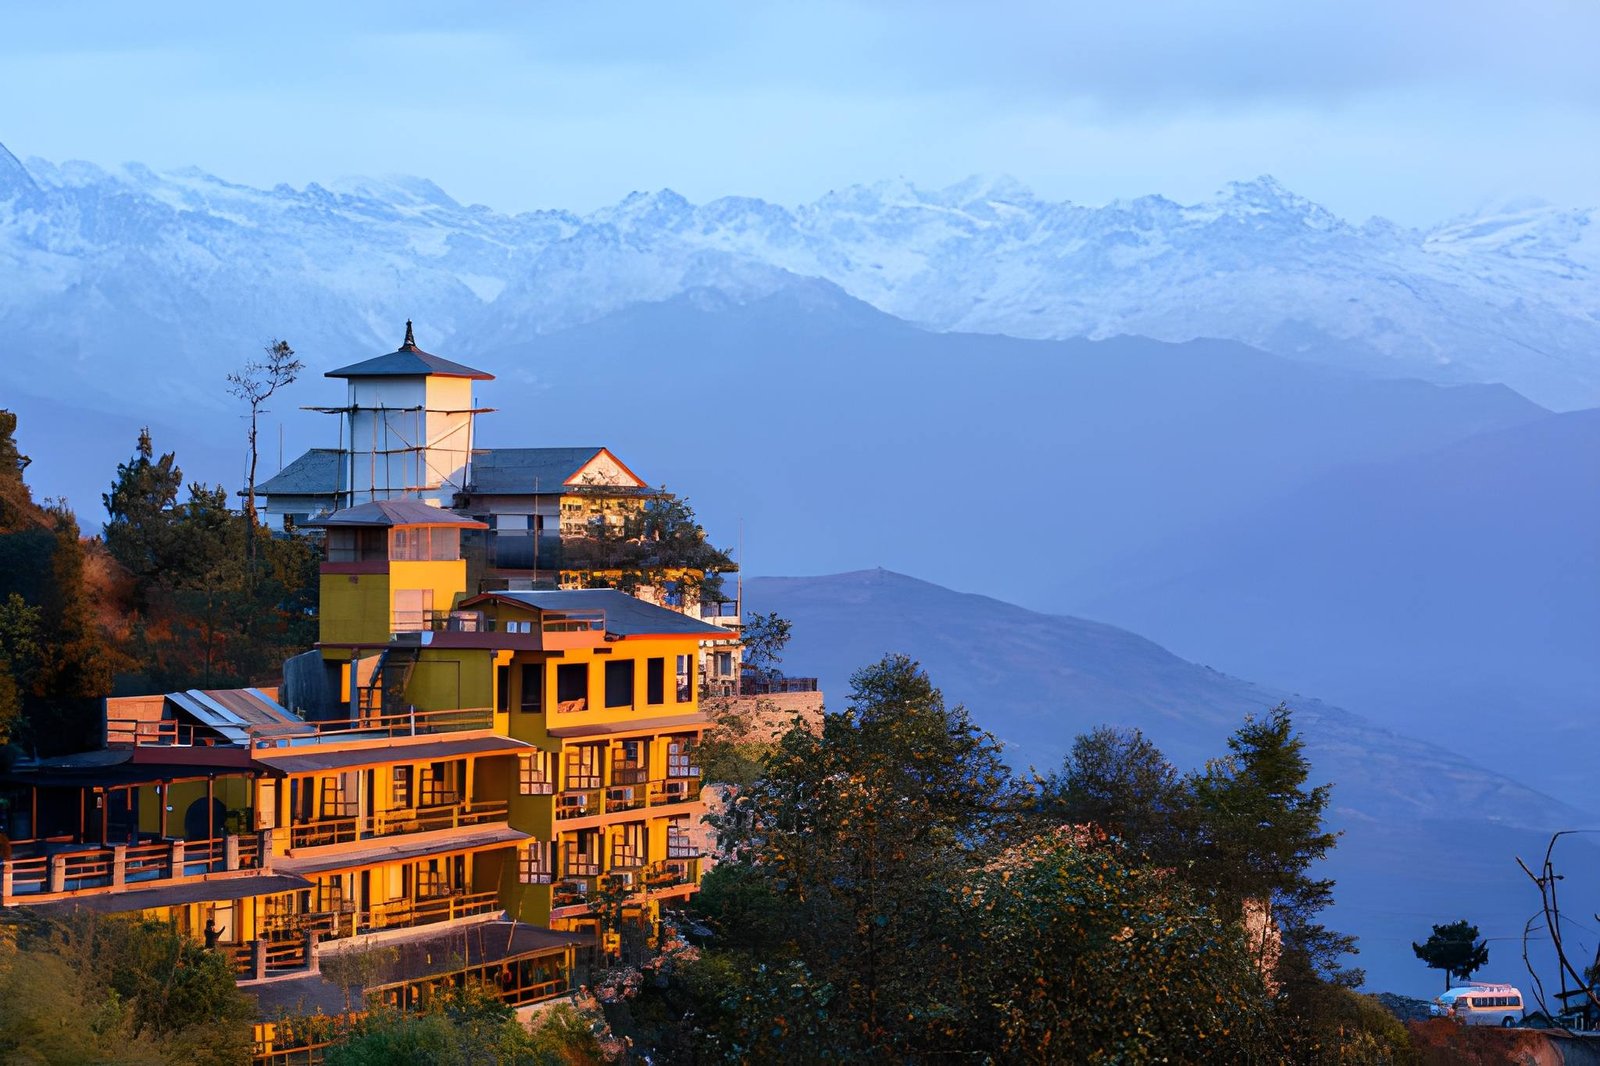
But you should not doubt Kathmandu as well. You can catch the Nagarkot sunrise above the Kathmandu Valley. At 2,100 metres on the valley rim, you can see a 180-degree arc of Himalayan peaks during October and November mornings. From Dhaulagiri in the west to Kanchenjunga in the east, you can even see Everest as a dark triangle of mighty summits. A 3-day Kathmandu itinerary with a Nagarkot overnight delivers this view to any traveler regardless of fitness level.
Meanwhile, Chitwan has its own dawn speciality with the early morning jeep safari. Not a sunrise moment in the same visual sense, but you can consider it more visceral. You’ll be moving through tall grass corridors in the pre-dawn half-light while your Guide Dai reads the forest in silence, and then suddenly a one-horned rhino appears from the mist twenty meters from the jeep. These are the moments that people recount for years, and they happen on 2-night Chitwan stays.
5. Long Treks Demand Time That Most Travelers Simply Do Not Have
The Everest Base Camp trek takes 12–14 days. The Annapurna Circuit takes 15–20 days. Even the Poon Hill circuit, arguably the shortest trek in Nepal, requires 4–5 days of actual hiking plus travel time from Kathmandu on either side.
For the majority of international travelers, this is simply not compatible with the reality of annual leave. Most people working in the US, Europe, or the Gulf have 10–15 days of holiday per year. Factor in travel time to Kathmandu (8 to 14 hours from most major airports), and a 12-day trek, and it consumes the entire time before you have bought a single souvenir.
A 6-day short tour fits inside a normal 10-day holiday with two days of international travel padding on either end. It can be completed over a long weekend, extended with a few days of annual leave for travelers based in South or Southeast Asia. It is realistic in a way that the classic Nepal trekking holidays simply are not for most working travelers.
This is not a compromise. The short tour delivers a genuinely complete Nepal experience. It is a different experience from trekking, but definitely not a lesser one.
6. Nepal Rewards You For Slowing Down in Its Cities
One of the underrated arguments for the short tour format is what it allows you to actually do in Kathmandu and Pokhara. These are the cities that most trekking itineraries treat as mere gateways. Trekkers typically spend one night in Kathmandu before flying to Lukla or Pokhara, acclimatizing briefly, and disappearing into the mountains.
They see the tourist district of Thamel, maybe one stupa, and board their morning flight. They miss Bhaktapur entirely. They miss Patan’s museum, the finest repository of Newari Buddhist art in existence.
They miss the morning ritual at Pashupatinath, which is one of the most quietly affecting things you can experience anywhere in Asia. You witness cremations on the riverbank, sadhus sitting in firelight, priests performing aarti as the Bagmati flows past.
Kathmandu is a city with 2,000 years of active religious and artistic life compressed into a valley ringed by mountains. Bhaktapur is a medieval city that survived largely intact and still functions as a living community rather than a museum. Pokhara is one of the most naturally beautiful cities in the world. A short tour gives these places two to three days each, which is enough time to move from tourist to traveler in them.
The short tour, in this sense, is not a lesser version of the Nepal experience. It is a unique version of a part of Nepal that most trekkers never really see.
7. It Is the Perfect First Chapter of a Longer Nepal Story
Perhaps the most persuasive argument for the short tour is what it does to you afterward.
Nepal is one of those rare destinations that creates repeat visitors almost automatically. Travelers who do a short tour come back for Poon Hill. Poon Hill trekkers come back for Annapurna Base Camp. Annapurna trekkers come back for Everest Base Camp, Upper Mustang, or Langtang. The country operates like a series of doors, each one opening onto something more extraordinary than the last.
The short tour is the first door, with low commitment, but higher reward. It’s structured in a way that answers the question “what is Nepal actually like” before you have invested two weeks and serious physical preparation in the answer. For first-time visitors, that is exactly the right starting point. You come away understanding the country. You experience its culture, its scale, its warmth. In a way, deciding to return feels less like a luxury and more like an inevitability.
Many of the most committed Nepal travelers, i.e., those who come back year after year and those who speak of it the way others speak of home, started with three days in Kathmandu and a Nagarkot sunrise. The short tour is not the whole story. It is just the best place to begin.
Thinking about your first Nepal short tour? Far Out’s Glimpse of Nepal package covers the full Golden Triangle in 6 days, with day-by-day itineraries, cost breakdowns, and everything you need to plan your trip.
A Realistic Guide For Beginners to Climb the Lobuje East Peak
Can Beginners Climb Lobuche East Peak?
Well, the simple answer is yes. But it’s not for the beginners you might be thinking of.
Lobuche East Peak (6,119m), or commonly referred to as Lobuje East Peak, is scalable for beginners who have solid physical fitness with some prior high-altitude trekking experience, or those who climb with a certified guide. It is not suitable for complete beginners with zero trekking experience, regardless of fitness level.
That distinction matters. While its labeled as “Easy to manage with few preparations,” there are also 45–50° ice slopes and mandatory fixed ropes en route. That contradiction is exactly why you might be confused about the difficulty level.
You can check out our main page on the Lobuje East Peak Climb after finishing this blog to learn about the itinerary and bookings.
What Kind of Beginner Can Actually Climb Lobuche East?
“Beginner” covers a wide range. Here’s how to honestly place yourself.
Not recommended: Complete beginners with no trekking experience
If your longest hike has been a day trail and you’ve never spent consecutive days walking at elevation, Lobuche East is too large a jump. The issue isn’t even technical climbing. It’s the cumulative physical and altitude stress across 18–19 days. Your body simply won’t have the reference points to recognise early warning signs of altitude sickness, exhaustion, or overexertion.
Possible with preparation: Fit people with no altitude experience
If you’re physically strong (regular runner, hiker, or gym-goer) but have never trekked above 3,500m, this is doable. You should have the right preparation and genuine commitment to acclimatization though. You’ll also need to treat the trek-in seriously, not as a warm-up. Your biggest risk isn’t the summit day; it’s underestimating how altitude compounds fatigue over two weeks.
Ideal candidate: Trekkers with EBC or comparable experience
If you’ve completed the Everest Base Camp trek, the Annapurna Circuit, or any multi-week trek above 4,000m, you already have the most important foundation. You know what your body does at altitude, you understand long trekking days, and the technical elements of Lobuche East, like crampons, fixed ropes, and harness, are learnable skills that guides teach on-route.
This is the beginner profile Lobuche East is genuinely built for.
Are You Ready for Lobuje? A Quick Self-Check
Before going further, run through this honestly:
- Have you completed a multi-day trek of 10+ days?
- Have you trekked above 4,000m before?
- Can you hike 6–8 hours consecutively with a daypack?
- Are you comfortable in cold, exposed conditions?
- Are you free of significant cardiovascular or respiratory issues?
If you answered yes to four or five, you’re a strong candidate. If you answered yes to two or three: possible, but you need structured preparation first. If you answered yes to one or fewer: Lobuche East is not your next step.
How Hard Is Lobuche East Peak for Beginners?
There are three distinct difficulty layers, and they’re definitely not the same.
Physical difficulty
The summit push is 8–10 hours round-trip from high camp. But the real physical challenge is the 12 days of trekking before you even reach base camp. By the time you begin the climb, your body is already running on accumulated fatigue. Strong cardiovascular endurance is what carries you through, not gym fitness.
Altitude (the real challenge)
At 6,119m, altitude is the primary objective hazard, not the ice slope. Acute Mountain Sickness (AMS), High Altitude Pulmonary Oedema (HAPE), and High Altitude Cerebral Oedema (HACE) are real risks above 5,000m. The itinerary should build in acclimatization days at Namche Bazaar and Dingboche, specifically to manage this. Skipping or rushing acclimatization days is the single most common reason climbers turn back.
Technical difficulty
The Nepal Mountaineering Association grades Lobuche East as PD — Peu Difficile, or moderately difficult in alpine grading. The summit route involves a steep snow and ice slope of approximately 45–50°, fixed rope sections, crampon use, and rappelling on descent. These are real mountaineering techniques, but they are teachable.
Guides conduct practical training at base camp before the summit push. Most first-timers find the technical elements manageable. It’s actually the altitude and endurance that test them.
“In my experience guiding this route, the section between high camp and the summit ridge is where climbers feel it most. It’s not because it’s technically extreme, but because altitude is making the climb difficult at that point. Our itinerary is designed to trek to EBC first, so that trekkers can adjust to the altitude. That design makes a measurable difference.” – Mr Sunir Gurung, Owner of FarOutNepal.
When Lobuche East Is Not the Right Choice
This matters more than any encouragement section. Do not attempt Lobuche East if:
- You have no multi-day trekking experience whatsoever
- You’ve shown strong sensitivity to altitude on previous treks (severe headaches, vomiting above 3,500m)
- Your aerobic fitness is poor, i.e., you can’t sustain 5–6 hours of uphill walking
- You’re expecting a trekking-only experience with a short summit scramble at the end
- You cannot commit to the full acclimatization schedule
If one or more of these apply, the honest recommendation is to do the Everest Base Camp trek first. It covers much of the same route, takes you to Kala Patthar, and gives you the single most useful data point for Lobuche East: how your body handles the Khumbu at altitude.
What Skills Do Beginners Need?
Less than you might think, but they do need to be learned, not improvised on summit day.
- Walking with crampons on snow and ice
- Using a climbing harness and attaching to a fixed rope with an ascender (jumar)
- Basic ice axe use for self-arrest
- Rope etiquette, like how to move efficiently on a fixed line with other climbers
The good news: All of these are taught during the pre-climb training session at Lobuche East Base Camp, near the summit day. You do not need to arrive with mountaineering experience. You need to arrive physically prepared enough to absorb and apply these skills under fatigue.
How Beginners Should Prepare for Lobuche East
Fitness preparation (start 3–4 months out)
Focus on cardiovascular endurance over strength. Long uphill hikes with a weighted pack (10–12kg), stair climbing, and sustained cardio sessions of 60–90 minutes simulate the demand better than gym workouts. The goal is the ability to move steadily uphill for 6+ hours, not peak athletic performance.
Mental preparation
Cold, disrupted sleep, sustained discomfort, and days where progress feels imperceptible, but these are normal parts of a high-altitude expedition. Trekkers who struggle most are often fit but mentally unprepared for how unglamorous the middle days of a Himalayan climb feel. Read accounts from people who’ve done it or enquire from our experienced guides, not just the summit photos.
A practice trek (strongly recommended)
If time allows, do a significant trek, like EBC, Annapurna Base Camp, or Manaslu Circuit, in the 12 months before your Lobuche East attempt. Nothing replaces actual days at altitude for calibrating your preparation.
Why Beginners Who Prepare Correctly Do Succeed
Lobuche East has a strong success rate among guided climbers precisely because the expedition structure is designed around beginner limitations. Our itinerary builds in multiple acclimatization days. Groups are kept small (typically 2–10 people). Sherpa support means load management is handled. The route uses fixed ropes throughout the technical section.
You are not being dropped on a mountain and asked to figure it out. You are joining a system that has been refined across hundreds of guided ascents.
The climbers who don’t summit are almost always those who arrived underprepared, whether physically or in their understanding of what altitude actually does to a body. That’s entirely within your control before you board the flight.
Is Lobuche East a Good First Mountain Compared to Others?
| Peak | Height | Technical Grade | Best For |
| Lobuche East | 6,119m | PD (moderate) | Trekkers with altitude experience. |
| Island Peak | 6,189m | PD | Similar profile, more crowded |
| Mera Peak | 6,476m | F (easy) | True beginners, less technical |
- If you want the least technical entry point, Mera Peak is the gentler option.
- If you want a genuine mountaineering experience that still sits within reach of a prepared beginner, Lobuche East is the stronger choice.
- Island Peak is comparable to Lobuche. The two are often discussed interchangeably, and the choice usually comes down to route preference and group availability.
Is Lobuche East Right for You?
Lobuche East Peak, also frequently searched as Lobuje East Peak, is one of the most accessible genuine mountaineering experiences in the Himalayas. It sits in a specific sweet spot: technical enough to be a real summit, structured enough to be achievable for a prepared beginner.
If you’ve done EBC or a comparable multi-week trek, you’re physically active, and you’re willing to prepare seriously over 3–4 months, this is likely within your reach.
If you’re starting from zero trekking experience, the honest path is: do EBC first, then come back to Lobuche East. That’s not a discouragement; it’s the route that actually gets you to the summit.
Ready to find out if you qualify? Explore our 21-day Lobuje East Peak expedition →
Altitude Sickness Medication: Diamox, Dosage & What Actually Works

Introduction: Diamox or Acetazolamide
Picture this: You have booked your first EBC trek. You are ready to fly to Kathmandu, take a flight to Lukla, and spend sixteen days in the mountains. As you do some research, someone in a forum mentions Diamox, and suddenly, you are digging medical PDFs, wondering whether you actually need it.
Here is the short answer: Acetazolamide ( or Diamox) is the most commonly prescribed medication for altitude sickness. It is not a magic pill, though. Whether you need it depends almost entirely on your trek profile, your personal history, and the itinerary you are following.
Medical Disclaimer: This guide is for general educational purposes only and is not a substitute for professional medical advice. Always consult a qualified physician before taking any medication for altitude sickness.
What Is the Best Medication for Altitude Sickness?
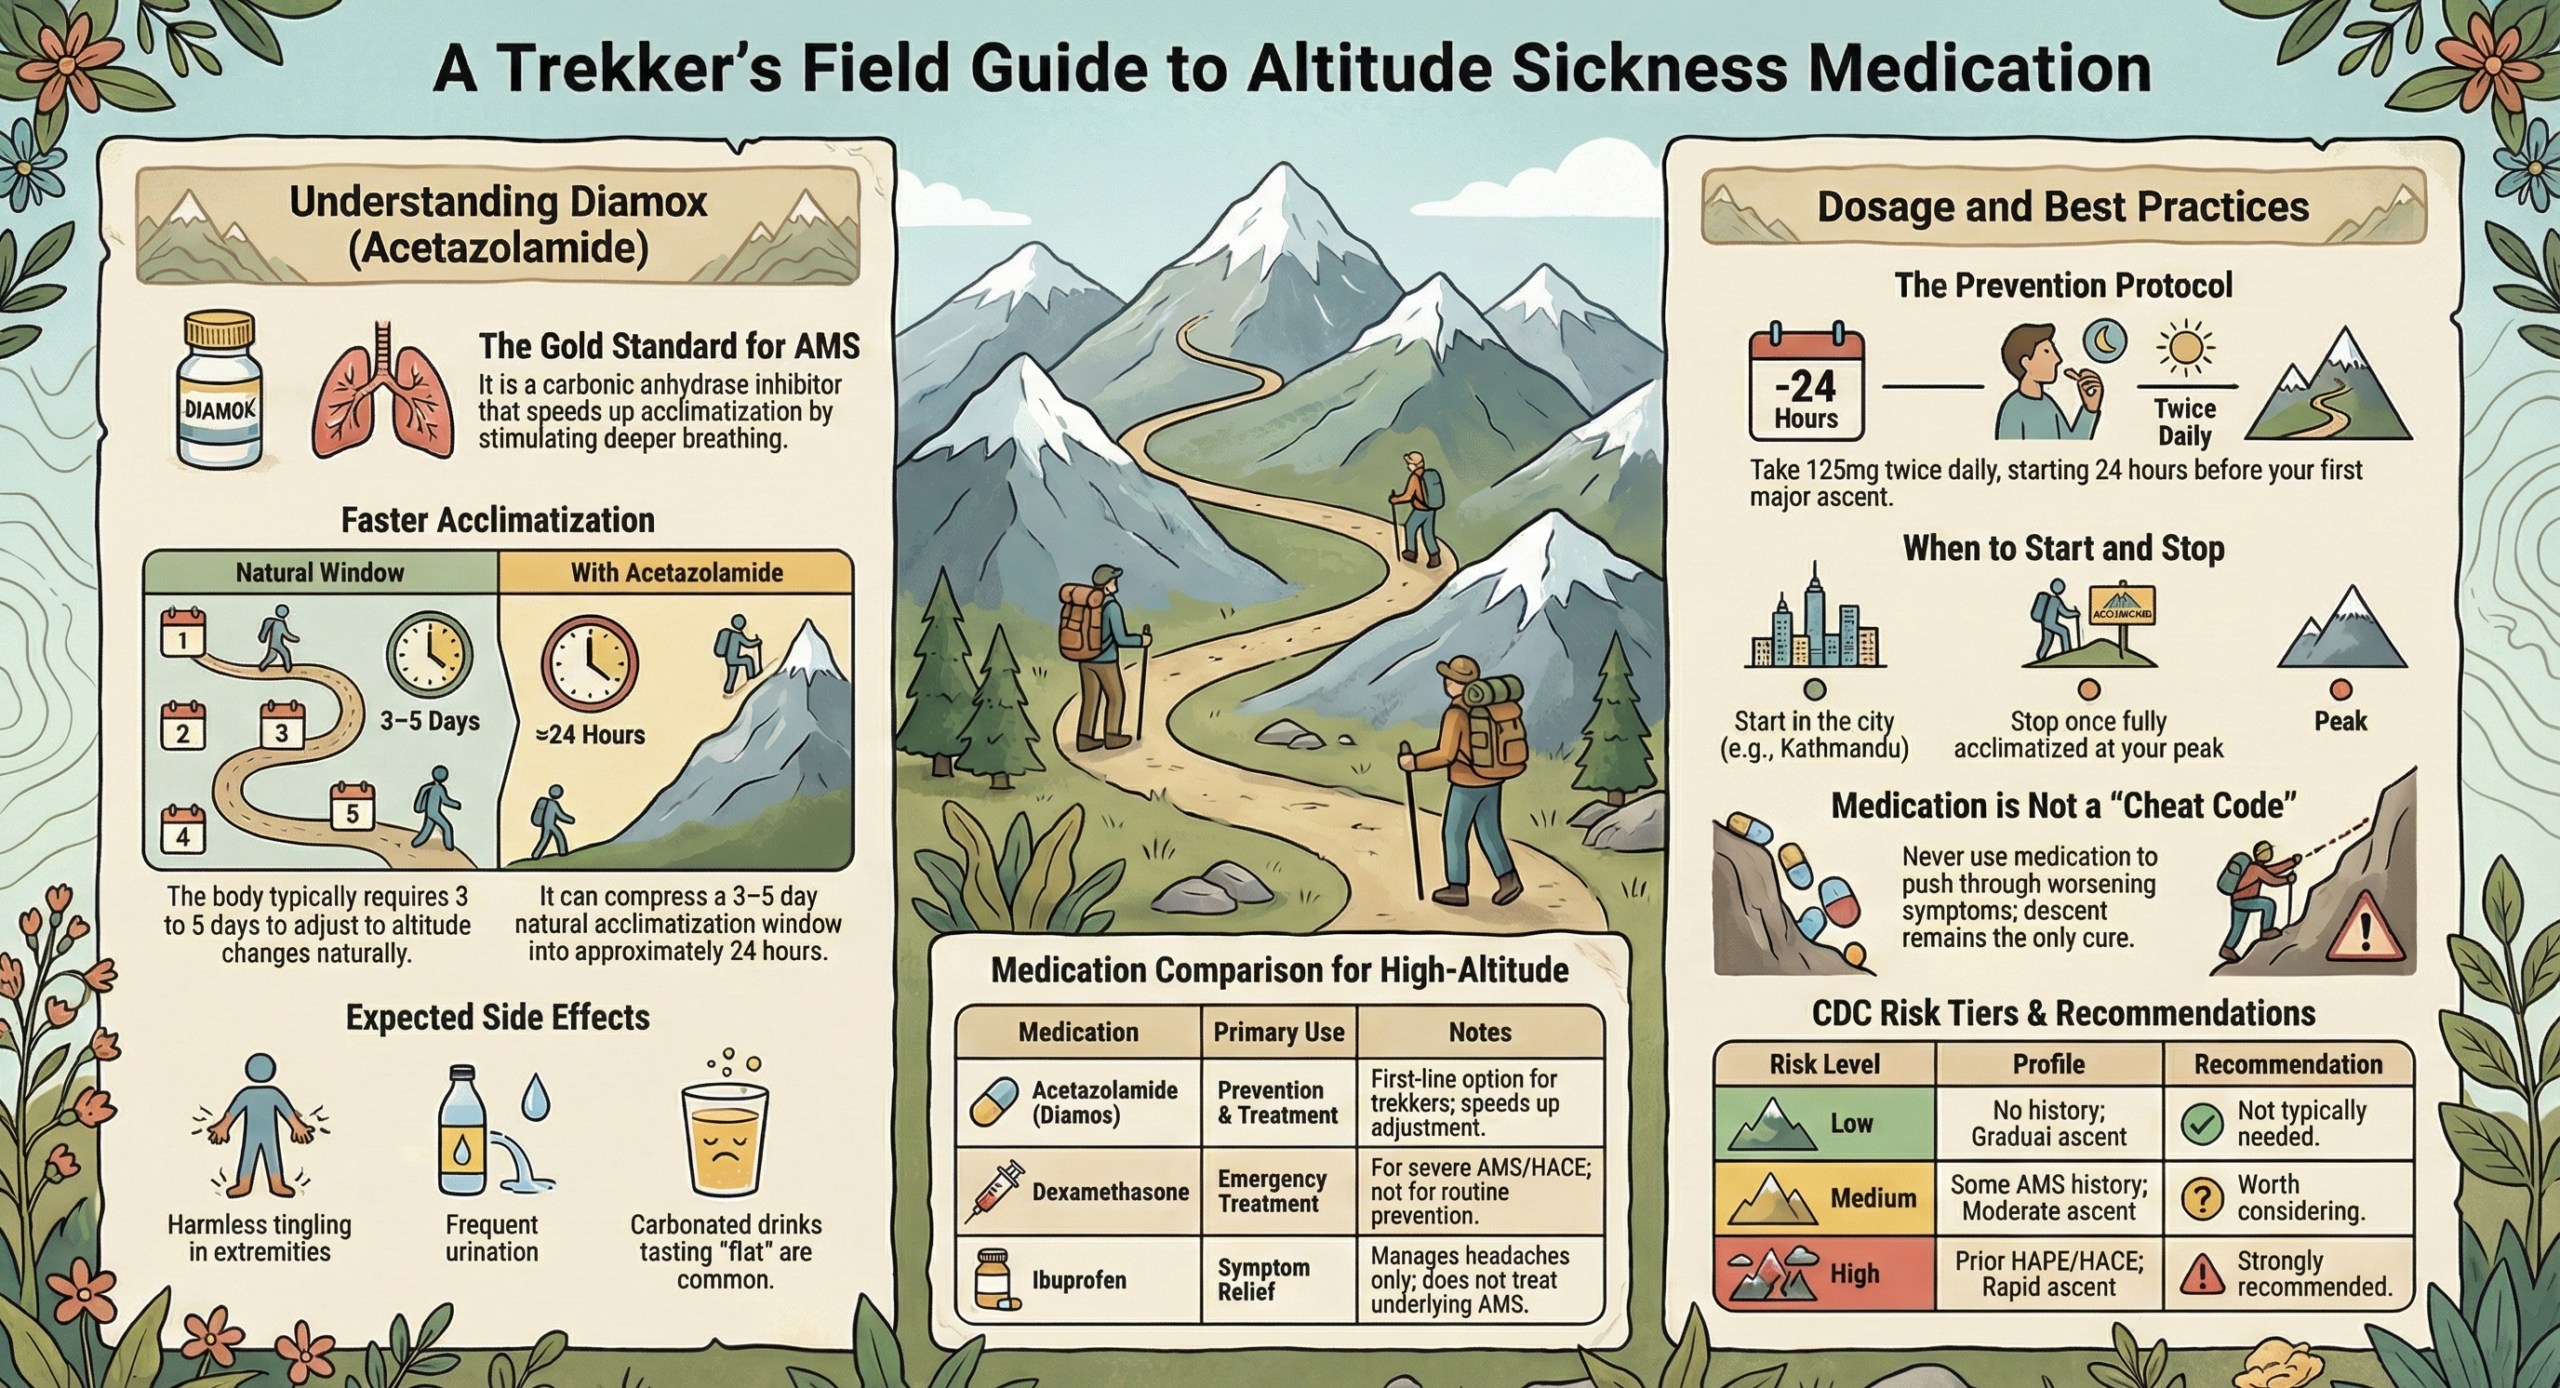
The drug of choice is always acetazolamide, sold under the brand name Diamox. It stimulates faster, deeper breathing, which accelerates the body’s acclimatization process rather than just masking symptoms like headache.
Acetazolamide may be the most prescribed, but it is not the only drug used in altitude illness management.
| Medication | Primary Use | When It’s Used | Notes |
| Acetazolamide (Diamox) | Prevention + treatment of AMS | Before and during ascent | First-line option; commonly prescribed |
| Dexamethasone | Emergency treatment of severe AMS, HACE | Serious symptoms; evacuation situations | A corticosteroid — not for routine prevention; carried by guides and rescue teams |
| Ibuprofen | Headache relief in mild AMS | Symptom management | Treats headache only; does not address underlying AMS |
| Nifedipine | Emergency treatment of HAPE | Life-threatening lung fluid accumulation | Specialist use; not a trekker’s self-medication option |
The important distinction: Dexamethasone and Nifedipine are emergency medications. They are carried by experienced guides and rescue teams on routes like EBC and Manaslu for life-threatening situations. They’re not alternatives to acetazolamide for everyday prevention.
Ibuprofen (typically 400 mg) is useful for managing headache in mild AMS and is worth carrying regardless. It does not treat the cause, but it can make the acclimatization window more bearable.
How Diamox Actually Works
Your body’s adjustment to altitude is essentially a breathing problem. At 5,000 m, every breath delivers roughly half the oxygen it would at sea level. To compensate, your body needs to breathe more, but the signal chain that triggers this response takes days to calibrate.
Acetazolamide is a carbonic anhydrase inhibitor. In plain terms, it nudges your kidneys to release bicarbonate, which slightly acidifies your blood. That acidification tells your brain to breathe harder. More oxygen in, faster acclimatization.
According to the CDC Yellow Book (2026 edition), the ventilatory acclimatization that normally takes 3–5 days is compressed to approximately one day with acetazolamide. That is a meaningful difference on a trek where every acclimatization day counts.
It also helps with something most trekkers do not expect: sleep. Above around 2,700 m, periodic irregular breathing becomes nearly universal and wrecks your rest at altitude. Acetazolamide improves nocturnal oxygen saturation and reduces it significantly, which means you wake up feeling less wrecked the morning before a big climb.
What it does not do is allow you to cheat the mountain. It cannot prevent HAPE or HACE if you are ascending recklessly. It does not eliminate AMS risk, but reduces it. And it will not save you from a bad itinerary.
Diamox Dosage for Altitude Sickness
Based on current wilderness medicine guidelines and the CDC Yellow Book (2026):
Important: These are standard reference dosages. Your physician may adjust based on your weight, health history, and risk profile. Always follow your prescribing doctor’s specific guidance.
For Prevention
The standard prevention dose is 125 mg twice daily, starting the day before you ascend above 3,000 m and continuing for the first two days at altitude, longer if you keep ascending.
| Use | Dose | Frequency |
| Standard | 125 mg | Twice daily |
| Body weight >100 kg | 250 mg | Twice daily |
The 125 mg dose is increasingly preferred over the older 250 mg standard because it produces far fewer side effects while maintaining effectiveness. The CDC specifically flags 250 mg for trekkers over 100 kg.
For Treatment
If AMS symptoms appear, the commonly used treatment dose is 250 mg twice daily. This is taken alongside rest at the same altitude, not as an enhancement to push higher.
| Use | Dose | Frequency |
| Treatment of AMS | 250 mg | Twice daily |
One important note: If symptoms are worsening despite medication, descent is the only answer. Diamox is not a substitute for going down.
How to Take Diamox on a Nepal Trek
Timing is everything here, and most first-time trekkers get it slightly wrong.
Start the day before ascent. Not the morning you fly to Lukla or drive to the trailhead. For an EBC trek, that means taking acetazolamide the day before your Lukla flight, when you are still in Kathmandu. By the time you land at 2,860 m, the medication is already active.
Continue for the first 2–3 days at each new altitude band. On the EBC route, this aligns with your rest days at Namche Bazaar (3,440 m) and Dingboche (4,360 m). On the Manaslu Circuit, it applies from Samagaun onwards. On Annapurna Base Camp, the compressed profile makes the early days particularly important.
Stop once you are fully acclimatized at your highest point. No need to continue during descent as the work is done.
A few practical things that matter on the trail:
- Take it with food. An empty stomach makes nausea more likely.
- Drink more water than you think you need. Acetazolamide is a mild diuretic, and dehydration is already a risk at altitude.
- Avoid alcohol for the first 48–72 hours at any new elevation. It suppresses the respiratory drive that the medication is trying to stimulate and independently increases AMS risk.
Do You Actually Need Diamox?
The CDC Yellow Book (2026) categorizes AMS risk into three tiers based on your altitude illness history, your sleeping altitude on day one, and your rate of ascent:
| Risk Level | Your Profile | Recommendation |
| Low | No AMS history · sleeping altitude <2,750 m on day 1 · ascent ≤500 m/night | Not typically needed |
| Medium | Some AMS history · sleeping 2,750–3,400 m on day 1 · faster ascent with rest days | Worth considering |
| High | HAPE/HACE history · sleeping >3,400 m on day 1 · rapid ascent without rest days | Strongly recommended |
The reality on most Himalayan treks: you land at Lukla (2,860 m) and reach Namche (3,440 m) within two days. That puts most trekkers squarely in the “Medium” category from day one, regardless of fitness level.
You should seriously consider acetazolamide if:
- You have had AMS before on any previous trek. Prior history is the strongest predictor of future AMS
- Your itinerary is compressed with fewer rest days than standard
- You are heading above 4,000 m with limited experience at altitude
- You are flying directly into high altitude (common on Tibet itineraries as Lhasa sits at 3,656 m)
You may not need it if:
- You are on a well-paced itinerary with proper acclimatization days built in
- You have completed similar-altitude treks before without symptoms
- Your travel medicine physician has assessed your risk as low based on your profile
The honest answer for most people planning Everest Base Camp is that it is worth the conversation with your doctor. Acetazolamide is inexpensive, widely available on prescription, and the cost of the conversation is zero.
Side Effects of Diamox: What to Actually Expect

Diamox has a reputation that puts people off. Here is what is actually going on.
Tingling in your hands, feet, and face: This is the most common side effect and the one that surprises people most. It starts a few hours after your first dose and continues throughout the course. It is harmless. If you are not experiencing it at all, it may be a sign that the medication is not at a full therapeutic level.
More bathroom trips: Acetazolamide is mildly diuretic. You will urinate more, especially in the first day or two. On a trek, this mostly means planning on long days between lodges.
Your beer tastes weird: Specifically, carbonated drinks taste flat or metallic. The enzyme that normally helps you taste carbonation is the same one that acetazolamide inhibits. Your Everest brew at Namche will taste off. This is a good sign that the medication is working.
Mild nausea: Some people experience this, almost always on an empty stomach. Food fixes it.
If you develop a skin rash, hives, or any sign of an allergic reaction, stop immediately and seek medical attention.
Who Should Avoid Diamox?
Acetazolamide is not appropriate for everyone. Your physician will screen for these, but you should know them before your consultation.
Sulfonamide (sulfa) allergy: Acetazolamide is chemically related to sulfonamide antibiotics. People with a documented sulfa allergy may react to it. This is the most significant contraindication. If you have had a reaction to sulfa drugs, flag it to your doctor before they prescribe acetazolamide.
Kidney disease or kidney stones: Acetazolamide affects how the kidneys handle bicarbonate and may increase the risk of stone formation. Anyone with a history of kidney issues should discuss this carefully with their physician.
Pregnancy: Acetazolamide is generally not recommended during pregnancy. The risk-benefit calculation at altitude is a conversation for your obstetrician.
Certain medications: It can interact with some diuretics, lithium, and other drugs. Disclose your complete medication list to your prescribing doctor.
This is precisely why the pre-trek physician consultation is not optional if you are considering medication. It takes fifteen minutes and eliminates guesswork.
Medication vs. Acclimatization: The Most Important Thing
Medication supports acclimatization. It does not replace it.
The trekkers who get into serious trouble at altitude are not usually the ones who forgot their Diamox. They are the ones who skipped the Namche rest day because they felt fine, pushed through a mild headache at Dingboche, and treated medication as a green light to move faster.
No dose of acetazolamide makes a compressed itinerary safe. The rules still apply:
- No more than 300–500 m of sleeping altitude gain per night above 3,000 m.
- Rest days at Namche Bazaar and Dingboche on the EBC routes. These are not optional extras.
- Never ascend with active AMS symptoms, regardless of what is in your pack.
Acetazolamide gives your body a better chance. The itinerary gives it the time. You need both.
For acclimatization schedules, route-specific risk profiles, and how to read early symptoms on the trail, see our complete altitude sickness guide.
Quick Reference
| Question | Answer |
| Best medication for altitude sickness | Acetazolamide (Diamox) |
| Standard prevention dose | 125 mg twice daily (250 mg if >100 kg) |
| When to start | The day before ascending above 3,000 m |
| Treatment dose | 250 mg twice daily |
| Main side effects | Tingling, frequent urination, flat taste in carbonated drinks |
| Sulfa allergy + Diamox | Not an automatic contraindication — discuss with your doctor |
| Does it replace acclimatization? | No. Never. |
So, Should You Take Diamox?
Acetazolamide is a well-studied, commonly prescribed, and genuinely useful tool for trekkers heading into high altitudes. If taken at the right dose & started at the right time, alongside a sensible ascent profile, it meaningfully reduces AMS risk and makes the acclimatization window more manageable.
But it is exactly that: a tool. The mountains do not care what is in your pack. They respond to patience, preparation, and the willingness to turn around when the situation calls for it. Medication just helps your body keep up.
If you are planning a high-altitude route, always see a travel medicine physician at least four to six weeks before departure. If you’re wondering how to detect signs and symptoms of AMS, check out our guide on AMS signs and symptoms.
Planning a high-altitude trek in Nepal? Explore our itineraries: built with acclimatisation days, experienced guides, and safety protocols designed for high-altitude terrain. 👉 Browse our Nepal trekking trips
Altitude Sickness (AMS) Symptoms: Early Signs, Severity Levels & When to Worry
Introduction
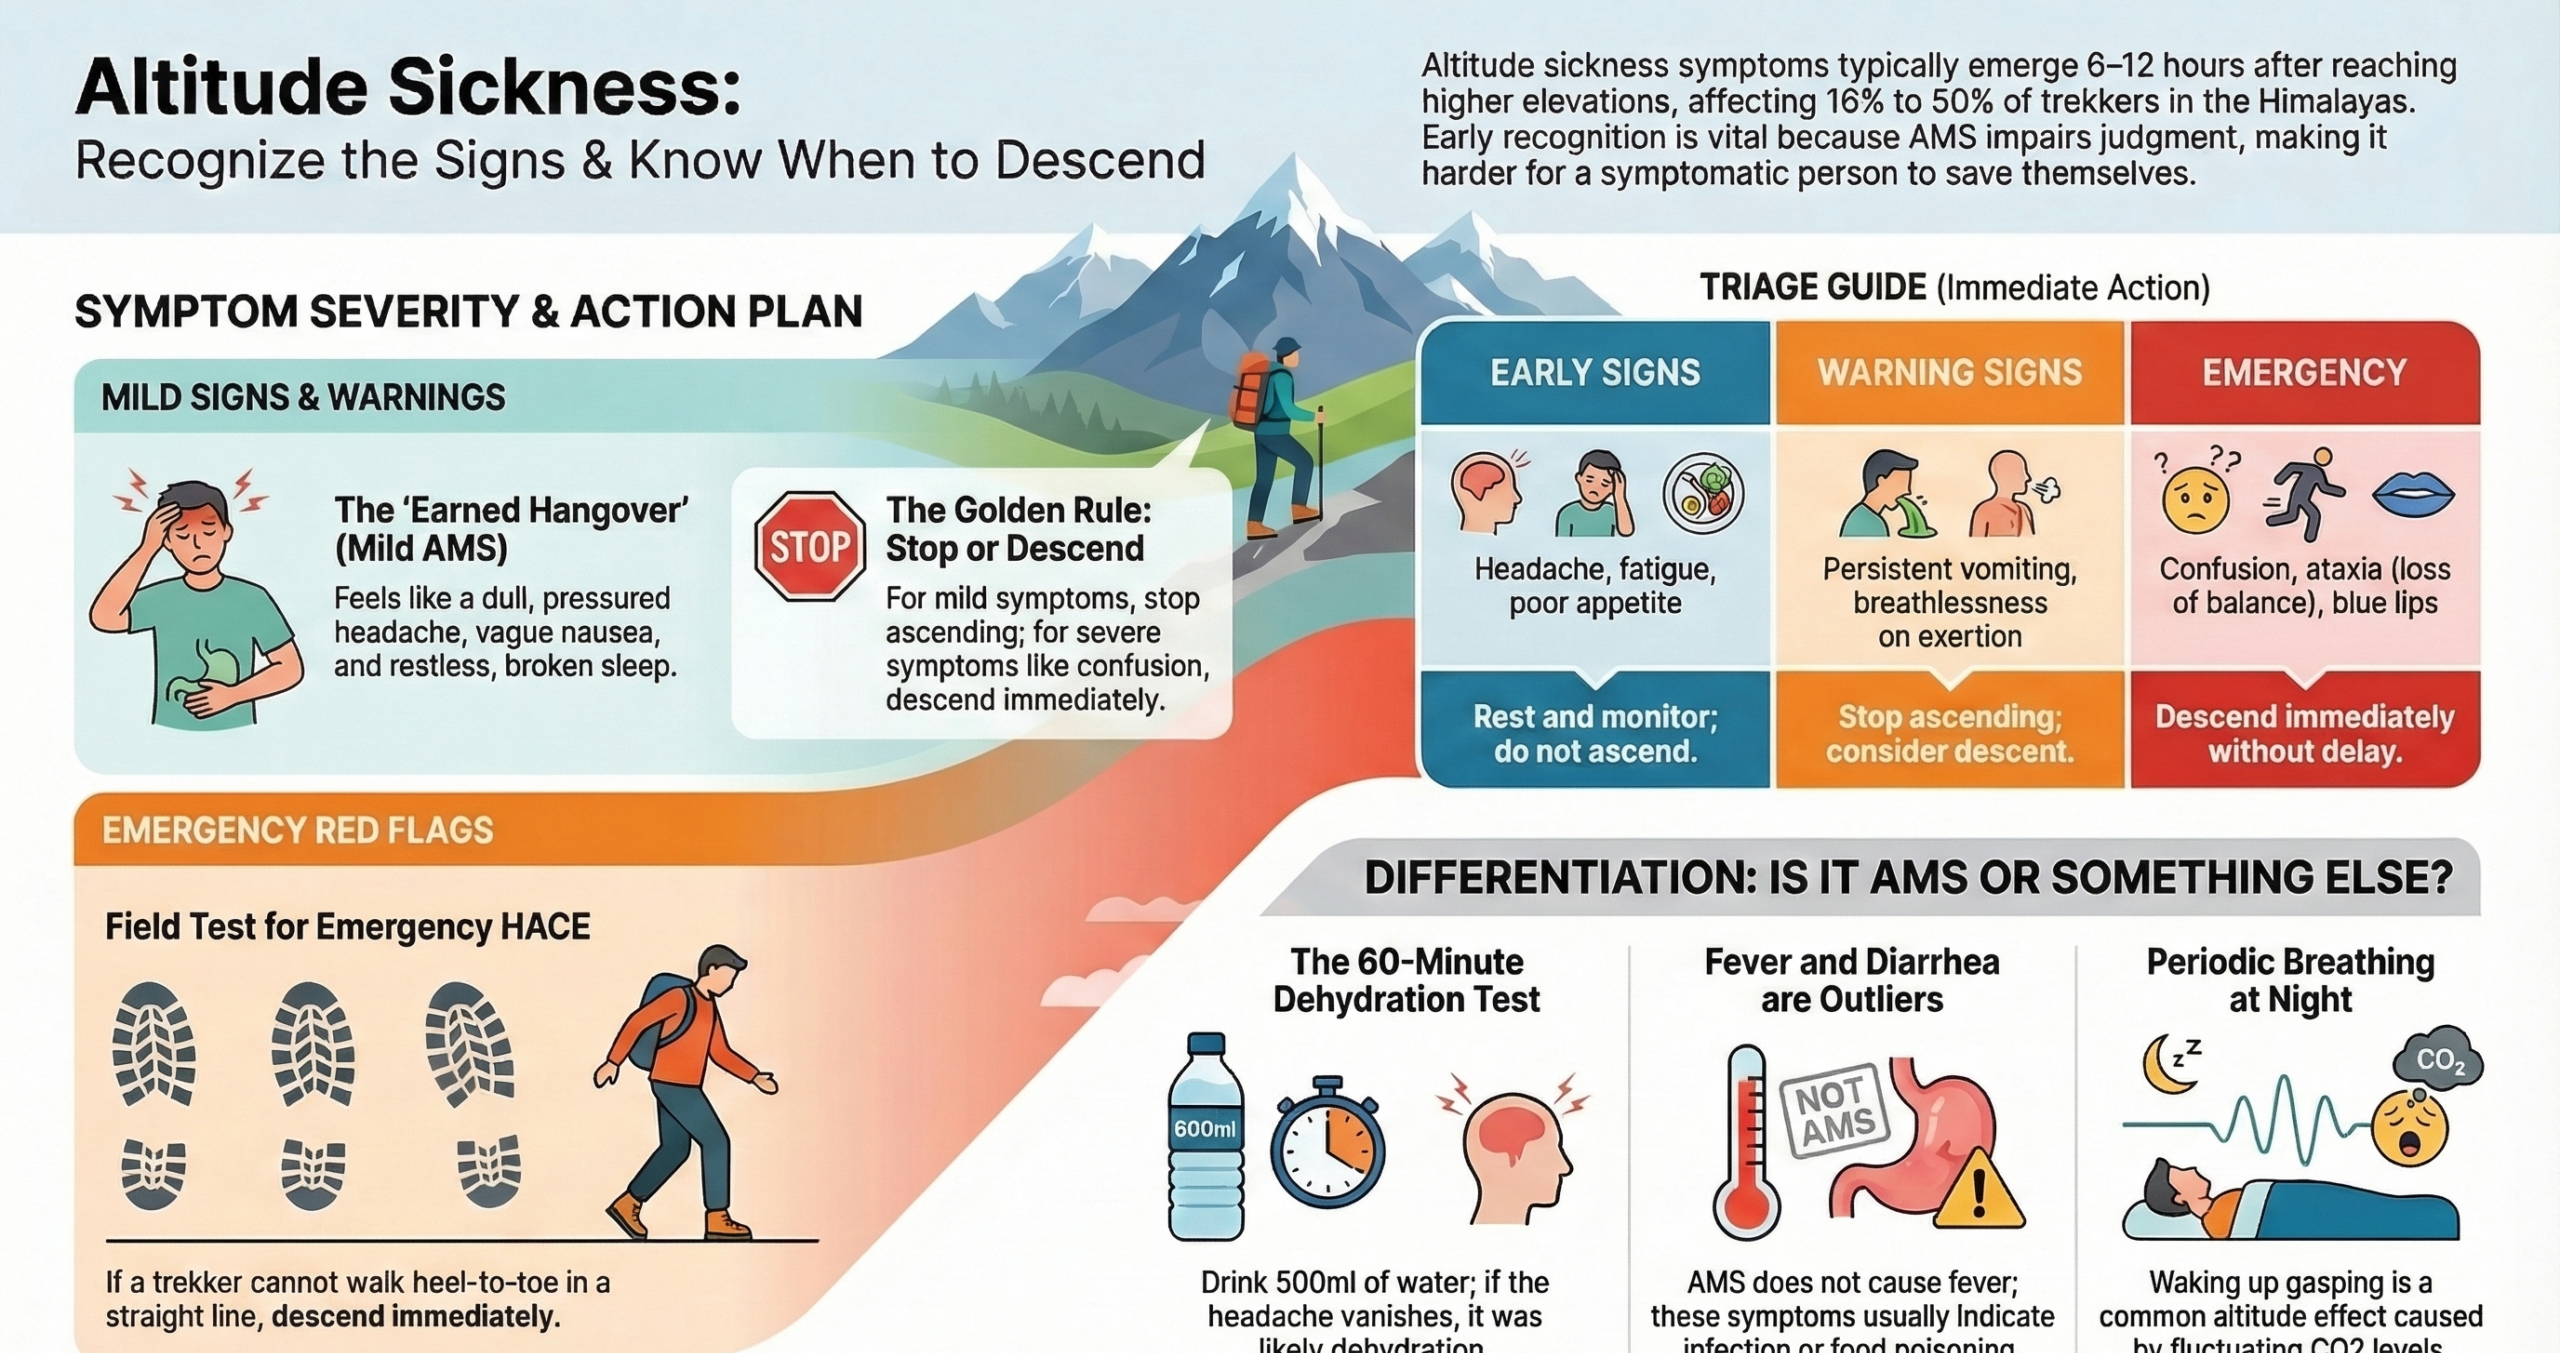
Altitude sickness symptoms usually begin to appear within 6–12 hours of reaching higher elevations. These symptoms typically range from mild headaches and fatigue to serious conditions affecting the lungs and brain. Studies in the Himalayas show AMS rates ranging from 16% to over 50%, depending on altitude and ascent speed.
This makes it one of the most common medical concerns for trekkers. Recognizing symptoms early and understanding what they actually mean is what keeps a great trek from becoming a medical emergency.
What Does Altitude Sickness Feel Like?
Most people expect altitude sickness to announce itself clearly. It rarely does and sneaks in quietly. The most honest description? It feels like a hangover you didn’t earn.
A dull, pressured headache that sits behind your eyes and wraps around your skull. A vague nausea that makes you want to vomit after smelling anything. A night of broken, restless sleep that leaves you more exhausted than when you went to bed.
What catches trekkers off guard is the subtlety. Initially, you feel off but not dramatically unwell. Many dismiss it as trail tiredness, a bad night’s sleep, or yesterday’s exertion. That dismissal is exactly where AMS gets dangerous.
The experience varies more than most expect. Some people feel genuinely terrible at mild AMS. Others feel only a little more tired. Fitness level doesn’t protect you, while experienced trekkers who lead the group on day one sometimes struggle most by day three. There is no reliable way to predict individual susceptibility in advance.
Early Signs of Altitude Sickness
The following symptoms typically appear first, often within hours of arriving at a new elevation:
- Headache: The defining symptom; throbbing or pressure-type, often worsening overnight
- Fatigue: Disproportionate tiredness that rest doesn’t fully relieve
- Loss of appetite: Food becomes unappealing, not just less enjoyable
- Mild dizziness: Lightheadedness, nausea (especially when standing or moving quickly)
- Sleep disturbance: Difficulty staying asleep, waking repeatedly, and feeling unrefreshed in the morning
A headache alone at altitude is classified as a high-altitude headache (HAH) and is extremely common. It becomes AMS when accompanied by at least one other symptom: nausea, fatigue, or dizziness. This combined symptom severity can reach a clinical threshold, which can be defined by the Lake Louise Scoring System.
If you wake up with a headache and no appetite after your first night at a new elevation, that combination deserves attention, not dismissal.
Altitude Sickness Symptoms by Severity
Mild Symptoms (Early AMS)
AMS is rare below 2,500m. Above 4,500m (which is the elevation of many popular Himalayan treks), more than half of the trekkers may be affected. Mild AMS is the most common presentation and, if managed correctly, is rarely dangerous.
- Headache that responds to ibuprofen or paracetamol
- Mild fatigue
- Reduced appetite
- Slight dizziness
- Disrupted sleep
At this stage, the right move is simple. Stop ascending. Rest at the same altitude. Most mild AMS resolves within 24–48 hours with acclimatization. The mistake people consistently make is pushing their ascent because they feel “only a little off.” That is how mild progresses to other stages.
Moderate Symptoms
Moderate AMS means your body is struggling to compensate. Symptoms intensify and begin interfering with normal functioning:
- Persistent headache that doesn’t fully respond to painkillers
- Nausea, possibly with vomiting
- Significant fatigue, where basic tasks feel effortful
- Breathlessness with mild exertion
- Reduced urine output
Do not ascend further. If symptoms don’t change (improve or worsen), even after 24 hours of rest at the same altitude, descending 300–500m is the right call. This is the stage at which ignoring symptoms creates a real risk.
Severe Symptoms (Emergency Warning Signs)
Severe AMS indicates progression toward HACE (High Altitude Cerebral Edema) or HAPE (High Altitude Pulmonary Edema). Both of these are life-threatening conditions and require immediate action.
HAPE is actually the more common cause of altitude-related death and can develop without preceding AMS symptoms in some cases. HACE, if untreated, can progress to coma and death within 12–24 hours due to brain herniation.
Descend immediately. Do not wait for morning.
- Breathlessness at complete rest
- Persistent dry cough, especially with pink or frothy sputum (HAPE)
- Confusion, disorientation, or unusual behavior
- Inability to walk a straight line (ataxia). A hallmark sign of HACE
- Extreme lethargy beyond normal exhaustion
- Blue lips or fingernails (cyanosis)
A useful field test for HACE: Ask the person to walk heel-to-toe in a straight line. If they can’t, even if they could before, descend immediately.
Specific AMS Symptoms Explained
Altitude Sickness Headache
The headache of AMS isn’t random. When oxygen levels drop, the brain triggers vasodilation, where the blood vessels widen in an attempt to push more oxygenated blood to the brain tissue. This increases intracranial pressure.
But the pain itself is generated through the trigeminovascular system. This is the same nerve pathway involved in migraines, which is why an AMS headache can feel remarkably similar to a migraine.
What makes it distinct from other headaches: It typically worsens overnight, peaks in the morning, and intensifies when bending forward or lying flat. Exertion makes it worse. It often doesn’t respond well to hydration alone, which is one of the key ways to differentiate it from a dehydration headache.
If ibuprofen isn’t meaningfully reducing it after a few hours, treat that as a signal, not a nuisance.
Nausea and Loss of Appetite
Hypoxia activates the sympathetic nervous system. This is the same stress-response system behind pre-adrenaline nausea. Simultaneously, the gut is deprioritized under low-oxygen conditions. Digestion slows. Food becomes unappealing.
In early AMS, this isn’t dramatic nausea, but a persistent, low-level queasiness. Many trekkers eat mechanically but find no enjoyment in food. Vomiting typically signals moderate-to-severe AMS, and when it appears, it matters beyond discomfort. Vomiting also accelerates dehydration and can delay acclimatization.
Dizziness and Fatigue
Dizziness at altitude stems from reduced oxygen reaching the vestibular system and brain. This is also compounded by the cardiovascular effort of compensating for hypoxia. It presents as lightheadedness, which is most noticeable when standing or changing positions quickly.
Fatigue runs deeper than just the tiredness after trekking. Muscles switch to less efficient anaerobic metabolism earlier than normal. Meanwhile, the body is working hard just to maintain basic function. There’s an increase in breathing rate, elevated heart rate, and heightened sympathetic activation. All of it burns energy. Fit, experienced trekkers are often the most surprised by how profound this fatigue feels.
Sleep Disturbances at Altitude
This is the most misunderstood AMS symptom, and the one most likely to be blamed on everything except the actual cause.
When you’re sleeping at an altitude, hypoxia triggers faster breathing (hyperpnea), which drops CO₂ levels. Low CO₂ signals the brain to temporarily stop breathing (apnea). Falling oxygen level then restarts the breathing drive, and the cycle repeats.
This is called periodic breathing, sometimes referred to as Cheyne-Stokes respiration at altitude. Each cycle lasts roughly 30 seconds to 2 minutes, though at altitude these cycles tend to be shorter and more frequent than in other clinical settings.
The result: Repeated micro-awakenings, often with a gasping or startled sensation. Vivid or unsettling dreams are common. You go to bed tired and wake up more exhausted, because you technically stopped breathing dozens of times overnight.
Many trekkers blame cold air, tent noise, or a new environment. If you’re consistently waking with a jolt at a new elevation, this is why.
Symptoms That Are Often Confused with Altitude Sickness
Knowing what altitude sickness is is just as important as knowing what it is. Once you’ve ruled out dehydration, food poisoning, or a common cold, what remains needs to be taken seriously.
Can Altitude Sickness Cause Fever?
No. Fever is not a symptom of AMS or HACE. If you have a fever above 38°C at altitude, think infection first, like viral illness, respiratory infection, or something requiring medical attention beyond altitude protocol.
The exception worth knowing: Fever can appear with HAPE, which is why HAPE is sometimes initially mistaken for pneumonia. But by that point, respiratory symptoms, including breathlessness at rest and a worsening cough, are dominant and hard to miss. A fever without those classic AMS markers points strongly away from altitude sickness.
Diarrhea at Altitude: AMS or Something Else?
Diarrhea is one of the most common medical complaints among trekkers in Nepal, but it is rarely caused by altitude. AMS only causes nausea and sometimes vomiting.
What actually causes trekker diarrhea in the Himalayas is far more mundane: contaminated water, unfamiliar food, traveler’s gut bacteria, including E. coli and Giardia. This is so prevalent in the first two weeks of a Nepal trip that many trekkers incorrectly attribute it to altitude when it needs an entirely different response of rehydration and possibly antibiotics, not descent.
Fever combined with diarrhea is almost certainly not AMS. Think food poisoning or infection.
AMS vs. Dehydration
This is the most practically useful distinction to understand, because dehydration and AMS frequently co-exist and share overlapping symptoms.
Where they overlap: headache, fatigue, nausea, dizziness.
Where they differ:
- Dehydration headache typically improves within 30–60 minutes of drinking water. AMS headache does not.
- Dehydration causes dry mouth, thirst, and dark urine. These are not typical AMS features.
- Altitude itself increases fluid loss through faster, drier breathing. Many trekkers arrive genuinely dehydrated without realizing it, which can worsen AMS symptoms.
A practical field approach: Drink 500ml of water and wait 45–60 minutes. If the headache eases meaningfully, dehydration was likely the cause. If it persists or worsens, treat it as AMS and act accordingly.
How AMS Symptoms Progress If Ignored
AMS follows a quick escalation when ascent continues despite symptoms.
Hours 6–12 after ascent: A dull headache begins, but is often dismissed as trail tiredness. Mild fatigue. Slight nausea. Easy to explain away.
Night 1: The headache intensifies when lying down. Sleep is fragmented by periodic breathing. Morning reveals worse symptoms than the evening before. This is a critical signal: if you feel worse after a night of rest, acclimatization is not happening.
24–48 hours with continued ascent: Headache becomes severe and unresponsive to medication. Vomiting. Profound fatigue. Breathlessness on minimal exertion. The body is no longer compensating.
Beyond this point: The transition to HACE or HAPE can happen within hours. Confusion appears. Coordination deteriorates. Breathing becomes labored at rest. This is a medical emergency with a narrow treatment window.
One critical and underappreciated factor:
AMS impairs judgment. The very condition requiring action makes it harder to recognize that you need to act. Guides, trek partners, and pre-agreed symptom plans matter here. You should not rely solely on self-assessment when symptomatic.
When to Be Concerned About Altitude Sickness Symptoms
Here’s a sobering finding from Nepal-based research: 63% of trekkers developed AMS symptoms despite 80% having prior knowledge of the condition.
Knowing about altitude sickness does not protect you from it. It also doesn’t guarantee you’ll recognize it in yourself.
Seek descent or emergency assistance when:
- Symptoms worsen after 24 hours of rest at the same altitude
- The headache becomes severe and doesn’t respond to ibuprofen
- Breathlessness occurs at rest, not just on the trail
- Coordination or balance deteriorates
- Confusion, unusual behavior, or extreme lethargy appear
- Any symptom from the severe category above is present
The golden rule of altitude: If in doubt, descend. Dropping even 300–500m can produce a dramatic improvement within hours. Altitude is the only reliable cure for AMS, and it works fast.
Do You Need Medication for These Symptoms?
Acetazolamide (sold under the brand name Diamox) is the most widely used medication for altitude sickness prevention and treatment. It works by inducing a mild metabolic shift that stimulates deeper, more frequent breathing, essentially accelerating what acclimatization does naturally over 3–5 days into roughly one.
It also directly reduces periodic breathing during sleep, which is why many trekkers on Diamox report significantly better rest at altitude. Importantly, it doesn’t mask symptoms, but supports the body’s actual adaptation process.
Whether you need it depends on your ascent profile, personal susceptibility, and trek itinerary. For dosage, timing, and a full breakdown of how to use it properly, see our complete altitude sickness medication guide.
Quick AMS Symptom Reference
| Category | Symptoms | Action |
| Early Signs | Headache, fatigue, poor appetite, mild dizziness, broken sleep | Rest, don’t ascend, monitor closely |
| Warning Signs | Persistent headache, nausea/vomiting, breathlessness on exertion | Stop ascending, consider descent |
| Emergency Signs | Breathlessness at rest, confusion, ataxia, pink/frothy cough | Descend immediately without any delay |
So, can we manage AMS symptoms?
Altitude sickness is manageable when you catch it early. The trekkers who get into serious trouble aren’t usually the ones who didn’t know the symptoms, but the ones who recognized them and kept climbing anyway.
Understand what your body is telling you. Know what AMS is and what isn’t. And when symptoms don’t resolve with rest, descend first and investigate later.
For a complete overview of causes, risk factors, and prevention strategies, see our complete altitude sickness overview guide.
What to Pack for Trekking in Nepal: Complete Gear List + Local Tips (2026 Guide)
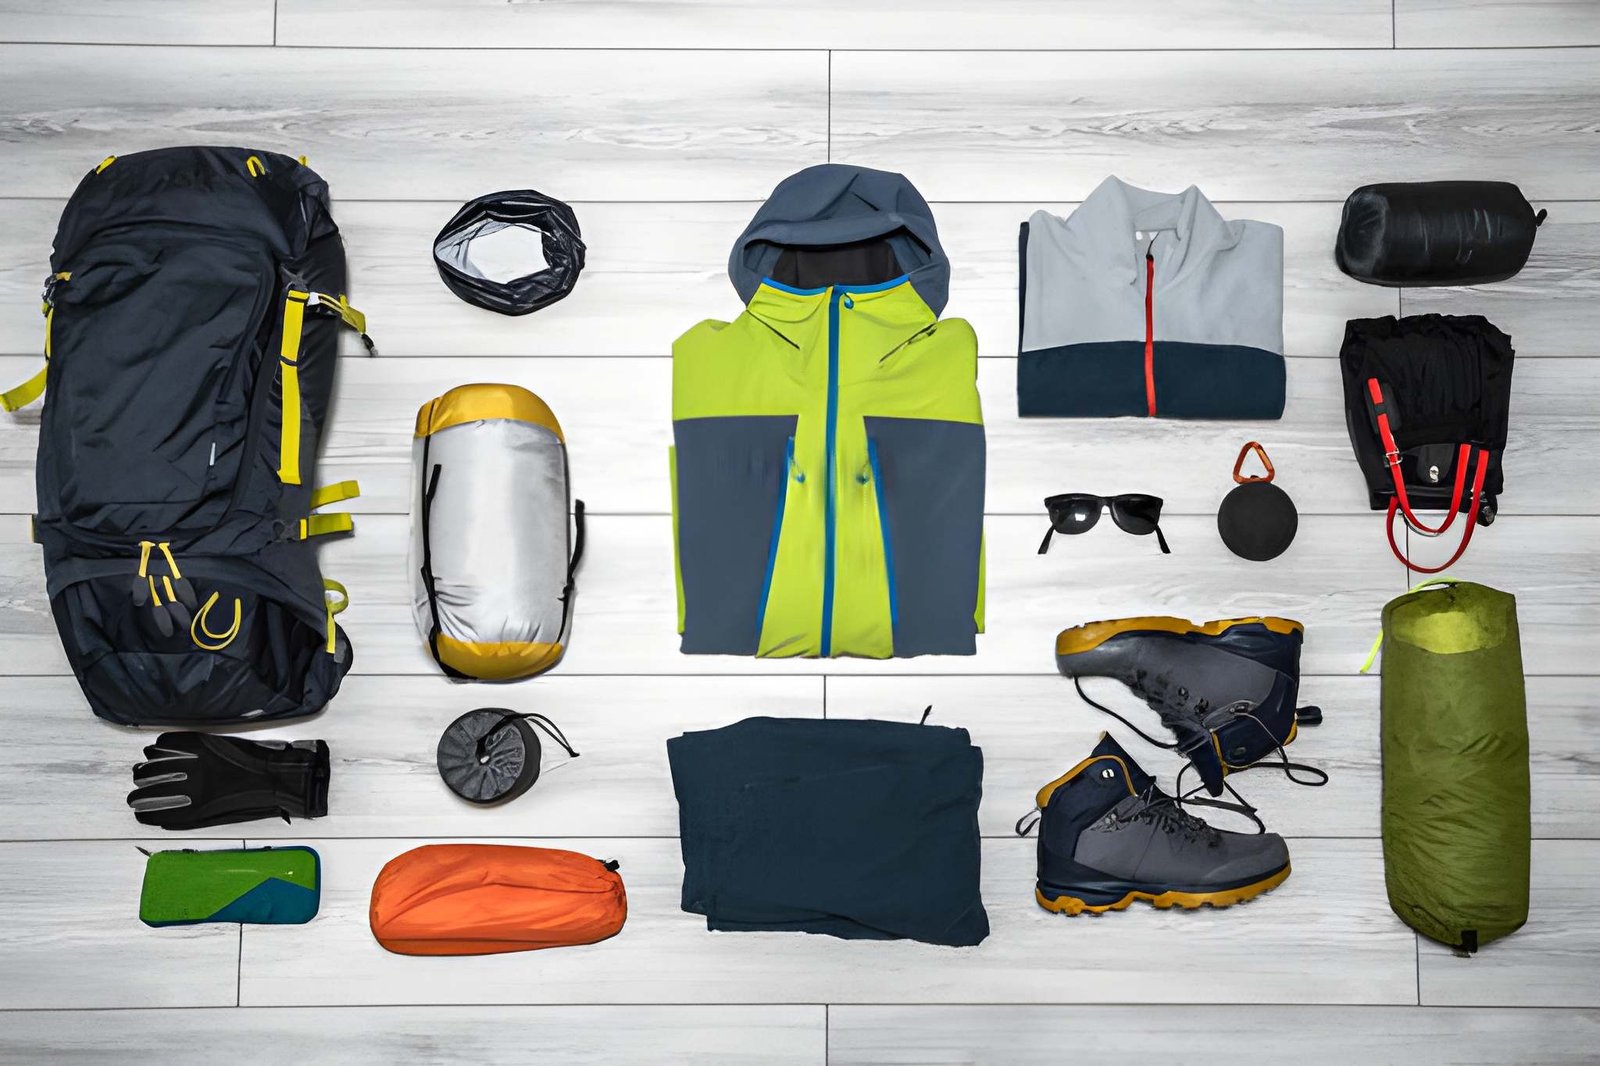
What trekking gears are needed when visiting Nepal
- Layered clothing (base, insulation, waterproof shell)
- Trekking boots: waterproof, broken-in before you fly
- Backpack (50–70L main + 25–30L daypack)
- Sleeping bag (-15°C rated, especially for high altitude)
- Trekking poles
- Basic first aid, medications, and personal items
The good news is, you don’t need to pack everything for trekking in the Himalayas. Nepal ( especially Kathmandu) has excellent, affordable gear available to rent or buy. The rule of thumb is knowing what to bring from home, what to grab locally, and what to leave behind entirely.
Introduction: Stop Doom-Scrolling Gear Packing Lists
You’ve already read three packing lists this week. They all say, “Bring a warm jacket.” You already know that, though, since it’s common sense.
Here’s the thing: trekking in Nepal isn’t like hiking a trail back home. You’re dealing with altitude changes of 2,000m+ in a single trek, weather that flips from warm sun to freezing wind in an hour, teahouses that may not have heating systems, and trails where the nearest gear shop is miles behind you.
Generic advice won’t cut it. You need Nepal-specific guidance. You need to learn what the locals know, what experienced trekkers wish they’d known, and what’s actually available in Kathmandu before you head out.
That’s exactly what this guide covers: a complete gear list, what NOT to pack, the rent vs. buy question answered properly, and market prices so you can budget before you land.
The Complete Nepal Trekking Gear List
A complete setlist consists not only of what you wear on the trek, but also of your overall journey.
Clothing: The Layering System
Let’s forget individual brands for a second. In Nepal, how you layer matters more than what brand or how thick you’re wearing.
- Base Layer: The moisture manager and best friend of your skin. It always goes on first and stays on all day. Merino wool is the gold standard as it wicks sweat, regulates temperature, and doesn’t smell after three days (yes, really). Bring two sets of thermal tops and bottoms.
Our Advice: Avoid cotton entirely. Once wet, cotton stays wet and wet cotton at 4,500m is genuinely dangerous (including risk of hypothermia).
- Mid Layer: The warmth engine. A thin fleece works for moderate altitudes below. A thicker fleece or down jacket works best for the high stuff. The down jacket is one of many items you can easily rent in Kathmandu for $1–3/day. So, you don’t need to stuff one in your bag from home.
- Outer Layer: It’s your shield in the mountains. A waterproof, windproof shell jacket is non-negotiable. Even on bluebird days, wind above 3,500m is brutal. Rain is possible year-round. This layer doesn’t need to be heavy, but just needs to stop wind and water.
- Bottoms: One to two pairs of zip-off trekking trousers. The convertible style earns its weight as you’ll be in shorts at Namche (3,440m) and full trousers with thermals under them at Gorak Shep (5,140m).
- Accessories: Warm beanie, buff or balaclava, gloves (thin liner + waterproof outer), UV-protection sunglasses, and two to three pairs of wool hiking socks.
Footwear: The Steps You Take
Your boots are the single most important item you own on your treks. Get this wrong, and you’ll spend your Himalayan adventure hobbling between teahouses with blisters the size of momos.
- Waterproof hiking boots with ankle support and a solid grip
- Size them up slightly. Your toes should not be pressing forward on long descents
- Break them in for 3–4 weeks before you fly. Wear them on walks, errands, everywhere. New boots on day one of a two-week trek is a nightmare.
- Pack camp slippers or flip-flops for teahouse evenings. Your feet will thank you.
Backpacks & Storage
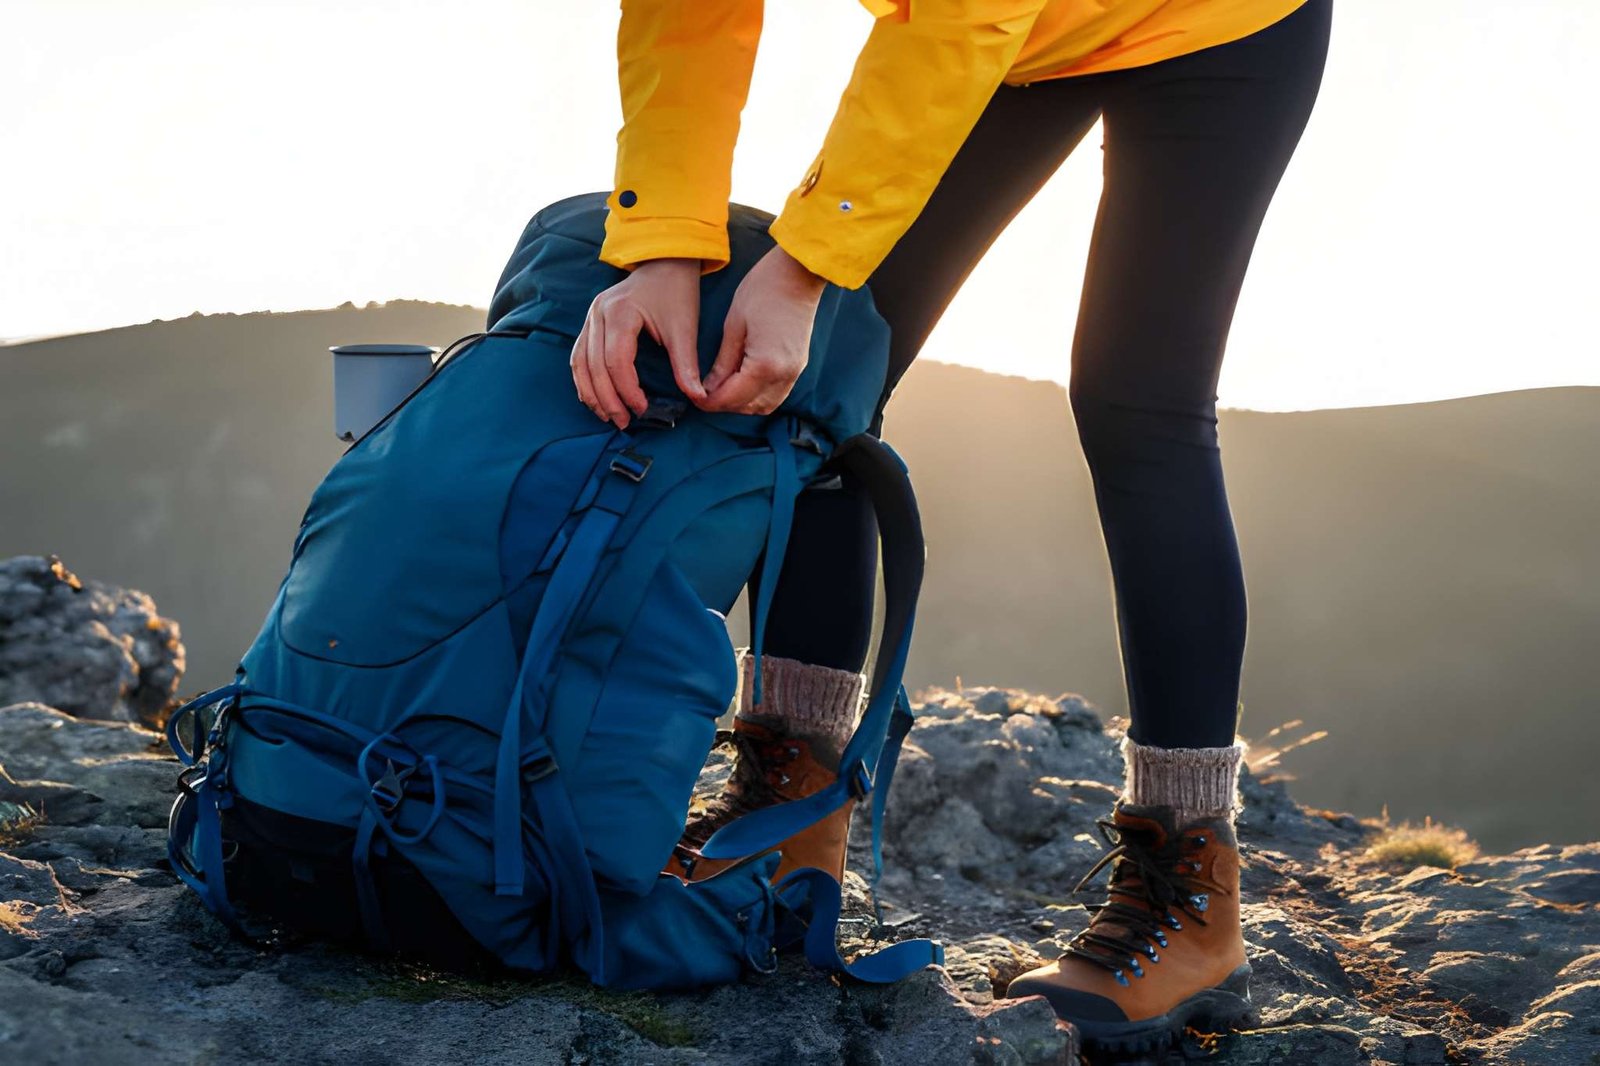
- Main pack: 50–70L with a rain cover. If using a porter, a waterproof duffel works great.
- Daypack: 25–30L that you carry yourself every day, including snacks, water, layers, camera, and documents.
- Store anything you don’t need on the trail at your hotel in Kathmandu. Most guesthouses offer free luggage storage.
Sleeping Gear
- Do you need a sleeping bag? Yes, for most treks, especially anything above 3,500m. Teahouse blankets exist but are thin, often damp, and shared with a lot of strangers. A sleeping bag rated to -15°C is recommended for EBC and high-altitude routes.
- The good news: Sleeping bags are very easy to rent in Kathmandu ($1–2/day). If you’re trekking a lower route or only in warmer months, a liner may be enough.
Essentials & Accessories
| Item | Notes |
| Headlamp + spare batteries | Power cuts are common; don’t rely on your phone |
| Trekking poles | Highly recommended. They save your knees on descents. |
| Power bank (20,000mAh+) | Charging at teahouses costs $1–3 per charge |
| Water bottle (metal) + purification tablets | Metal bottles can be heated on the teahouse stoves for free |
| Sunscreen SPF 50+ & lip balm | UV radiation increases significantly at altitude |
| First aid kit | Paracetamol, Ibuprofen, Diamox, blister kit, antiseptic |
| Toilet paper | Critical above 4,000m where water freezes |
| Cash in NPR | ATMs disappear fast once you leave the valley |
| Trekking permits | TIMS card + national park entry. Sort in Kathmandu. |
Clothing by Altitude: What to Wear Where
Most blogs hand you a list and leave you guessing. Here’s how it actually works on the trail:
| Altitude | Conditions | What You’ll Be Wearing |
| Below 2,500m | Warm days, cool evenings | T-shirt + zip-off trousers, fleece for evenings |
| 2,500–3,500m | Cool to cold, windy | Base layer + mid fleece + shell jacket |
| 3,500–5,000m+ | Cold days, very cold nights | Full thermal base + mid + down jacket + shell, beanie, gloves |
Trek-Specific Gear: EBC vs. Annapurna
Everest Base Camp Trekking Gear
EBC is the big one. Nights at Gorak Shep (5,140m) regularly drop to -15°C to -20°C in autumn and winter. Your gear needs to be rated for that, not just “pretty cold.”
EBC-specific additions beyond the standard list:
- Sleeping bag rated -15°C minimum (non-negotiable)
- Heavy down jacket (not just a fleece)
- Heavyweight waterproof gloves
- Microspikes for icy sections near the top
- Altitude medication (Diamox) should be consulted with a doctor before departure
Interested in trekking the EBC? Check out our EBC itinerary page & book your journey today.
Annapurna Region Treks
The Annapurna Circuit and its Base Camp trek are slightly lower in max altitude, but the weather is equally unpredictable. The standard list applies. You can get away with a slightly lighter sleeping bag on the Annapurna Base Camp route in spring, but don’t cut corners if trekking in October–November.
What NOT to Pack for Trekking in Nepal
This might be the most useful section in this entire guide.
Cotton clothing: We said it once, we’ll say it again. Cotton harms. Leave it in Kathmandu.
More than two of anything: You won’t change clothes the way you think you will. Trekkers wear the same things every day. Two pairs of trousers, two base layers, maximum.
A heavy “just in case” jacket from home: Down jackets are cheap and excellent in Kathmandu. Don’t haul one across the world.
Jeans: They weigh a ton, they’re slow to dry, and they’re restrictive. Leave them.
A full toiletries bag: Travel-size only. You won’t be using much of it.
Anything you haven’t used in the last month: If you haven’t needed it recently, you won’t need it at 4,500m either. This rule eliminates about 30% of most people’s pack.
Target pack weight: 8–12kg. Every extra kilo will feel like five by day four.
Should You Rent or Bring Trekking Gear in Nepal?
This is the question. And the honest answer is: you probably need less from home than you think.
Renting Trekking Gears in Nepal:
- Down jacket (~$1–3/day or $15–30 to buy)
- Sleeping bag (~$1–2/day)
- Trekking poles (~$1/day)
- Duffel bag (~$1/day)
Bring Trekking Gears from Home:
- Hiking boots (must be broken in and cannot be rented)
- Base layers and merino wool (fit and quality vary widely in rentals)
- Personal medications and first aid
- Daypack (fit matters)
The Quality Warning
Not all rental gear in Nepal is equal. Some shops have well-maintained, quality stock. Others have down jackets with the insulation compressed into nothing and sleeping bags that smell like six seasons of altitude trekking. Know who you’re renting from.
At Far Out, we help trekkers arrange quality-checked gear in Kathmandu. So, you’re not playing rental roulette before your trek. [Get in touch here.]
Cost of Trekking Gear in Kathmandu
One of the most common questions, and one almost nobody answers with real numbers. Here’s what you’re looking at in 2026:
| Item | Rent (Per Day) | Buy (Kathmandu) | Buy (Western Retail) |
| Down jacket | $1–3 | $20–60 | $150–300 |
| Sleeping bag (-15°C) | $1–2 | $30–80 | $150–400 |
| Trekking poles | $1 | $10–25 | $60–150, |
| Trekking boots | — | $30–100 | $120–300 |
| Waterproof shell jacket | $1–2 | $20–50 | $100–250 |
| Duffel bag (70L) | $1 | $15–30 | $60–120 |
Budget trekker (renting most items, buying essentials): $50–100 total gear spend in Kathmandu.
Mid-range trekker (buying quality local gear): $150–250.
Kathmandu prices are genuinely 50–70% lower than Western retail for equivalent gear. Budget travellers, this is great news.
Where to Buy or Rent Trekking Gear in Nepal
Kathmandu: The Main Hub
Thamel is the trekking gear epicentre of Nepal. Hundreds of shops, every item you need, and serious competition keep prices reasonable. The street to know is Tridevi Marg, where the better-stocked, imported-brand shops tend to cluster.
Tourist trap warning: Counterfeit gear is real. “North Face,” “Mammut,” and “Patagonia” jackets at $15 are not the real thing. They look convincing and fall apart in the cold. Either buy knowingly (a $15 fake is fine for low altitudes) or pay more for genuine stock from reputable shops.
Pokhara also has a solid gear scene in the Lakeside area, which is good for Annapurna region trekkers who fly direct.
Common Packing Mistakes Trekkers Make
Collected from real trekkers (and our own guides who’ve watched this unfold on trails for years):
- Not breaking in boots: Its the number one cause of trek-ruining blisters. Wear new boots for 3–4 weeks before departure.
- Ignoring the layering system: Buying a “really warm jacket” and thinking that’s sufficient. Temperature swings 20°C between midday and midnight at altitude. Layers are the system.
- Underestimating the cold above 4,000m: First-timers consistently say, “It was way colder than I expected.” It will be. Plan for it.
- Over-relying on cheap gloves: Your hands are exposed all day. Budget gloves fail fast. Get good ones.
- Forgetting a power bank: Teahouses charge $1–3 per device charge. On a 14-day trek that adds up fast, and power cuts are common.
- Not checking insurance altitude coverage: Many standard travel policies cap at 2,000–3,000m. If you’re heading to EBC (5,364m), you need a policy that explicitly covers high-altitude trekking. Check before you fly.
Pro Packing Tips from Far Out
A few final notes from people who’ve done this a few hundred times:
- Pack everything, then remove 20%. Seriously. Then remove a bit more.
- Use dry bags inside your pack. Even with a rain cover, moisture finds a way in.
- Test all gear before you leave home. Wear the boots, sleep in the sleeping bag, and check the headlamp batteries.
- Snacks are cheapest in Kathmandu. Stock up on nuts, energy bars, and electrolyte tabs before the trek. Prices at altitude can be 3–4x higher.
- Adjust for season. Pre-monsoon (March–May) and post-monsoon (Sept–Nov) are peak seasons with predictable conditions. Winter and monsoon require additional gear planning.
Final Word: Pack Smart, Trek Better
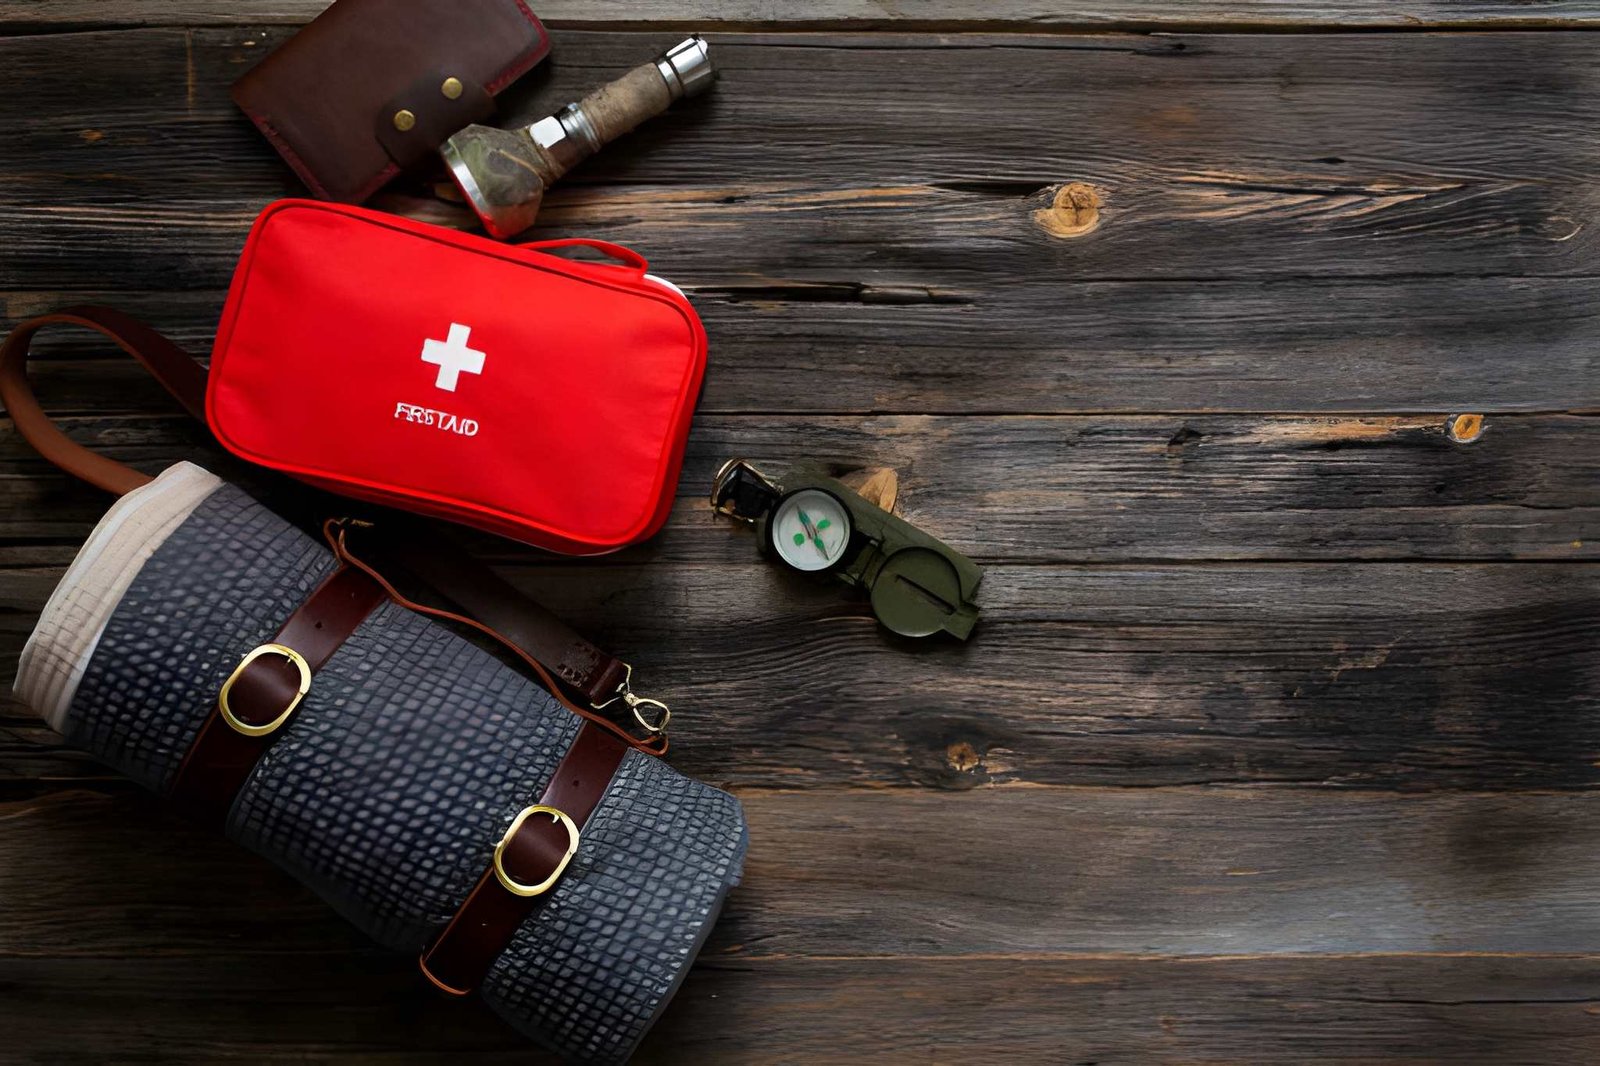
The best trekking kit isn’t the most expensive one or the most complete one. It’s the one that’s light enough not to slow you down, warm enough not to stop you, and smart enough to have been half-assembled in Kathmandu at a fraction of what you’d pay back home.
Pack with intention. Leave the “just in case” pile on your bedroom floor. And focus on what you actually came for: the mountains, the trail, and the kind of experience that makes every ounce of preparation worth it.
Need help putting it all together? Far Out works with trekkers to sort gear, permits, guides, and logistics before they hit the trail. No guesswork, no tourist traps. Just a smooth start to your Nepal adventure. Contact Far Out here.
Prices mentioned above are subject to change. Make sure to always consult an expert like Far Out Nepal on these things before you plan your trek.
Classic Everest Base Camp vs. Gokyo Lakes Trek: Which Route Should You Choose?
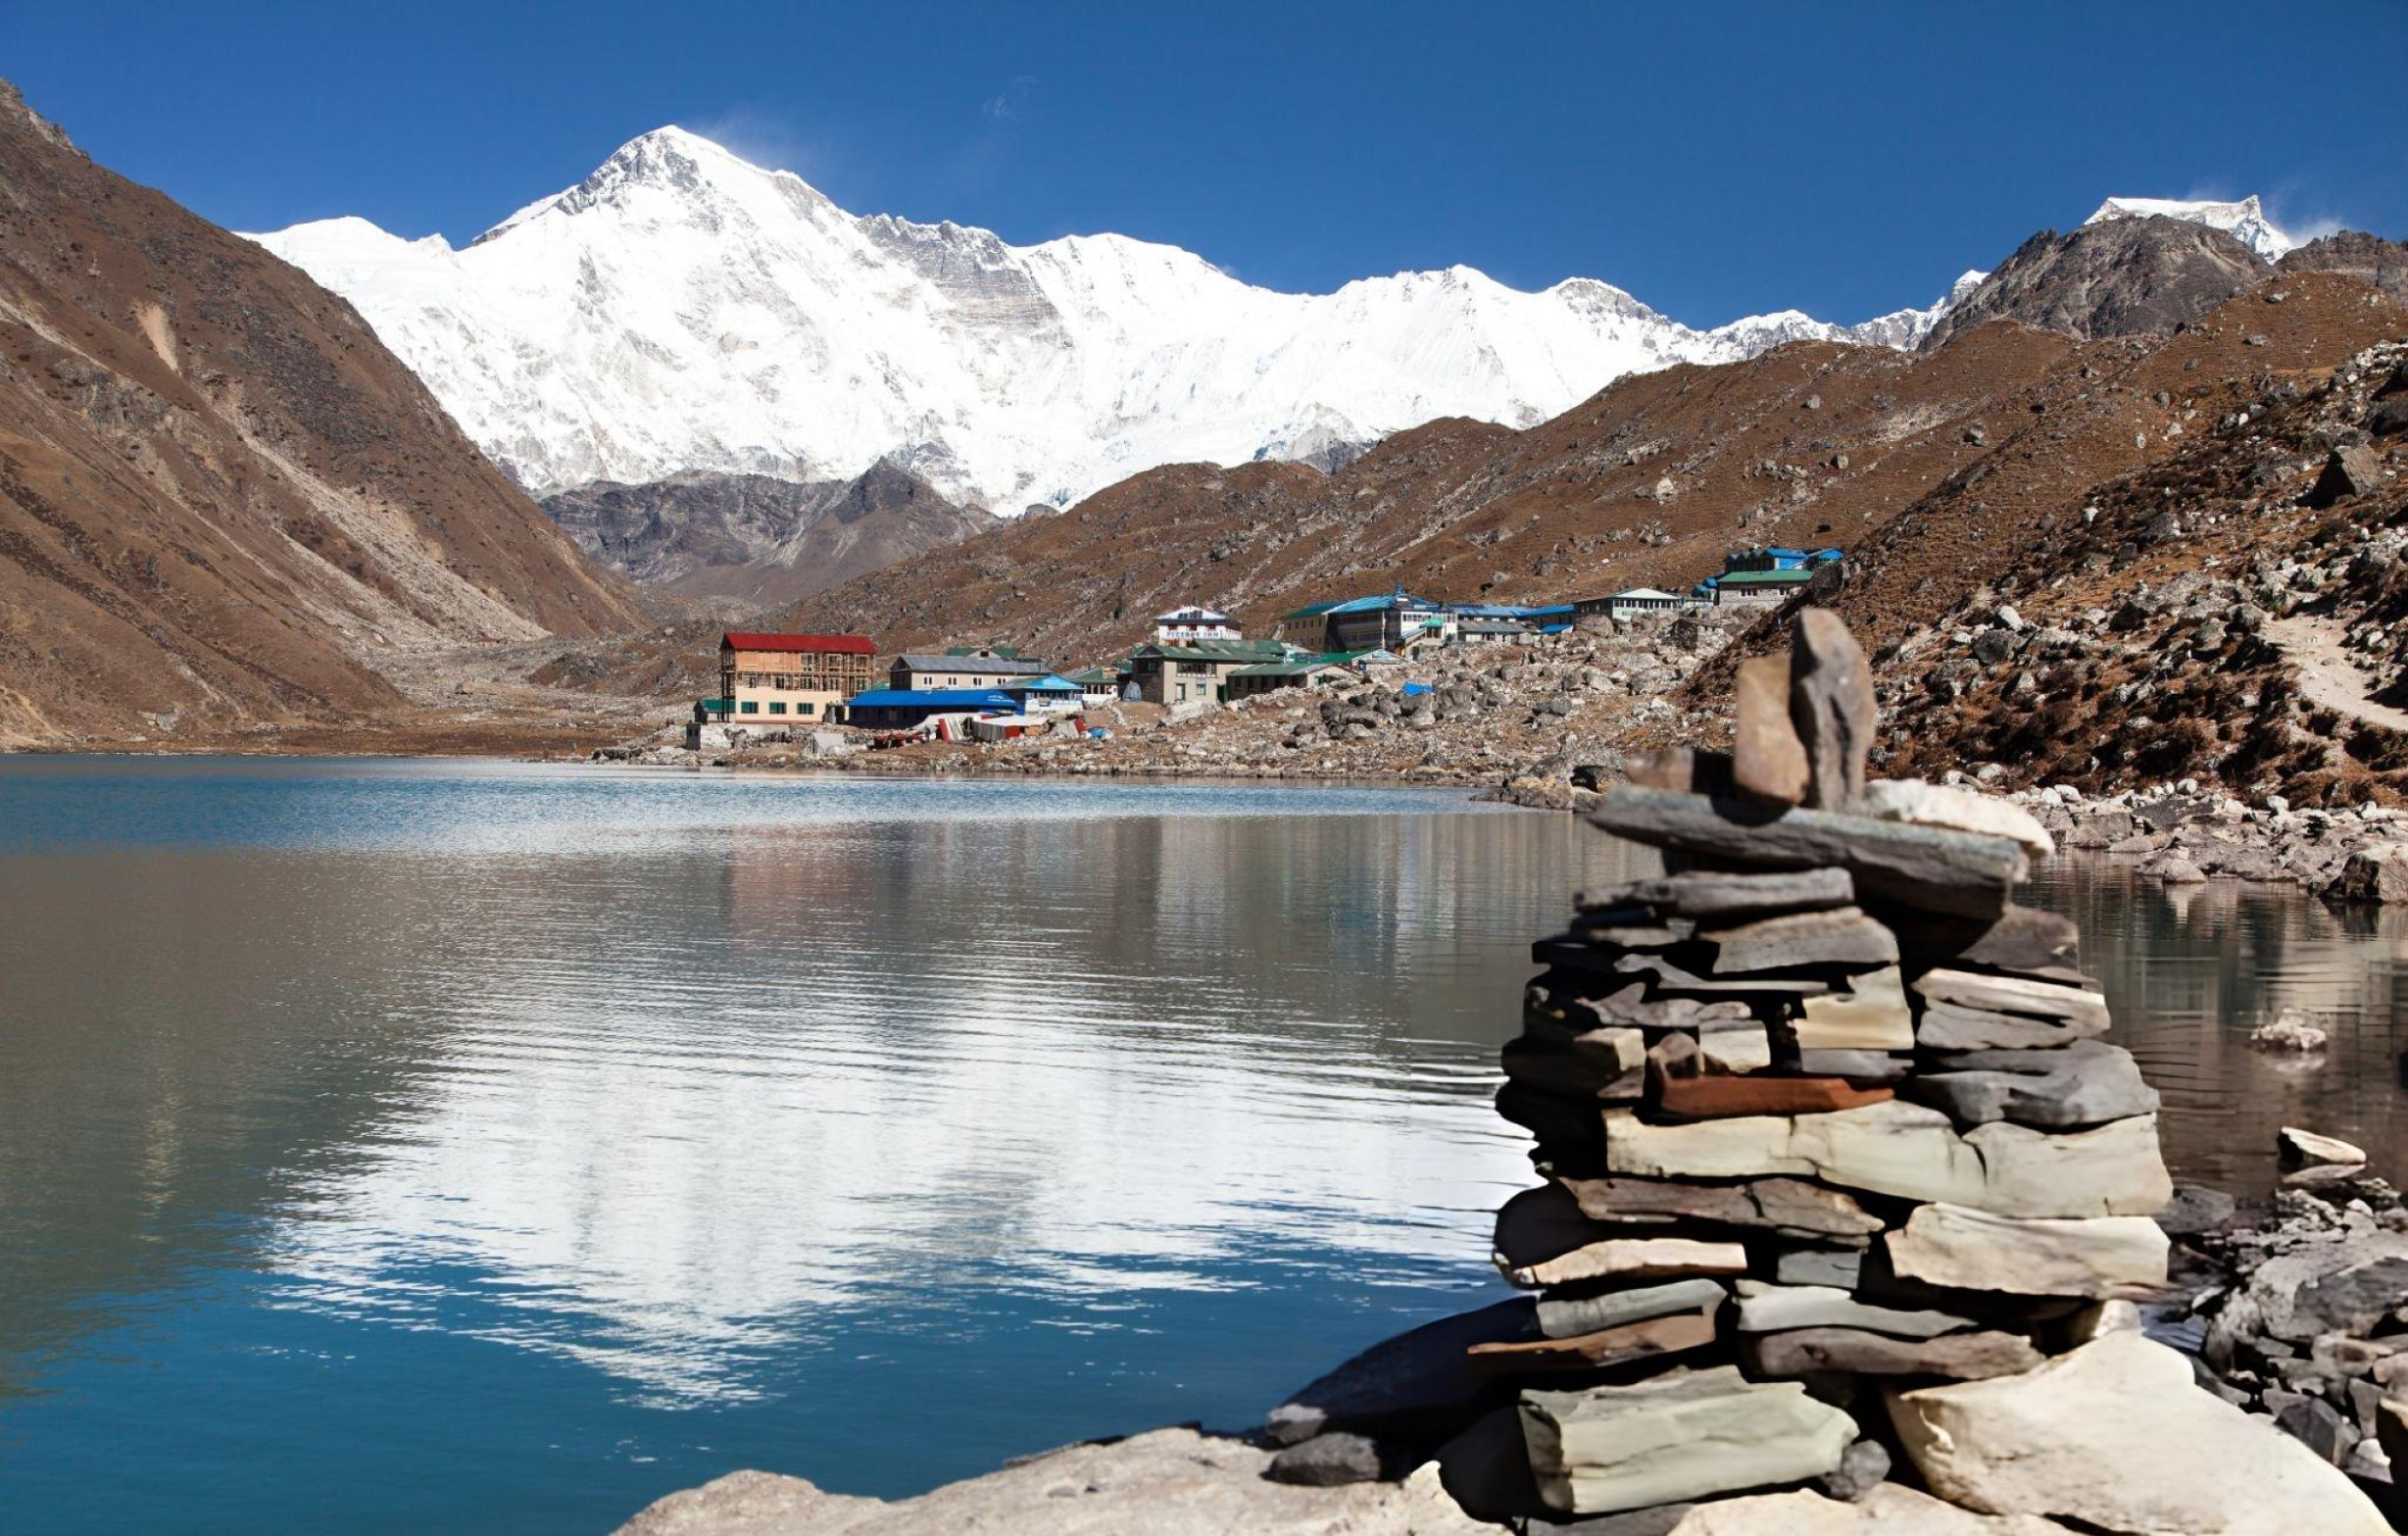
Introduction: EBC vs. Gokyo Lakes
Let’s be honest. If you’ve started searching up “EBC vs Gokyo,” you’re not looking for a casual trekking experience. You’re already deep in the trekking rabbit hole, probably with seven tabs open and hastily comparing trekking companies & packages.
We get it. This is one of the most exciting, yet also one of the most confusing, decisions you’ll make. Both routes are genuinely spectacular. Both routes also start at Lukla, and both put you in the shadow of the world’s highest peaks. The difference is what happens in between.
At Far Out Nepal, we’ve guided trekkers on both routes for over 25 years. We’ve seen first-timers moved to tears at Kala Patthar. We’ve watched photographers lose their minds completely at Gokyo Ri. And we’ve guided the combined circuit with trekkers who refused to choose, and never regretted it.
EBC or Gokyo: Two Routes, Two Completely Different Journeys
Before the comparison tables and altitude numbers, here’s the summary of each:
Classic EBC = The iconic route, which is a well-established and world-renowned pilgrimage. You will be face-to-face with the world’s highest peak, which is an euphoric experience in itself.
EBC via the Gokyo Circuit = The full picture. Sacred lakes, Nepal’s longest glacier, a 360° panorama of four eight-thousand-foot peaks, and a circuit route that never repeats a single step.
Now let’s go deeper.
The Classic Everest Base Camp Trek (14-17 Days)
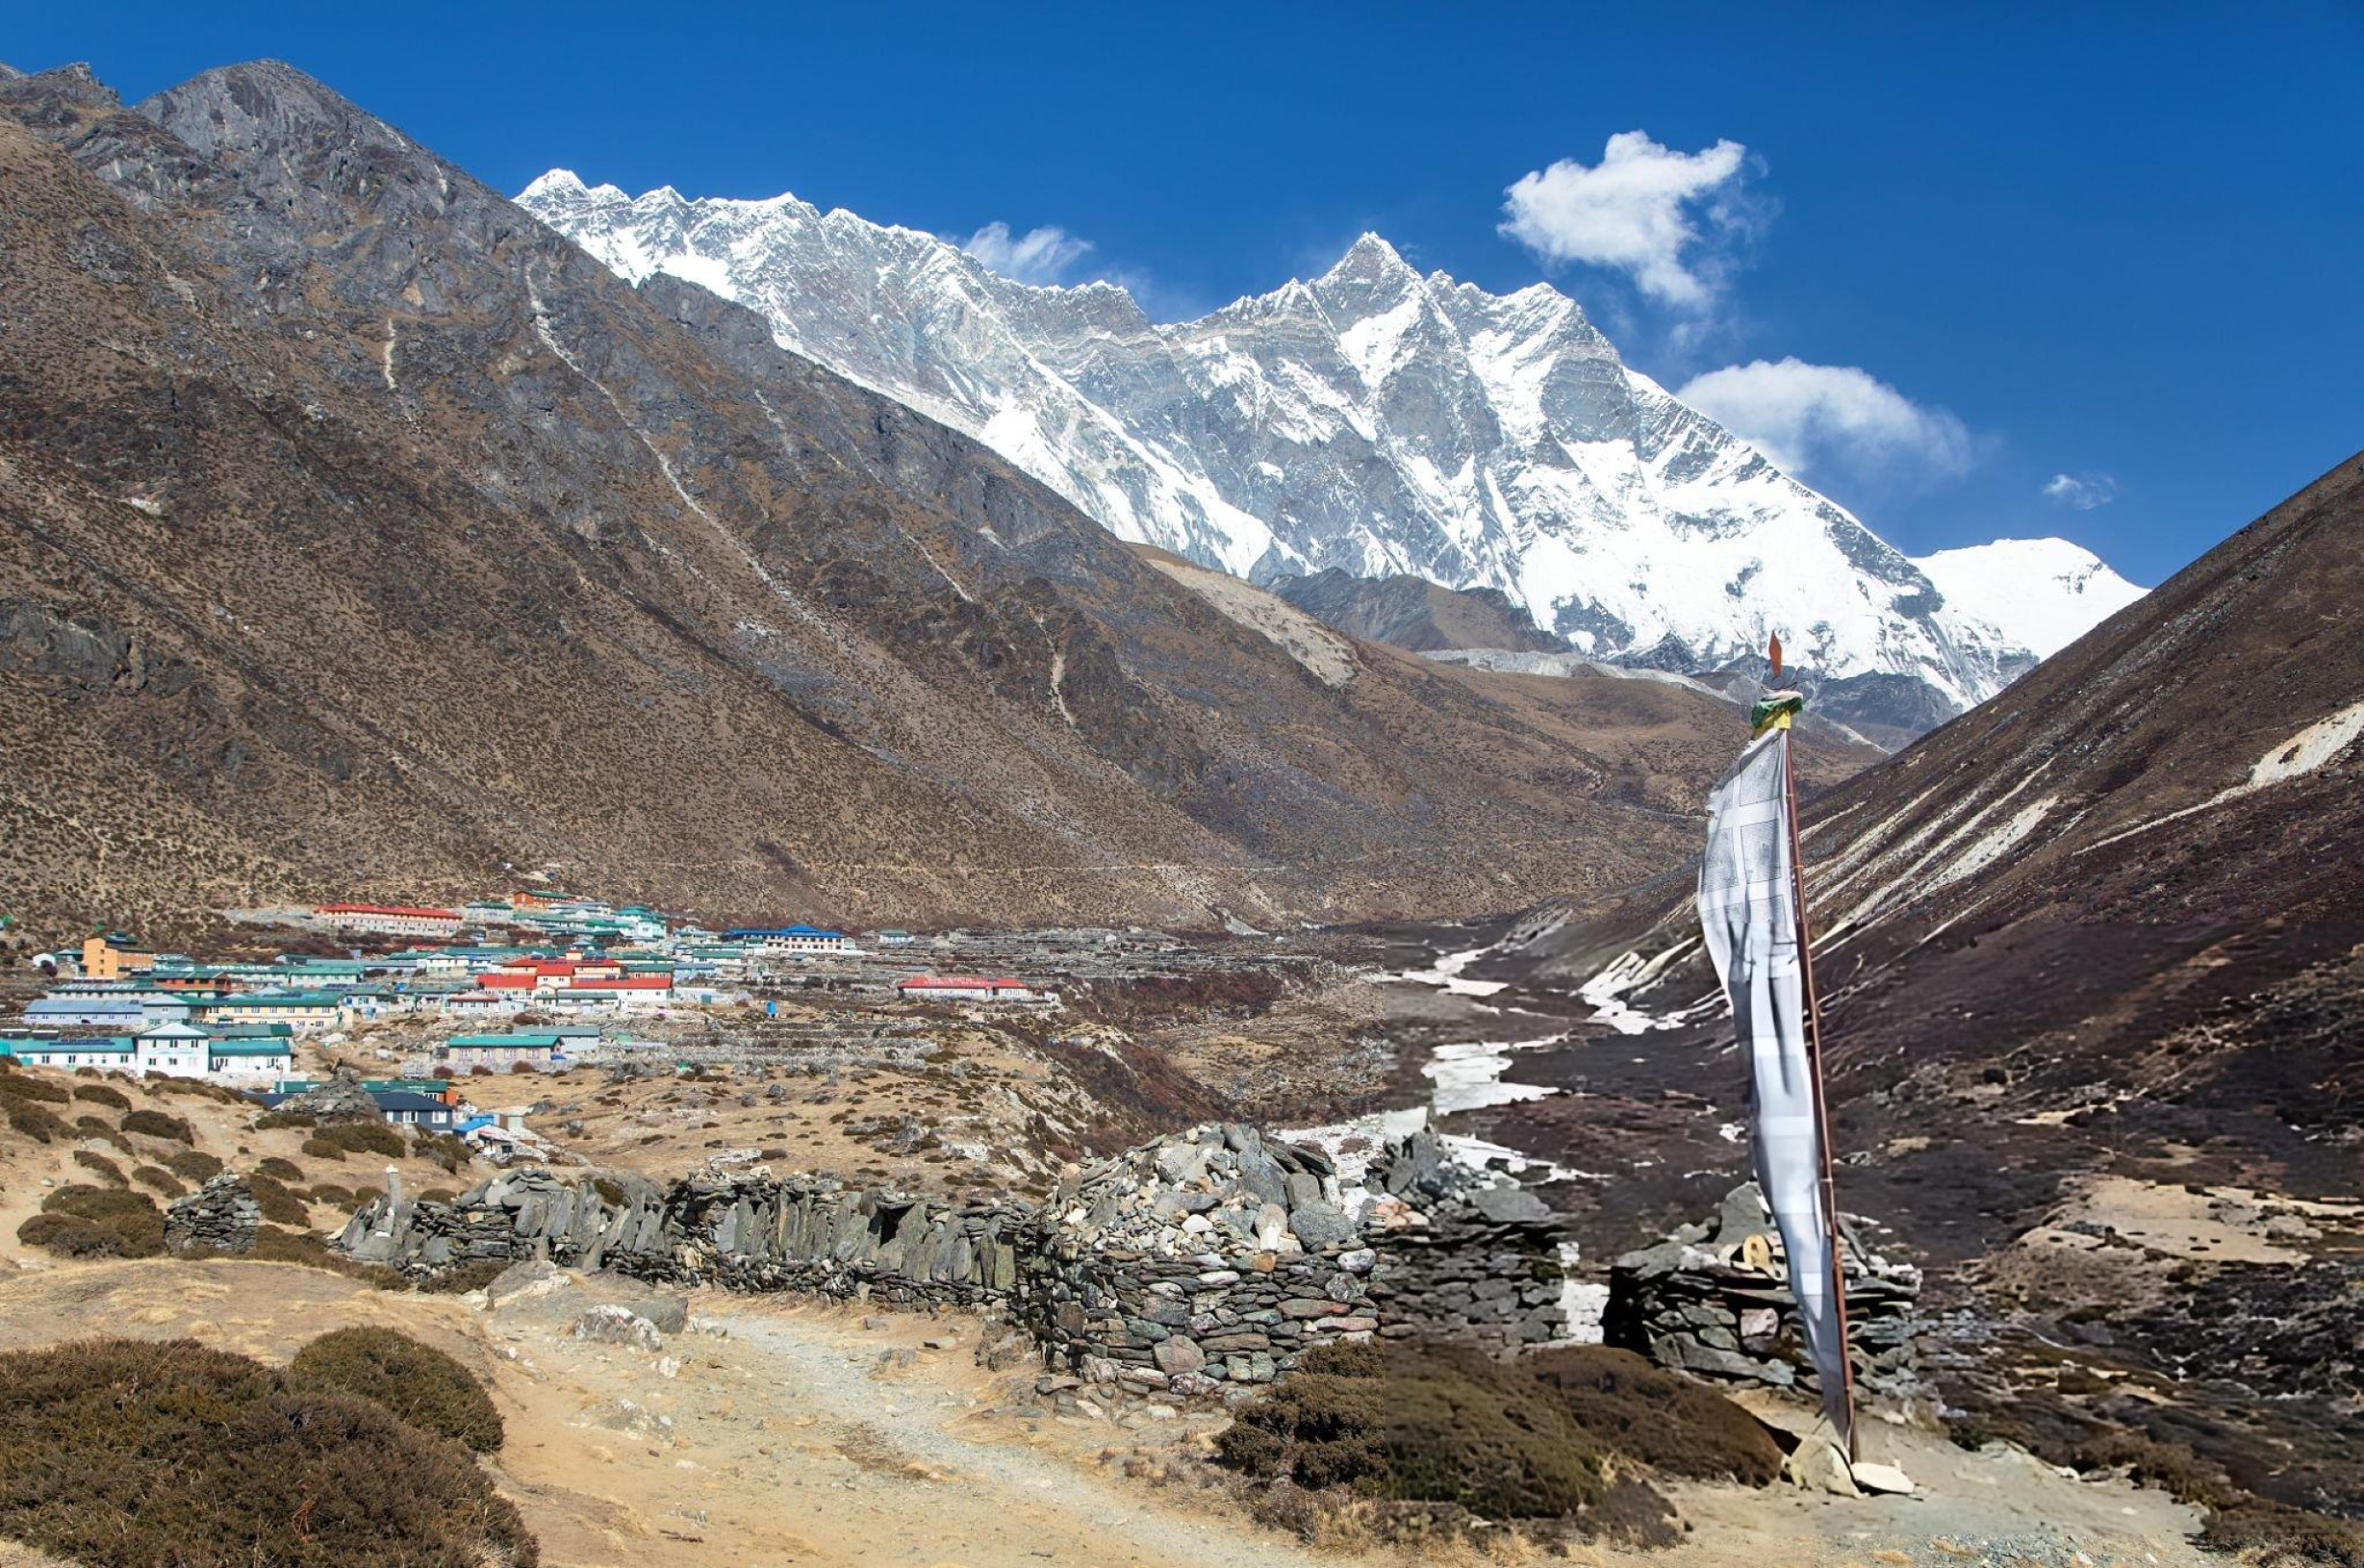
The Classic EBC Trek welcomes over 40,000 trekkers every year to the Khumbu region, and the numbers don’t lie.
This is one of the world’s great trekking routes. Starting with a flight into Lukla (2,860 m), you follow the Dudh Koshi River through a string of legendary Sherpa villages: Phakding, Namche Bazaar, Phortse, Dingboche, etc., before arriving at Gorakshep and stepping onto the moraine of Everest Base Camp (5,340 m / 17,500 ft).
Our 17-day Classic EBC Trek covers approximately 130–140 km round trip, with two planned acclimatisation stops built in (Namche Bazaar and Dingboche). The summit moment (and yes, it feels like a summit) is Kala Patthar at 5,545 m / 18,192 ft, where Everest’s south face fills your entire field of vision roughly 9 km away.
One thing we are honest about that most agencies won’t tell you: the return trip retraces the same path. Same trail, same teahouses, same ridgelines, but in reverse. For some trekkers, that’s a meditative experience. For those seeking novelty, it’s a compelling reason to consider the Gokyo circuit. Worth knowing before you commit.
→ Ready to see the full day-by-day breakdown? View the Classic EBC Trek map here.
The Gokyo Lakes Route (18-20 Days)

This route shares the trail with the classic as far as Namche Bazaar, then turns northwest into the quieter, less-travelled Gokyo Valley. Instead of heading toward Lobuche, you trek through Dole and Machhermo before arriving at Gokyo village. Our 20-day EBC via Gokyo trek is a genuine circuit, without backtracking, no repeated terrain, and new scenery every single day.
The village sits beside one of the most extraordinary landscapes in the Himalayas: a series of six turquoise glacial lakes, each shimmering at over 4,700 m, fed by the Ngozumpa Glacier (Himalaya’s longest glacier), stretching between 4,700 m and 6,000 m.
From Gokyo, you ascend Gokyo Ri (5,357 m), cross the dramatic Cho La Pass (5,420 m), and rejoin the classic EBC trail for the final push to Gorakshep, Base Camp (5,340 m), and Kala Patthar (5,645 m) on this route.
And about those lakes. The Gokyo Lakes aren’t just beautiful, they’re a Ramsar Wetland Site (No. 1692, designated in 2007), making them internationally recognised for their ecological significance. They are also sacred to both Hindus and Buddhists, with Sherpa communities honouring them for generations. Pilgrims still travel here for the annual Janai Purnima festival. You’re not just passing through a scenic valley. You’re walking through a living sacred landscape.
→ Curious about the full 20-day circuit? Explore the EBC via the Gokyo Lakes map here.
EBC or Gokyo: The Numbers That Matter
| Factor | Classic EBC | Everest Gokyo Circuit |
| Duration | 14-17 Days | 18-20 Days |
| Distance | ~130–140 km | ~160–175 km |
| Max Altitude | 5,545 m / 18,192 ft | 5,645 m / 18,520 ft |
| Grading | Difficult | Difficult |
| Crowds | High (40,000+ trekkers/year) | Moderate and noticeably quieter |
| Scenic Diversity | Mountains, glaciers, monasteries | Lakes, glaciers, passes, four 8,000m peaks |
| High Pass | None | Cho La Pass (5,420 m) |
| Glacier Walking | Limited | Extensive (Ngozumpa Glacier) |
| Route Type | Out-and-back | Full circuit without any repeated terrain |
| Group Size | 1–10 people | 2–10 people |
| Best Season | March–May / Oct–Nov | Mid-March–April / Mid-Oct–Nov |
| Best For | First-timers, bucket-list trekkers | Experienced trekkers, photographers, adventurers |
Route Differences Between Classic EBC vs. Gokyo Lakes Trek
Both treks start identically. Here’s where they diverge and how they eventually reunite:
| S.N. | Classic Everest Base Camp Trek Route | Gokyo Lakes and Cho La Pass Route |
| 1 | Arrive Kathmandu | Arrive Kathmandu |
| 2 | Drive → Ramechhap, fly → Lukla, trek → Phakding | Drive → Ramechhap, fly → Lukla, trek → Phakding |
| 3 | Phakding → Namche Bazaar (3,450 m) | Phakding → Namche Bazaar (3,450 m) |
| 4 | Namche acclimatisation | Namche acclimatisation |
| 5 | Namche → Tengboche (3,860 m) | Routes split: Namche → Dole (4,200 m) |
| 6 | Tengboche → Dingboche (4,360 m) | Dole → Machhermo (4,470 m) |
| 7 | Dingboche acclimatisation | Machhermo → Gokyo Lakes (4,790 m) |
| 8 | Dingboche → Lobuche (4,940 m) | Gokyo acclimatisation + Gokyo Ri ascent (5,357 m) |
| 9 | Lobuche → Gorakshep → EBC (5,340 m) | Gokyo → Thangnak (Cho La prep) |
| 10 | Kala Patthar → Pheriche | Cho La Pass crossing (5,420 m) → Dzongla |
| 11 | Pheriche → Namche | Dzongla → Lobuche (4,940 m) |
| 12 | Namche → Lukla | Lobuche → Gorakshep → EBC (5,340 m) |
| 13 | Fly → Ramechhap → Kathmandu | Gorakshep → Kala Patthar (5,645 m) → Pheriche |
| 15 | — | Descent → Namche → Lukla |
| 16 | — | Fly → Ramechhap → Kathmandu |
EBC or Gokyo: What Are You Actually Going to See?
Even if the region may be the same, what you’ll be seeing would be comparatively unique. While both routes are identical up to a certain point, they differ vastly in what they offer to trekkers, particularly in their destinations.
Classic EBC: Intimate, Epic, and Unforgettable
The classic route’s scenery doesn’t hit you all at once. It builds. Rhododendron forests give way to the magnificent Tengboche Monastery (3,860 m) with Ama Dablam (6,856 m) rising impossibly behind it. The trail passes through Phortse village, offering sweeping views of Kusum Kanguru (6,367 m), Thamserku (6,623 m), and Pumori (7,165 m), and gradually strips the landscape down to its raw glacial bones as you approach the Khumbu region.
Then comes Kala Patthar at sunrise.
Standing at 5,545 m, with Everest’s south face roughly 9 km in front of you. Nuptse, Lhotse, and the churning Khumbu Icefall are all visible as well. This is the kind of moment that rewires something in your brain permanently. This is what 40,000 people come for every year. And it delivers.
The Gokyo Circuit: The View That Changes Everything
Here’s the thing about Gokyo Ri. At 5,357 m, it is technically lower than Kala Patthar, but somehow offers what many experienced trekkers, Himalayan guides, and mountaineers describe as the better overall view of Everest.
Why? Because from Gokyo Ri, you see these eight-thousanders simultaneously: Cho Oyu (8,201 m), Mt. Everest (8,848 m), Lhotse (8,516 m), and Makalu (8,481 m). Let’s not forget Cholatse and Taboche, with the turquoise Gokyo Lakes shimmering directly below you and the Ngozumpa Glacier filling the valley between.
Kala Patthar puts you closer to Everest. Gokyo Ri shows you why Everest is the highest mountain in the world.
Comparing Difficulty and Altitude Between EBC & Gokyo
Both treks are graded “Difficult” by Far Out Nepal. Neither requires technical mountaineering skills, but both demand solid fitness, genuine respect for altitude, and a commitment to proper acclimatisation. This is not a weekend hike with a dramatic backdrop. It’s a multi-week high-altitude expedition.
On the Classic EBC, the challenge is sustained altitude accumulation across consecutive days above 4,000 m. The trail is well-established and well-marked, with teahouses spaced at regular intervals. Expect 5–7 hours of walking per day across steep trails, high ridges, and rugged Khumbu terrain. The two planned acclimatisation stops are non-negotiable and built into our itinerary.
On the EBC via Gokyo, the Cho La Pass (5,420 m) is the variable that changes everything. This is a steep, icy crossing with potential glacier walking with crampons. It is not technically difficult, but it demands strong fitness, proper acclimatisation, and ideally some prior high-altitude experience.
It also imposes a seasonal constraint: the Cho La Pass is generally unsafe between mid-December and mid-February due to the accumulation of snow and ice. That’s why our Gokyo trek’s best windows are mid-March to April and mid-October to November.
One counterintuitive advantage of the Gokyo route: the altitude profile through the Gokyo Valley is actually gentler in the early days. Trekking through Dole and Machhermo before reaching the lakes means more cumulative time above 4,000 m, building your altitude resilience before the Cho La and the final push to Kala Patthar.
💡 From Our Sherpa Guides: Never skip your acclimatisation days. Not even if you feel fine; altitude sickness doesn’t always announce itself early.
EBC or Gokyo: Who Should Choose Which Trek?
| Trekker Type | Best Choice | The Honest Reason |
| First-time Himalayan trekker | Classic EBC | Well-marked trail, dense teahouse network, simpler logistics |
| Experienced trekker wanting variety | EBC via Gokyo | True circuit, diverse terrain, the Cho La challenge |
| Photographer/content creator | EBC via Gokyo | Gokyo Ri’s lake-glacier-peak panorama is unmatched anywhere |
| Bucket-list / Everest-obsessed traveller | Classic EBC | Maximum time at Base Camp, closest proximity to Everest |
| Solo trekker craving solitude | EBC via Gokyo | Gokyo Valley trails are dramatically, blissfully quieter |
| Repeat Himalayan trekker | EBC via Gokyo | You’ve done EBC. Gokyo adds entirely new terrain and perspective |
| Short on time (under 18 days) | Classic EBC | The Gokyo circuit requires a minimum of 20 days with us |
Can’t Choose Between EBC or Gokyo? You Don’t Have To.
Here’s the thing nobody tells you at the start of your research: the combined route exists precisely for people who refuse to settle.
The EBC Trek via Gokyo Lakes and Cho La Pass is the most complete trekking experience the Khumbu region offers. In 20 days, you get the sacred Gokyo Lakes, a sunrise on Gokyo Ri with four eight-thousanders in view, the drama of crossing Cho La at 5,420 m, Everest Base Camp (5,340 m), and Kala Patthar (5,645 m), with zero repeated trail. Every single day is new ground, and it’s the route we recommend to any trekker who has the time and the fitness for it.
EBC or Gokyo: Which is better for photography?
Gokyo, without much debate. The combination of turquoise lakes at 4,700–5,000 m, the Ngozumpa Glacier, Gokyo Ri’s multi-peak panorama, and the visual drama of the Cho La crossing provide photographers with a range of shots that the Classic EBC cannot match. Kala Patthar at sunrise is iconic, but Gokyo offers more depth, foreground, and variety across more shooting days.
So, Which One Should You Choose: EBC or Gokyo?
If you have 17 days or this is your first Himalayan trek, the Classic EBC is the ideal route. It is iconic for a reason. Standing at Kala Patthar with Everest in your face is one of those experiences that permanently divides your life into before and after.
If you have 20 days, some altitude under your boots, and you want a trek that keeps surprising you with sacred lakes, glaciers, four eight-thousanders in one place, a high-pass crossing, and zero repeated terrain, the EBC via Gokyo is the answer.
And if you’re sitting there thinking, “I want all of it.“ Well, that’s exactly the right instinct. The combined route was built for you.
Plan your Classic EBC Trek with Far Out Nepal →
Explore the EBC via the Gokyo Lakes circuit with Far Out →
Altitude Sickness: An Overview of Acute Mountain Sickness (AMS)
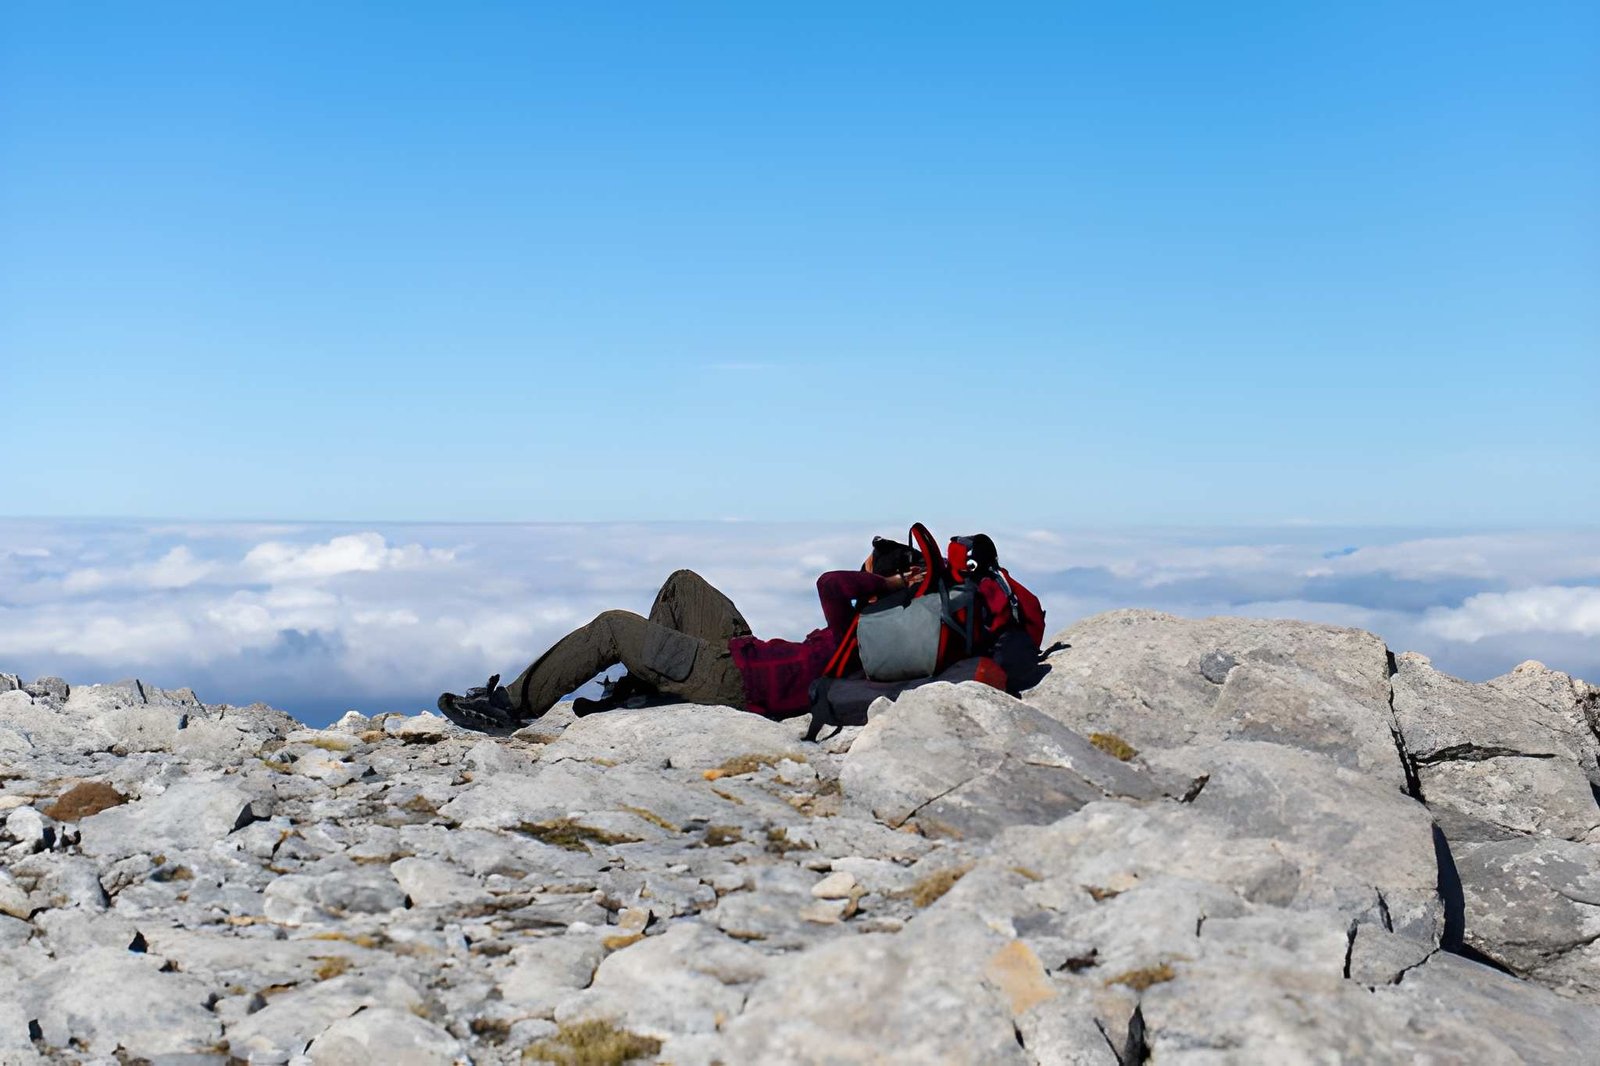
Altitude sickness or Acute Mountain Sickness (AMS) is a physiological response to the decrease in oxygen availability at high elevations, typically occurring above 2,500 m (8,200 ft). It develops when the body ascends faster than it can adapt to the drop in oxygen partial pressure, placing stress on the brain, lungs, and cardiovascular system.
Most trekkers experience some degree of AMS above 3,000 m. On popular Himalayan routes, the risk escalates significantly above 3,500 m and reaches its highest point above 5,000 m, where oxygen availability is roughly 50% of sea level.
AMS is the most common form, but altitude illness also includes two serious, life-threatening conditions: High-Altitude Pulmonary Oedema (HAPE) and High-Altitude Cerebral Oedema (HACE). Both require immediate descent and emergency care.
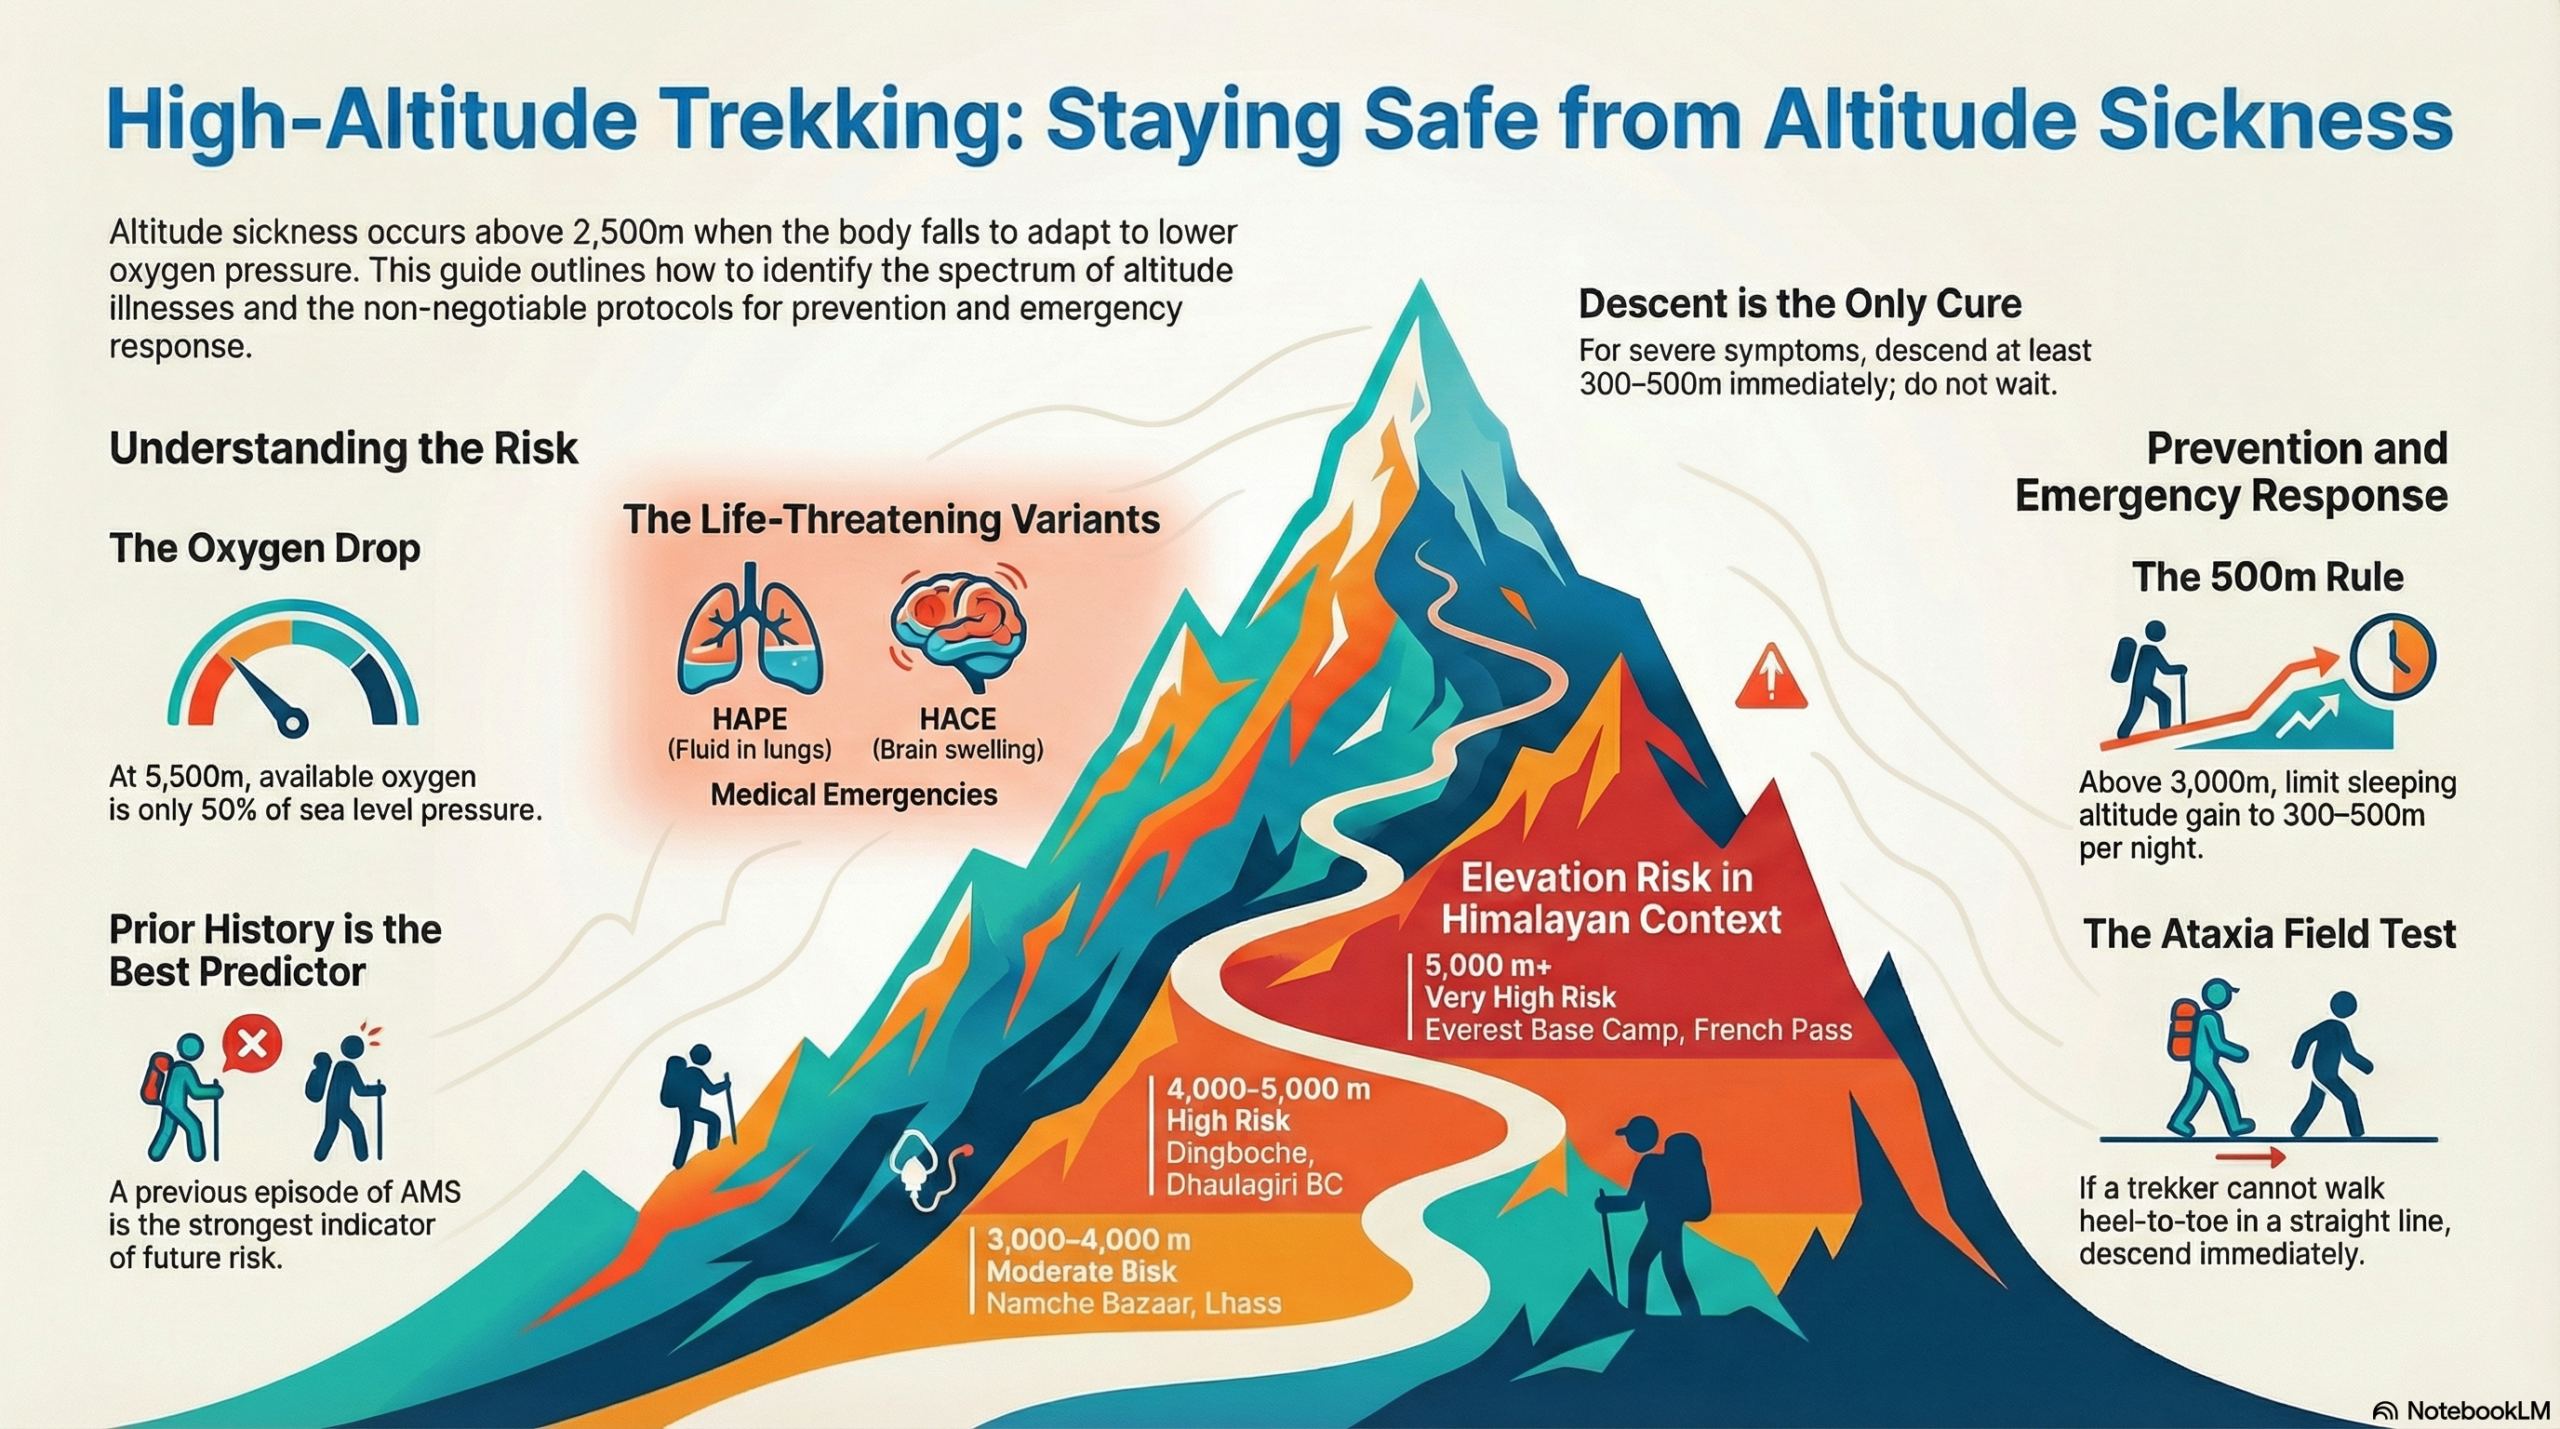
Note: This guide is intended as general educational content for trekkers planning high-altitude travel. It is not medical advice. Individual responses to altitude vary significantly, and nothing here should substitute for professional guidance from a qualified physician or certified mountain guide. If you or someone in your group is experiencing severe symptoms at altitude, descend immediately and seek professional help.
Why Does Altitude Sickness Happen?
As elevation increases, the atmospheric (barometric) pressure drops. Lower pressure means fewer oxygen molecules per breath, even though the percentage of oxygen in the air remains constant at 21%. At 3,500 m, available oxygen is approximately 65% of sea level. At 5,500 m, it falls to around 50%.
When the body ascends rapidly, it cannot compensate quickly enough. The physiological responses, like increased breathing rate, elevated heart rate, changes in blood chemistry, etc., take from days to weeks for stabilisation. If you ascend faster than this window allows, then AMS follows.
Individual Risk Factors
There is no reliable predictor of who will develop altitude sickness. Physical fitness offers minimal protection. Even the elite athletes are just as susceptible as casual trekkers. Key risk factors include:
- Rapid ascent rate above 3,000 m
- Sleeping at a new high altitude without adequate acclimatisation days
- Dehydration and overexertion during ascent
- Residence at or near sea level
- Genetic susceptibility (not yet predictable through standard testing)
- Age: Children and young adults may be at slightly higher risk in some studies, though the effect largely disappears when the ascent rate is controlled for
Altitude Risk Bands in the Himalayan Context
| Elevation | Risk Level | Reference Points |
| Below 2,500 m | Minimal | Kathmandu (1,400 m), Pokhara (820 m), Paro (2,200 m) |
| 2,500–3,000 m | Low–Mild | Lukla (2,860 m), Shana/Bhutan trail start |
| 3,000–4,000 m | Moderate | Namche Bazaar (3,440 m), Lhasa (3,656 m), Jangothang (4,080 m) |
| 4,000–5,000 m | High | Dingboche (4,360 m), Dhaulagiri BC (4,740 m), Namtso Lake (4,718 m) |
| 5,000 m+ | Very High | EBC (5,364 m), Kala Patthar (5,545 m), French Pass (5,360 m), Rinchen Zoe La (5,320 m) |
How AMS Risk Compounds
No single factor determines whether you will develop altitude sickness. The variables that matter most are your prior history with AMS, how fast you ascend, and the altitude you are targeting. A trekker with no prior AMS history ascending gradually to 4,000 m sits in a fundamentally different risk category than someone with a previous AMS episode pushing rapidly above 5,000 m.
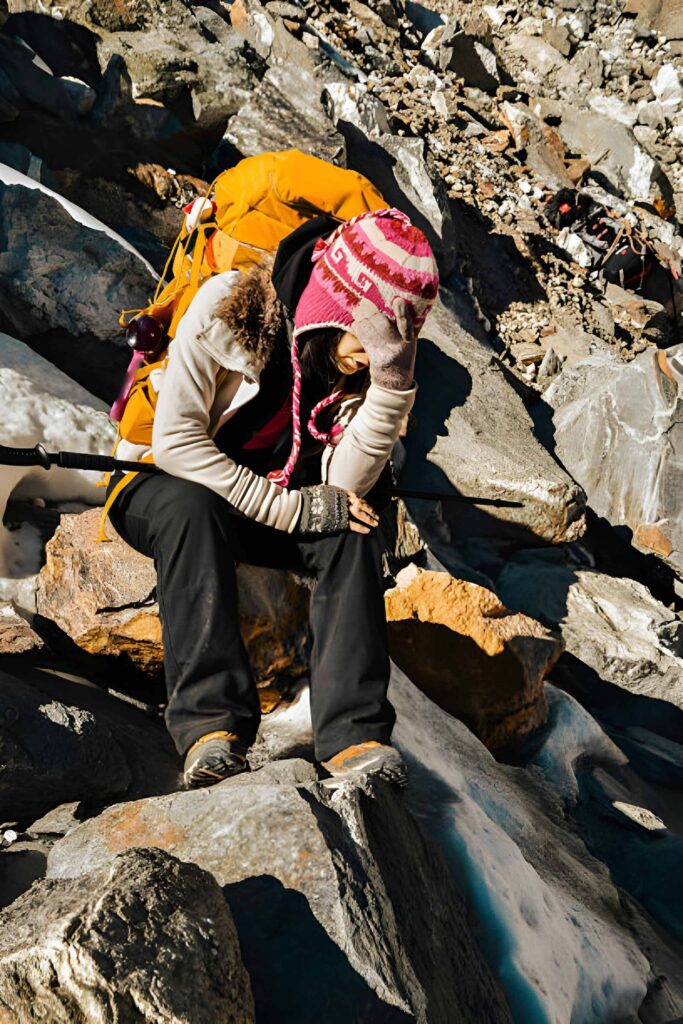
These three variables are the foundation, but additional factors can push any row up one level: dehydration, alcohol consumption in the first 48–72 hours at a new elevation, overexertion on ascent days, and arriving at altitude with a pre-existing respiratory illness, all of which meaningfully increase risk beyond what the table reflects.
One finding worth noting: Prior AMS history is the strongest individual predictor by a significant margin. If you have experienced AMS before, assume you will experience it again unless your ascent profile is carefully managed. A previous episode does not confer any immunity or tolerance.
Types of High-Altitude Illness
Altitude illness exists on a spectrum. AMS is common and manageable with rest. HAPE and HACE are critical medical emergencies. Understanding their difference is the most critical safety knowledge for any high-altitude trekker.
Acute Mountain Sickness (AMS)
AMS is the most prevalent form, affecting an estimated 25–50% of trekkers above 3,500 m and up to 75% at elevations above 5,000 m on trekking routes, with rates climbing higher on rapid, unmanaged ascent profiles. It typically develops within 6–12 hours of reaching a new altitude. The defining feature is a headache, combined with at least one other symptom such as fatigue, nausea, or dizziness. AMS is graded using the Lake Louise Score (LLS), where a score of 3 or above (with headache present) indicates AMS. Moderate-to-severe scores are a clear signal to stop ascending.
High-Altitude Pulmonary Edema (HAPE)
HAPE involves fluid accumulation in the lungs and is the leading cause of altitude-related death among trekkers. It most often develops 2–4 days after arriving at altitude, more commonly on the second night at a given elevation than the first. Early signs include reduced exercise tolerance and a dry cough. As it progresses, breathlessness at rest and a productive cough with pink or frothy sputum develop. HAPE can deteriorate within hours. The occurrence is estimated at 1–6% of high-altitude travellers, depending on ascent rate and elevation profile.
HAPE is a medical emergency. If breathlessness occurs at rest or a persistent cough develops with pink or frothy sputum, immediate descent is required. Do not wait further.
High-Altitude Cerebral Edema (HACE)
HACE is the most severe form of altitude illness, involving swelling of the brain. It typically follows severe, untreated AMS. The hallmark symptom is ataxia: the loss of coordination or inability to walk a straight line. Confusion, altered consciousness, and severe headache unresponsive to pain relief are warning signs. HACE can progress to coma within 24 hours.
Incidence is estimated at less than 1% of high-altitude travellers, but mortality is high without rapid descent.
HACE is a life-threatening emergency. Any trekker showing confusion, extreme drowsiness, or loss of coordination at altitude must descend immediately. This is not a condition to monitor, but an emergency to act on.
| Feature | AMS | HAPE | HACE |
| Primary Organ | Brain/Systemic (Mild) | Lungs | Brain (Severe) |
| Severity | Common; manageable with rest | Emergency. The leading cause of death | Emergency; most severe form |
| Defining Sign | Headache + Nausea/Fatigue | Breathlessness at rest & pink/frothy spit | Ataxia (loss of coordination) & confusion |
| Urgency | Stop ascent; rest | Immediate descent is mandatory | Immediate descent is mandatory |
Symptoms of Altitude Sickness
Symptoms range from mild discomfort to a life-threatening emergency. Recognising where on this spectrum a person sits is the most important safety skill for any high-altitude trekker.
Mild AMS
Symptoms typically appear 6–12 hours after reaching altitude and may resolve with rest at the same elevation:
- Headache (dull or throbbing, often worse at night, defining indication)
- Fatigue and weakness
- Reduced appetite
- Difficulty sleeping, including irregular breathing during sleep
- Mild dizziness
Moderate AMS
If mild symptoms persist or worsen after 24 hours, or if the following develop, do not ascend further:
- Worsening headache not relieved by standard pain relief
- Nausea and vomiting
- Increasing fatigue and weakness
- Reduced urine output
- Shortness of breath on mild exertion
Severe AMS / Early HAPE or HACE
These are emergency warning signs. The trekker should not be left alone, and descent should begin immediately:
- Breathlessness at rest or with minimal movement
- Persistent dry or wet cough, especially with pink or frothy sputum
- Loss of coordination and inability to walk in a straight line (ataxia)
- Confusion, disorientation, or unusual behaviour
- Severe headache unresponsive to medication
- Extreme fatigue. Patient is unable to stand without assistance
Field test for ataxia: Ask the trekker to walk heel-to-toe in a straight line. If they cannot do this, treat it as a severe symptom and arrange descent.
How to Prevent Altitude Sickness: Overview
The single most effective prevention is controlled, gradual ascent. No supplement, food, or preparation can replace the body’s need for time to acclimatise. The following principles apply across all high-altitude treks:
- Ascend gradually. Above 3,000 m, limit sleeping altitude gain to 300–500 m per night. This is the most consistently supported guideline in wilderness medicine.
- Climb high, sleep low. Day hikes to higher elevations, followed by descending to sleep at lower altitudes, accelerate acclimatisation. This principle is built into most well-designed Himalayan itineraries.
- Build in acclimatisation days. Rest days at key elevations, like Namche Bazaar (3,440 m) and Dingboche (4,360 m) on the EBC route, are not optional padding. Skipping them significantly increases AMS risk.
- Stay hydrated. Aim for 3–4 litres of water per day at altitude. Dehydration worsens AMS symptoms and is common due to increased respiratory water loss in dry mountain air.
- Avoid alcohol and sedatives. Both suppress respiratory drive during sleep, impairing the body’s natural ventilatory response to altitude. This effect is most significant in the first 48–72 hours at a new elevation.
- Do not ascend with symptoms. If any AMS symptoms are present, rest at the current altitude until they fully resolve. This rule applies regardless of itinerary pressures.
For a full prevention guide, including acclimatisation schedules, training recommendations, and the role of medications, see our complete altitude sickness prevention guide.
Treatment of Altitude Sickness
Treatment depends on severity. The underlying principle across all levels is the same: do not ascend until symptoms resolve, and descend if they worsen or fail to improve.
Mild AMS: Rest at the current altitude. Do not ascend. Most mild AMS resolves within 12–48 hours with adequate rest and hydration. Ibuprofen (commonly used at 400 mg) has demonstrated efficacy for headache relief in clinical studies but does not treat the underlying cause.
Moderate AMS: Stop all ascent. If symptoms do not improve after 24 hours of rest, descend 300–500 m. Even a modest descent often produces rapid symptom relief. Supplemental oxygen, where available, can provide temporary relief.
Severe AMS, HAPE, or HACE: Descent is the only definitive treatment. There is no alternative. Descend immediately (at minimum 300–500 m), more if logistics allow
- Do not wait for morning or better weather if the trekker’s condition is deteriorating
- Supplemental oxygen reduces symptoms during descent but does not replace descent
- Portable hyperbaric chambers (e.g., Gamow bags) can simulate descent in emergencies and are carried by rescue teams on major Himalayan routes
Do not self-medicate based on information in this guide. Always consult a physician before your trek.
Medication options, including acetazolamide (Diamox) and dexamethasone, are covered in detail in our medication guide.
Natural Remedies: What the Evidence Says
Various foods and supplements are cited as altitude sickness aids, particularly in Himalayan and Andean cultures. The evidence for most is limited, and none replace acclimatisation.
- Ginger: some evidence for reducing nausea associated with AMS, but no demonstrated effect on core AMS progression
- Garlic: traditional use in Himalayan communities; no robust clinical evidence for altitude illness prevention
- High-carbohydrate diet: Carbohydrates require less oxygen to metabolise than fats or proteins, which may provide a marginal support for energy production at altitude. The effect is modest but supported by general physiology.
- Coca leaves / tea: widely used in South American high-altitude communities; evidence is anecdotal, and use is culturally and legally context-specific
Hydration, adequate sleep, and a conservative ascent profile remain the only interventions with consistent evidence.
Helicopter Evacuation Considerations
On major trekking routes in Nepal, helicopter evacuation is available in clear weather conditions. However:
- Flights depend on visibility and wind
- Patients may need to be moved to a landing zone
- Insurance verification or payment guarantee is required before dispatch
Remote circuits such as Manaslu or Dhaulagiri may involve staged evacuation due to terrain and weather constraints.
Evacuation is a logistical process, not an instant solution. Early decision-making significantly improves outcomes.
The Safety Hierarchy
Altitude emergency management follows a clear progression:
- Stop ascent
- Rest and reassess
- Descend if symptoms persist
- Evacuate if severe symptoms develop
When uncertain, descend. Altitude illness responds to elevation loss. Delay increases risk. A well-planned trek with built-in acclimatisation, experienced leadership, and a defined evacuation protocol reduces severe altitude complications from likely to unlikely.
Altitude Sickness on Popular Himalayan Treks
Nepal’s, Tibet’s, and Bhutan’s major trekking routes all pass through significant altitude bands. Risk profiles differ by route based on maximum elevation, rate of ascent, and availability of acclimatisation days.
| Trek or Region | Maximum Elevation (m) | Maximum Sleeping Altitude (m) | AMS Risk Level | Critical Acclimatisation Points | Key High-Altitude points | Route Specific Challenges |
| Everest Base Camp (Nepal) | 5,545 m | 5,364 m | Very High | Namche Bazaar (3,440 m), Dingboche (4,360 m) | Kala Patthar (5,545 m), Everest View Hotel (3,880 m) |
|
| Dhaulagiri Circuit (Nepal) | 5,360 m | 5,050 m | Very High | Italian Base Camp (3,660 m), Glacier Camp (4,200 m), Dhaulagiri Base Camp (4,740 m) | French Pass (5,360 m), Dhampus Pass (5,240 m) |
|
| Snowman Trek (Bhutan) | 5,320 m | Above 4,000 m | Very High / Compounding | Not in source | Rinchen Zoe La (5,320 m) |
|
| Lhasa and Beyond (Tibet) | 5,200 m | 5,200 m | Very High | Lhasa (3,656 m) | Everest North Base Camp (5,200 m), Rongbuk Monastery (5,100 m) |
|
| Manaslu Circuit (Nepal) | 5,106 m | 5,100 m | High to Very High | Dharmasala (4,460 m) | Larkya La Pass (5,106 m) |
|
| Langtang Valley (Nepal) | 4,984 m | 3,870 m | Moderate to High | Kyanjin Gompa (3,870 m) | Tserko Ri viewpoint (4,984 m) |
|
| Jomolhari Trek (Bhutan) | 4,930 m | 4,080 m | Moderate to High | Jangothang (4,080 m) | Yalila Pass (4,930 m) |
|
| Annapurna Base Camp (Nepal) | 4,130 m | 4,130 m | Moderate to High | Chhomrong (2,170 m) | Annapurna Base Camp (4,130 m) |
|
In Conclusion…
Altitude sickness is the single most important health risk on any high-altitude trek. Thankfully, it is also highly manageable with the right knowledge and pacing. Understanding the symptoms, respecting gradual acclimatization, and responding early to warning signs are what allow trekkers to safely reach destinations like Everest Base Camp, Annapurna Base Camp, and beyond. The mountains reward patience, not speed. When you prioritize acclimatization over ambition, you dramatically increase both your safety and your chances of success.
Planning a high-altitude trek?
Explore our carefully designed itineraries with built-in acclimatisation days and expert guidance to help you trek safely and confidently👉 Check out the Trips
Training for Everest Base Camp Trek: The Complete Preparation Guide
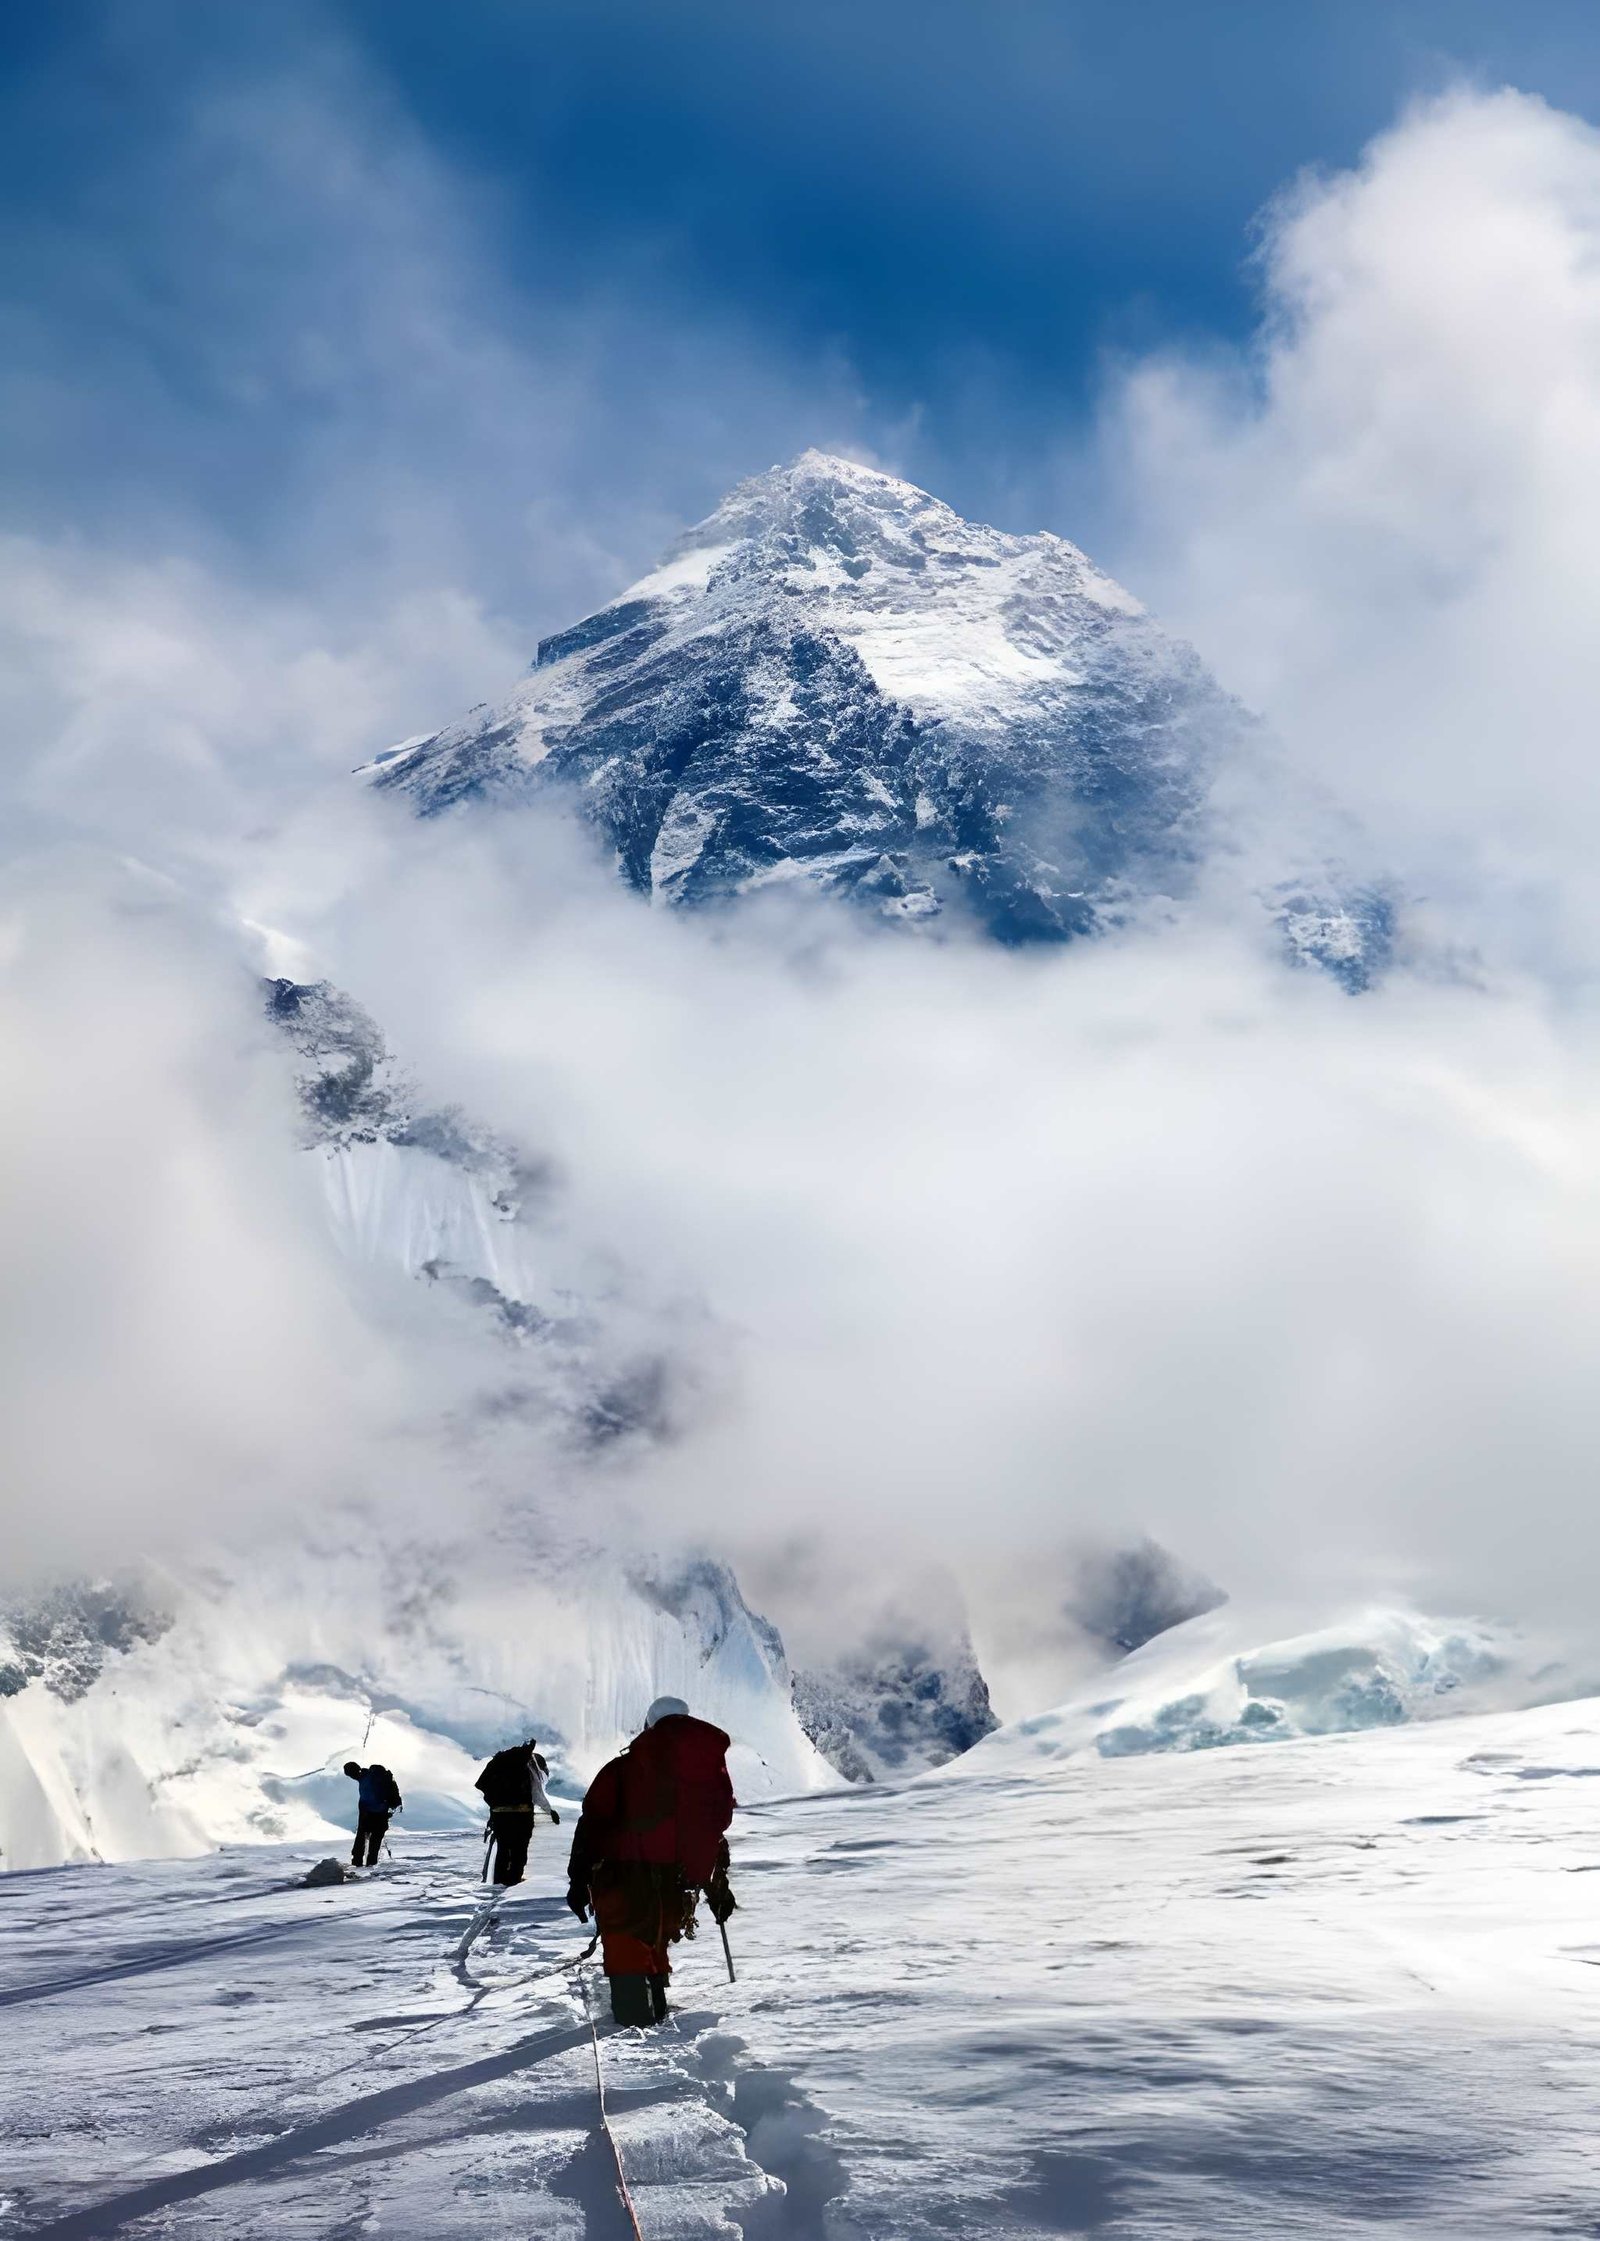
The Dream Is Real; But So Is the Climb
Standing at the foot of the world’s highest peak is one of those experiences that stays with you forever. The air is thin, the prayer flags are snapping in the wind, and the scale of the Himalayas is universal in a way no photograph can fully capture. But here’s the truth: reaching Everest Base Camp at 5,340m is not simply a matter of booking a flight to Lukla and showing up enthusiastic.
The trek covers roughly 130–140 km of rugged Himalayan terrain, with 5–8 hours of walking per day at altitudes that will genuinely test both body and mind. The encouraging reality? Most trekkers who adequately prepare complete the trek successfully. Those who fail typically underestimate the preparation required or attempt the trek without proper conditioning.
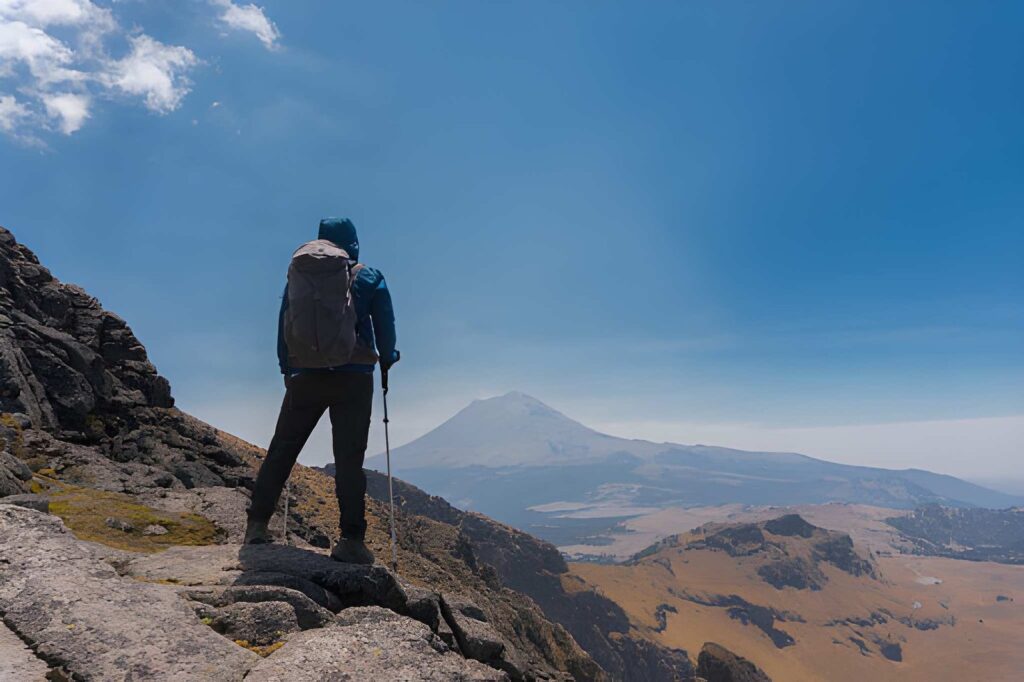
This guide gives you everything: a 12-week training plan, an easy-to-understand breakdown of what actually helps, a weight training guide built for trekking, altitude awareness, gear conditioning, and mental prep strategies. Consider this your complete preparation playbook.
Already convinced? Explore Far Out Nepal’s Classic EBC Trek. You can then come back and start training.
How Hard Is the Everest Base Camp Trek, Really?
The EBC trek is rated difficult, but not for the reasons most people assume. There’s no technical climbing, no rope work, no crampons. It’s hard because of three compounding factors: sustained daily effort over 13+ trekking days, significant altitude gain, and cumulative physical and psychological fatigue.
| Factor | What It Means on Trail | How Training Addresses It |
| Max Altitude | 5,545m at Kala Patthar (with variations at the Gokyo Route). This is roughly 50-55% of sea-level oxygen | Aerobic base training, acclimatisation schedule |
| Daily Trekking | 5–8 hours on rocky, uneven trail each day | Long hikes, back-to-back training days |
| Total Distance | ~130–140 km round trip | Progressive weekly mileage build-up |
| Terrain | Rocky, steep, often icy in higher sections | Weighted hikes, stair climbing, trail running |
| Technical Skill | None required. This is trekking, not peak climbing | Focus entirely on endurance and strength |
| Duration | 13+ days of consecutive trekking effort | Multi-week progressive training, not single-session fitness |
The altitude is the wildcard. At 5,000m+, your body works roughly 40% harder than at sea level to deliver oxygen to your muscles. This means that even well-conditioned trekkers, such as runners, swimmers, and footballers, can struggle without altitude-specific preparation. Fitness helps enormously. But it doesn’t make you immune.
Cardio Training for EBC: What Each Activity Gives You
Not all cardio is equal when preparing for the Everest Base Camp trek. Different sports build different physiological qualities, where some map far more directly to the demands of the trail than others. Here’s an honest, sport-by-sport breakdown.
| Sport | Aerobic Base | Leg Strength | Downhill Control | Pack Load Simulation | Trek Specificity | Verdict |
| Hiking (loaded) | Very High | High | Very High | Very High | Very High | The gold standard. Non-negotiable. |
| Stair Climbing | High | High | Low | Moderate | High | Best gym substitute for the trail. |
| Running (trail) | Very High | Moderate | Moderate | Low | Moderate | Excellent aerobic base builder. |
| Cycling | Very High | Moderate | Very Low | Very Low | Moderate | Great base builder, low joint stress. |
| Swimming | High | Low | Very Low | Very Low | Low | Excellent recovery and lung training. |
| Football/Soccer | Moderate | Moderate | Low | Very Low | Low | Good base activity, not sufficient alone. |
| Basketball / Tennis | Moderate | Moderate | Low | Very Low | Low | Useful for general conditioning only. |
| Yoga / Pilates | Low | Moderate | Very Low | Very Low | Low | Excellent supplement. Never primary training. |
Hiking is irreplaceable. Loaded hiking builds leg strength, balance, cardiovascular endurance, and mental tolerance for long days simultaneously. Start flat and short; build to steep and long over 12 weeks.
Stair climbing is the most underrated EBC tool. It replicates the rhythmic, sustained uphill effort of the trail better than any other gym machine. Thirty to 45 minutes daily over 8–10 weeks is what trekkers consistently credit for getting them to Base Camp.
Cycling is the best low-impact aerobic complement to hiking. It helps build the cardiovascular base that sustains you at altitude without the joint stress of running. Long rides of 90+ minutes in Zone 2 heart rate are the target.
Swimming builds exceptional lung capacity and diaphragmatic breathing control. These qualities pay real dividends at altitude when every breath matters. It won’t build your hiking legs, but it makes your lungs and heart significantly more efficient.
Football and other sports are more useful than most trekkers realise. A 90-minute football match covers 10–13 km of varied-intensity movement and builds leg power, cardiovascular capacity, and mental toughness. The limitation is its interval nature. Basically, it doesn’t build the long, sustained aerobic base EBC demands. Use it as your base activity and supplement with hiking and stair climbing.
The ideal cardio strategy: No single sport is sufficient on its own. The most effective preparation combines hiking (specificity), cycling or swimming (aerobic base with low injury risk), and stair climbing (trail simulation). If you play a sport like football or basketball, keep it, and build your specific EBC training around it.
Weight Training for the EBC Trek: What to Lift and Why
Weight training is essential, not optional. The trail demands sustained leg power for uphill climbs, core stability for uneven terrain, and shoulder endurance for carrying a loaded pack hour after hour.
Key Muscle Groups for EBC
| Muscle Group | Why It Matters on EBC | Primary Exercises | Priority |
| Quads and Glutes | Power for uphill climbs: the dominant trail movement. | Squats, step-ups, lunges, leg press | Critical |
| Hamstrings | Brake control on steep descents. Underrated by most trekkers | Romanian deadlifts, hamstring curls, Nordic curls | Critical |
| Calves | Absorb impact on rocky terrain across 8+ hours per day | Weighted calf raises, single-leg raises | High |
| Core (deep stabilisers) | Stabilise spine under pack weight on uneven ground | Planks, dead bugs, bird-dogs, pallof press | Critical |
| Glute Med / Hip Abductors | Lateral knee stability on uneven, rocky trail | Lateral band walks, clamshells, single-leg squats | High |
| Upper Back and Traps | Carry pack weight without fatigue or postural collapse | Rows, face pulls, shrugs | Moderate |
| Shoulders | Support pack straps over multi-hour trekking days | Overhead press, lateral raises, rear delt flys | Moderate |
| Ankles (stability) | Prevent ankle rolls on boulder-field terrain above 4,000m | Single-leg balance, Bosu ball, ankle circles | Moderate |
For structure, two to three strength sessions per week is the sweet spot. A sample week in the peak phase:-

- Monday: legs (squats, RDL, step-ups, calf raises)
- Wednesday: full body (rows, press, lunges, core)
- Saturday: long loaded hike. Rest or do yoga on the remaining days.
Your 12-Week EBC Training Plan
This plan integrates cardio, weight training, and hiking progressively across three phases: Build (Weeks 1–4), Peak (Weeks 5–10), and Taper (Weeks 11–12).
| Week | Phase | Cardio Focus | Weight Training | Hiking / Practice | Pack Weight | Rest Days |
| 1–2 | Build | 30 min jog or cycle x3/week | 2x full body: squats, lunges, rows, plank, calf raises | 1 flat day hike. You need to focus on duration, not pace | Day pack only | 2 |
| 3–4 | Build | 45 min run and stairs x3/week | 2x split: legs day (squats, RDL, step-ups) and upper/core day (rows, press, dead bugs) | 1–2 hikes with mild incline | 5–7 kg | 2 |
| 5–6 | Peak | 60 min trail run or stair climb x3/week | 3x split: heavy legs, upper back and shoulder, core and stability | 1 long hike (600m+ elevation gain) | 7–10 kg | 1–2 |
| 7–8 | Peak | 75 min trail run or stair master | 3x split: Bulgarian split squats, Nordic curls, weighted rows, loaded planks | 1 weekend multi-hour hike | 10–12 kg | 1–2 |
| 9–10 | Peak | Combo: run, stair, and short hike on the same day | 3x; maintain loads from Weeks 7–8, no new PRs | 2-day back-to-back hikes (simulate consecutive trek days) | 12–14 kg | 1 |
| 11–12 | Taper | Lighter cardio. 30–40 min, lower intensity | 2x maintenance only, reduce loads by 30%, full range of motion | 1 final long hike at trek pace | Trek pack weight | 2–3 |
Fitness level guide: Beginners start at Week 1. Regularly active individuals (3+ workouts per week) begin at Week 3. Advanced athletes can compress Weeks 1–6 into four weeks and move to the peak phase earlier.
Do not train to failure in the 3 weeks before departure. The goal in the taper phase is maintenance, not progress. Arriving at Lukla with sore muscles from a heavy leg day two days prior is a preventable mistake that undermines months of preparation.
Altitude and Acclimatisation: What You Need to Know
Altitude is the one variable that fitness alone cannot overcome. Above 3,000m, oxygen levels drop significantly, and your body adapts over days, not hours. The golden rule is simple: climb high, sleep low. Ascend during the day; descend to sleep at a lower elevation. This stimulates adaptation without triggering sickness, and it’s why a well-structured itinerary builds dedicated rest days into the schedule.
Watch for AMS symptoms above 3,500m. Common symptoms include headache, nausea, fatigue, and disrupted sleep. If they appear, stop ascending. Drink 3–4 litres of water daily. You should also consult your doctor about Diamox at least 4–6 weeks before departure.
Gear, Nutrition and Mental Prep
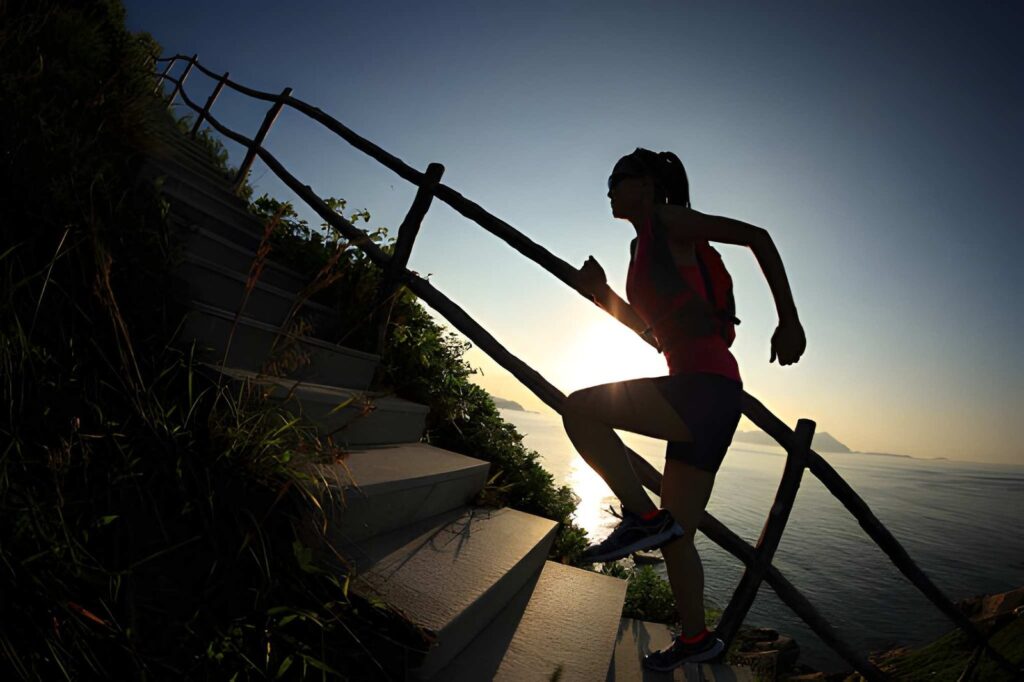
- Break in your boots 8–10 weeks out. New boots at altitude after six hours on a rocky trail is a reliable recipe for blisters that jeopardise your entire trek. Wear the same sock combination you’ll use on the trail (people choose the merino liner under a thicker hiking sock).
- Train with your actual pack, loaded progressively from 5 kg to 12–14 kg. This builds the specific endurance gym exercises that can’t be replicated and reveals gear problems before the trip.
- Eat consistently during training, even when not hungry. Many trekkers lose their appetite above 4,000m. Dal bhat is the trail staple: carb-heavy, calorie-dense, and available everywhere with unlimited refills. Pack trail mix, energy bars, and dried fruit as pocket fuel.
- Pace like a Sherpa, not a tourist. The most common first-timer mistake is starting too fast. Slow your pace to where you can hold a full conversation; that is the sustainable speed.
Mental Preparation: The Training You Should Not Miss Out
The mind quits before the body does. This is an observable pattern on the EBC trail, not a motivational cliché. By Day 9 or 10, when the altitude is disturbing your sleep, your legs carry accumulated weeks of fatigue, and the trail keeps ascending regardless, the gap between those who reach Base Camp and those who turn back is almost entirely psychological.
Mental resilience is trainable. Here is how.
Pacing practice: On long training hikes, deliberately resist the urge to push hard. Practice the Sherpa pace, which is slow, consistent, and sustainable enough to hold a full conversation. Sherpas overtake trekkers effortlessly because they have mastered energy conservation, not because they are superhuman.
Diaphragmatic breathing: Belly breathing is more oxygen-efficient than shallow chest breathing, which makes a meaningful difference at altitude. Practice it consciously during cardio training until it becomes automatic.
Mental chunking: On hard days, do not think about how far Base Camp is. Think about the next teahouse. Then the next village. Break the journey into achievable segments. It is deceptively simple and genuinely effective.
Mindfulness practice: Ten minutes of daily meditation builds the focus and equanimity that long, hard trekking days demand. The ability to stay present and non-reactive under physical duress is a tangible advantage at altitude.
Visualisation: Spend a few minutes each week imagining standing at Kala Patthar. Imagine the view of Everest at dawn and the feeling of finishing. This is sports psychology, not mysticism, and it measurably improves performance under stress.
Common Mistakes to Avoid During Training
- Skipping long hikes: Gym fitness and trail fitness are not the same thing
- Neglecting hamstrings and calves: The descent from Kala Patthar will expose this immediately
- Overtraining in the final two weeks: Arrive rested, not depleted
- Underestimating altitude: AMS doesn’t respect fitness levels; follow the acclimatisation schedule
- Testing new gear on the trail: Everything must be worn and proven during training
- Skipping rest days: Adaptation happens during recovery, not during effort
Tips from Experienced EBC Trekkers (Across Social Platforms)
“The stair master saved my trek.” Multiple experienced trekkers report that 30–45 minutes on the stair master daily (over 8–10 weeks) was the most effective single gym exercise for EBC prep. It replicates the trail’s sustained, rhythmic uphill effort better than anything else.
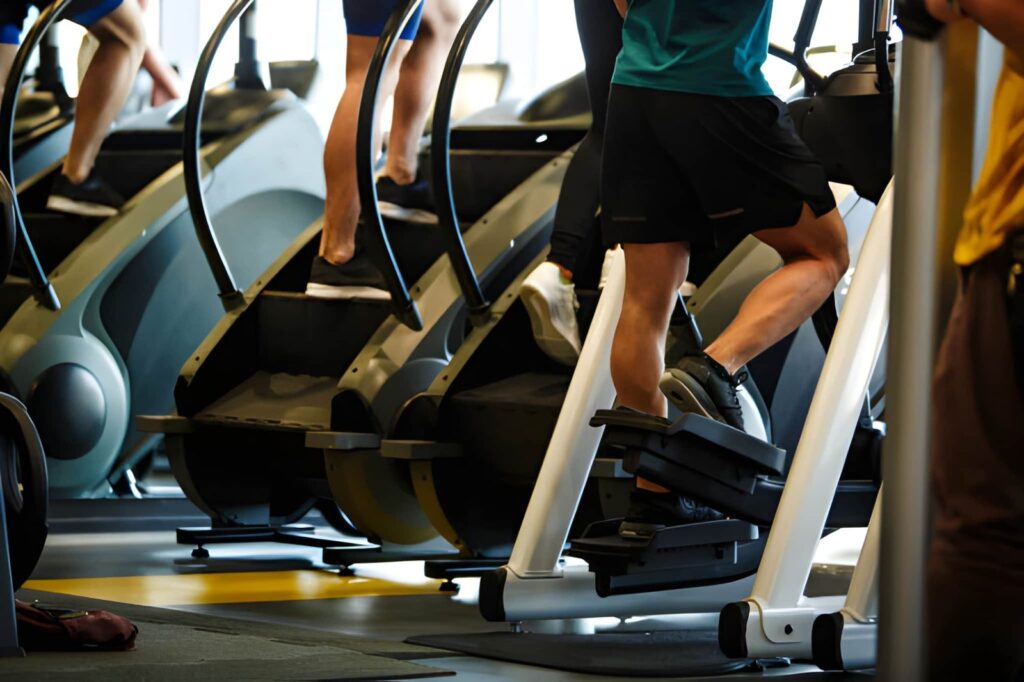
“Slow is fast.” First-time trekkers almost universally start too fast. Every experienced high-altitude trekker eventually says the same thing: slow your pace to where you can hold a comfortable conversation, and you will reach Base Camp. Race the trail, and the altitude will stop you.
“Train on tired legs.” Schedule back-to-back hiking days in Weeks 8–10. It is the cumulative fatigue of Days 2, 3, and 4 on the trail that breaks unprepared trekkers. Building this specific resilience is what separates those who reach Base Camp from those who don’t.
Ready to Trek? Your Final Preparation Checklist
The Everest Base Camp trek is one of the most transformative journeys on earth. It challenges you, humbles you, and rewards you in equal measure. Here is what every well-prepared trekker has in common:
- 12-week plan covering cardio, weight training, and hiking
- Hiking and stair climbing as primary cardio; cycling, swimming, and sports as supplements
- Hamstrings and calves are trained as seriously as quads
- Back-to-back hiking days in peak weeks
- All gear is broken in 8–10 weeks before departure
- AMS awareness and acclimatisation schedule understood
- Pacing, breathing, chunking, and visualisation practised
- 3–4 litres of hydration and calorie-dense food on the trail
The mountain will be there. The question is: will you be ready?
Book your Everest Base Camp Trek with Far Out Nepal. Get expert guides, an acclimatisation-optimised itinerary, and full support from Kathmandu to Base Camp.