
Category: Blogs
Which Season Should You Choose for the Langtang Trek?
The Langtang Experience
Most trekkers will tell you the best time for the Langtang Trek is autumn. They’re not wrong, but they’re not giving you the full picture either.
The Langtang region offers three distinct routes, each with its own seasonal logic. The Classic Langtang Valley trek and the Langtang–Helambu circuit follow a broadly similar seasonal pattern. The Langtang Ganja La Trek is different. It’s a high pass route, and with a narrower and more weather-dependent window than the valley routes below it.
Choosing your season isn’t just about the weather. It’s about matching conditions to the experience you’re actually looking for. This can be anything from the clearest possible mountain views, the quietest trails, the best conditions for crossing a 5,100m pass, or simply the most forgiving introduction to Himalayan trekking.
Here’s a complete breakdown of every season and every month across all three routes so you can make that decision with confidence.
Quick answer:
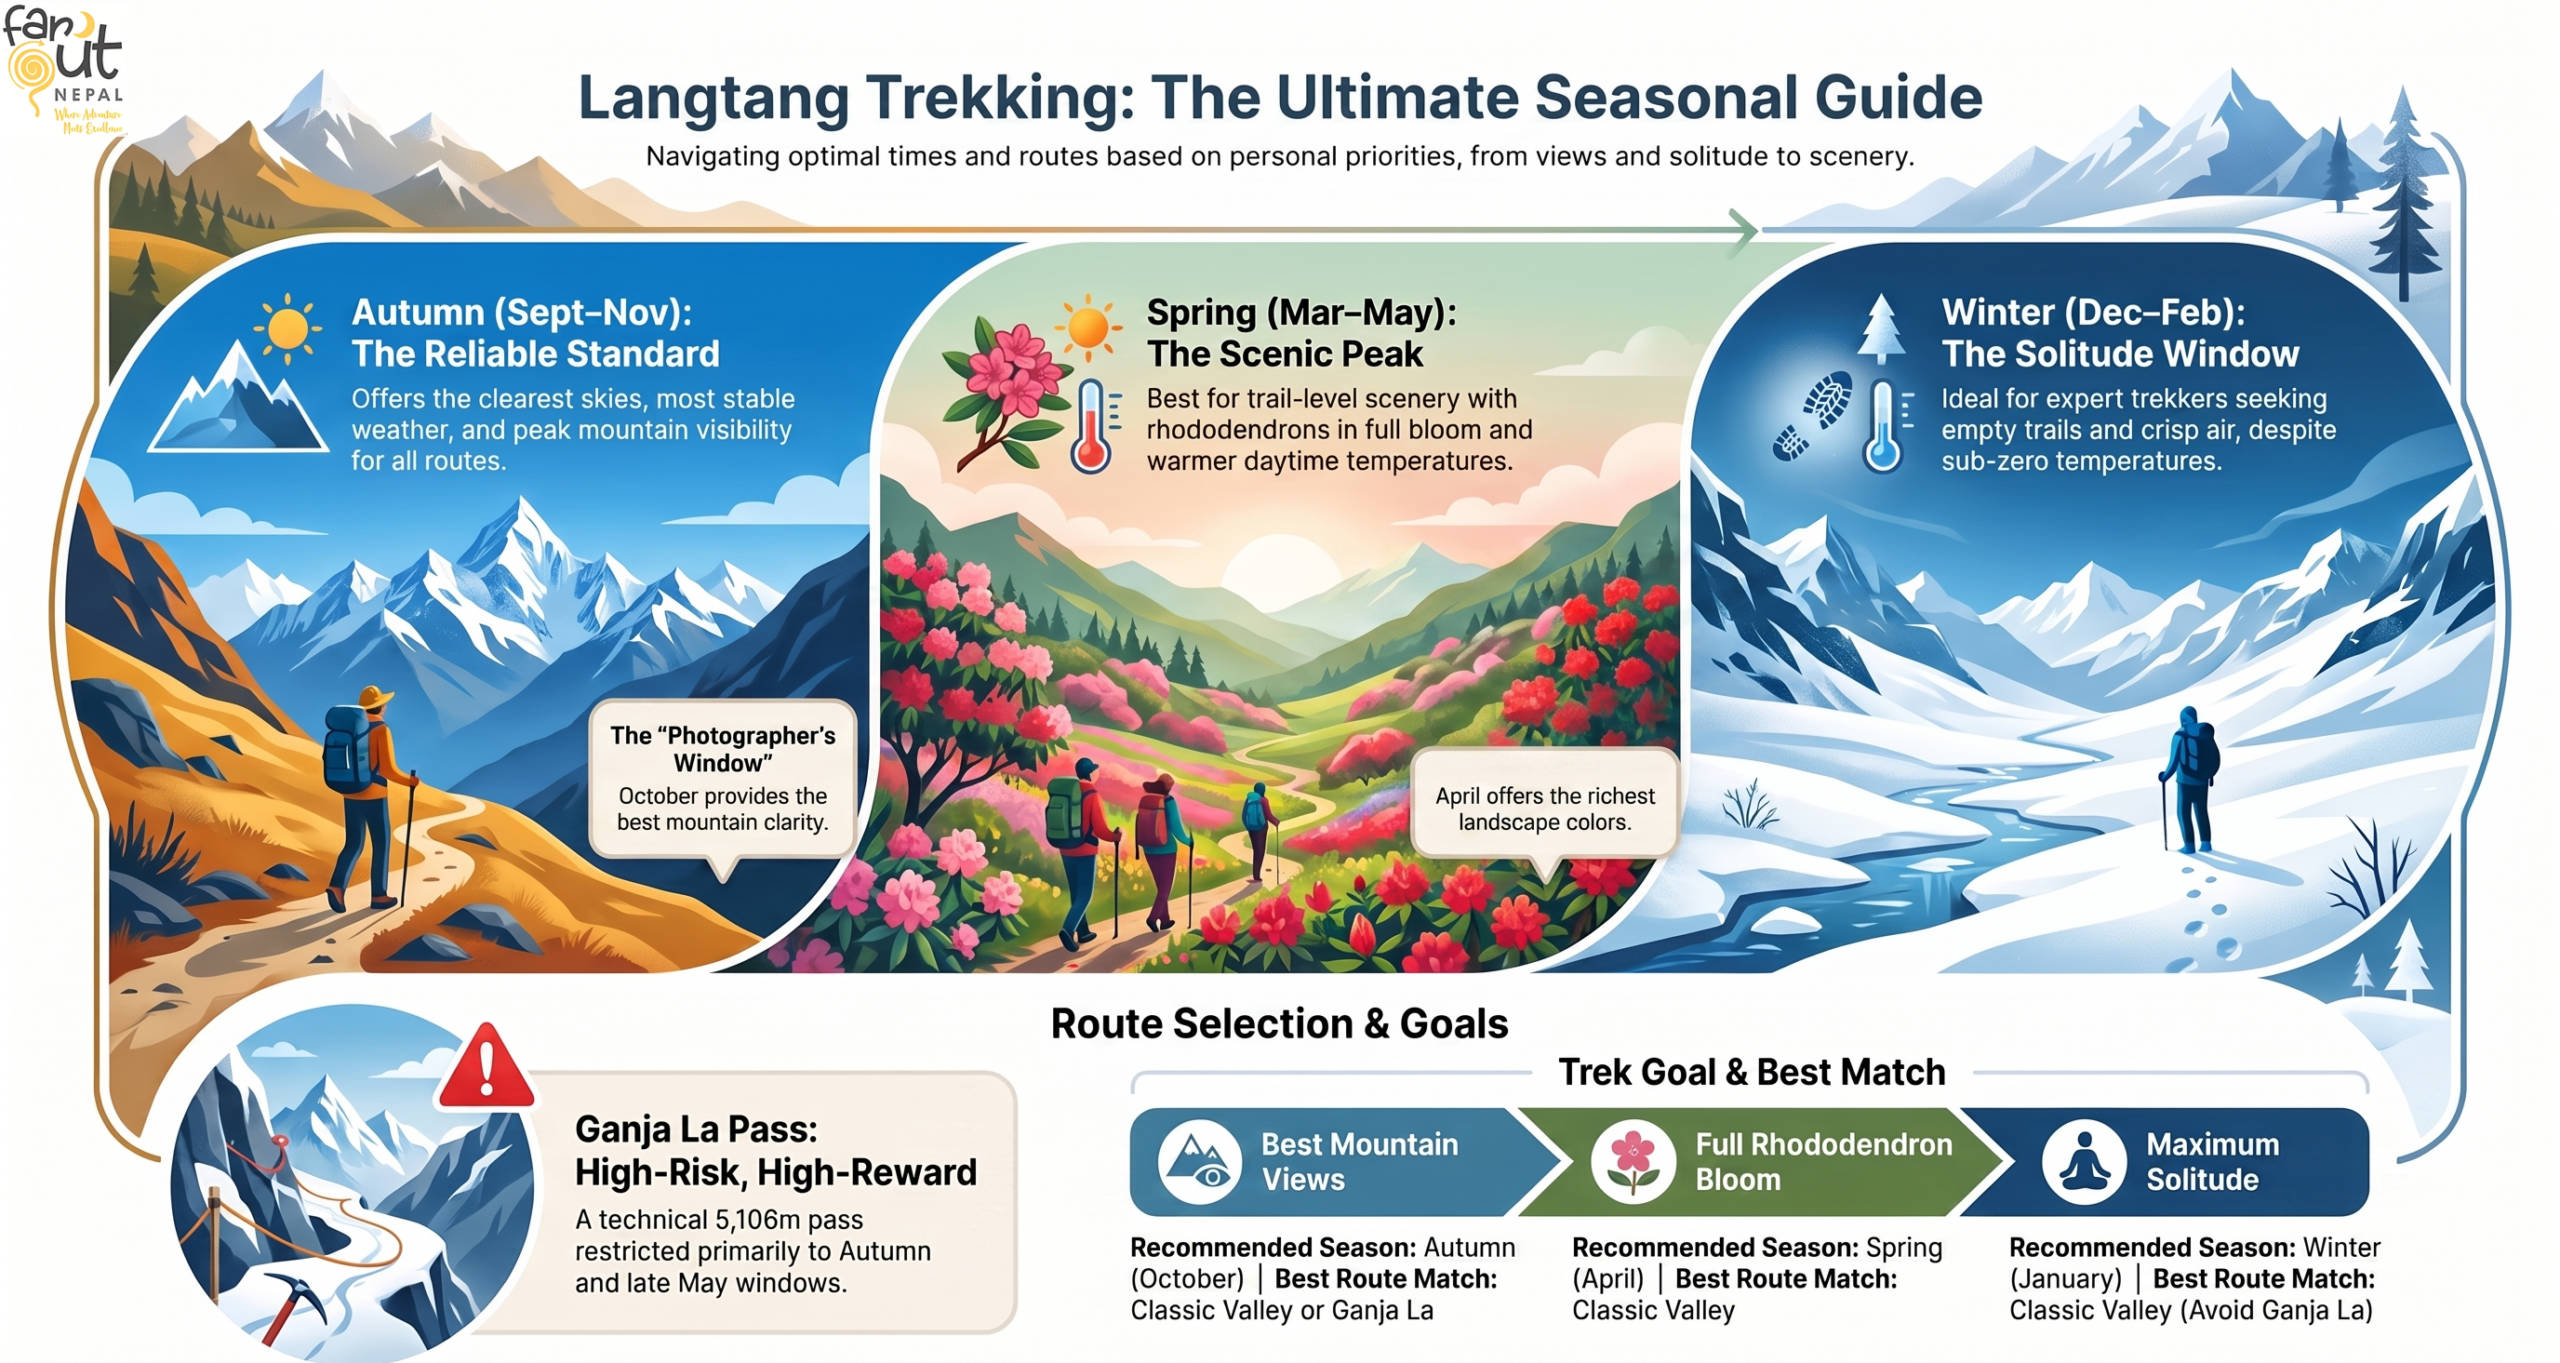
- Best overall → Autumn
- Best scenery → Spring
- Fewest crowds → Winter
- Pass crossing (Ganja La) → Autumn or late May
To learn about the route difficulty, see our [Langtang Trek Difficulty guide] →
Planning a Ganja La crossing specifically? The [Langtang Ganja La Trek page] covers the full route and departure options →
So, What Is the Best Time for the Langtang Trek?
Autumn is the best time for the Langtang Trek for most trekkers. October in particular offers the most reliable combination of clear skies, stable trails, and comfortable trekking temperatures. Spring runs a close second. The conditions are excellent, and the trail scenery is at its most vivid, though mountain visibility can be more variable. Winter is genuinely beautiful but demands more experience and preparation. Monsoon is a specialist choice.
| Season | Weather | Views | Crowds | Difficulty | Recommendation |
| Autumn (Sep–Nov) | Stable, dry | Excellent | High | Standard | Best overall |
| Spring (Mar–May) | Warming, some afternoon cloud | Very good | Moderate–High | Standard | Best for scenery |
| Winter (Dec–Feb) | Cold, clear | Good | Low | Harder | Solitude seekers |
| Monsoon (Jun–Aug) | Wet, humid | Poor | Very low | Harder | Not recommended for most |
The table above applies primarily to the Classic Langtang Valley route and the Langtang–Helambu circuit. The Ganja La Trek has a tighter seasonal window.
See the Ganja La route section below and the dedicated [Langtang Ganja La Trek page] for details →
Spring (March–May): Best for Views and Balanced Conditions
Spring is the season that turns the Langtang valley into something extraordinary below your feet rather than just above your head. While autumn earns its reputation for mountain clarity, spring earns its own for what happens at trail level.
Weather
March opens cool at altitude and genuinely cold above 3,500m, but temperatures climb steadily through April and into May. Daytime trekking conditions are comfortable across most of the route by mid-March. The key variable in spring is afternoon cloud. Moisture rising from the lower valleys builds cloud cover most afternoons from April onward. Mornings are reliably clearer, which has practical implications for photography and high-altitude views.
Trail Conditions
Trails are in good condition across the season. Snow lingers on the higher sections in early March, but is typically manageable on the Classic Valley and Helambu routes. May brings the warmest conditions and the longest daylight hours of this trekking calendar. However, it also marks the approach of monsoon departures in the final two weeks of May, which should be monitored against weather forecasts.
Visibility
Spring visibility is excellent on clear mornings and genuinely outstanding in the first half of March before significant cloud build-up becomes regular.
The trade-off versus autumn is real: post-monsoon skies in October are more consistently clear than pre-monsoon skies in April. If a guaranteed unobstructed view of Langtang Lirung is your primary objective, autumn edges spring on reliability. If the overall sensory experience of the trail matters as much as the summit panorama, spring holds its own.
Altitude Experience
Temperatures at altitude (Kyanjin Gompa: 3,870m) are milder in spring than in autumn’s later weeks or winter. This makes acclimatisation more comfortable for trekkers who struggle with cold temperatures and significantly reduces the gear burden. Kyanjin Ri (4,773m) is accessible throughout the spring season for trekkers seeking an additional altitude push from the valley.
Who Should Go in Spring
Spring suits trekkers for whom the journey through the forest and valley matters as much as the high-altitude experience. The rhododendron forests below Langtang are at full bloom from mid-March through April. Dense red and pink flowerings appear at the lower elevations, giving way to other species higher up. This is the season’s defining visual, and it’s one autumn simply cannot match.
If you’re a photographer whose subject is the landscape rather than exclusively the mountains, this is your season. Think of late March and April as the trail’s own version of peak light. This is not the crisp blue-sky clarity of October, but something richer and more layered.
Best routes in spring: Classic Langtang Valley, Kyanjin Ri extension. Ganja La is accessible in most years during spring, late April and May offer the most reliable window before the monsoon arrives.
Spring verdict: Best for trekkers whose priority is scenery and trail colour over guaranteed clear skies. Rhododendron forests are at peak bloom in March and April.
Views are excellent on clear mornings with some afternoon cloud from April. Ganja La is accessible for most of the season in good years. First-time trekkers will find spring conditions forgiving and rewarding.
Autumn (September–November): Best Overall Season
Autumn is the most reliable season for the Langtang Trek, and October is the single best month on the trekking calendar. After the monsoon clears, the skies above the Langtang valley are as clear as they get anywhere in Nepal. The combination of stable trails, comfortable temperatures, and exceptional mountain visibility makes this the season that delivers most consistently for the widest range of trekkers.
Stable Weather
The monsoon typically clears from the Langtang region by mid to late September. From that point through to mid-November, trekking conditions are as close to ideal as mountain weather allows. You can experience dry trails, low wind, reliable daytime temperatures, and skies that stay clear well into the afternoon. Late October and November bring noticeably colder nights, with temperatures below freezing at Kyanjin Gompa. But daytime trekking remains comfortable with the right layering system.
Crowd Expectations
Autumn is busy, and it’s worth being direct about that. October in particular draws the largest volume of trekkers of any month. The lower villages on the Classic Valley route, including Syabrubesi, Lama Hotel, and Langtang village, will have competition for teahouse beds at peak weekends.
Book accommodation in advance if you’re trekking in October. November is noticeably quieter while retaining most of autumn’s weather advantages, and is worth serious consideration for trekkers who want good conditions without the October peak.
Photography Conditions
October is the Photographer’s Window for Langtang. Post-monsoon air clarity is at its annual peak, with particulates washed out by months of rain, views to the high ridges unobstructed, and the great quality of light in the early morning. Langtang Lirung (7,227m) is visible in full from the valley in a way that is reliably available in October and less guaranteed in any other month.
Ganja La Conditions
Autumn is the primary season for the Ganja La Pass crossing. After the monsoon, the pass stabilises into its most predictable and accessible state of the year. Dry trail conditions, clear weather windows, and manageable snow levels at the pass make late September through November the window most guided departures target. Conditions begin to deteriorate meaningfully from December as winter snowfall accumulates.
If crossing Ganja La is your goal, autumn is the season to plan around.
Best for: First-time trekkers on the Classic Valley route, experienced trekkers targeting Ganja La, photography-focused trekkers, and anyone whose schedule gives them one window and needs the most reliable conditions.
Autumn verdict: The most reliable season across all Langtang routes. Post-monsoon skies deliver the clearest mountain views of the year. Trail conditions are stable and dry throughout. Ganja La is at its most accessible. Late October nights are cold, so layering and a quality sleeping bag are not optional. Book teahouses in advance for October departures.
Winter (December–February): Best for Solitude
Winter in Langtang is a different kind of trek. The trails empty out, the air gets sharp and cold, the mountains sit above you with a clarity that the busier seasons rarely produce, and the experience becomes something more demanding and more private than any other time of year.
For the right trekker, it’s exceptional. For the wrong one, it’s a serious miscalculation.
Snow Conditions
Snow arrives on the higher sections of the Classic Valley route from December, typically above 3,500m. By January, snow is possible from 3,000m upward, and trail conditions above Langtang village can be significantly harder than in other seasons. The route to Kyanjin Gompa remains doable for experienced trekkers but requires proper winter footwear, traction devices, and the ability to read changing trail conditions.
Ganja La is not recommended in winter. Snow accumulation around the pass creates route uncertainty, and conditions can change fast enough to make a crossing impractical or dangerous even for strong trekkers. Trekkers should be clear on this: winter is the one season to avoid for the Langtang Ganja La pass.
Cold Management
Temperatures at Kyanjin Gompa drop well below freezing overnight from December through February. January is the coldest month, with night temperatures of -10°C to -15°C at altitude, which are not unusual, and teahouse heating is basic at best. A four-season sleeping bag is essential, not a comfort upgrade. Trekkers who have not experienced extended sub-zero nights in mountain conditions should take this seriously before committing to a winter departure.
Trail Access
The Classic Valley route remains passable for experienced trekkers throughout winter, though progress is slower and some sections require more technical care than in other seasons. The Langtang–Helambu circuit’s lower altitude sections are more accessible in winter than the high valley, and parts of the Helambu route can be trekked with considerably less snow exposure than the Classic route.
Who Should Avoid Winter
Winter is not suitable for first-time trekkers, for solo trekkers without high-altitude winter experience, or for anyone whose schedule doesn’t allow flexibility for weather delays. The physical demands are genuinely higher, the margin for error is smaller, and the support infrastructure, like open teahouses, other trekkers on the trail, or rescue access, is thinner.
December vs January:
| December | January | |
| Temperature | Cold but manageable | Coldest month. Significant night freeze. |
| Snow on the trail | Possible above 3,500m | Likely above 3,000m |
| Ganja La | Rarely accessible | Not recommended |
| Difficulty vs autumn | Noticeably harder | The most demanding winter month |
| Best suited for | Experienced trekkers | Expert only |
January is the Solitude Seeker’s Month. If you want Kyanjin Gompa entirely to yourself, crisp air that makes the valley feel like a different world, and a trek that tests your self-sufficiency rather than your ability to book teahouses, January delivers all of that. It just asks for genuine winter trekking competence in return.
Winter verdict: Rewarding for experienced trekkers who know what they’re taking on. Beautiful, quiet, and more demanding than any other season.
December is the more forgiving entry point; January is expert territory. Ganja La is off the table. First-timers should choose a different season.
Monsoon (June–August): Best for Quiet Trails
Monsoon is the season most experienced trekkers dismiss in a sentence. That’s not entirely wrong. For the majority of trekkers, and particularly for anyone planning a Ganja La crossing, the monsoon is not the right choice. But it’s worth understanding what you’re actually trading off, because for a specific kind of trekker, the Classic Langtang Valley route in monsoon has a genuine appeal.
Rain Patterns
The monsoon reaches Langtang from June, bringing daily rainfall that typically peaks in July and gradually eases through August. Rain falls most heavily in the afternoon and evening. Mornings, though, can be surprisingly clear, particularly in the lower valley sections. This pattern is reliable enough that experienced monsoon trekkers plan their daily stages around it, starting early and reaching camp or a teahouse before the afternoon rain arrives.
Visibility
Mountain visibility is the clear casualty of monsoon trekking. Cloud cover is persistent above the mid-valley, and clear views to Langtang Lirung or the high ridges are the exception rather than the rule. The landscape compensation is real. The valley is intensely, almost aggressively green, and the lower forest sections are lush in a way that no other season replicates. This, however, will be disappointing for trekkers coming primarily for mountain views.
Trail Challenges
Lower sections of the Classic Valley route can be muddy and slippery after heavy rain. Leeches are present on the forest sections below Langtang village through the monsoon period and are a practical consideration rather than a minor nuisance. Stream crossings can be higher and faster than in other seasons. Trail debris and occasional minor landslides on steeper sections are a real risk.
When Monsoon Works
Monsoon makes most sense for trekkers combining a tight budget with significant prior trekking experience, or for those with a specific interest in the valley’s landscape rather than its high-altitude views.
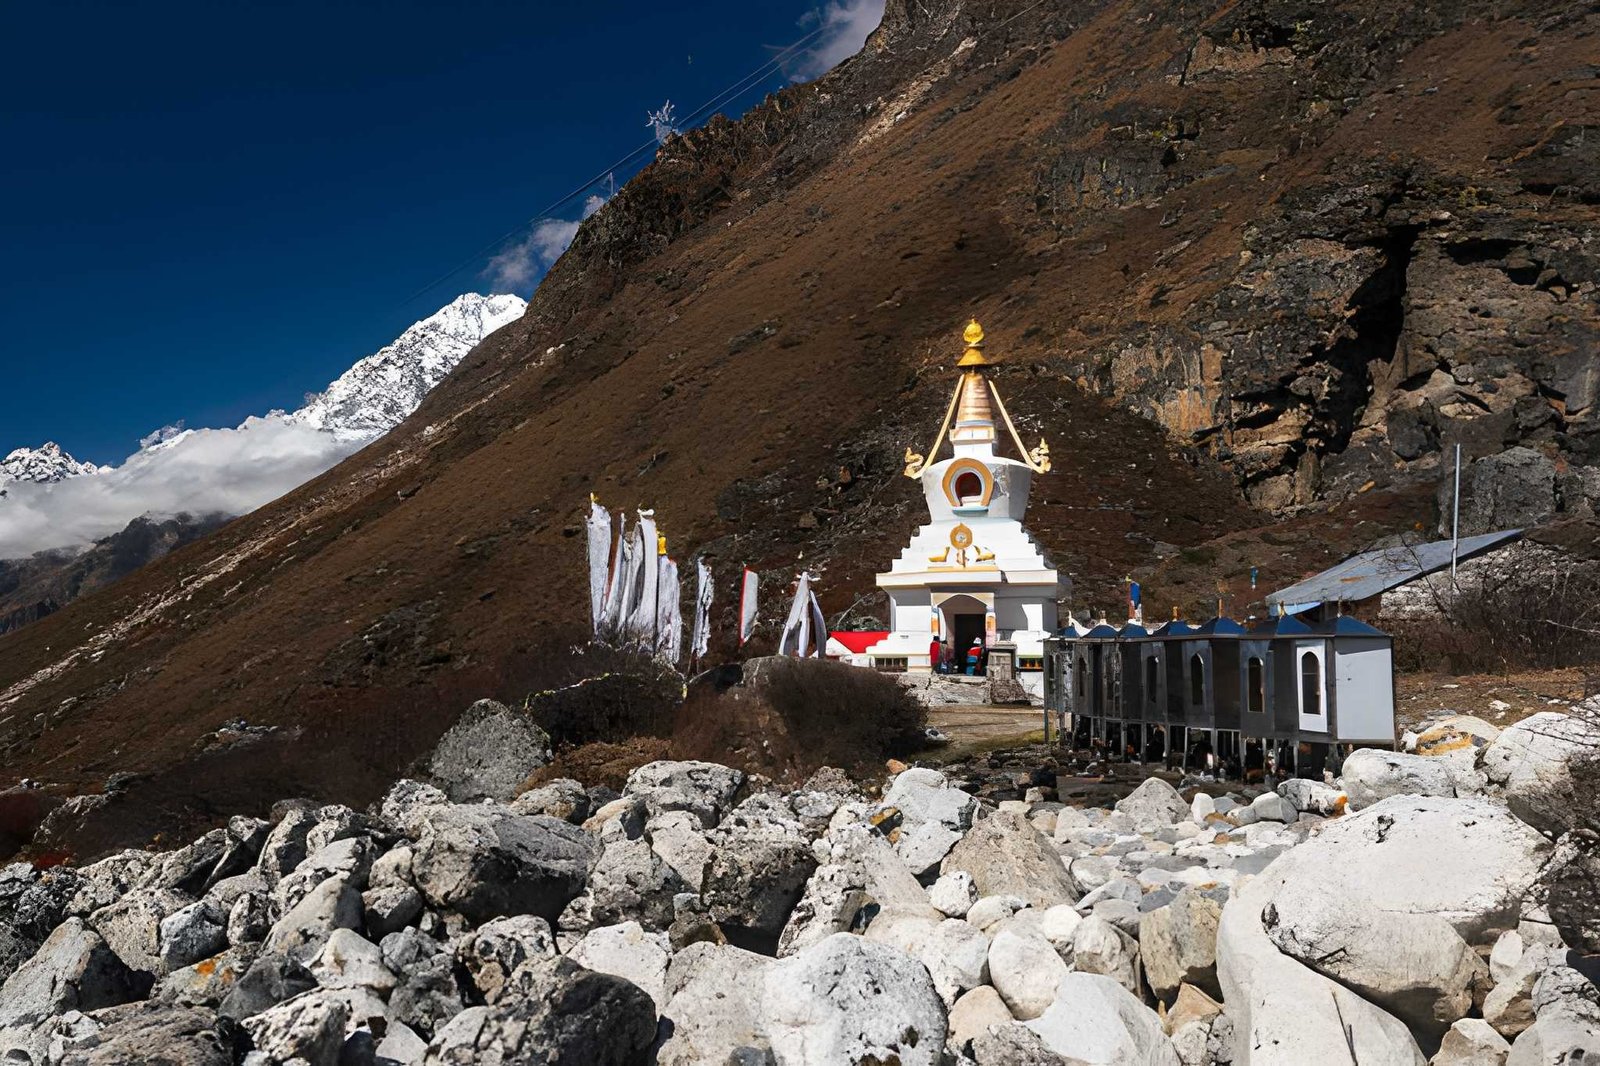
Teahouses are available without booking, prices in some areas are lower, and the trail has a quality of quiet that peak season never approaches. The Classic Valley route to Kyanjin Gompa is the appropriate monsoon objective. The Langtang–Helambu circuit is manageable at its lower elevations, and Ganja La should not be attempted.
Best Time for Different Langtang Routes
The three Langtang routes have meaningfully different seasonal profiles. Understanding which route you’re trekking is the first step in choosing when to go.
| Route | Best Season | Alternative Season | Difficulty |
| Classic Langtang Valley | Autumn | Spring | Moderate |
| Langtang Ganja La Pass | Autumn | Late May | Challenging |
| Langtang–Helambu | Autumn | Spring | Moderate |
Classic Langtang Valley
The Classic route follows the Langtang Khola valley from Syabrubesi to Kyanjin Gompa and back. Its seasonal logic is the most straightforward of the three: autumn for reliability, spring for scenery, and winter for solitude with appropriate experience. The route’s moderate difficulty means it remains accessible across a wider seasonal range than the pass route.
Monsoon is possible on this route for experienced trekkers but comes with the visibility, trail condition, and leech trade-offs described above.
Langtang Ganja La Pass
Ganja La has a tighter seasonal window than either valley route, and that window shapes everything about when to plan this trek. The pass sits at 5,106m and is genuinely exposed to high-altitude weather systems in a way that the valley routes are not.
Autumn (late September–November) is the primary season. Stable post-monsoon conditions give the most reliable crossing weather and the best chance of the full experience. You will encounter clear skies at the pass, exceptional views in both directions, and dry trail conditions on the technical sections approaching and descending from the pass.
Late May offers a secondary window before the monsoon arrives. Conditions are good in most years, with the rhododendron-season scenery as a bonus on the lower sections. Departures should be planned for the earlier part of May to allow a buffer before the monsoon pattern establishes.
Winter and monsoon: Not recommended.
Langtang–Helambu
The Helambu circuit runs at generally lower altitude than the Classic Valley route, which has practical seasonal consequences. The lower elevation sections are more accessible in winter than the high valley and can be trekked with considerably less snow exposure. In the monsoon, Helambu’s lower reaches are more forgiving than the upper valley, though visibility limitations apply across the whole circuit.
Autumn and spring are the primary seasons, consistent with the Classic route. Helambu is worth specific consideration for trekkers who want a slightly different experience from the main valley, with the option of linking through to Langtang or returning via a different circuit.
Month-by-Month Langtang Trek Guide
| Month | Conditions | Difficulty | Recommendation |
| January | Coldest month. Snow likely above 3,000m. | High | Experienced trekkers only |
| February | Cold but improving. Late Feb warmer. | High | Experienced trekkers |
| March | Warming. Rhododendrons begin below 3,000m. | Moderate | Good, being the spring opening |
| April | Peak spring. Full rhododendron bloom. | Moderate | Excellent |
| May | Warm. Late May: last Ganja La window. | Moderate | Good, as it’s the last pre-monsoon month |
| June | Monsoon begins. Increasing rain. | High | Not recommended for Ganja La |
| July | Peak monsoon. Wet, low visibility. | High | Avoid for most routes |
| August | Monsoon continues. Late Aug: start of clearing. | High | Avoid unless experienced |
| September | Monsoon clearing. Trails are wet early month. | Moderate–High | Late Sept: conditions improve fast |
| October | Peak autumn. Best overall conditions. | Moderate | Best month of the year |
| November | Late autumn. Colder from mid-month. | Moderate | Excellent with fewer crowds than Oct |
| December | Cold. Snow possible above 3,500m. | High | Experienced trekkers. No Ganja La. |
October and April stand out as the two peak months across the full seasonal calendar. The former for mountain clarity and trail reliability, the latter for scenery and trail colour.
November is underrated. Conditions remain excellent, and the crowds that defined October have thinned considerably.
Choose Your Season Based on Your Trek Goal
The Far Out Season Selector below maps common trek goals to the season and route that best delivers them. Use it as a starting point, not a prescription. Your specific dates, experience level, and what you’re actually hoping to see will refine the answer further.
| Trek Goal | Recommended Season | Best Route Match |
| Best mountain views | Autumn | Classic Valley or Ganja La |
| Fewest crowds | Winter | Classic Valley |
| Snow on the trail | Winter | Classic Valley (avoid Ganja La) |
| Photography — landscapes | Spring (April) | Classic Valley |
| Photography — mountains | Autumn (October) | Classic Valley or Ganja La |
| Lower risk, first trek | Autumn | Classic Valley |
| Rhododendron scenery | Spring (March–April) | Classic Valley |
| Pass crossing | Autumn or late May | Ganja La |
| Budget travel | Monsoon | Classic Valley only |
The goal column above reflects what trekkers most commonly tell us they’re coming to Langtang for. If your goal isn’t listed, the principle is simple: autumn gives you the most reliable version of almost any Langtang experience. Spring gives you the most vivid. Winter gives you the quietest. Monsoon gives you the most demanding.
Common Seasonal Mistakes on the Langtang Trek
The most common planning errors on the Langtang Trek aren’t about choosing the wrong season outright. They’re about misreading what a season actually involves once you’re on the trail.
Packing for the wrong conditions. Autumn trekkers regularly overpack cold-weather gear for the valley sections while underestimating what Kyanjin Gompa nights in late October actually require. The reverse happens in winter, when trekkers who have read that winter is “possible” arrive without the four-season sleeping bags and thermal layers that make it comfortable rather than an endurance exercise. Pack for the conditions at altitude, not the conditions at the trailhead.
Treating altitude as a constant. Langtang’s altitude range, from roughly 1,500m at Syabrubesi to 3,870m at Kyanjin Gompa, with Kyanjin Ri pushing to 4,773m, means the seasonal experience at the start and end of the trek is genuinely different. Acclimatisation is more demanding in winter because cold amplifies altitude’s physiological effects. Trekkers who manage autumn conditions at Kyanjin Gompa without difficulty may find the same altitude meaningfully harder in January.
Assuming a shorter route is an easier one. A shorter Langtang itinerary in winter is not an easier choice than a longer one in autumn. Season changes the experience category, not just the conditions. The Langtang–Helambu circuit in autumn and the same circuit in monsoon are different treks in meaningful ways, not variations on the same experience.
Booking Ganja La without checking the pass window. The Ganja La Pass has a defined seasonal window, and booking a departure outside of it is the single most avoidable planning mistake on the Langtang trail. Winter and monsoon crossings are not a matter of being well-prepared. They are genuinely inadvisable regardless of experience level in most years. If Ganja La is on your itinerary, confirm the season before the booking, not after.
Final Verdict: When Should You Visit Langtang?
The Langtang Trek rewards trekkers who choose their season deliberately rather than defaulting to whatever dates are available.
Autumn (October–November) is the answer for most trekkers. If you have one window and need it to work, this is it. October for maximum reliability; November if you want excellent conditions with fewer people on the trail.
Spring (March–May), if the scenery along the route matters as much to you as the views above it. Rhododendrons in bloom, warming temperatures, and conditions that are forgiving for first-timers. Expect some afternoon cloud from April.
Winter (December–February) if solitude is the goal and your experience supports it. December is the more accessible entry point; January is for trekkers who know exactly what a sub-zero night at 3,870m involves.
Monsoon (June–August) only if you’ve trekked in Himalayan monsoon conditions before and you’re specifically coming for the Classic Valley. Ganja La is off the table.
Contact Far Out now, and book your Langtang trip today!
Which Langtang Route Is Right for You? Find Out The Difficulty of Each Routes.
Introducing the Langtang Trek
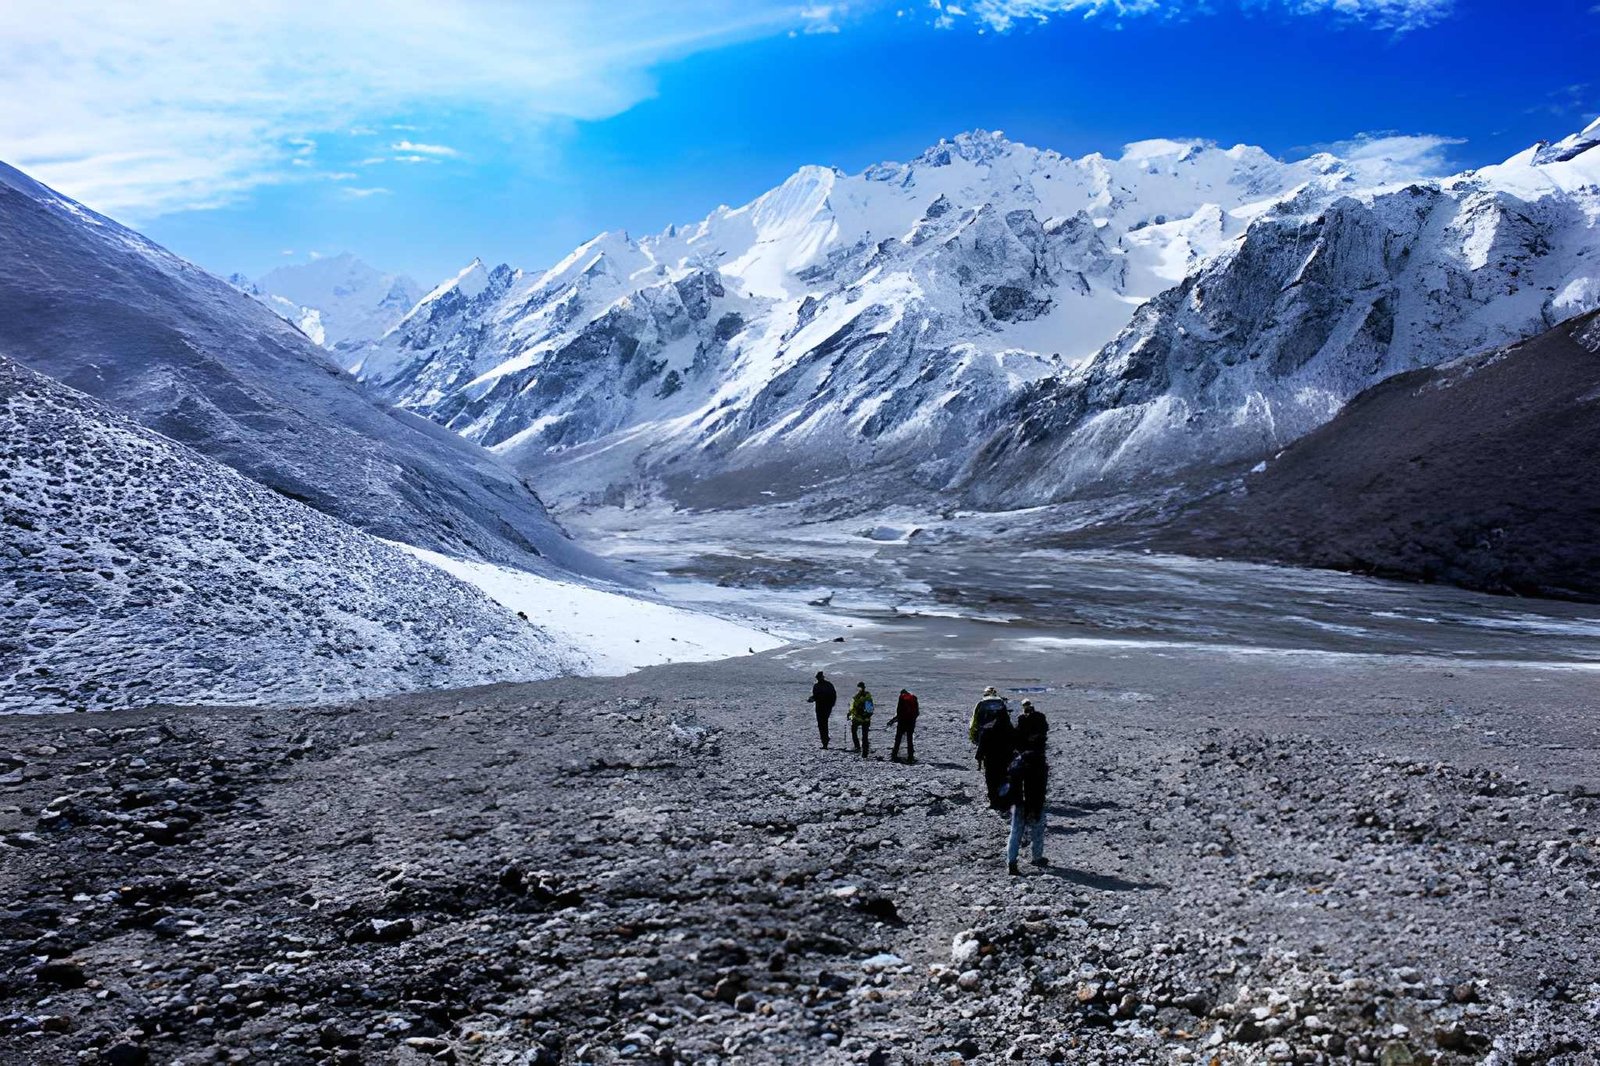
Langtang is one of Nepal’s most underrated trekking regions in Nepal. It’s close to Kathmandu, genuinely wild, and far less crowded than Everest Base Camp or Annapurna. But here’s what most guides won’t tell you upfront: Langtang is not one trek.
Depending on which route you choose, you could be doing a moderate walk through rhododendron forests and yak pastures, or crossing a 5,122m glaciated mountain pass with crampons on your feet and nothing but ridgeline on either side.
The Langtang Trek difficulty changes completely based on your route.
This guide breaks down each Langtang route by actual difficulty based on altitude, terrain, walking hours, and physical demand, so you can choose the one that matches your experience and fitness, not just your ambition.
Already Know You Want the Challenge? Far Out’s Langtang Ganja La Pass Trek is a 13-day expedition crossing one of Nepal’s most rewarding high passes. Limited group sizes. Expert local guides. Departure dates are available in spring and autumn.
View the Langtang Ganja La Pass Trek → Or keep reading to find the right route for your fitness and experience level.
Quick Answer: How Difficult Is the Langtang Trek?
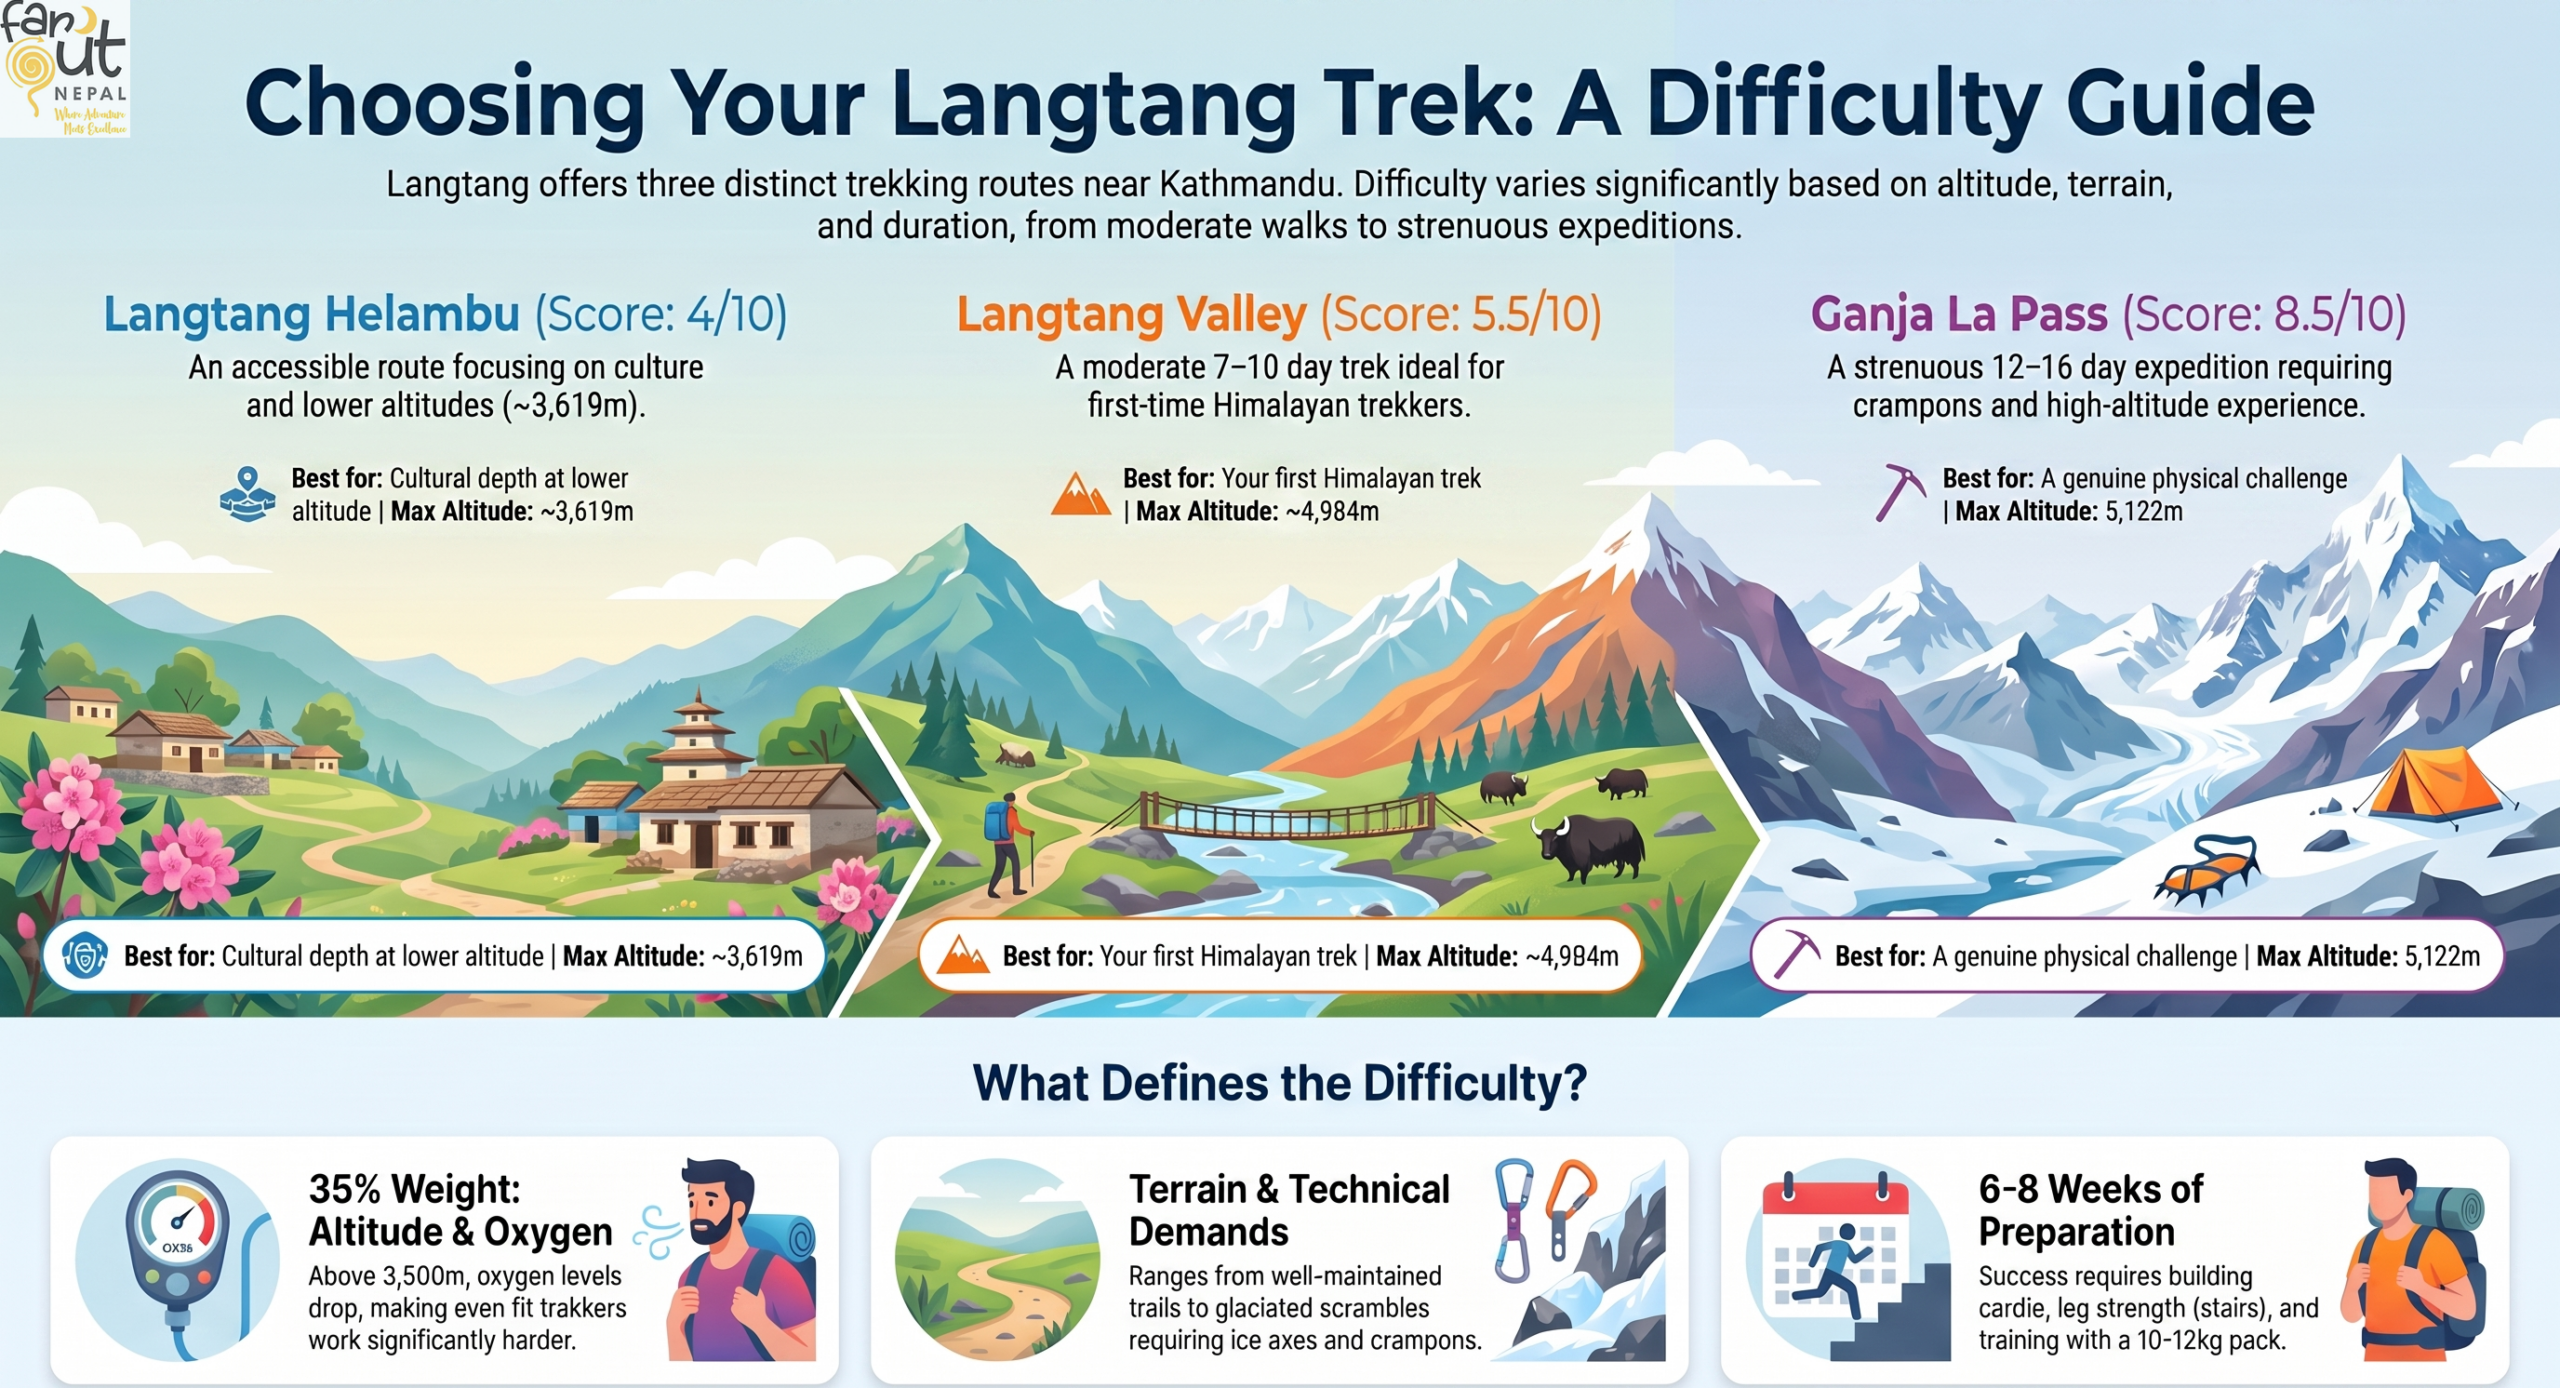
Langtang Valley is a moderate trek. Most reasonably fit people with no prior high-altitude experience can complete it. The Langtang Ganja La Pass trek is strenuous. It involves a technical high pass crossing above 5,000m and is best suited to experienced trekkers. Langtang Helambu sits in the middle, with moderate terrain at a lower altitude, ideal for those prioritising culture over challenge.
| Route | Difficulty | Duration | Max Altitude | Best For |
| Langtang Valley | Moderate | 7–10 days | ~4,984m (Tserko Ri) | First-time Himalayan trekkers |
| Langtang Ganja La Pass | Strenuous | 12–16 days | 5,122 m (Ganja La) | Experienced trekkers |
| Langtang Helambu | Moderate | 7–11 days | ~3,619m (Thadepati) | Cultural trekking, lower altitude |
The short version: if you’ve never trekked above 4,000m before, start with Langtang Valley. If you’ve done that and want something that genuinely pushes you, Ganja La is the answer.
What Actually Makes a Langtang Trek Difficult?
Here’s the framework we use to assess every route. The five factors, each weighted by real-world impact.
Altitude and Oxygen
Altitude is the single biggest variable in Himalayan trekking difficulty. Above 3,500m, your body starts working harder to extract oxygen from thinner air. Symptoms of altitude sickness, like headache, nausea, fatigue, and poor sleep, can affect even fit trekkers. The higher you go, the longer your body needs to adjust.
Weight: 35% of total difficulty
Trail Terrain
Terrain adds physical demand beyond just elevation. Rocky paths, loose scree, steep ascents & descents, and glaciated sections all add to the difficulty. A 400m climb on a well-cut switchback trail feels completely different from a 400m scramble over boulders. Pass crossings introduce exposed sections where route-finding and footing matter.
Weight: 20% of total difficulty
Duration and Accumulated Fatigue
A trek doesn’t have to be technically hard to wear you down. Back-to-back trekking days build cumulative fatigue that shorter outings don’t prepare you for. Recovery time, or lack of it, determines whether you feel strong on day 8 or wrecked.
Weight: 20% of total difficulty
Recovery and Acclimatisation Days
Built-in rest days aren’t laziness, but physiology. Routes that include acclimatisation days (like an extra night at Kyanjin Gompa) are meaningfully easier on your body than compressed itineraries that push altitude gain every day.
Weight: 10% of total difficulty
Season and Weather Conditions
Langtang in October is a different beast from Langtang in February. Trail conditions, wind, snow on passes, and visibility all change the difficulty equation substantially. Season affects Ganja La the most. In winter, the pass becomes a serious mountaineering objective, not a trekking one.
Weight: 15% of total difficulty
The Far Out Difficulty Index combines these five factors to score each route out of 10. You’ll see the score at the end of each route section below.
Langtang Valley Trek Difficulty
The Langtang Valley trek is the most popular route in the region. It delivers proper Himalayan scenery, genuine altitude experience, and a real sense of remoteness without putting beginners in over their heads.
Who Is This Route For?
Langtang Valley is built for people taking their first serious step into high-altitude trekking. You don’t need prior Himalayan experience. You do need a baseline of fitness. Remember that this isn’t a walk in the park, but if you can comfortably hike for 5–6 hours with a daypack, you’re in the right territory.
Walking Hours
Expect 5–7 hours of walking per day on most active trekking days. The trail from Syabrubesi to Langtang Village gains altitude steadily through dense forest before opening into the wide, glacier-flanked valley. Days feel long but rarely desperate.
The side trip to Tserko Ri (4,984m) is the hardest single day on the route. This trip involves a steep 4–5 hour ascent from Kyanjin Gompa that rewards you with one of the best viewpoints in the entire Himalayan region. Your legs will know about it.
Altitude Experience
You’ll spend most of the trek between 2,000m and 3,800m, with the Kyanjin Gompa area sitting at around 3,870m. The ascent is gradual enough that most trekkers acclimatise well with a properly paced itinerary.
The Tserko Ri summit is the altitude ceiling for this route. At just under 5,000m, you’ll feel the thin air. But as it’s a day hike, you will descend back to sleep lower.
Common Challenges
- The first day out of Syabrubesi is long and involves significant elevation gain through humid forest
- Sleep quality drops noticeably above 3,500m for most trekkers
- Cold nights at Kyanjin Gompa catch people unprepared
- The trail after the 2015 earthquake has been rerouted in sections. Some segments are steeper than older maps suggest.
Can Beginners Do Langtang Valley?
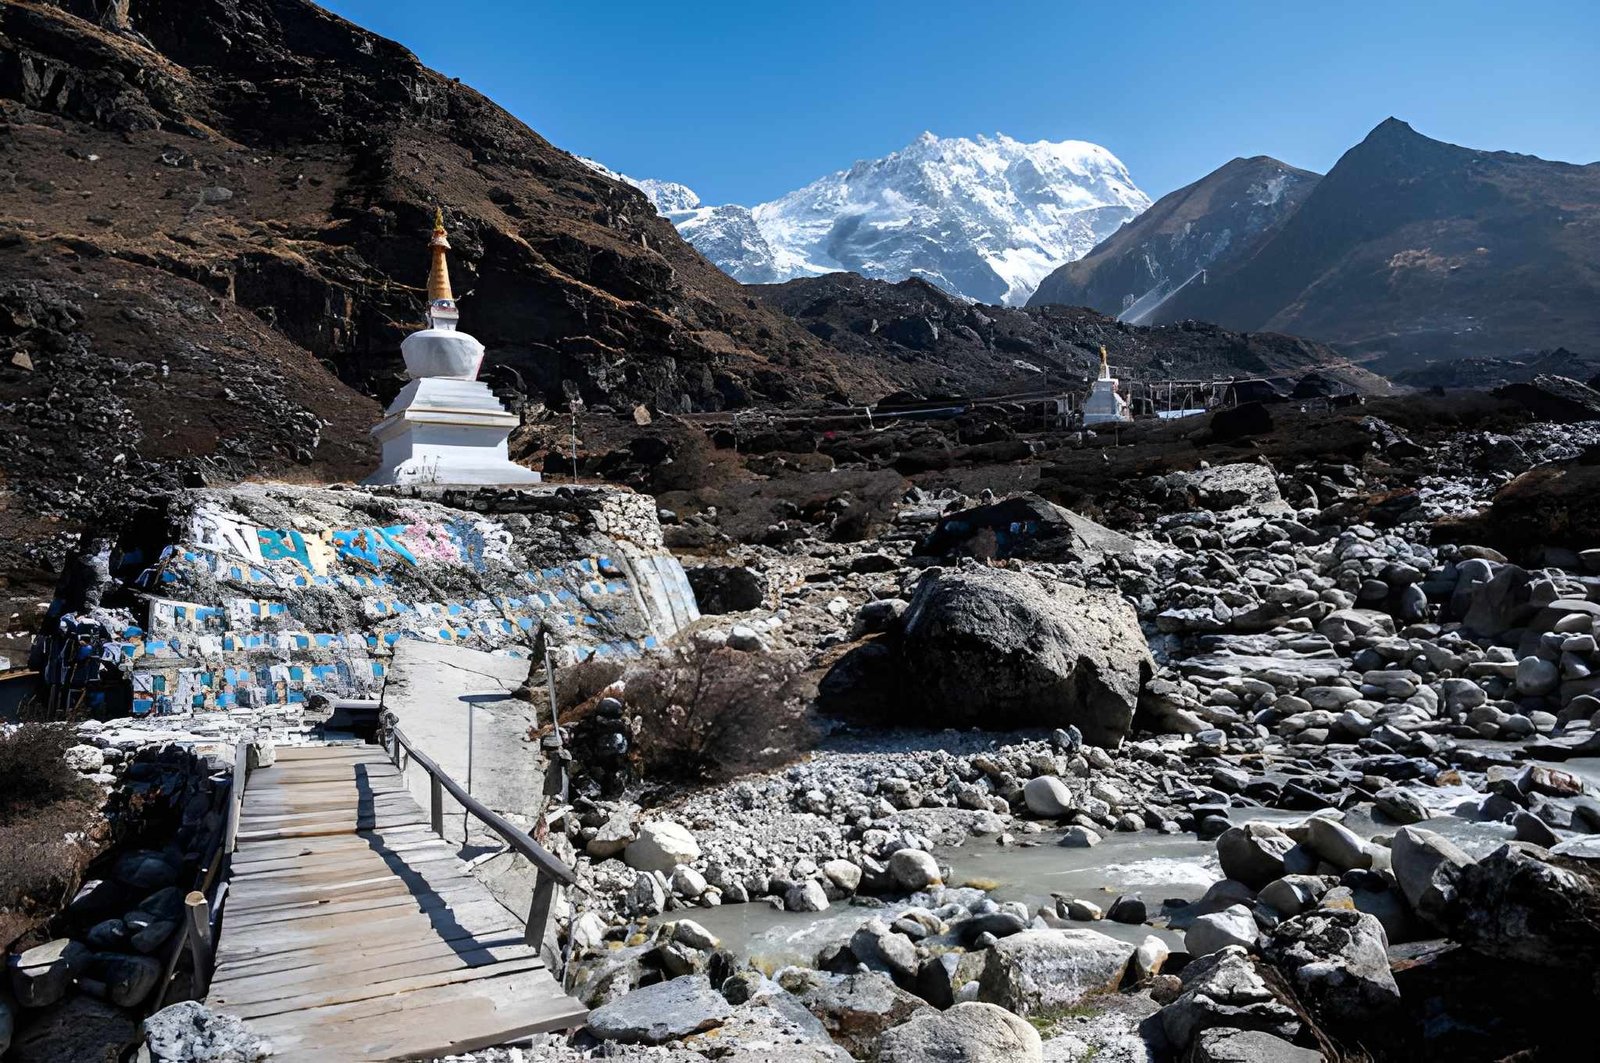
Yes, but with preparation. Trekkers who arrive with zero fitness training will struggle. Those who’ve spent 6–8 weeks building cardio and leg strength will find it challenging but achievable. No technical skills are required. A guide is recommended but not mandatory for this route.
Who should avoid it: Anyone with unmanaged heart or respiratory conditions, or those who cannot commit to proper acclimatisation pacing.
Far Out Difficulty Score: 5.5 / 10
- Altitude: manageable with correct pacing.
- Terrain: well-maintained.
- Duration: 7–10 days leaves room for rest.
- Verdict: moderate, achievable for most fit adults.
Langtang Ganja La Pass Difficulty
Ganja La is where Langtang stops being a trekking destination and starts being an expedition. The pass sits at 5,122m and requires you to cross a glaciated, technically demanding section that simply doesn’t exist on the Valley route. If Langtang Valley is a confident walk, Ganja La is a test.
Why Ganja La Feels Different
The difference isn’t just altitude, but everything that comes with altitude this high. The air above 5,000m contains roughly half the oxygen of sea level. Your pace slows involuntarily. Simple tasks take more effort. The psychological weight of a remote, high-altitude environment is real and worth acknowledging before you commit.
Ganja La also takes you through sections where there are no teahouses, no shortcuts, and no easy exits. That remoteness is part of its appeal, but it changes the nature of every decision you make on the trail.
The Pass Crossing
The Ganja La crossing itself is the centrepiece of the route. You’ll typically begin the ascent before dawn from high camp, cross the pass in the morning before the weather deteriorates, and descend steeply into the Helambu valley on the other side.
The ascent involves scrambling over loose rock and, depending on the season, snow and ice. Crampons and ice axes are required in shoulder seasons. They are not “optional” or “just recommended.” The descent on the Helambu side is long and steep, with significant elevation loss in a single day.
Altitude and Recovery
After crossing Ganja La at 5,122m, your body needs recovery time. A good itinerary builds in acclimatisation days at Kyanjin Gompa before the crossing attempt, not as a luxury, but a requirement. Trekkers who skip acclimatisation days on this route are taking a serious risk with altitude sickness at the worst possible point on the trek.
Remote Sections
Between Kyanjin Gompa and the first Helambu teahouses, you are genuinely remote. Supply logistics, rescue access, and communication are all more complicated than on the Valley route. This changes the risk profile significantly and is the primary reason this trek requires an experienced guide and should not be attempted solo.
Who Should Attempt Ganja La?
- Trekkers with prior experience above 4,500m
- People who have completed at least one multi-day high-altitude trek
- Those who are comfortable with physical challenge and uncertainty
- Trekkers willing to turn back if conditions on the pass are dangerous
Who should not attempt it: First-time high-altitude trekkers, those with a history of altitude sickness, anyone trekking without a qualified guide, or anyone attempting it outside the main trekking windows (spring and autumn).
Far Out Difficulty Score: 8.5 / 10
- Altitude: high and technically demanding.
- Terrain: glaciated pass crossing.
- Duration: 12–16 days with real fatigue accumulation.
- Remoteness adds a difficulty multiplier.
- Verdict: strenuous, rewarding, not for the unprepared.
Ready to Attempt Ganja La?
Our 13-day Langtang Ganja La Pass Trek is built around proper acclimatisation, experienced mountain guides, and small group sizes — so you arrive at the pass prepared, not just hopeful.
See Full Itinerary, Dates & Pricing for the Langtang Ganja La Trek →
Questions before you commit? Send us a trek inquiry. We would love to help you decide if Ganja La is the right call for your fitness level.
Langtang Helambu Trek Difficulty
Helambu is the quietest of the three routes and the most culturally rich. It loops through Tamang and Sherpa villages at a lower altitude than the Valley route, connecting ancient trading paths that feel worlds away from the more trafficked parts of Nepal.
Terrain
Helambu involves rolling hills, forested ridgelines, and traditional village paths rather than the dramatic alpine terrain of the other routes. The trekking is rarely flat. There’s a lot of up and down, but the altitude ceiling is significantly lower, which changes the physical experience entirely.
Altitude
The highest point on most Helambu itineraries is Thadepati at 3,619m. This altitude sits well below the altitude where acclimatisation becomes a serious concern for most trekkers. Nights are spent lower still, which means sleep quality is better, and recovery is faster than on the Valley route.
Who It Fits
Helambu suits trekkers who want a genuine Himalayan experience without the altitude challenge. It’s ideal for those who have limited high-altitude experience, are travelling at times when the higher passes are less accessible, or simply want cultural immersion alongside nature. It also works well as a first Nepal trek before attempting something more demanding.
Far Out Difficulty Score: 4 / 10
- Altitude: low enough for most healthy adults.
- Terrain: challenging in sections but no technical elements.
- Verdict: accessible, rewarding, and the best entry point into the Langtang cluster.
Which Langtang Trek Should You Choose?
Still deciding? Here:
| If you want… | Best Route | Why |
| Your first Himalayan trek | Langtang Valley | Achievable altitude, well-supported trail, real mountain experience |
| A genuine physical challenge | Langtang Ganja La Pass | Technical pass, remote terrain, full expedition feel |
| Cultural depth at a lower altitude | Langtang Helambu | Village life, lower altitude ceiling, quieter trails |
| The most dramatic scenery | Langtang Ganja La Pass | Valley + pass + Helambu descent covers three distinct landscapes |
| A shorter itinerary | Langtang Valley or Helambu | Both are manageable in 7–10 days |
| Something most trekkers haven’t done | Langtang Ganja La Pass | Low foot traffic, high reward, rarely crowded |
One honest note: the Ganja La route is frequently underestimated. Trekkers who assume it’s “just like the Valley but longer” arrive underprepared. It’s a different category of trek.
How to Prepare for a Langtang Trek
The most common cause of a cut-short Langtang trek is not altitude. It’s arriving underprepared physically. Here’s what actually makes a difference.
Cardio Base
Build your aerobic capacity over 6–8 weeks before departure. Running, cycling, or swimming. Anything that keeps your heart rate elevated for 30–60 minutes. For Ganja La specifically, you want a strong cardio base because your heart works harder at altitude even on rest days.
Leg Strength and Endurance
Stairs are your best training tool. Find a building, a hill, or a stadium and use it. For long descents, eccentric leg strength (the muscles working as you go downhill) is specifically worth training. Squats and lunges help here.
Pack Training
Train with your loaded trekking pack. A 10–12kg pack changes everything about how your body moves over long trekking days. Don’t arrive having only ever trained in running shoes.
Sleep and Recovery
Don’t underestimate pre-trek fatigue. Arriving in Kathmandu already tired from travel and then immediately starting a demanding trek is a pattern that catches people out. Build in at least one rest day in Kathmandu before you begin.
Final Verdict: Is Langtang Trek Difficult?
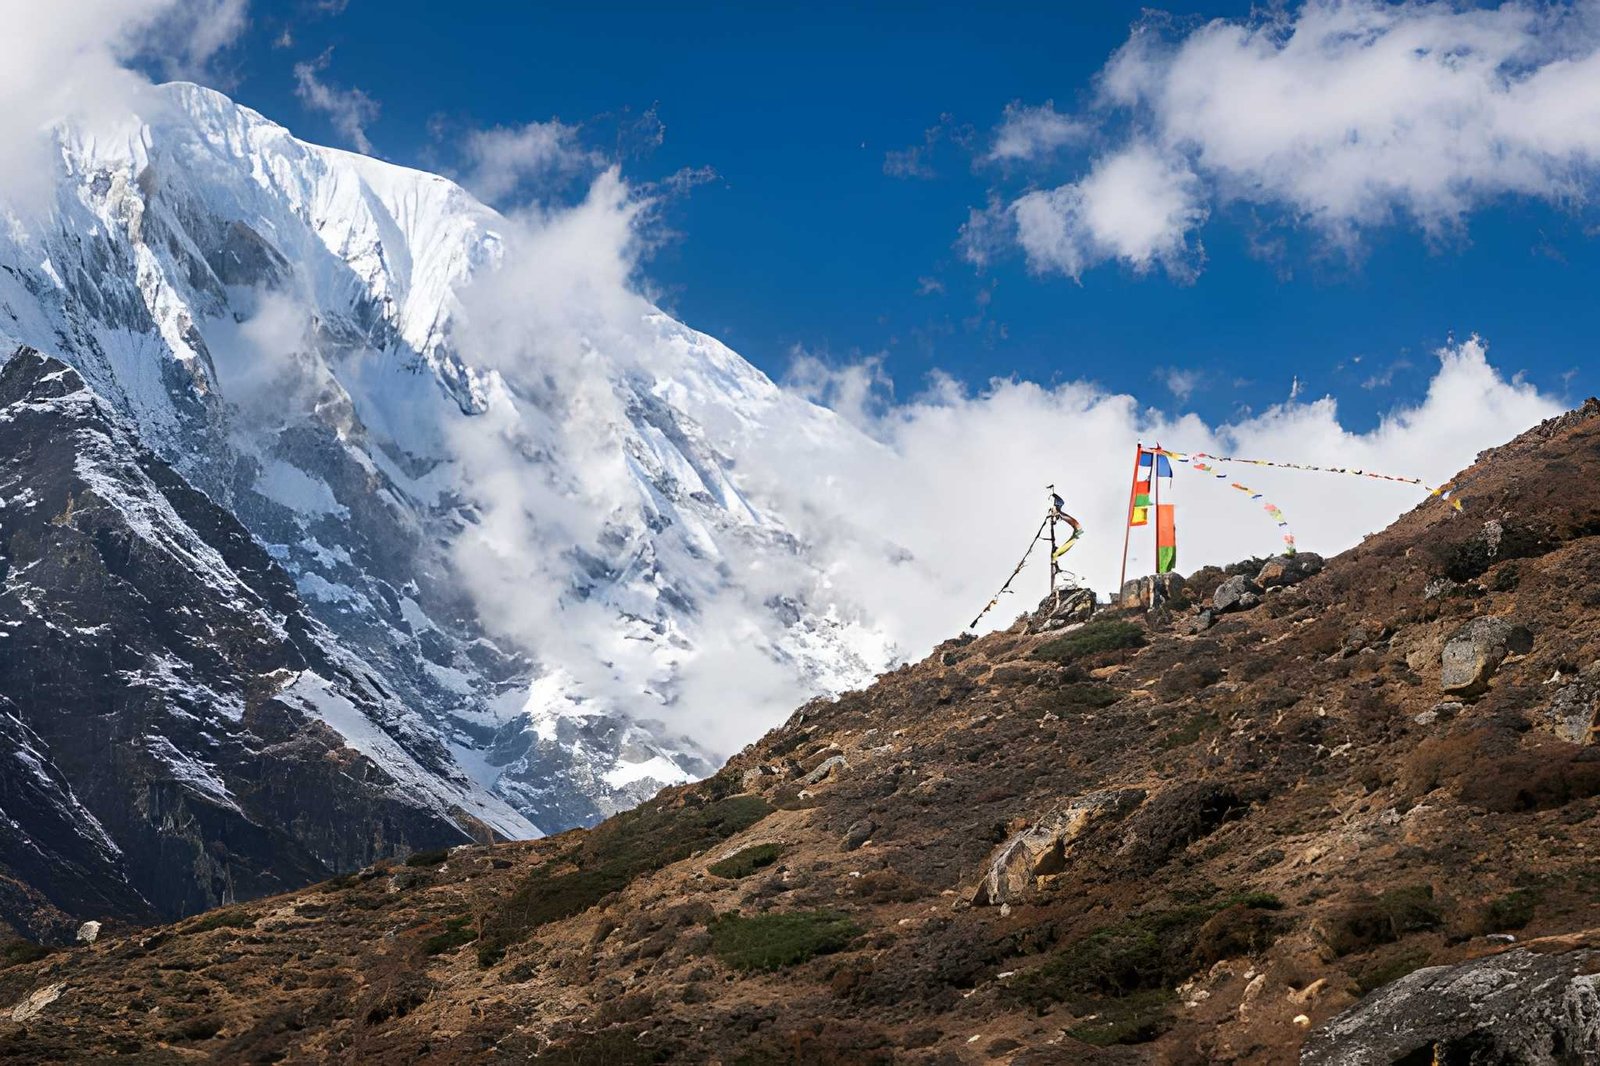
There’s no single answer, as there’s no single Langtang trek.
Langtang Valley is moderate. With preparation, most fit adults can complete it and come back wanting more.
Langtang Ganja La Pass is strenuous. It earns that description. It’s one of the more demanding non-technical Himalayan routes available to trekkers, and it rewards the people who show up ready for it with an experience that very few people on earth have had.
Langtang Helambu is accessible. It’s the best first step into this part of the Himalayas.
The right trek isn’t the hardest one. It’s the one that matches where you are right now, so you can come back and do the others.
Find Your Langtang Trek
| I want… | Start here |
| My first Himalayan experience | Langtang Valley Trek → |
| A serious high-pass challenge | Langtang Ganja La Pass Trek → |
| Culture at a lower altitude | Langtang Helambu |
| Help choosing the right route | Send us an inquiry → |
Not sure which route fits your fitness level? Drop us a message, and we’ll give you an honest answer. No hard sell, just a straight recommendation based on your experience and timeline. Contact Us →
Which Is the Hardest Pass on the Everest Three Passes Trek? (Kongma La vs Cho La vs Renjo La)
Introduction to The Everest Three Passes
If you’re searching for the Everest Three Passes Trek, this question is likely not idle curiosity. Underneath “which pass is hardest” is often a quieter one: am I actually capable of this? That’s a fair thing to wonder before committing weeks and serious money to a trek that crosses three passes above 5,300m.
Everyone agrees that the hardest pass is Kongma La due to the altitude or the distance. But altitude alone doesn’t explain why, and it definitely doesn’t tell you which pass will be hardest for you specifically. Difficulty here isn’t one-dimensional. It shows up as exhaustion on one pass, as nerve on another, and as sheer persistence on the third. This guide breaks down what actually makes each crossing hard, so you can prepare for the right thing instead of just bracing generally.
Which Everest Pass Is the Hardest?
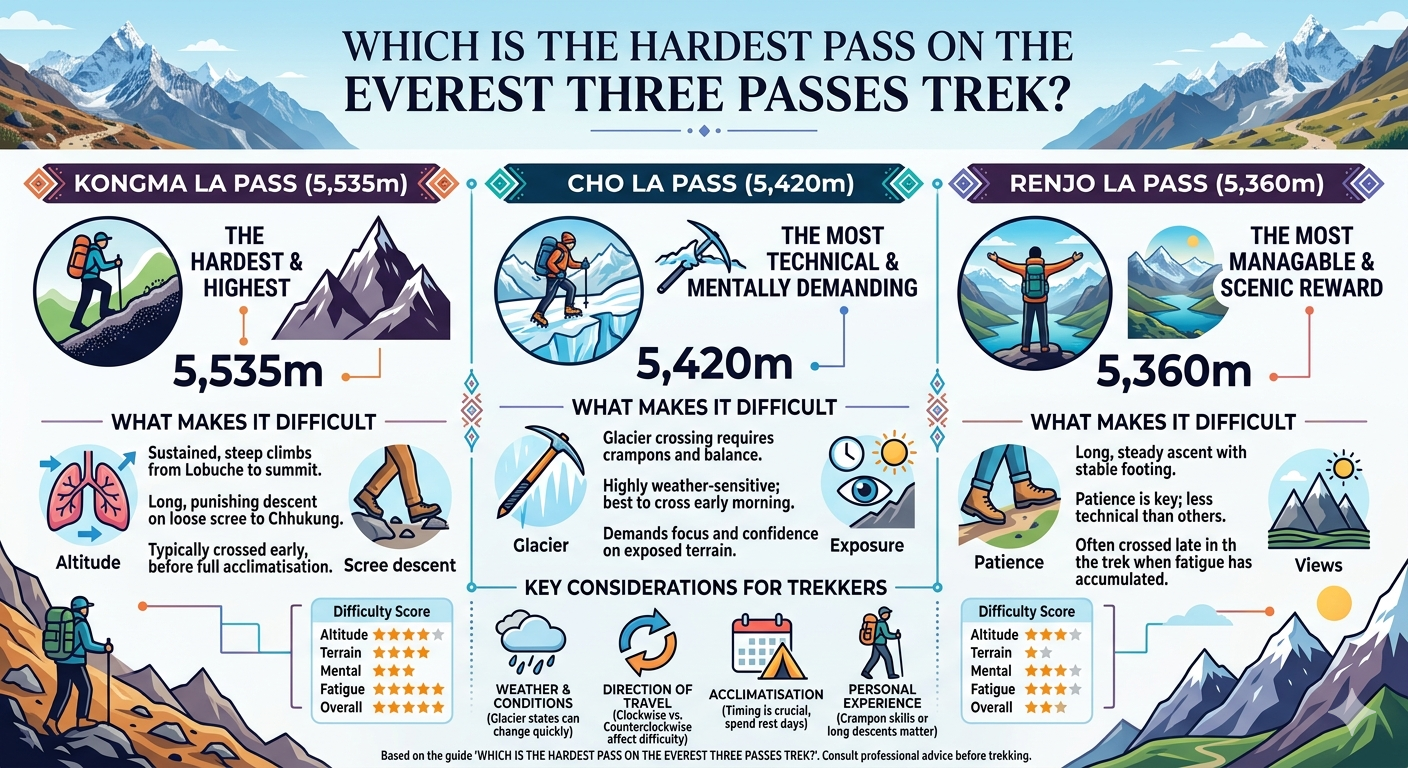
As stated above, Kongma La (5,535m) is generally the hardest pass on the Everest Three Passes Trek.
- Kongma La: the highest, longest, and most physically exhausting
- Cho La: most technical, most mentally demanding
- Renjo La: most manageable, best views
But “hardest” depends on what you personally struggle with.
How We Compared Kongma La, Cho La, and Renjo La
Most of the rankings of these passes are solely based on elevation. But that’s incomplete. A 100m difference in altitude matters less than when you cross a pass, or what’s the terrain like at that time, or even what kind of difficulty do you personally handle worst?
Two trekkers can cross the same pass on the same day and come away with completely different verdicts on how hard it was. This is because difficulty isn’t just a property of the mountain; it’s a product of the mountain meeting a specific person on a specific day.
We compared all three across four dimensions, weighted by how much each actually shapes the experience of crossing:
| Dimension | Weight | What It Measures |
| Altitude | 35% | Oxygen availability, summit elevation |
| Terrain | 25% | Surface type: rock, scree, or glacier |
| Mental & Exposure | 20% | Fear, exposure, and the consequence of a misstep |
| Fatigue & Acclimatisation | 20% | When the pass is crossed, cumulative tiredness |
Altitude
Every 100m above 5,000m costs you more than the last. Kongma La’s summit sits 175m above Renjo La’s. This may not sound dramatic on paper, but it is noticeably harder in your lungs when you’re crossing the pass.
Terrain
Loose scree drains you differently from glacier ice, which drains you differently from packed trail. Kongma La’s descent is scree. Cho La’s crossing is ice. Renjo La is mostly stable rock. It’s the same altitude range, but three different kinds of tiredness.
Mental & Exposure
Some difficulty is physical. Some is psychological. Standing on moving ice above a drop triggers a different kind of stress than a long, grinding climb, even if the climb burns more calories.
Fatigue & Acclimatisation
The same pass crossed on Day 5 and Day 12 of a trek can feel like two different mountains. Your body’s altitude tolerance improves substantially over the first ten days at elevation. Timing changes everything.
If you can score each pass against these four dimensions, and a clearer, more honest ranking emerges: one that explains why it’s hard, not just that it is.
Everest Three Passes at a Glance
| Pass | Elevation | Route | Typical Trek Day | Tests |
| Kongma La | 5,535m | Lobuche → Chhukung | Day 5–7 (clockwise) | Endurance |
| Cho La | 5,420m | Dzongla → Gokyo | Day 8–10 (clockwise) | Confidence |
| Renjo La | 5,360m | Gokyo → Lungden | Day 11–13 (clockwise) | Consistency |
All three sit within the wider Khumbu region, linking the Everest Base Camp trail with the Gokyo Lakes valley. Crossing all three in one trip is what defines the Three Passes Trek. There’s no shortcut around any of them if you’re doing the full loop.
Kongma La Pass: Why It’s Usually Considered the Hardest
- Elevation: 5,535m
- Route: Lobuche → Chhukung
- Tests: Endurance
If you’ve never wondered whether your legs will simply give out partway through a day, Kongma La is where you’ll find out.
What Makes Kongma Difficult
From Lobuche (4,940m), the ascent gains roughly 600 vertical metres with almost no flat recovery sections. It’s sustained, grinding, and long before you even reach the summit. The descent toward Chhukung is where most people actually struggle. This descent is a long stretch of loose scree that punishes already-tired knees and demands constant attention. There’s no coasting down. Every step requires a small decision.
This is also the pass most often crossed early in the standard clockwise itinerary, typically Day 5–7, when your body hasn’t finished adapting to altitude. That timing disadvantage is a real part of why it earns its reputation. The difficulty isn’t only the mountain, it’s the mountain arriving before you’re ready for it.
Who Struggles Most Here
If long, sustained physical effort wears you down faster than fear does, Kongma La will be your hardest day. Trekkers without prior experience above 5,000m, or anyone who hasn’t trained for sustained descents, tend to find this the most punishing of the three. It’s not because of any single moment, but because of how long the difficulty lasts.
When Kongma Feels Easier
Cross it later in your itinerary, like after eight or more days at altitude, and Kongma La becomes noticeably more manageable. Trekkers doing the route counterclockwise, who reach Kongma La after Renjo La and Cho La, consistently report an easier experience here, even though nothing about the mountain has changed.
Difficulty Score
| Category | Score |
| Altitude | ★★★★★ |
| Terrain | ★★★★ |
| Mental & Exposure | ★★★ |
| Fatigue impact | ★★★★★ |
| Overall | ★★★★★ |
Cho La Pass: Why It Feels More Technical Than Kongma
- Elevation: 5,420m
- Route: Dzongla → Gokyo
- Tests: Confidence
If exposure unsettles you more than exhaustion does, this is the pass that will quietly get under your skin.
Glacier and Footing
Cho La’s defining feature is its glacier crossing. It’s a section of ice that demands balance, caution, and usually crampons. It isn’t long, but it concentrates risk into a short stretch in a way that nothing else on the trek does. Every foot placement matters here. That’s a different kind of tiring than a long climb, that is mentally draining rather than physically draining, and it lingers in a way pure fatigue doesn’t.
Weather Sensitivity
Cho La is the most condition-dependent of the three passes. Crossing early in the morning (ideally before 7 am) means firmer, more predictable ice. Cross later in the day, after the sun has softened the surface, and the same pass becomes meaningfully harder and riskier. Season matters too: October and November typically offer more stable conditions than the unsettled snow sometimes left over from the monsoon season.
Who Finds Cho La Hardest
If you’ve never crossed exposed terrain or worked with crampons, the glacier section can be the most intimidating moment of the entire trek, regardless of your fitness level. Strong, fit trekkers with no prior exposure experience sometimes find Cho La harder than Kongma La, even though it sits 115m lower. Confidence under uncertainty matters more here than raw stamina.
Difficulty Score
| Category | Score |
| Altitude | ★★★★ |
| Terrain | ★★★★★ |
| Mental & Exposure | ★★★★★ |
| Fatigue impact | ★★★ |
| Overall | ★★★★ |
Renjo La Pass: The Most Balanced of the Three
- Elevation: 5,360m
- Route: Gokyo → Lungden
- Tests: Consistency
If you can keep putting one foot in front of the other for hours without losing focus, Renjo La rewards you generously.
Why Renjo Feels Smoother
There’s no glacier here, no major scree field, nothing technical to navigate. What Renjo La asks for instead is patience. It involves a long, steady ascent from Gokyo that gains elevation gradually rather than punishing you in short bursts. The terrain is stable underfoot. The challenge is less about any single obstacle and more about sustaining effort, breath after breath, at altitude.
When Renjo Becomes Difficult
By the time most trekkers reach Renjo La, typically the final pass on a clockwise loop, fatigue has already accumulated from two prior crossings. The pass itself is the most forgiving of the three, but it’s rarely crossed by fresh legs. Consistency, not difficulty, is what gets tested here: can you keep going at the same pace after everything that’s come before?
Who Enjoys Renjo Most
Trekkers who find altitude tiring but not frightening, and who prefer a pass that rewards patience over technical skill, tend to enjoy Renjo La the most. It’s also the strongest confidence-builder if crossed first. For trekkers attempting the route counterclockwise, Renjo La is a manageable introduction to what a 5,000m+ pass actually feels like.
Scenic Value
It’s worth noting Renjo La isn’t just the easiest of the three, but arguably the most beautiful. From the summit, Everest, Lhotse, and Makalu line the horizon, with the Gokyo Lakes glittering below. The reward at the top is real, and it tends to make the long ascent feel worthwhile in a way the other two passes don’t quite match.
Difficulty Score
| Category | Score |
| Altitude | ★★★★ |
| Terrain | ★★ |
| Mental & Exposure | ★★★ |
| Fatigue impact | ★★★★ |
| Overall | ★★★ |
Kongma La vs Cho La vs Renjo La: Side-by-Side Comparison
| Category | Kongma La | Cho La | Renjo La |
| Altitude | ★★★★★ | ★★★★ | ★★★★ |
| Technicality | ★★★ | ★★★★★ | ★★ |
| Mental demand | ★★★★★ | ★★★★ | ★★★ |
| Descent difficulty | ★★★★★ | ★★★★ | ★★★ |
| Scenic reward | ★★★★ | ★★★★ | ★★★★★ |
| Overall difficulty | ★★★★★ | ★★★★ | ★★★ |
The pattern is clear once you see it side by side: Kongma La wins on sheer physical demand, Cho La wins on technical and mental intensity, and Renjo La wins on consistency and reward. None of them is easy. They’re just hard in different currencies.
If you’re planning the full circuit rather than a single pass, our Everest Three Passes Trek itinerary breaks down the complete route day by day, including acclimatisation scheduling around all three crossings.
Why Trekkers Disagree on the Hardest Pass
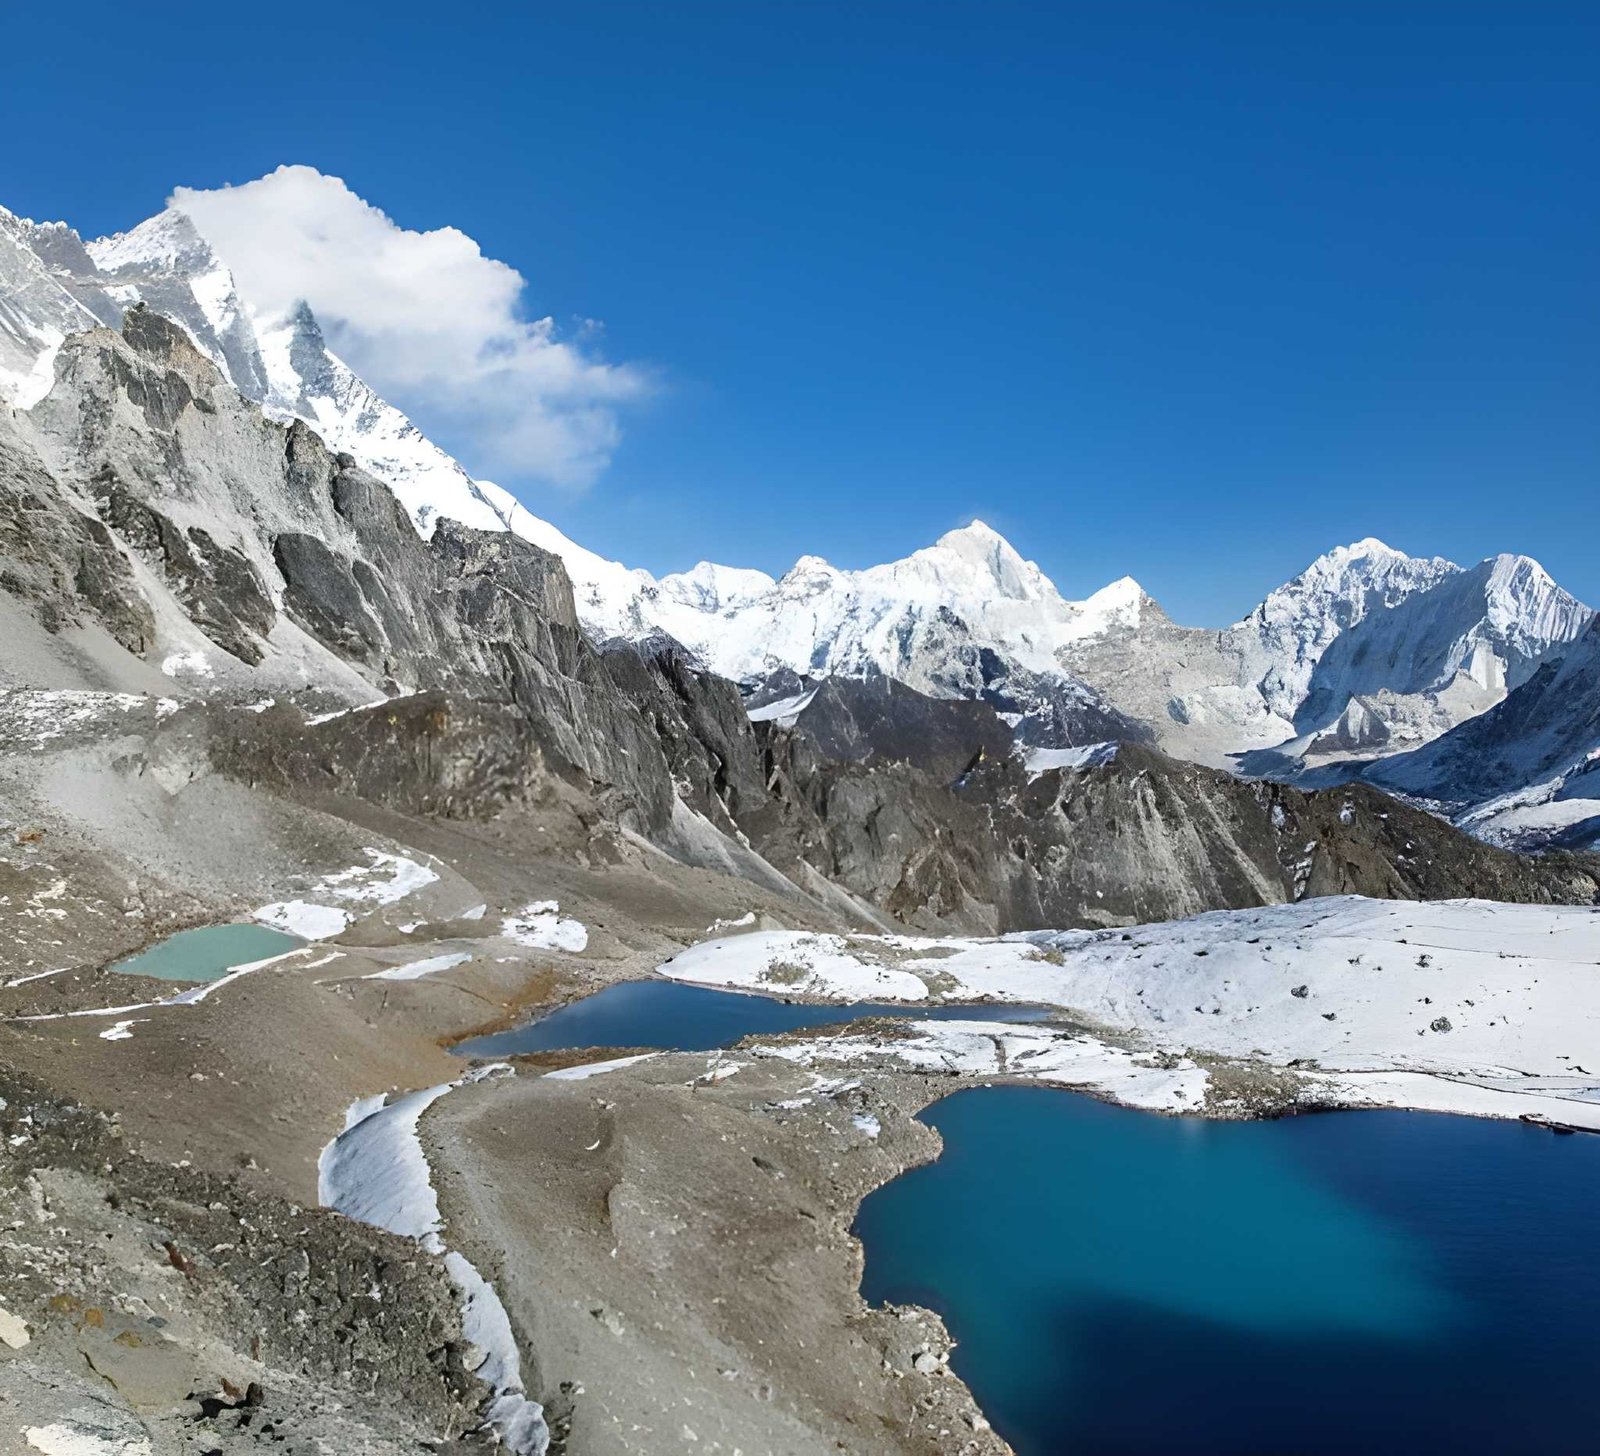
Ask ten people who’ve completed the Three Passes which pass was hardest, and you won’t get one answer. Some will say Kongma La without hesitation. Others will insist Cho La’s glacier was the worst moment of the trip. A few will say Renjo La caught them off guard simply because it came last. That’s not inconsistency, but a difficulty that isn’t fixed. It shifts based on four things.
Weather
A clear, cold morning on Cho La is a different pass entirely from a warm, overcast afternoon crossing. Glacier conditions swing more with the weather than either of the other two passes.
Direction of Travel
Clockwise (Kongma La → Cho La → Renjo La) front-loads the hardest physical pass before you’re fully acclimatised. Counterclockwise reverses that. It eases in with Renjo La and saves Kongma La for when your body is most adapted, at the cost of facing it after two passes’ worth of accumulated fatigue.
Acclimatisation
Someone who’s spent extra rest days at altitude before starting will experience all three passes differently than someone moving through on a tighter schedule. Time at elevation is the single biggest variable nobody controls for in generic difficulty rankings.
Previous Trekking Experience
A trekker who’s used crampons before will find Cho La’s glacier far less intimidating than a first-timer. Someone who’s done long descents on loose rock will find Kongma La’s scree section routine rather than punishing. Your difficulty ranking is, in part, a reflection of what you’ve already done.
This is why a fixed “hardest pass” answer only tells part of the story. The framework above gives you the consensus. The honest answer is that your hardest pass depends on which of these four variables hits you hardest.
Which Everest Pass Should You Choose?
If you’re planning your preparation or trying to decide where to focus your training for the Khumbu region, here’s where the four dimensions point.
If you struggle with long endurance → Kongma La will test you most. Train with sustained climbs and long descents on loose or uneven terrain.
If you struggle with exposure or technical footing → Cho La will test you most. If you’ve never used crampons, consider a short practice session before the trek.
If you struggle with altitude anxiety generally → Kongma La’s elevation and timing make it the most likely to trigger it.
If you’re after the best reward-to-effort ratio → Renjo La delivers spectacular views without demanding technical skill. It can be a strong choice if you’re newer to high-altitude trekking.
If you’re doing the full loop (most trekkers are) → Prepare hardest for Kongma La, respect Cho La’s technical demands, and let Renjo La be the pass where you finally enjoy the view instead of just surviving it.
Final Verdict: Which Is the Hardest Pass on Everest?
Kongma La is the hardest pass on the Everest Three Passes Trek. The highest, longest, and most physically demanding, this pass is often crossed before trekkers are fully acclimatised.
Cho La is the most technical and mentally demanding, thanks to its glacier crossing and weather-sensitive conditions.
Renjo La is the most manageable, but at 5,360m, “manageable” is relative. Nothing on this trek is easy. Some of it just asks more from your legs, and some of it asks more from your nerves.
Best Time to Visit Bhutan: A Month-by-Month Weather, Festivals & Travel Guide
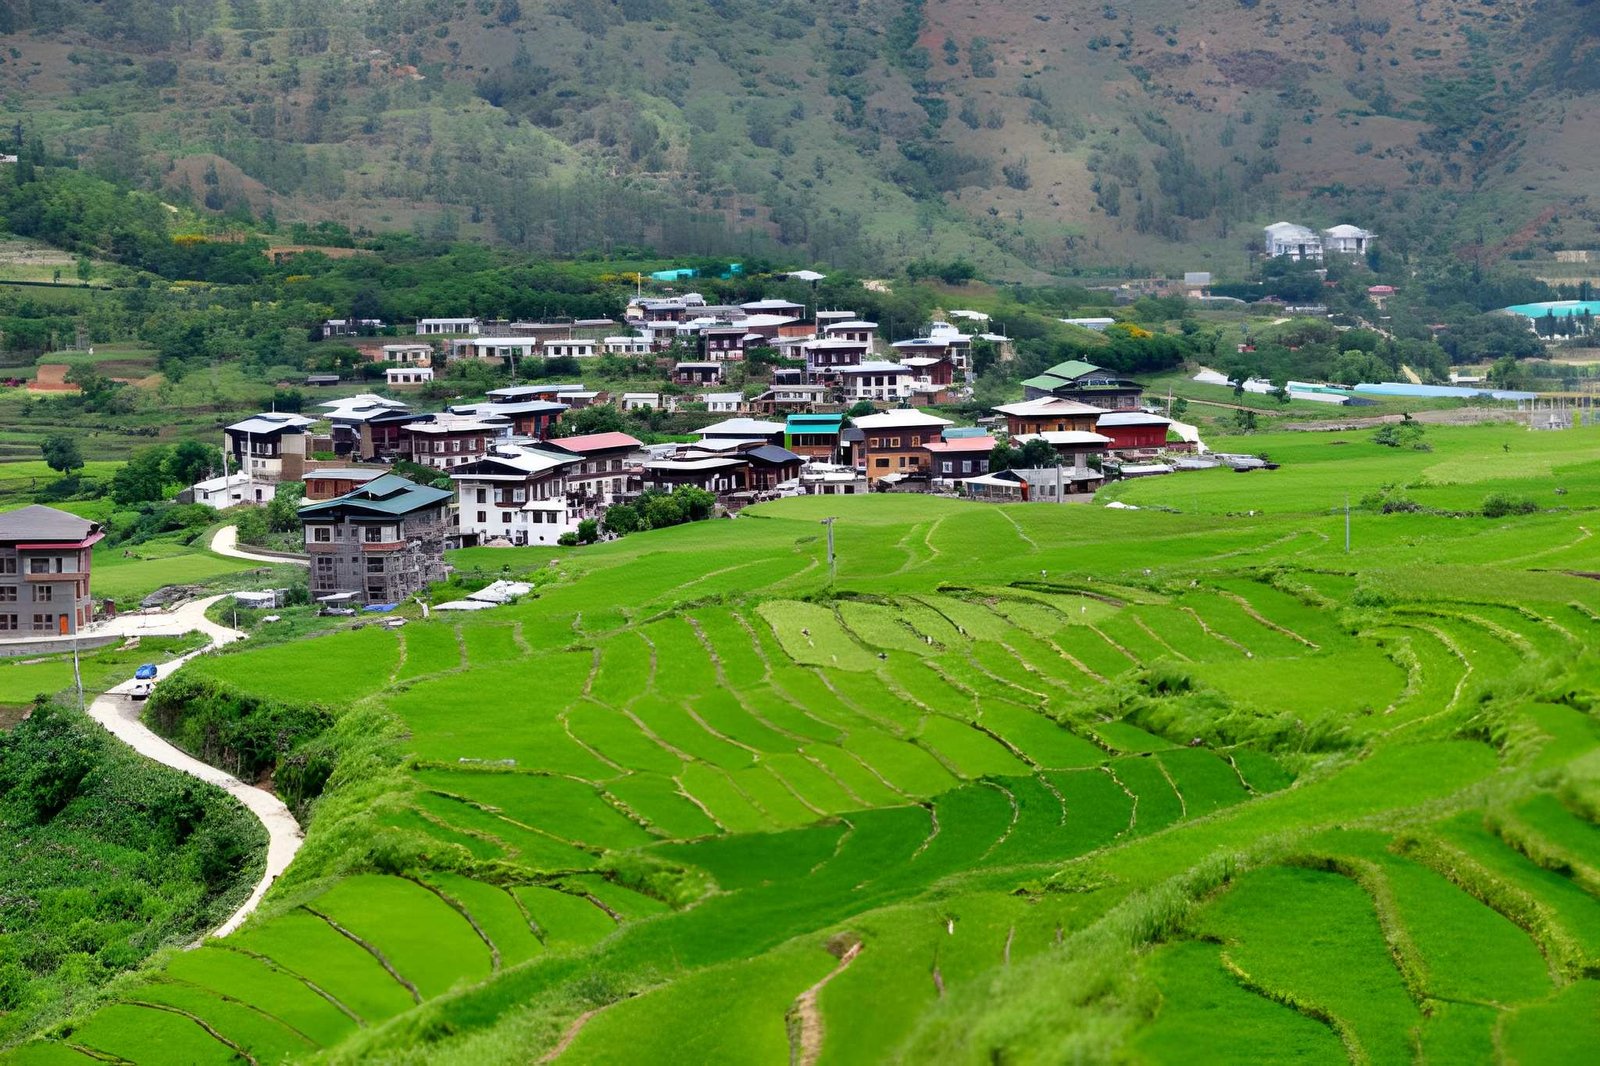
Thinking about when to visit Bhutan
October and November are Bhutan’s most-praised travel months for many good reasons. The skies are sharp, Himalayan views are unobstructed, and the kingdom feels alive after the festival season. But they are not the only answer.
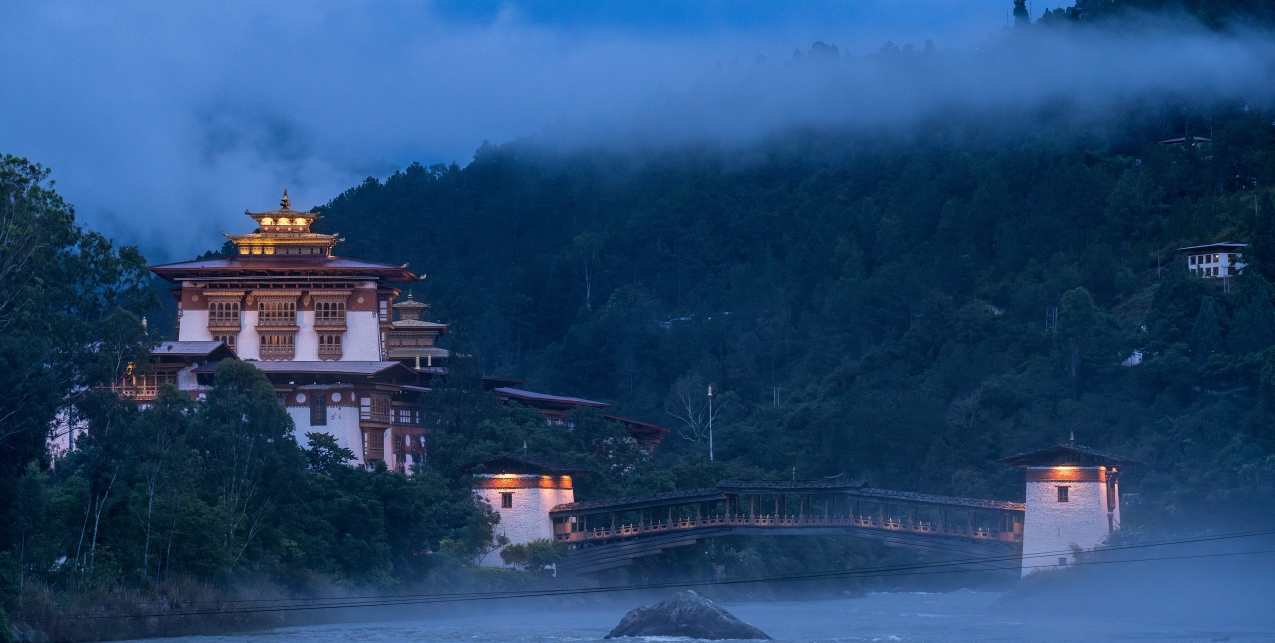
Spring brings rhododendron valleys and Bhutan’s most celebrated festivals. Late November offers that same October clarity at noticeably lower prices. And as for winter, it’s far from being a season to skip, reveals a quieter, warmer Bhutan, particularly in the subtropical Punakha valley.
What follows is not a weather report. It’s a decision guide that is built to help you match the right season to your travel style, budget, and what you most want to see. Bhutan is one of the world’s more considered travel investments. Getting the timing right matters.
Quick Answer: When Is the Best Time to Visit Bhutan?
Not all travellers come to Bhutan for the same reason, and the best month depends entirely on what you’re there for. The following table can help you find your match at a glance, and then you can read the seasonal sections for the full picture.
| Travel Goal | Best Time to Visit Bhutan |
| Clear Himalayan views | October – November |
| Festival immersion | March–April & September |
| Lowest travel costs | January – February |
| Trekking | March–May & October |
| Photography | Late November |
| Lush green landscapes | July – August |
| Family travel | April & October |
| Nepal + Bhutan combined | October – November |
| Honeymoon | March–April or October |
| Luxury travel | October – November |
| Budget-conscious travel | December – February |
No single month wins for everyone. The sections below break down exactly what each season delivers, and what it costs you.
The Four Travel Seasons of Bhutan
Before diving into months and regions, it helps to understand how dramatically Bhutan’s seasons differ, not just in weather, but in experience, crowd levels, and value.
| Season | Weather | Mountain Visibility | Crowd Level | Relative Cost | Best For |
| Spring (Mar–May) | Mild, warming. 10–20°C valleys | Good to Very Good | Moderate–High | Moderate | Festivals, trekking, rhododendrons |
| Summer/Monsoon (Jun–Aug) | Warm, humid. Afternoon rains | Low in the east, better in the west | Low | Low–Moderate | Slow travel, green scenery, and budget |
| Autumn (Sep–Nov) | Crisp, clear. 10–22°C valleys | Excellent | High (Oct peak) | High (Oct peak) | First-timers, photography, trekking |
| Winter (Dec–Feb) | Cold to very cold. –5–12°C | Good (clear days) | Low | Low–Moderate | Punakha, festivals, budget travel |
Each season has its own genuine case and tradeoff. You can explore the following section for a deeper understanding.
Spring Season in Bhutan (March – May): Festivals, Flowers & Trekking
Spring is Bhutan at its most theatrical. Rhododendron forests, which Bhutan has over 46 species, bloom across mountain slopes from mid-March into April. These forests paint the valleys in red, pink, and white. The weather is also reliably mild in the lower valleys, trekking trails are open and well-conditioned, and the kingdom’s two most-attended festivals anchor the calendar.
Paro Tshechu: Held in March or April, depending on the lunar calendar, draws Bhutanese from across the country. The festival fills Paro with colour, devotion, and masked dance performances that have remained largely unchanged for centuries. Punakha Drubchen in February/March recreates a 17th-century battle victory and is one of Bhutan’s most visually dramatic religious events.
Spring tradeoff: Visibility is good, but rarely as sharp as late autumn. April is also very popular. So, book accommodation and guided itineraries well in advance.
Best spring itinerary: Paro → Punakha → Thimphu, timed around Paro Tshechu. This is Bhutan’s most popular cultural journey and works beautifully in April.
Monsoon Season in Bhutan (June – August): The Underrated Window
Most travel guides tell you to avoid the monsoon. That advice is incomplete. The honest picture is more nuanced, and for the right traveller, June through August offers something genuinely distinct.
Western Bhutan (Paro, Thimphu, and Punakha) receives significantly less rainfall than forecasts suggest. Valley travel remains practical on most days. Landscapes turn an intense, saturated green that photographs beautifully. Crowds thin almost entirely. Prices drop. The kingdom feels more like itself.
The scenery would be something like: Prayer flags in morning mist. Rice paddies are bright green against ancient fortress walls. Monasteries visited in near-solitude.
For slow travellers and atmospheric photographers, monsoon Bhutan has real appeal.
The genuine monsoon concern is eastern Bhutan. Road conditions can deteriorate significantly between June and August, and multi-day eastern circuits carry real logistical risk. If your itinerary stays in the west, the picture changes considerably.
Monsoon tradeoff: Trekking above 3,000m is inadvisable. Mountain views are frequently obscured. Eastern Bhutan road travel is unreliable. But for a western valley cultural journey or for travellers who want Bhutan without the crowds, the monsoon delivers a legitimate experience that many people undersell.
Autumn Season in Bhutan (September – November): The Peak Season
Autumn is when Bhutan performs. The monsoon clears, skies stabilise, and the Himalayas come into full, unobstructed view. September sees the transition of the skies improving slowly week by week. October arrives crisp and brilliant. November extends that clarity with a notable drop in crowd pressure and prices as the month deepens.
Thimphu Tshechu falls in September or October, drawing large crowds to the capital for three days of mask dances, religious ceremonies, and the unfurling of a giant thangka. For first-time visitors, the autumn arc of Paro → Thimphu → Punakha in October is the single most reliable introduction to Bhutan.
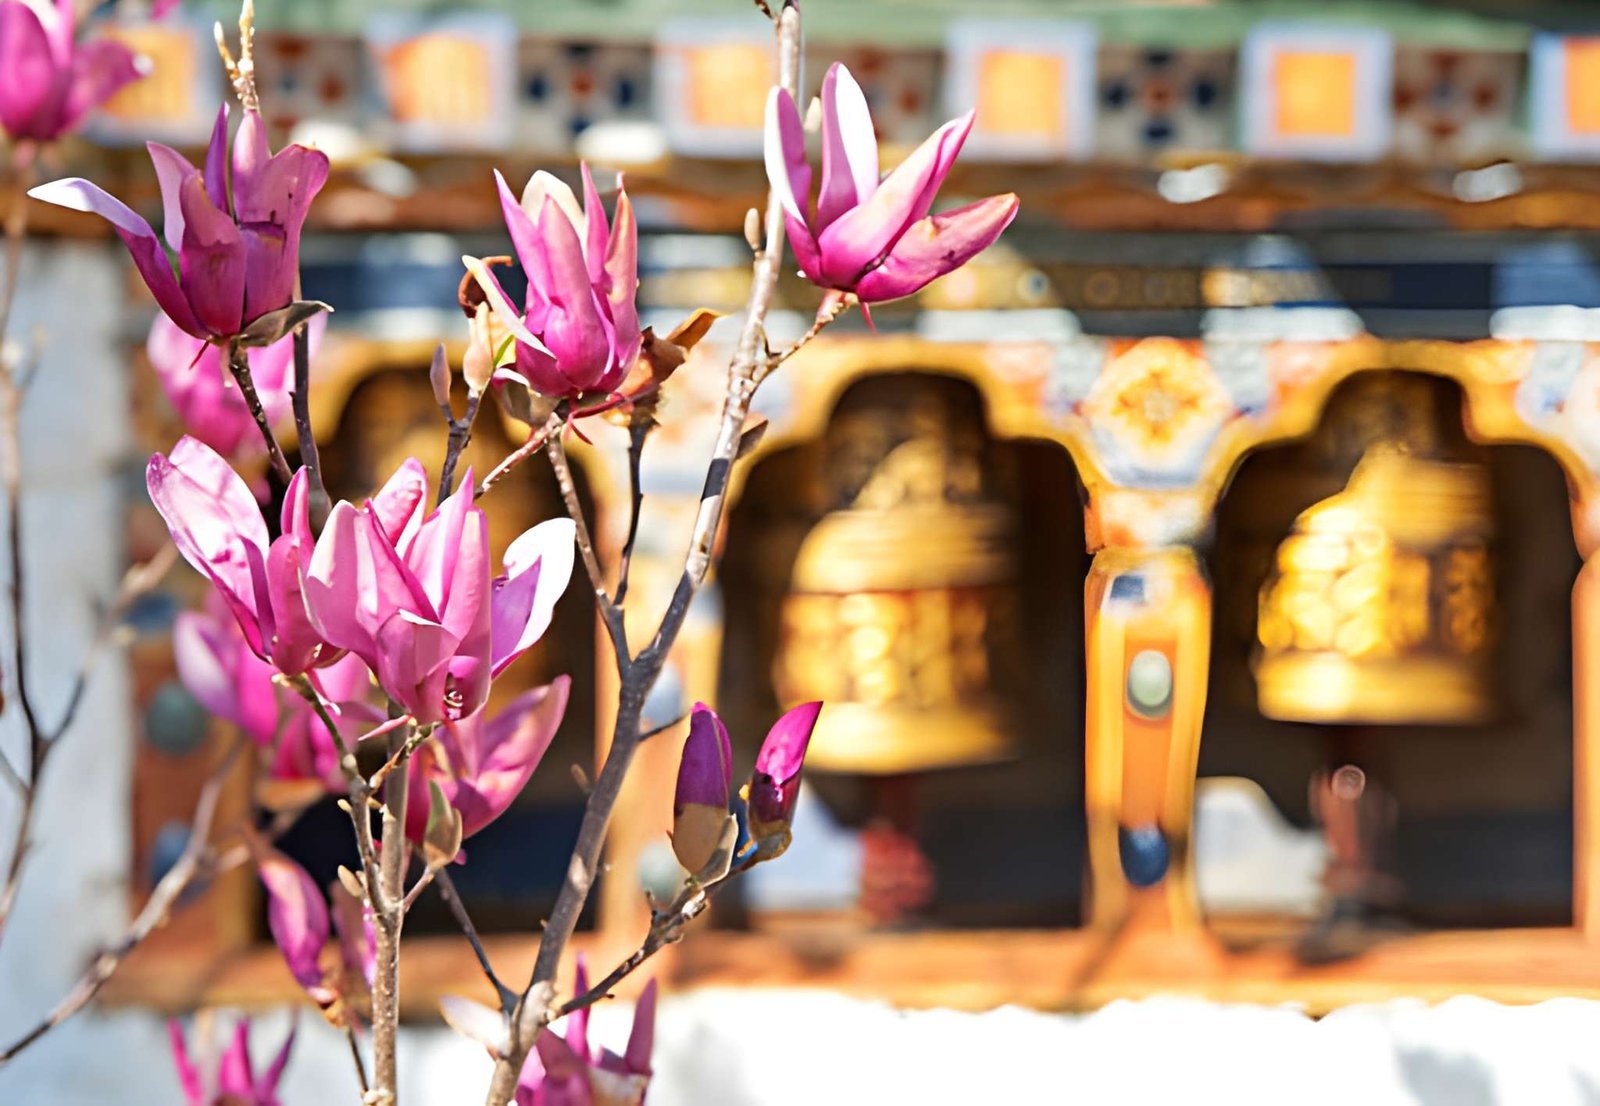
Autumn tradeoff: October is Bhutan’s most expensive and most crowded month. Premium lodges book out months in advance. If your dates are flexible, late November delivers nearly identical sky quality with noticeably less pressure on both logistics and budget.
Why Late November Is Bhutan’s Hidden Sweet Spot
Late November deserves its own mention because very few properly address it, and it may be the most strategically undervalued window in the Bhutan travel calendar.
By mid-to-late November, the festival crowds have dispersed, October premium pricing softens, and visibility remains excellent, often matching or exceeding early October conditions. The Himalayas are still fully clear. Tiger’s Nest trail conditions are ideal. Temperatures are cool but entirely manageable in the lower valleys.
In Phobjikha Valley, the black-necked cranes have arrived from Tibet. This is one of Bhutan’s most distinctive wildlife experiences, and is celebrated with the Black-Necked Crane Festival in mid-November. This event is rarely mentioned, yet it’s one of the most memorable things the country offers in any season.
Late November verdict: Clear skies. Reduced crowds. Softer prices. Cranes in Phobjikha. If you have flexibility in your travel dates and October feels too busy or expensive, late November is the answer.
Winter Season in Bhutan (December – February): Cold, Quiet & Underestimated
Winter has a reputation problem in Bhutan travel content. The blanket advice saying “avoid it” ignores a more accurate picture: winter Bhutan varies enormously by region.
Bumthang at 2,800m in January is genuinely cold, and multi-day highland treks are off the table. But Punakha, sitting at just 1,200m in a subtropical valley, is mild and pleasant in December. January is also warm enough for light layers, and clear enough for beautiful photography of the Punakha Dzong against winter light. The jacaranda trees lining the valley bloom in late February, creating one of Bhutan’s most photographed natural spectacles.
Punakha Drubchen in February is one of Bhutan’s most compelling festivals. It is dramatic, atmospheric, and attended primarily by Bhutanese rather than international tour groups. It’s the kind of experience that feels genuinely unmediated.
Winter tradeoff: Mountain passes can close due to snow, limiting some itinerary options. Bumthang and eastern routes require flexibility. But for a Punakha-centred winter journey, the season is genuinely compelling and significantly underpriced.
Bhutan Weather by Region: Why Location Changes Everything
Bhutan is not one climate. Treating it as such is the single most common planning error. Altitude variation across Bhutan’s valleys is dramatic, and the temperature difference between regions in any given month can be 10°C or more. Here’s how the main destinations compare across seasons:
| Region | Altitude | Winter | Spring | Monsoon | Autumn | Standout Feature |
| Paro | 2,200m | Cold, clear | Ideal | Manageable | Excellent | Tiger’s Nest, autumn clarity |
| Thimphu | 2,320m | Cold, dry | Pleasant | Moderate rain | Excellent | Cultural festivals, city-based |
| Punakha | 1,200m | Warm & mild | Very warm | Humid | Warm & clear | Winter travel, jacaranda bloom |
| Bumthang | 2,800m+ | Cold–very cold | Cool | Chilly, wet | Crisp | Spiritual journeys, snow possible |
| Phobjikha | 2,900m | Very cold | Cool | Cool & wet | Mild | Black-necked cranes (November) |
The practical implication: a “bad month” for Bhutan overall can be an excellent month for a specific region. December is cold in Thimphu and very cold in Bumthang, but it’s genuinely pleasant in Punakha. Understanding this unlocks year-round travel options that generic guides completely miss.
Travelling to Bhutan Month-by-Month
Scroll through for a fast read on any month. High-interest periods, including October, November, March, and April, are covered in more depth in the seasonal sections above.
| Month | Weather | Visibility | Crowds | Festivals | Best For |
| January | Cold, dry, clear | Very Good | Very Low | — | Budget travel, Punakha |
| February | Cold, brightening | Good–Very Good | Low | Punakha Drubchen | Winter culture, fewer tourists |
| March | Warming, rhododendrons emerge | Good | Moderate | Paro Tshechu (some years) | Trekking starts, spring colour |
| April | Warm, peak bloom | Good | Moderate–High | Paro Tshechu, local festivals | First-timers, families, flowers |
| May | Warm, pre-monsoon | Moderate | Moderate | — | Late spring trekking |
| June | Monsoon begins | Lower | Low | — | Slow travel, green scenery |
| July | Peak monsoon | Low (east) | Very Low | — | Western valleys only |
| August | Monsoon, lush green | Variable | Low | — | Atmospheric photography, budget |
| September | Clearing skies | Improving | Moderate | Thimphu Tshechu | Transitional, festival seekers |
| October | Perfect, crisp | Excellent | Very High | Post-festival calm | First-timers, photographers, and luxury |
| November | Crisp, clear | Excellent–Best | Moderate (late Nov) | Black-Necked Crane Festival | Sweet spot: clarity + value |
| December | Cold, silent | Very Good | Low | — | Solitude, winter landscapes |
Festival dates shift annually with the Bhutanese lunar calendar. Always confirm exact dates with your operator before finalising travel plans.
Best Time to Visit Bhutan for Your Travel Style
The most useful question isn’t “when is Bhutan best?” It’s “when is Bhutan best for me?” The answer depends entirely on what you’re actually there for.
| Traveler Type | Best Time | Why |
| First-time visitor | October–November | Clear skies, stable weather, post-festival energy |
| Festival traveler | March–April & September | Paro Tshechu, Punakha Drubchen, Thimphu Tshechu |
| Trekker | March–May & October | Open passes, good trail conditions, reliable visibility |
| Photographer | Late November | Crystal clarity, golden light, low crowds, cranes in Phobjikha |
| Family | April & October | Comfortable temperatures, accessible trails, manageable schedules |
| Honeymoon | March–April or October | Flower valleys or golden autumn — both deeply romantic |
| Budget traveler | January–February | Lower costs, fewer crowds, still beautiful |
| Luxury traveler | October–November | Premium lodge availability, ideal conditions, curated experiences |
| Slow traveler | June–August | Monsoon intimacy, solitude, lush atmospheric beauty |
| Nepal + Bhutan combo | October–November | Both destinations peak simultaneously for mountain views |
If more than one row applies to you, the overlap usually points to a clear answer. October suits first-timers, photographers, and luxury travellers simultaneously. Late November works for photographers, slow travellers, and budget-conscious visitors at once.
Best Time for Nepal, Bhutan & Tibet Combined
For travellers combining destinations, like the Nepal + Bhutan pairing (one of the most popular Himalayan itineraries), autumn is the clear answer. October and November align near-perfectly across all three destinations.
Nepal in October offers post-monsoon clarity ideal for trekking to Annapurna or Everest Base Camp. Bhutan in October–November matches this precisely with crisp skies, festival energy in September/October, and the late-November sweet spot for those adding a Bhutan leg after Nepal.
Tibet’s travel season runs roughly from April through October. For a Tibet → Bhutan sequence, autumn works well if timed before late November, when high-altitude access can narrow.
The Bhutan + Sikkim combination follows a similar logic. Both destinations align well in spring (March–May) and equally well in autumn for a single eastern Himalayan journey.
Recommended Nepal + Bhutan sequence: Fly Kathmandu → trekking or cultural circuit in Nepal → fly to Paro → Paro, Thimphu, Punakha circuit → depart. October or November. Allow 12–16 days minimum for both destinations to breathe properly.
Is There a Bad Time to Visit Bhutan?
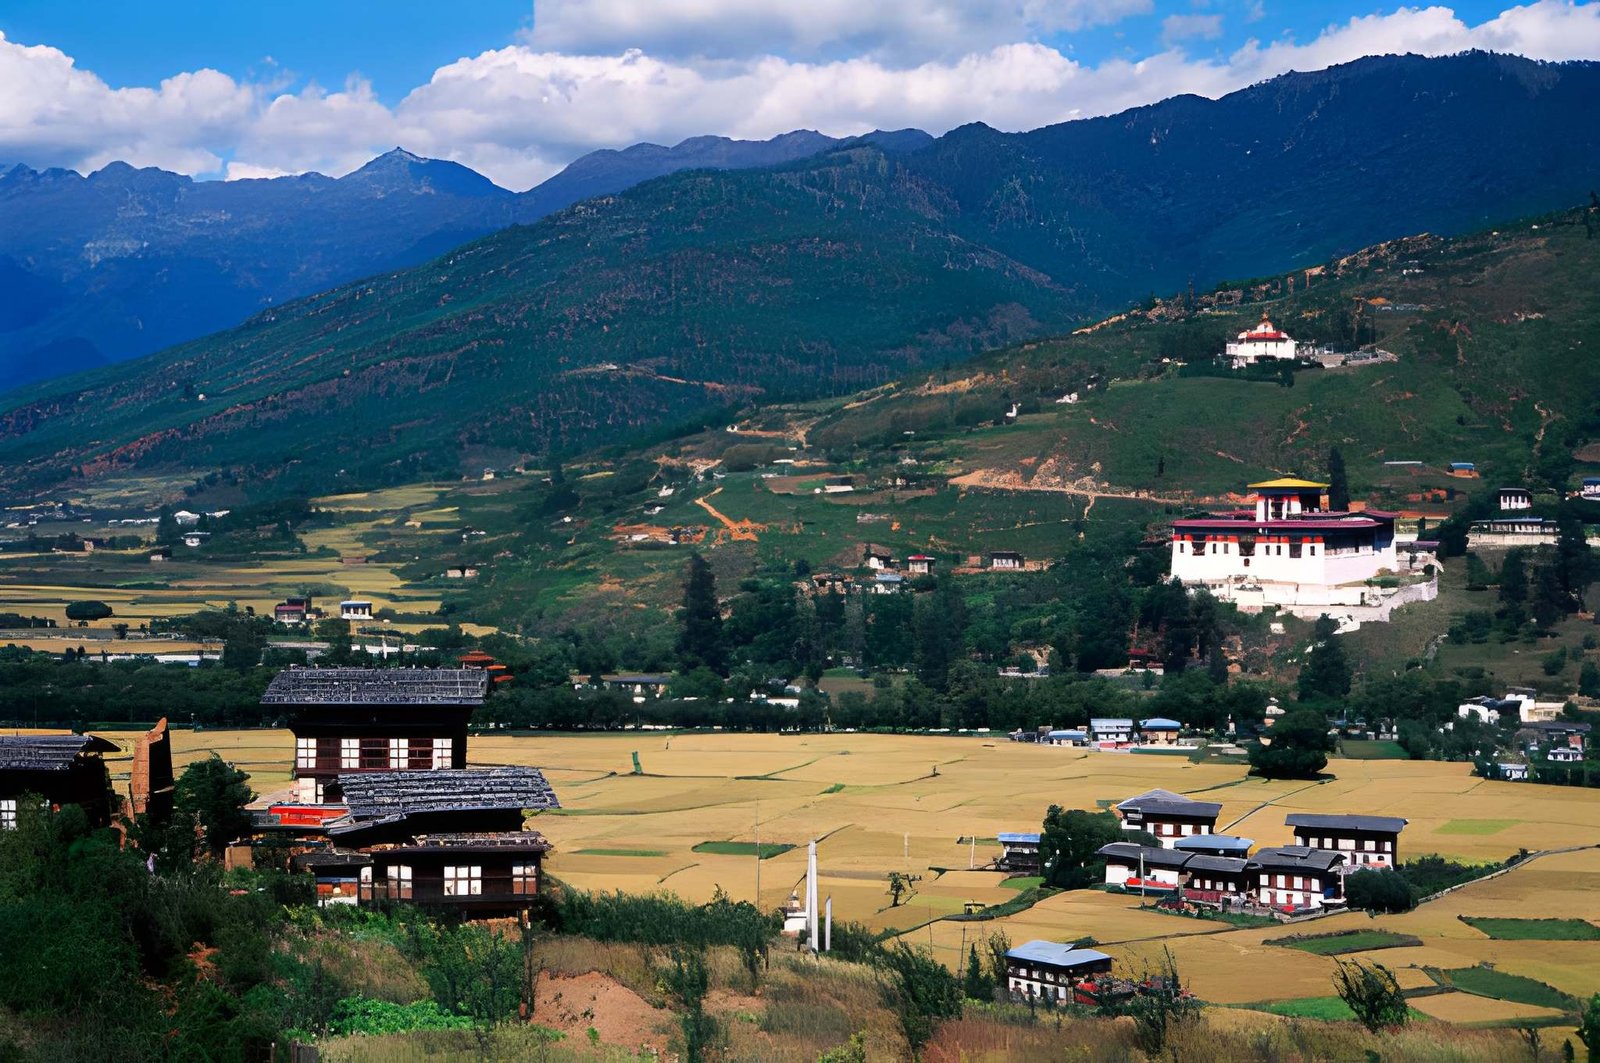
Bhutan is rewarding year-round, but that doesn’t mean every time is equally suitable for every traveller.
The genuine challenges by season:
- Eastern Bhutan in monsoon: Road conditions deteriorate significantly between June and August. Itineraries including Bumthang, Trashigang, or the Ura Valley carry real logistical risk in these months.
- Bumthang in deep winter: January temperatures at 2,800m are genuinely cold, and the highland experience is significantly limited. Unless you’re specifically seeking spiritual solitude in cold monastery surroundings, there are better windows.
- October festival weeks: Bhutan’s limited accommodation inventory means popular Tshechu dates can become stretched. Premium lodges in Paro book 6+ months out. If you’re set on October and haven’t planned early, expect constrained options and higher prices.
- Mountain passes in winter: Some passes connecting western and eastern Bhutan can close briefly due to snow. Winter itineraries need genuine flexibility built in.
Plan Your Bhutan Journey in the Right Season
Bhutan rewards thoughtful planning more than almost any other destination. The difference between a trip in October’s peak crowds and the same itinerary in late November (same clarity, quieter roads, and lower prices) is not small.
Equally, a traveller who arrives in April for Paro Tshechu and finds the rhododendrons in full bloom will have a profoundly different experience from someone who arrives in August expecting the same Bhutan.
The right time is the time that fits your actual priorities: what you want to see, how you prefer to travel, and how much flexibility you have. That’s a more useful question than “when is best” in the abstract.
Not sure which season suits your travel style? A well-planned Bhutan itinerary starts with timing, and Far Out Nepal can help you build the journey from there →
So, Which Nepal Treks Are Actually Less Crowded in 2026?
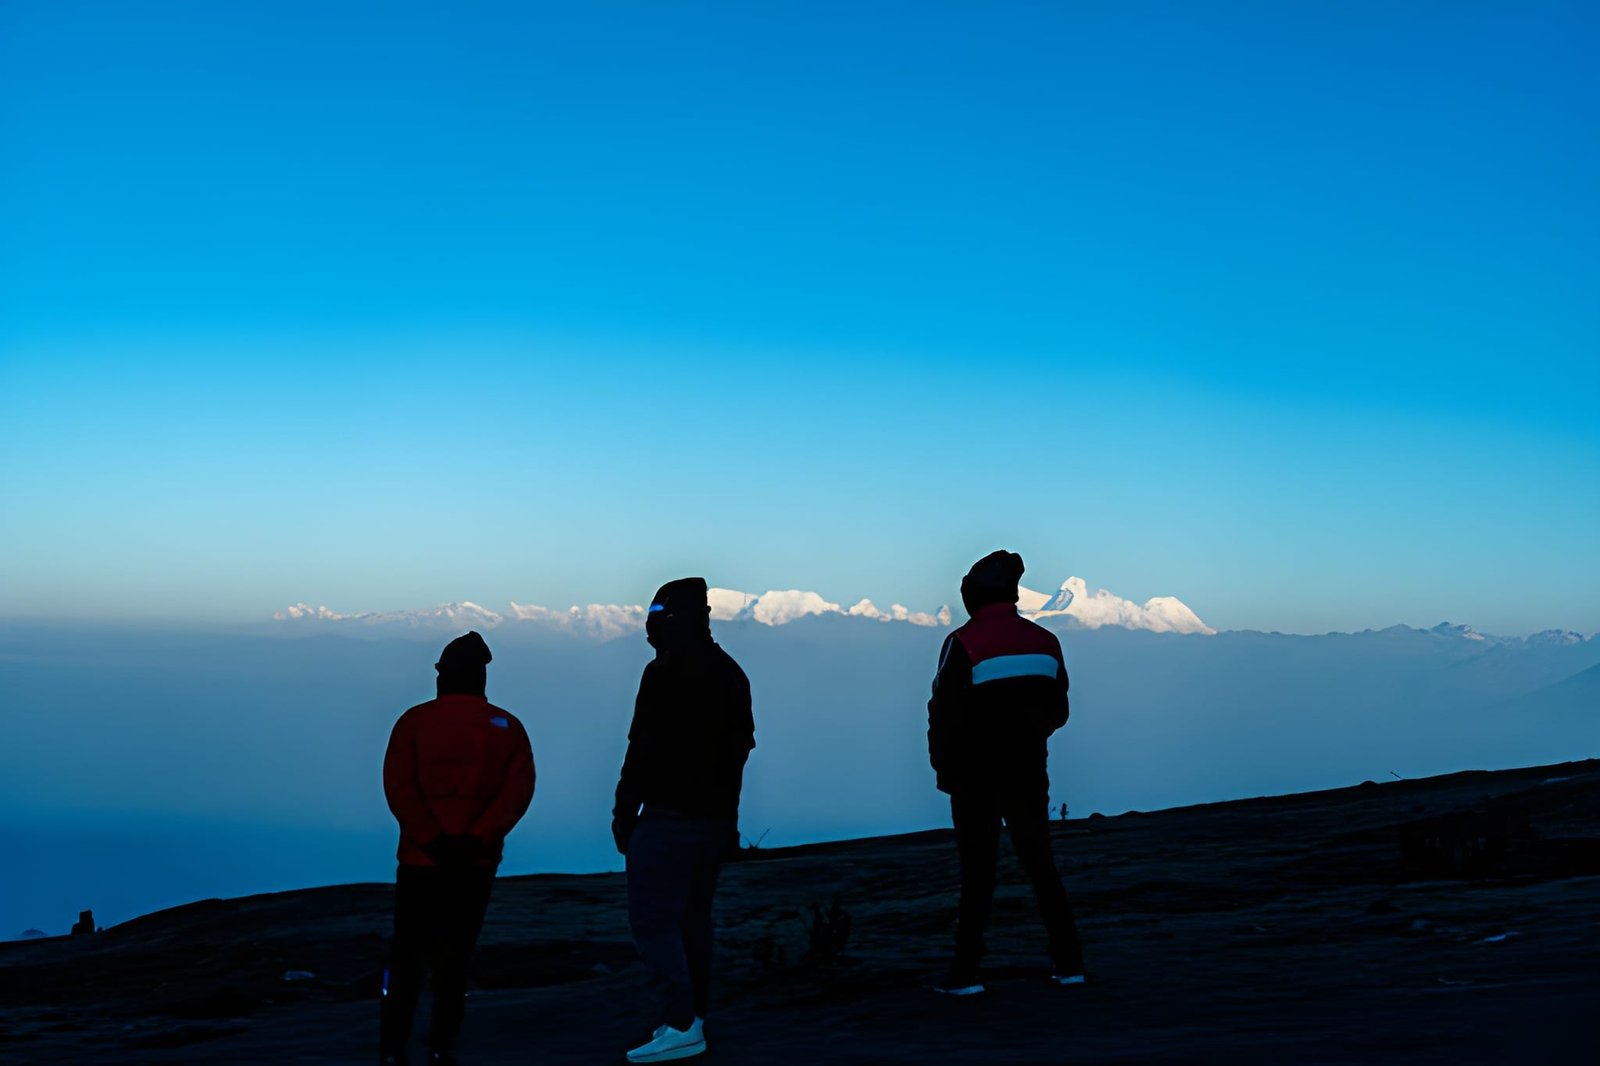
Introduction
It’s October, and you’ve come to trek EBC, stopping at Namche Bazaar. Every teahouse is full by 2 pm. You can see trekkers queueing for the same viewpoint for a photograph. A guide from another company tells his group this is “the quiet season.”
We’ve been watching this happen for 25 years: this slow conversion of once-genuine routes into managed experiences. It’s nobody’s fault, though. Good trails get discovered. Discovered trails get developed. Developed trails get crowded.
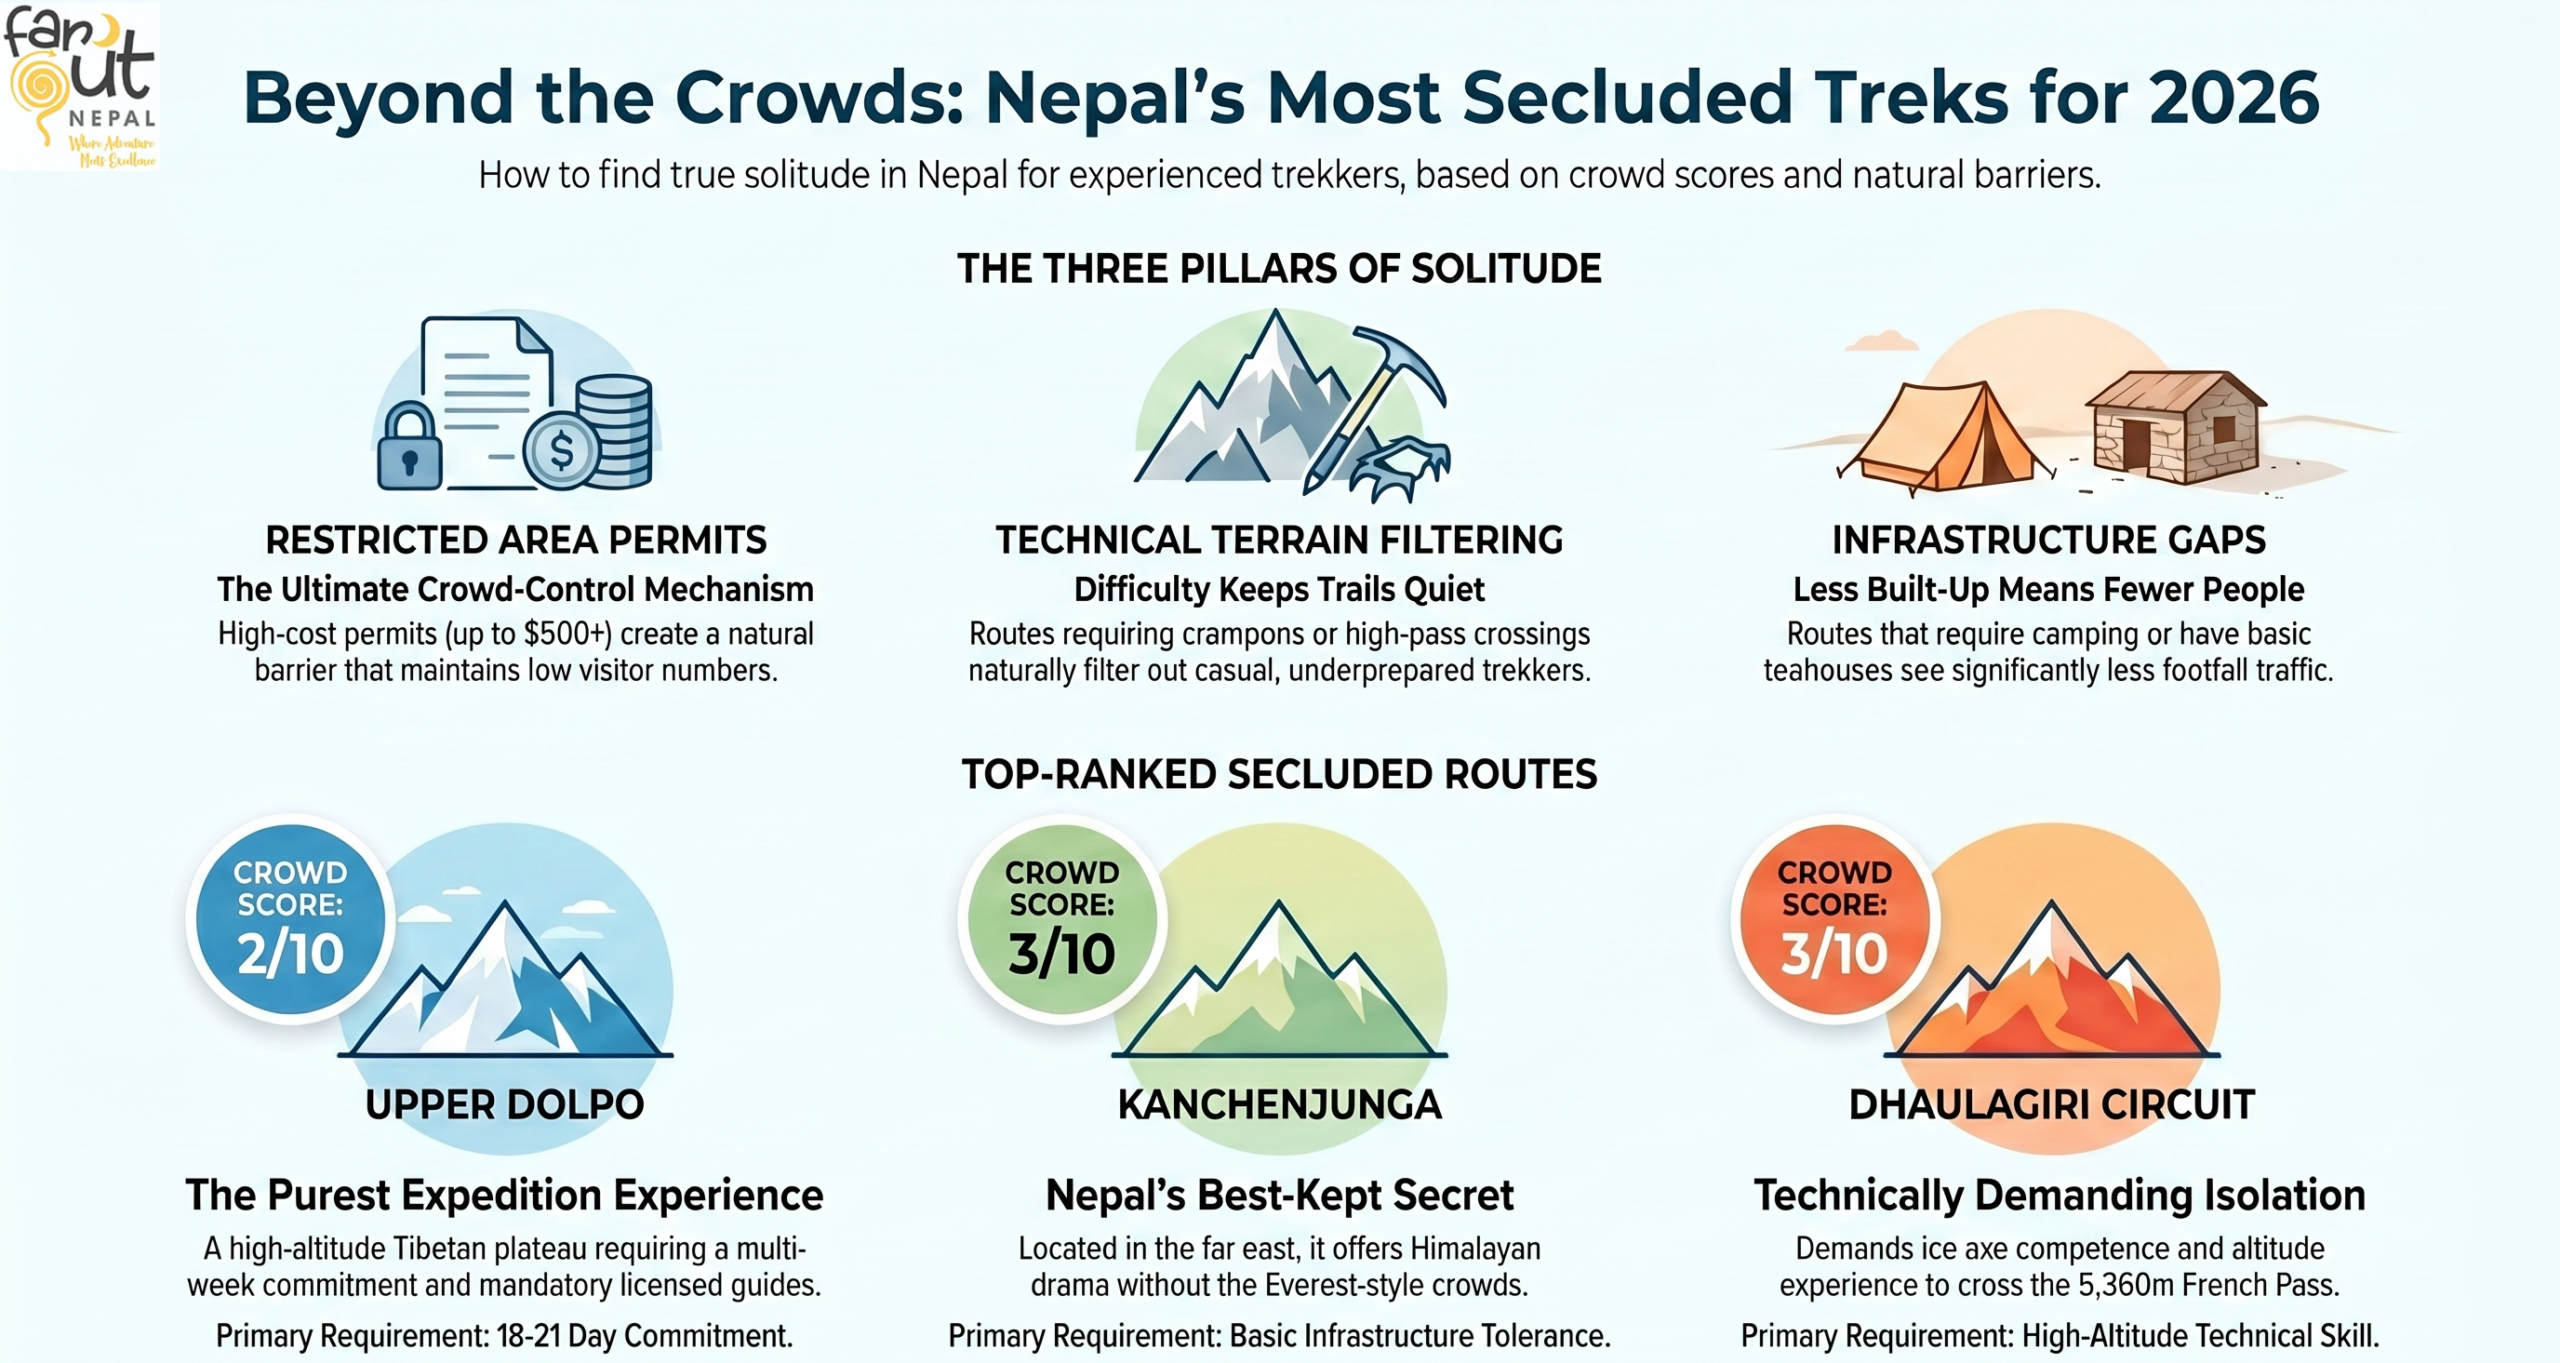
However, Nepal is vast, and the permit system creates genuine barriers, so not every trail ends up as a “hidden gem.” Some routes stay quiet because they ask more of you. This is a guide to those less crowded trek routes, being honest about what’s changed, specific about what hasn’t.
Before the List: What “Less Crowded” Actually Means for Routes in Nepal
Most lists treat “remote” and “less crowded” as interchangeable terms. They’re not.
A trail can be geographically remote and still funnel every trekker through the same two teahouses. A restricted area can still see seasonal surges that make it feel anything but quiet. Understanding the difference is what separates a genuinely peaceful trek from a disappointing one.
Three things actually determine crowd experience on a Nepal trail:
Trail density: How many trekkers share the same path on any given day? Some routes have natural bottlenecks (river crossings, single-file passes) where even 20 people feel like a crowd.
Teahouse availability: Can you get a room without booking months ahead? In peak season on popular routes, teahouses are fully reserved by 2 pm. That changes the entire character of a trek.
Permit volume: Certain areas require restricted area permits that cap annual visitor numbers. This is the most reliable crowd-control mechanism in Nepal trekking, and it’s the reason some routes have stayed genuinely quiet for decades.
One more thing most lists ignore: seasonality distortion. A trek labeled “quiet” is often only quiet in the off-season. Visit that same trail in October or April, and you may find yourself in a convoy. Where we mention seasonality below, take it seriously, as it changes everything.
These Were Considered “Hidden Gems,” But They’re Not Hidden Anymore
Before the ranked list, an honest disclaimer about three treks you’ll still find on most “less crowded” articles.
Mardi Himal: Still a beautiful trek worth doing. But quiet? Not in spring. It’s now a popular short-duration alternative to ABC. The teahouses above Forest Camp also fill fast in March and April. If you do it, go in November or early December.
Langtang Valley: The post-2015 earthquake rebuild brought improved infrastructure, and this, in turn, attracted more trekkers. The main Langtang trail now experiences consistent footfall traffic in both peak seasons. The Ganja La variation is a different story (more on that below).
Standard Annapurna Base Camp routes: Day-hikers and short-stay trekkers from Pokhara have significantly altered the lower sections of this trail. ABC itself remains stunning, but “less crowded” is no longer an accurate description for most of the route.
Far Out Nepal runs all three. But if your primary reason for looking at this list is genuine solitude, these aren’t your answer in 2026.
7 Less Crowded Treks in Nepal in 2026 (Ranked by Actual Crowd Experience)
Crowd Score is rated 1–10. Lower = quieter. Based on ground experience, permit data, and seasonal observation.
1. Upper Dolpo Trek
Crowd Score: 2/10
Best season for solitude: June–September (post-monsoon window), October
Upper Dolpo is in a category of its own. The restricted area permit (which is one of the most expensive in Nepal) keeps annual visitor numbers genuinely low. Large sections of the route are camping-only because teahouse infrastructure simply doesn’t exist. The landscape is a high-altitude Tibetan plateau: barren, ancient, and unlike anything else in Nepal.
Why it’s still quiet: The permit cost, the remoteness, the multi-week commitment, and the logistical complexity combine to create a natural filter. This isn’t a trek you stumble into. The people who do Dolpo have researched it for years.
Reality check: This is a serious undertaking. Minimum 18–21 days, camping sections, high passes, and very limited bailout options. A licensed guide is not optional, but legally required and genuinely necessary.
Who it’s for: Experienced trekkers with high-altitude experience and a tolerance for genuine remoteness, and time. Not a beginner’s trek by any means. Possibly the purest expedition trek experience.
2. Kanchenjunga Trek
Crowd Score: 3/10
Best season for solitude: April–May, October–November
Nepal’s far east is the country’s best-kept trekking secret. Kanchenjunga (the world’s third-highest peak) sees a fraction of the attention that Everest and Annapurna receive, despite offering comparable Himalayan drama. The approach from Taplejung is long, the infrastructure is basic by Nepal standards, and that combination keeps casual trekkers away.
Why it’s still quiet: It requires a flight or a long drive to Taplejung just to start. There’s no short version. The trek to both north and south base camps takes 3+ weeks, and overlaps with other popular routes is zero.
Reality check: Basic teahouses, variable food options, and a genuine sense of being far from help if something goes wrong. That last part is not meant to discourage; this is what makes it extraordinary.
Who it’s for: Trekkers who’ve done the classic routes and want something that shows Nepal in its rawest form.
3. Dhaulagiri Trek
Crowd Score: 3/10
Best season for solitude: October, April–May
One of our signature routes at Far Out Nepal, and one we’re genuinely proud to offer. The Dhaulagiri circuit via French Pass and Hidden Valley is technically demanding. But it’s also precisely why it stays quiet. The crowd self-selects out early.
Why it’s still quiet: French Pass (5,360m) and the Hidden Valley section require crampons, ice axe competence, and altitude experience. Most Nepal trekkers are not equipped or prepared for this level of terrain. It’s not considered a technical route to just sound fancy. It genuinely is.
Reality check: This trek routinely catches people off guard with its technical demands. You should be highly prepared to embark on this journey. The rewards of a near-private view of Dhaulagiri’s south face, the surreal Hidden Valley, and almost no other trekkers are proportional to the effort.
Who it’s for: Experienced trekkers with some high-altitude and winter terrain experience. People who read route descriptions carefully and aren’t prone to overestimating their fitness level.
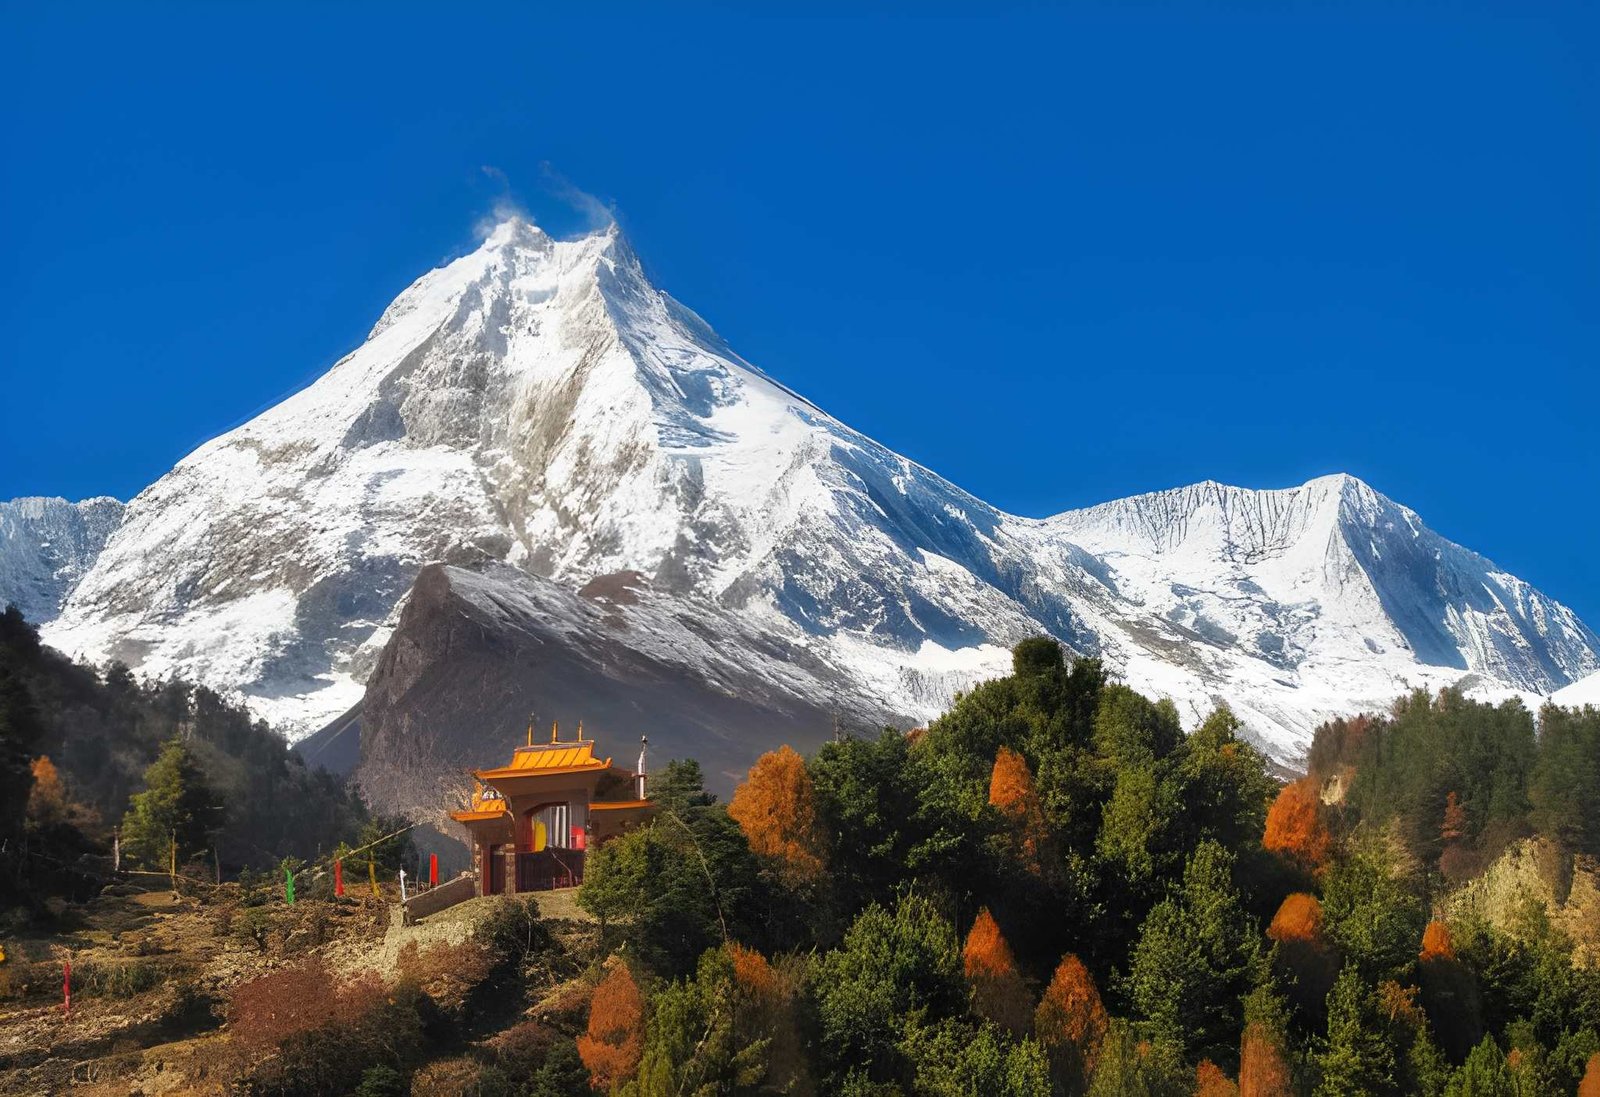
4. Manaslu Circuit Trek
Crowd Score: 4/10
Best season for solitude: November, early April
The honest assessment: Manaslu is growing. It is no longer the secret it was five years ago, and October now sees real traffic through certain sections. But it still registers significantly quieter than Annapurna Circuit or the Everest region, and the restricted area permit requirement maintains some natural filtering.
Why it’s still relatively quiet: The permit and mandatory guide requirement and the distance from Kathmandu add enough friction to keep it off the itinerary for shorter trips. The Larkya La pass (5,106m) also requires a level of preparation that filters out underprepared trekkers.
Reality check: If you’re doing this in October, particularly around the Samagaon to Samdo section, you will encounter other trekkers. It’s not the Annapurna Circuit crowded, but it has managed to meet solitude expectations. Go in November for a noticeably quieter experience.
Who it’s for: Trekkers ready to step up from the classic routes but not yet ready for the full commitment of Dolpo or Kanchenjunga, which is a genuinely rewarding middle ground.
5. Upper Mustang Trek
Crowd Score: 4/10
Best season for solitude: June–August (the monsoon bypass)
Upper Mustang sits in a rain shadow north of the Annapurna massif. This makes it one of the few Nepal treks that’s actually better in the monsoon months, when everywhere else is soaked and quiet-seekers are still looking for options.
The restricted area permit (now $50/day following a November 2025 policy change) still maintains a cost barrier, though easier access means crowd levels may gradually increase in the coming years.
Why it’s still quiet: The permit cost keeps casual visitors away. The landscape of the high-altitude Tibetan desert, ancient cave monasteries, and the walled city of Lo Manthang draws a specific kind of traveler rather than mass tourism.
Reality check: Infrastructure has genuinely improved in recent years. This is no longer a camping-only route. But “improved” is relative as expectations need to be calibrated to a remote Himalayan context, not a Kathmandu hotel.
Who it’s for: Trekkers interested in Tibetan Buddhist culture as much as mountain scenery. Anyone looking for a genuinely unique landscape that looks nothing like the rest of Nepal.
6. Everest Three Pass/Gokyo Trek
Crowd Score: 5/10
Best season for solitude: November, early May
Here’s a counterintuitive one: The Everest region itself, done differently. The Three Pass Trek of Cho La, Renjo La, and Kongma La shares the Everest approach as far as Namche Bazaar, then diverges sharply from the EBC highway. Most trekkers on the Everest trail are going to base camp and back. The passes filter them out by difficulty alone.
Why it’s still relatively quiet: Cho La Pass (5,420m) and the technical terrain around the three passes deters a large portion of EBC trekkers who are doing it as a bucket list item rather than a serious mountain experience. After Namche, the crowd thins significantly.
Reality check: You will share Namche, Tengboche, and Dingboche with EBC trekkers. You need to be ready for that. Above Dingboche and around the Gokyo Valley, the experience changes completely.
Who it’s for: Everest region enthusiasts who want the landscapes without the highway. Also suitable for trekkers who’ve completed the EBC and wish to return to the region via a different route.
7. Langtang Ganja La Trek
Crowd Score: 6/10
Best season for solitude: October–November, March
The distinction matters here. The standard Langtang Valley trek is no longer a quiet route. The Ganja La variation, which involves crossing the 5,122m Ganja La Pass into the Helambu region, is a fundamentally different experience. The pass creates a technical barrier that separates the casual Langtang visitor from the serious trekker.
Why it’s still relatively quiet: Ganja La requires a rope and an experienced guide for safe crossing. Most trekkers on the Langtang trail don’t attempt it. That one pass changes the entire crowd profile of the route.
Reality check: It has the highest score on this list for a reason. You will share the lower Langtang sections with standard route trekkers. The quieter experience begins at and beyond the pass itself.
Who it’s for: Trekkers with solid Nepal experience looking for a challenging variation on a familiar region. Good acclimatization profile for those building toward bigger objectives.
Which Less Crowded Trek Is Actually Right for You?
The list above covers a wide spectrum. Here’s how to filter it honestly.
If you want quiet but not remote, start with the Manaslu Circuit or the Everest Three Pass. Permit barriers do meaningful crowd-filtering, infrastructure is reasonable, and you’re not committing to a 3-week camping expedition. These are the accessible end of “less crowded.”
If you want genuinely off-beaten-path, Kanchenjunga or Dhaulagiri. Commit to 18–21 days, come with solid fitness and altitude experience, and accept that a guide is non-negotiable on both. The payoff is a Nepal that most trekkers never see.
If you want true expedition-level isolation, Upper Dolpo. This is the far end of the spectrum. Restricted permits, camping sections, and genuine remoteness. Not for everyone. That’s exactly the point.
Not sure which fits your actual experience level? We’ve been matching trekkers to the right routes for 25 years. Tell us where you’ve trekked before and what you’re looking for, and we’ll give you a straight answer→
A Note on Logistics: What Remote Treks Actually Require
A few realities worth knowing before you book anything on this list.
Restricted area permits: Dolpo, Mustang, Manaslu, and the Kanchenjunga area all require special permits beyond the standard TIMS and national park fees. These range from $90 to $500+, depending on the area and duration. Budget for them.
Guide requirements: Several of these treks legally require a licensed guide. Beyond legality, for routes like Dhaulagiri and Dolpo, a guide isn’t a luxury, but the difference between a safe trek and a serious incident. The terrain and isolation demand it.
Infrastructure expectations: “less crowded” often means “less built up.” Teahouse quality varies significantly on remote routes. Camping sections exist in Dolpo and parts of Kanchenjunga. If your comfort threshold requires guaranteed hot showers and Wi-Fi, calibrate expectations accordingly.
Cost reality: Remote treks cost more. Porters, permits, guide logistics, and longer duration all contribute. A Dolpo expedition costs significantly more than an EBC package. That’s not operator markup. It’s the genuine cost of reaching and supporting a journey in one of the world’s most remote regions.
Beyond Nepal: Himalayan Alternatives in Bhutan and Tibet
If you’ve read this far and the common narrative is “I want the Himalayas without the crowds” rather than “I specifically want Nepal,” two alternatives are worth knowing about.
Bhutan operates on a high-value, low-volume tourism model by government policy. The daily tourist fee structure limits mass tourism by design, which means trails and cultural sites that would be overwhelmed elsewhere remain genuinely accessible. Tiger Nest Hike and Snowman Trek offer Himalayan scenery with a crowd profile that Nepal’s open-access routes simply can’t match.
Tibet offers high-altitude landscapes and Tibetan Buddhist culture in a context that feels entirely distinct from anything in Nepal. The regulatory environment means visitor numbers are controlled, and overland routes through Central Tibet to Kailash offer a Himalayan experience of a different order entirely.
We run carefully designed small-group itineraries to both. If your interest extends beyond Nepal’s borders, our Bhutan and Tibet pages have the details.
Planning a Less Crowded Trek: Where to Start
The treks on this list are not plug-and-play packages. The permit systems, logistical complexity, and genuine remoteness of these routes require real planning, not a last-minute booking.
We’ve been running these specific routes for over two decades. Not just listing them. That distinction matters when something goes wrong at 5,000 meters, and the nearest road is four days away.
If one of these treks caught your attention, reach out with a quick inquiry. Tell us which route, your trekking background, and your timeframe. We’ll come back with a realistic breakdown: What it costs, what it requires, and whether it’s the right fit for where you are as a trekker.
Travelling Nepal in Monsoon: Be The Traveler Who Arrives When Everyone Leaves
Introduction to Monsoon Travelling In Nepal
Every year, thousands of travelers cross Nepal off their list come June. Rain, they say. Bad visibility. Leeches. Here’s what they’re giving away to the handful of people who know better.
The Honest Outlook of Monsoon
Nepal’s monsoon season runs from mid-June through the end of September, occasionally extending into mid-October. The heaviest rain falls across the southern Terai plains and the mid-hills. Temperatures climb as the hills reach 30–35°C, and the Terai can push past 40°C with humidity, making it feel like you’re standing inside a cloud.
Rainfall during the monsoon season can vary greatly. Some days experience continuous rain for several hours with short breaks in between, while other days remain dry but hot and humid. In recent years, changing climate patterns have made the weather increasingly unpredictable, causing the monsoon to arrive earlier or later than expected.
The season is marked by high humidity, overflowing rivers, floods, and occasional landslides that can disrupt road and flight connectivity in different parts of the country. Despite these challenges, monsoon travel in Nepal offers a completely different perspective of the Himalayas, with peaceful landscapes, lush green hills, dramatic clouds, fewer tourists, and vibrant local festivals.
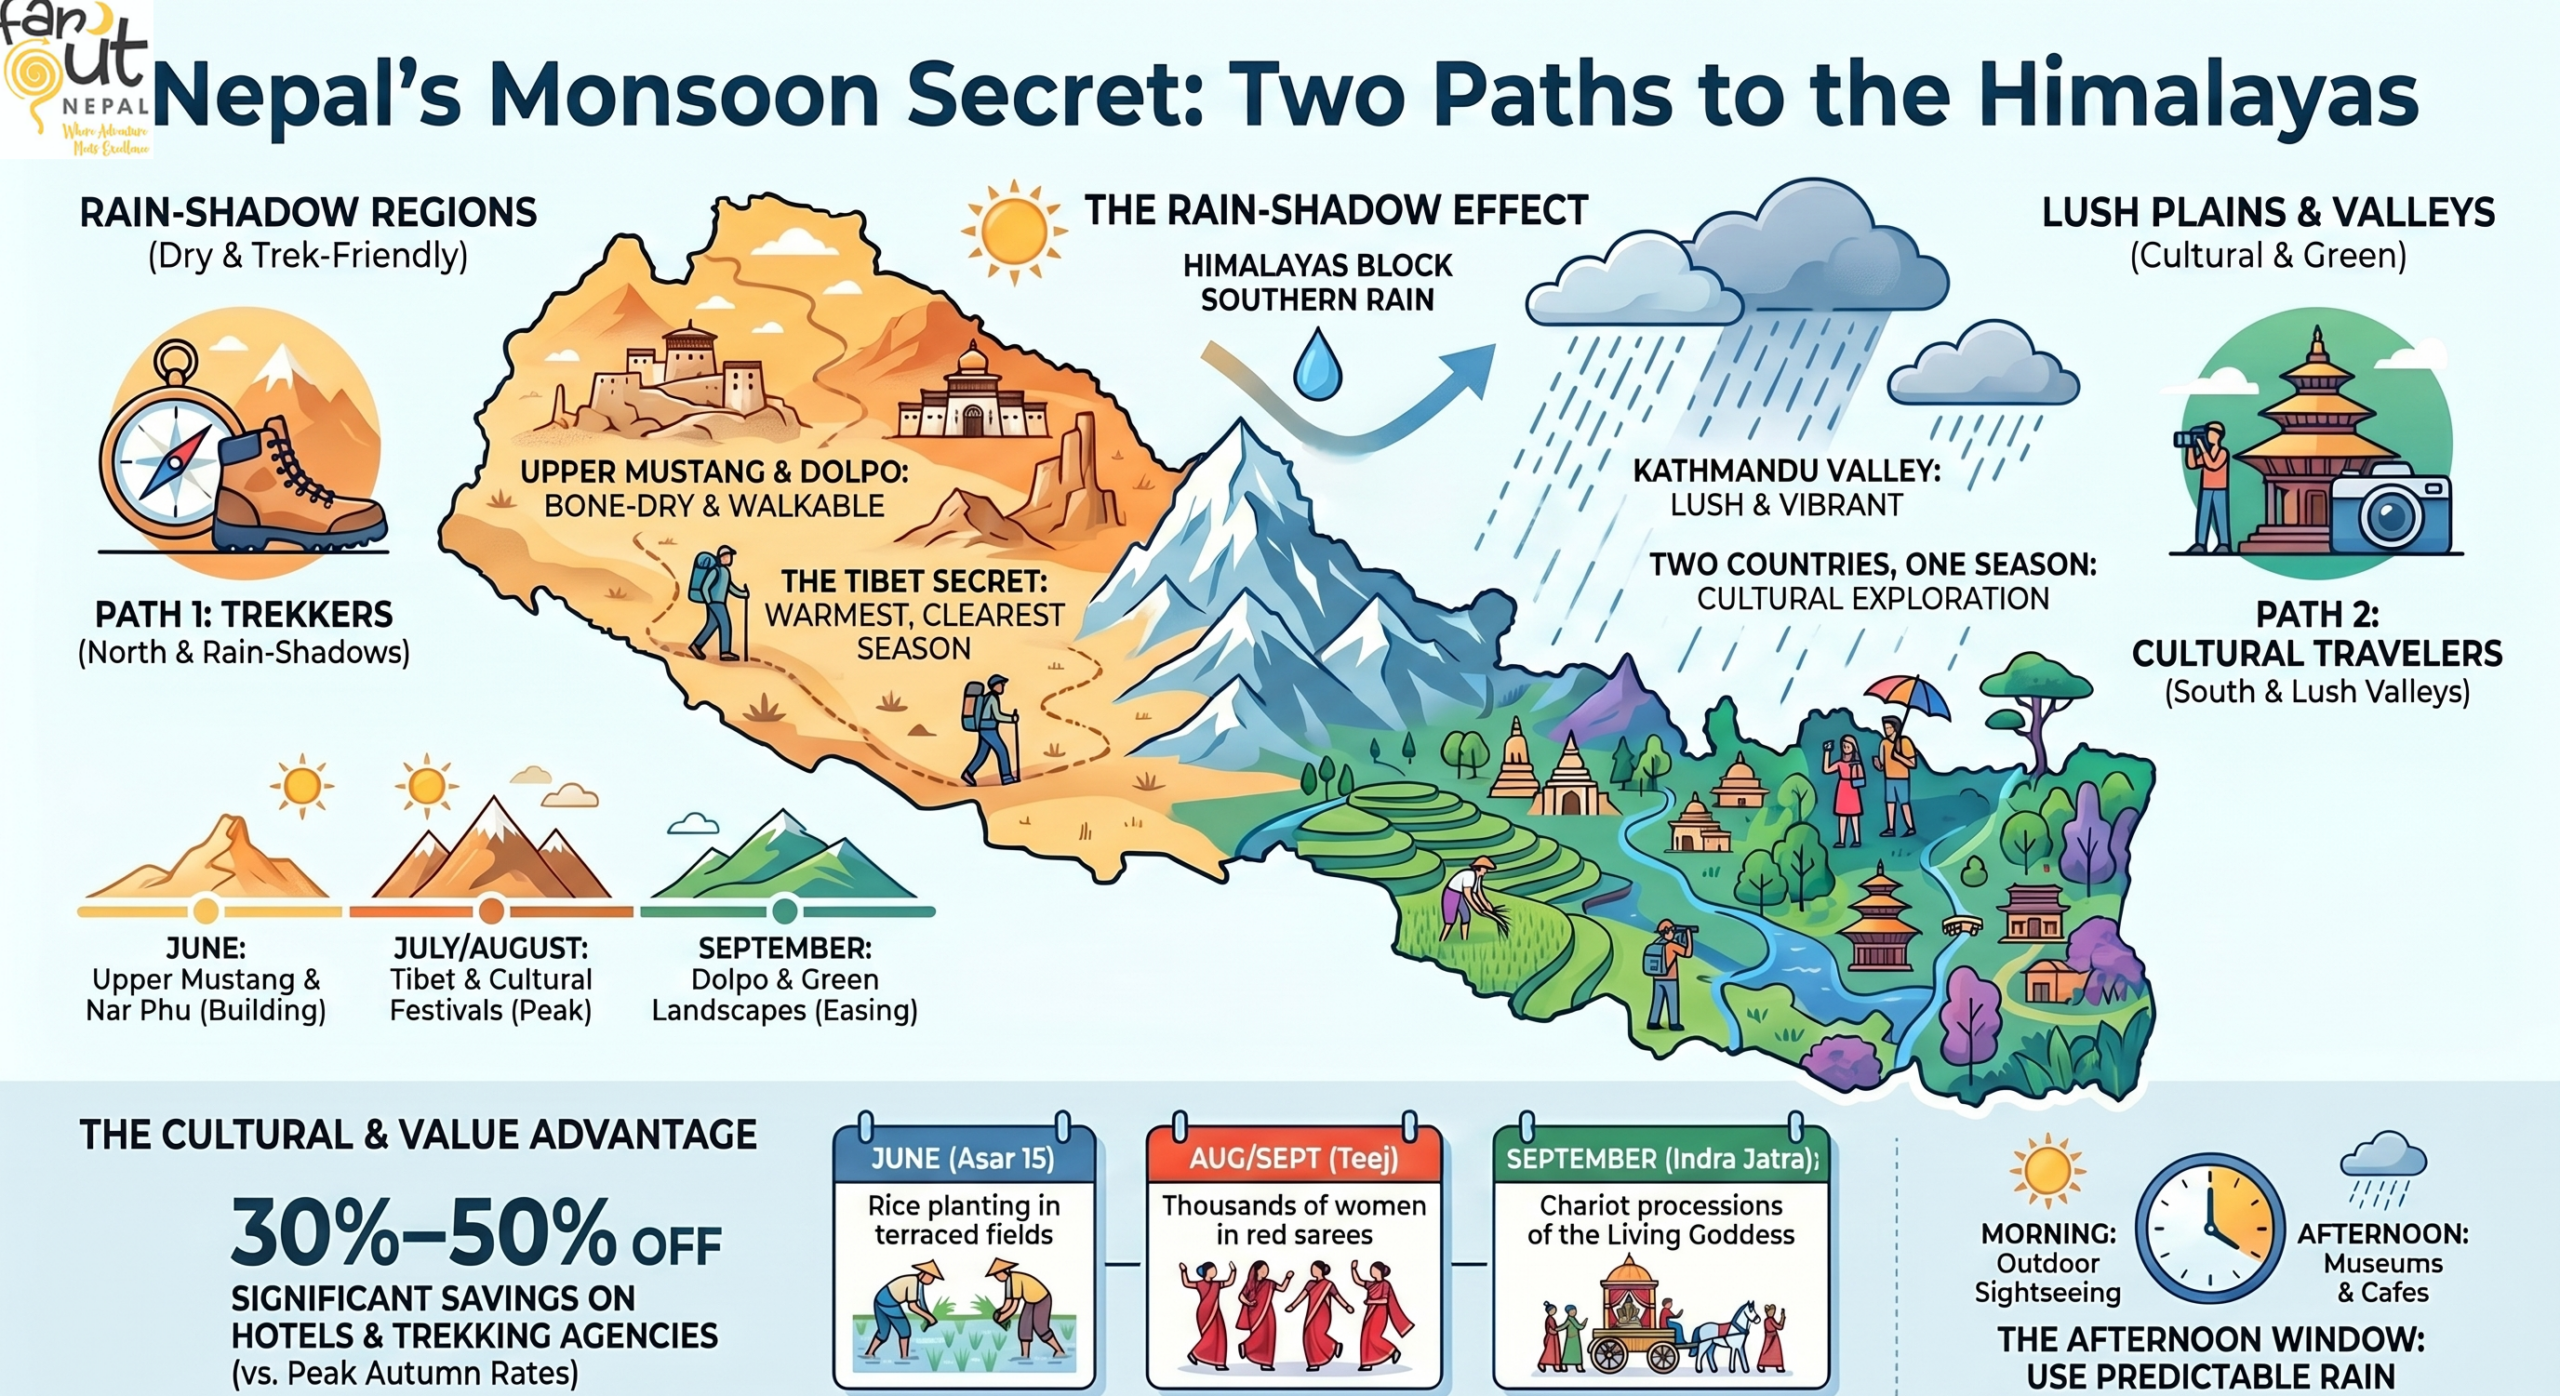
Is Monsoon a Good Time to Travel in Nepal?
For trekking and mountain adventures, the monsoon is generally not considered the ideal season. Most popular trekking routes become slippery and challenging due to rain, leeches, landslides, and poor visibility of the Himalayan peaks. If you fly into Lukla chasing Everest Base Camp, the monsoon will beat you. But Nepal is not one weather pattern, but at least four, running simultaneously.
However, certain rain shadow regions in the Himalayas still offer excellent travel experiences during this time. Reaching these destinations may sometimes be affected by flight delays or road conditions, but the landscape remains spectacular.
For travelers interested in cultural experiences, Kathmandu Valley can still be enjoyable during the monsoon. Exploring ancient temples, heritage sites, arts, crafts, and local cuisine in Kathmandu can be rewarding, especially with fewer crowds.
Two Types of Travelers. Two Completely Different Trips.
The reality is that a trekker’s monsoon Nepal and a cultural traveler’s monsoon Nepal are almost different countries.
The Trekker: Rain-shadow trekking in Upper Mustang, Dolpo, Nar Phu. Dry trails, zero crowds, dramatic landscapes.
The Culture Traveler: Kathmandu’s UNESCO sites, monsoon festivals, Lumbini, Pokhara. These are all alive, but feel quieter than usual.
If you’re traveling with family, booking a cultural heritage trip, or simply don’t want to trek, the monsoon is entirely workable and frankly underrated. Don’t let anyone talk you out of it.
For Trekkers: Rain Shadow Trekking is Nepal’s Dry-Season Secret
The Himalayas don’t just block the sun. They block the monsoon itself, creating an entirely different climate on their northern flanks. These are the destinations that stay dry while the rest of Nepal is under cloud cover.
Upper Mustang
Best months: May · Jun · Sep
Nepal’s “Forbidden Kingdom” sits in the rain shadow of the Annapurna and Dhaulagiri ranges, receiving almost no monsoon rainfall. The landscape shifts from Nepal’s green hills to a Tibetan desert of deep canyons, ochre cliffs, ancient cave monasteries, and the walled city of Lo Manthang (3,840m).
During the monsoon, the winds that torment Upper Mustang in spring finally calm down, making trails significantly easier to walk. July and August are manageable within the region itself, even if travel disruptions in lower regions can complicate access. May, June, and September are actually the most reliable windows.
Practical note: Upper Mustang requires a special Restricted Area Permit. Flights to Jomsom can be affected by monsoon weather, so plan ahead. The jeep road from Pokhara is an alternative if flights are canceled.
Upper Dolpo
Best months: Jun · Sep
Upper Dolpo is the most remote of Nepal’s rain-shadow regions. It is a restricted, high-altitude wilderness in the far west containing Shey Phoksundo Lake, Shey Gompa monastery, and villages that have maintained Tibetan Buddhist traditions for centuries. Early June and September are the recommended windows. Mid-July through August can create access difficulties through lower regions, though the region itself stays dry.
Practical note: Permit-required, remote, higher budget than most Nepal treks. Travel with an experienced licensed guide. This is not a casual weekend trek.
Nar Phu Valley
Best months: Jun · Jul · Aug · Sep
A hidden corner of the Annapurna region that falls squarely in the rain shadow. The monsoon season here delivers a rare combination: dry trails, spectacular Himalayan scenery, ancient culture, and almost complete solitude. Connects to the Annapurna Circuit as a natural add-on.
Practical note: Requires a Nar Phu restricted area permit on top of the standard ACAP permit.
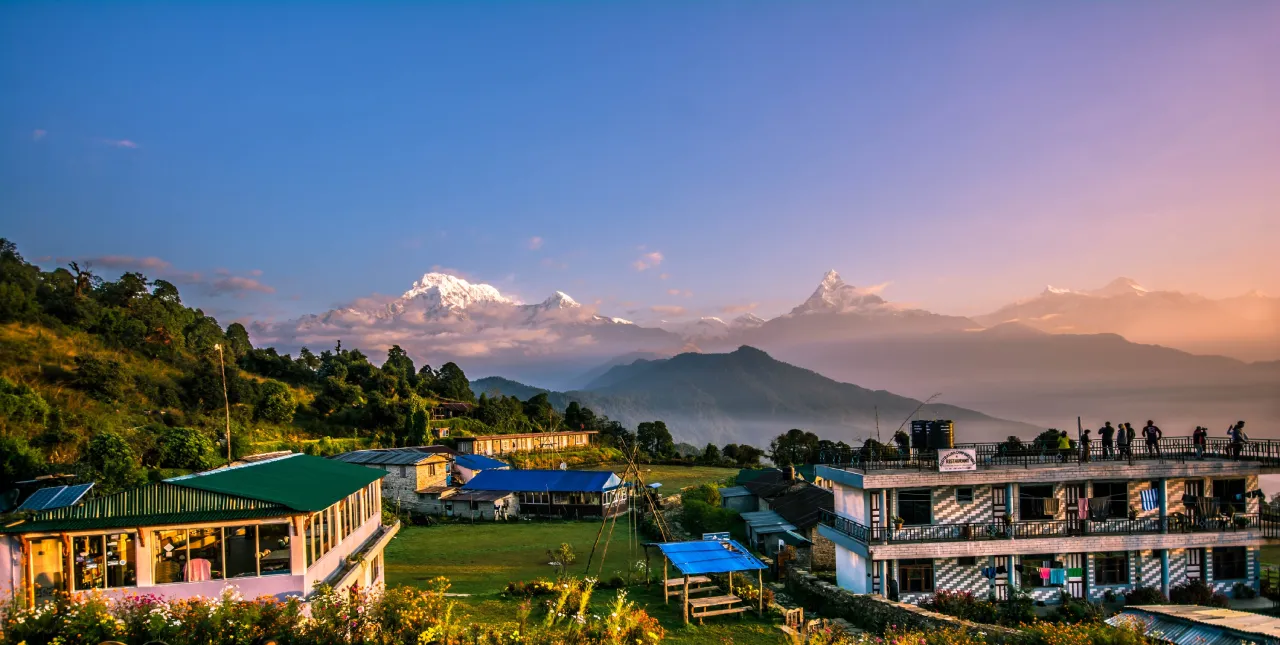
Ghorepani/Poon Hill
Best months: Jun · Jul · Aug · Sep
Not a rain-shadow destination, but Nepal’s most accessible short trek works during monsoon because of its wide, well-maintained stone paths and lower altitude. The forests around Ghorepani come alive with intensely green surroundings and birdsongs. The sunrise from Poon Hill over Annapurna and Dhaulagiri can be spectacular in the morning window before cloud cover builds.
Practical note: Start early every morning for the best visibility. Afternoons are reliably cloudy. Leech gaiters and trekking poles are non-negotiable on wet sections.
For Culture Travelers: Quieter Side of Nepal with Heritage Sites & No Crowds
Not every trip to Nepal is a trek. Monsoon is genuinely one of the best times to explore Nepal’s cultural and historical depth. You also get hotel discounts, empty UNESCO sites, and local festivals that only happen in the rainy season.
Kathmandu Valley
Best months: All monsoon months
Seven UNESCO World Heritage Sites within a single valley: Pashupatinath, Boudhanath, Swayambhunath, Bhaktapur Durbar Square, Patan Durbar Square, Kathmandu Durbar Square, and Changunarayan. You can visit all these without the spring and autumn tour groups.
The monsoon also brings Nepal’s most important festivals, all centered here.
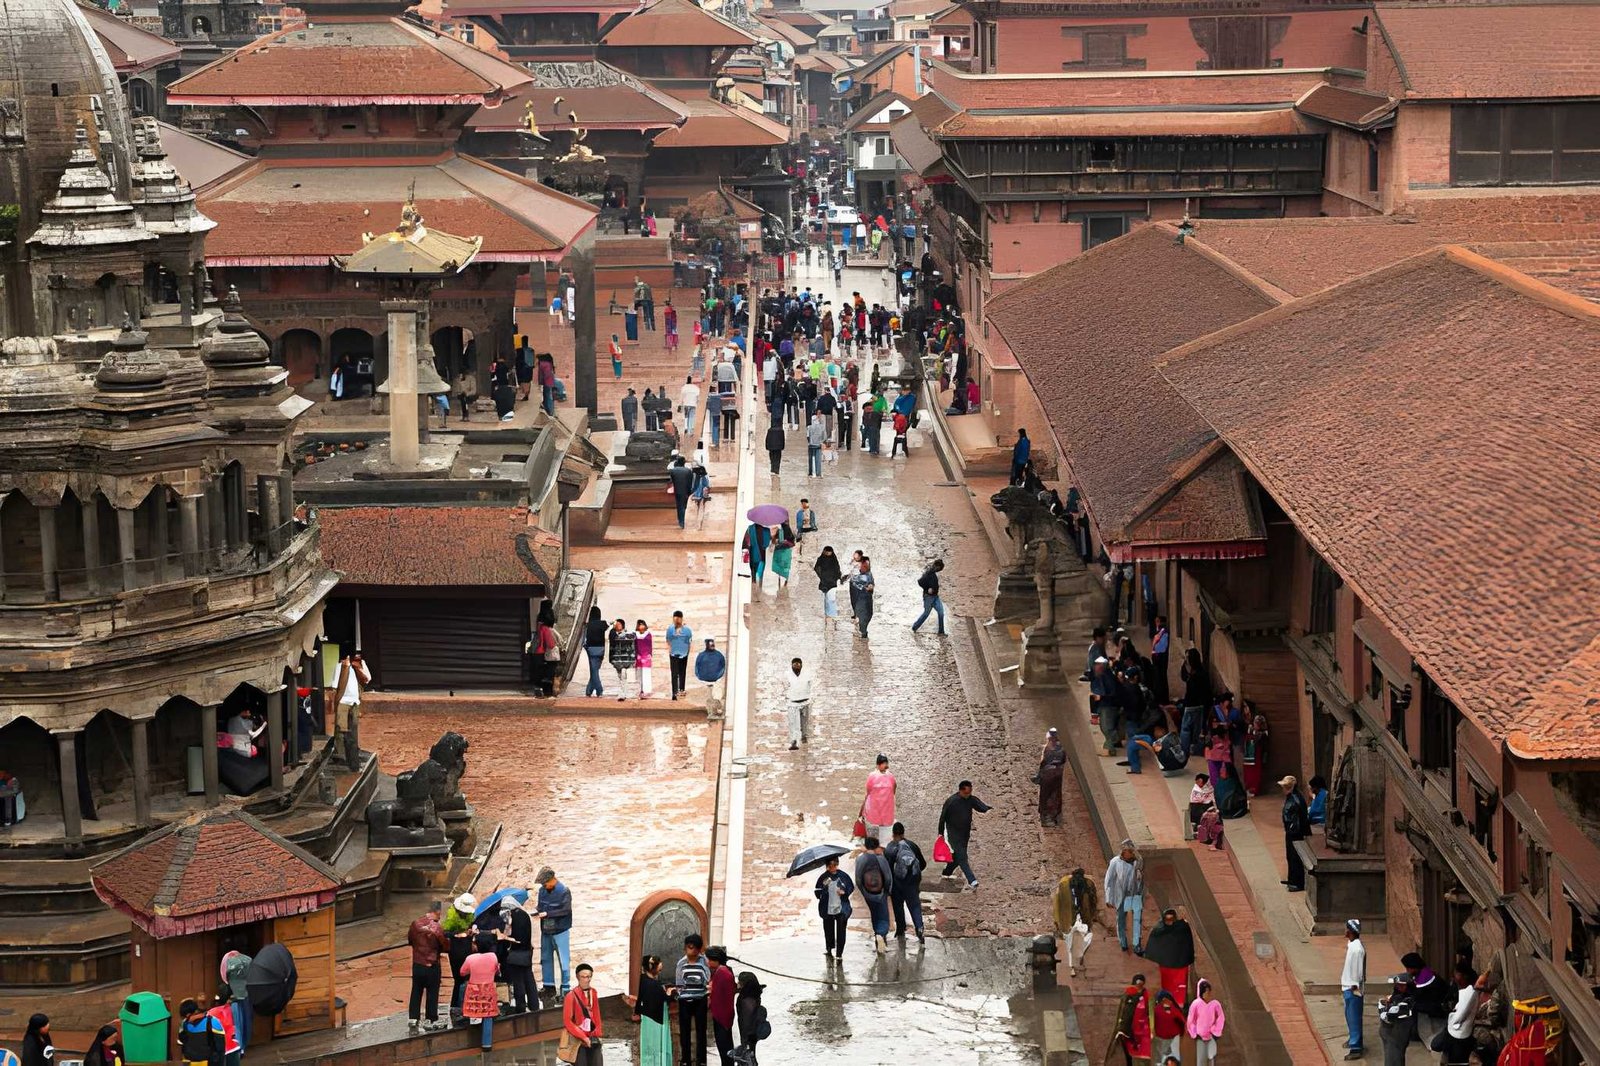
Practical note: Plan your outdoor sightseeing for mornings. Many temple courtyards are best explored in light rain, as you can see tiny details as the stone paths darken, and the marigold offerings glow. In the afternoons, you can visit the museums, Thamel, cooking classes, and local restaurants.
Lumbini
Best months: All monsoon months
You can also visit the birthplace of Siddhartha Gautama, or the titular Buddha. Monsoon rain turns Lumbini’s gardens intensely green. The Sacred Garden, Maya Devi Temple, Ashoka Pillar, and the ring of international monasteries are all quieter, more contemplative in the off-season.
Practical note: Lumbini pairs well with Chitwan National Park as a combined south Nepal circuit during the monsoon.
Pokhara
Best months: Jun · Sep · Oct
During monsoon, Phewa Lake fills to its edges, waterfalls cascade down the hillsides, and the lakefront café culture slows to a pace where you can just sit and watch the mist move across the Annapurna range. The rare clear break of Machhapuchhre suddenly appearing through parting clouds is something April crowds rarely witness with the same impact.
Practical note: July and August see the heaviest rain in Pokhara. June and September are more balanced. Use it as a rest stop or transit hub, not a trekking base, in the peak monsoon.
The Uncommon Monsoon Combination of Nepal + Tibet, No One is Talking About
While Nepal’s valleys fill with cloud and rain, just over the Himalayan barrier, Tibet sits in dry, clear, high-altitude air. This isn’t a coincidence, but geography, and it’s the best-kept secret of monsoon travel in this region.
The monsoon originates in the Bay of Bengal and moves northwest across South Asia. When it hits the Himalayan wall (the highest mountain barrier on Earth), it dumps its moisture on Nepal’s southern slopes and valleys. By the time the air crosses into Tibet, it has lost almost all its water content. The Tibetan Plateau receives less than 300mm of rain annually. During Nepal’s peak monsoon months, Tibet is entering its warmest, most accessible period.
Tibet in July–August: warmest temperatures, clear skies, high passes accessible, Lhasa at its most vibrant.
Nepal in July–August: rain-shadow trekking, festival season, green landscapes, off-season hotel pricing.
Practical itinerary: 3–4 days Kathmandu → overland or fly into Lhasa → Potala Palace, monasteries, high plateau.
The Months of Monsoon: When To Go, Exactly
June (Rain building): Good to go Upper Mustang, Nar Phu, Kathmandu Valley, Lumbini. Early access to rain-shadow routes before the peak monsoon.
July (Peak rain): Choose the Tibet combo, Kathmandu cultural tours, Upper Mustang interior. Festival season begins. Access roads in lower Nepal can flood.
August (Peak rain): Choose carefully. Tibet is excellent. Gai Jatra festival in Kathmandu. Upper Mustang interior. Avoid Dolpo access as road conditions are worse this month.
September (Rain easing): Good to go Upper Mustang, Dolpo, Nar Phu, Ghorepani all viable. Indra Jatra in Kathmandu. Landscapes at their greenest peak.
October (Tail end): Excellent window. Monsoon officially ends. Skies clear rapidly. Crowds and prices begin rising as the peak autumn season opens.
Monsoon Festivals: The Cultural Calendar Nobody Mentions
The monsoon season is Nepal’s most spiritually active period. These festivals don’t appear in most travel blogs because most travel blogs are written for trekkers. They’re a compelling reason to visit in their own right.
Asar 15: National Paddy Day
When: June 15 (approx.)
Where: Nationwide, especially vivid in Kathmandu Valley and hill districts
The official start of Nepal’s rice planting season. Farmers plant in waterlogged terraced fields to the sound of folk songs; in cities, people wade into the paddies together. It’s a celebration of agricultural identity, and one of the most photogenic days in the Nepalese calendar.
Janai Purnima: Sacred Thread Festival
When: Full moon of Shrawan (July–August)
Where: Pashupatinath, Gosaikunda, temples nationwide
Hindu men of the Brahmin and Chhetri castes change their sacred threads in a ritual renewal of spiritual commitment. Brahmin priests tie yellow threads around the wrists of worshippers as a symbol of protection. The festival also draws pilgrims to Gosaikunda Lake at 4,380m for ritual bathing. Kwati, a soup of nine varieties of sprouted beans, is the traditional food of the day.
Gai Jatra: The Cow Festival
When: Day after Janai Purnima (July–August)
Where: Kathmandu, Bhaktapur, Patan
Families who have lost a member in the past year lead a cow through the streets or a child dressed as one, as a symbolic guide for the departed soul. Gai Jatra evolved into a day of comedy, political satire, costumes, and street theater. To witness it is to understand something essential about how Nepal holds loss.
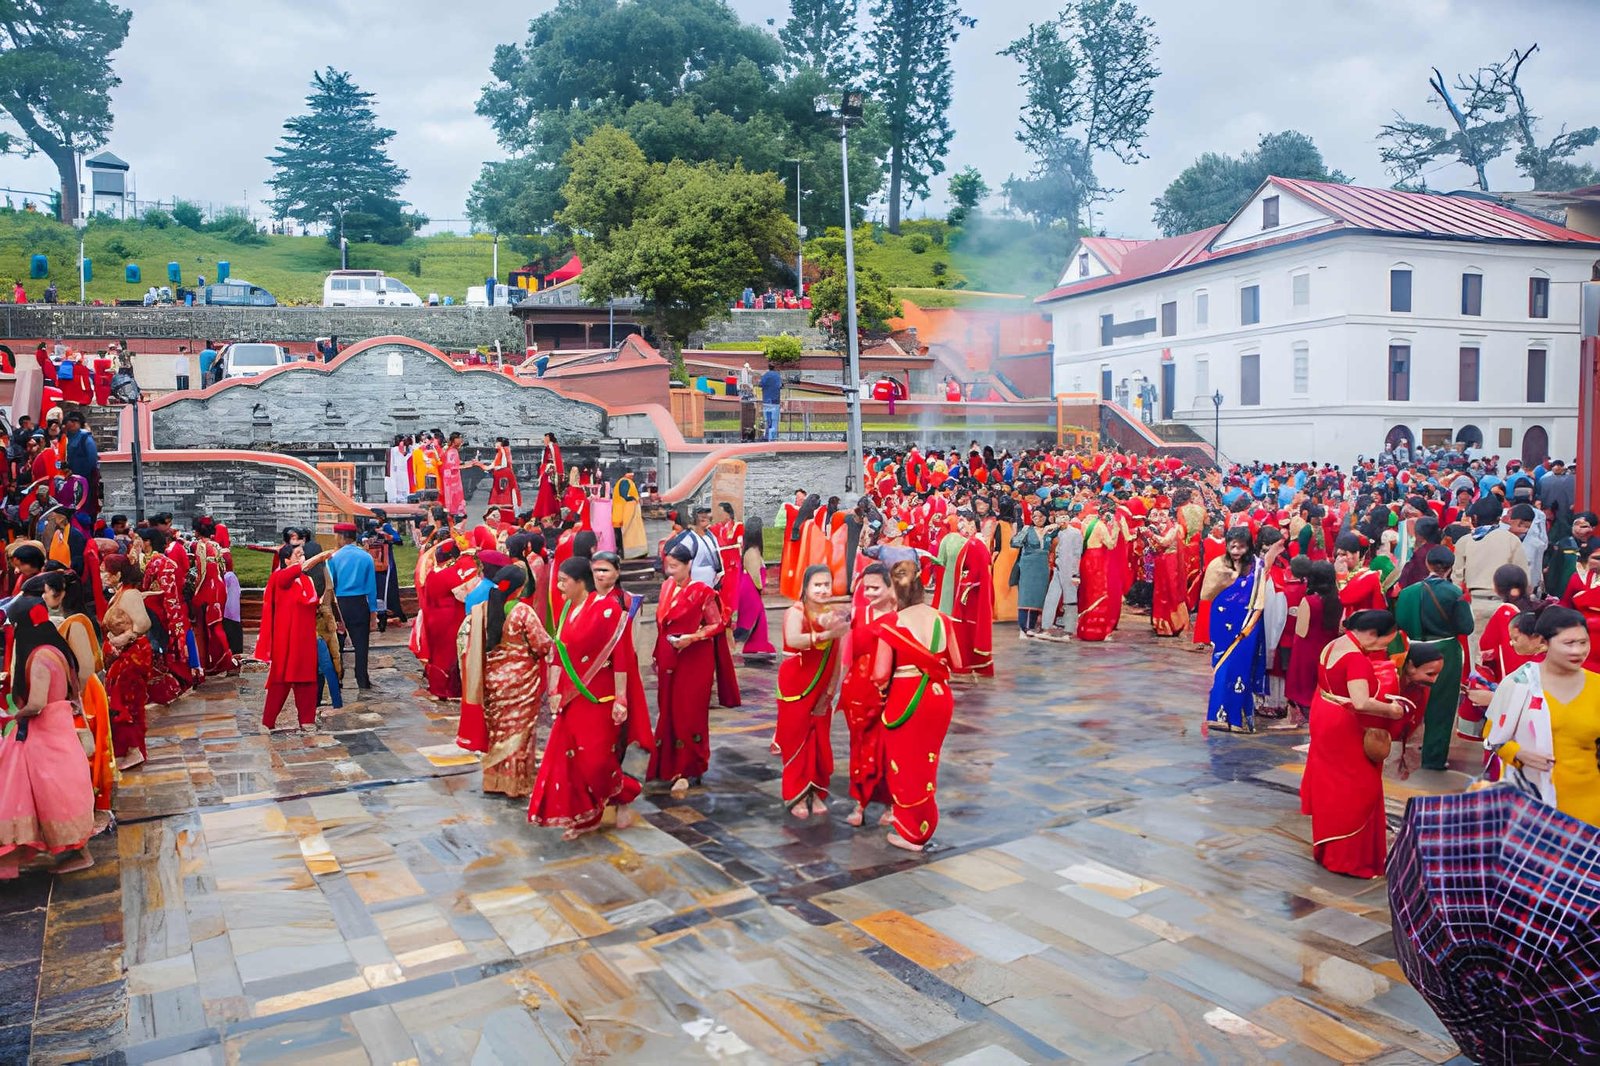
Teej: Women’s Festival
When: August–September
Where: Pashupatinath, Kathmandu; temple courtyards nationwide
A three-day festival dedicated to Goddess Parvati. Women dress in red sarees, gather at temples to pray and sing, observe a day-long fast, and celebrate with dancing that fills the streets. Pashupatinath becomes a sea of red on the main day. One of the most visually extraordinary events in the Nepalese calendar.
Indra Jatra: End of the Monsoon
When: September (8 days)
Where: Kathmandu Durbar Square
An eight-day celebration marking the close of the monsoon. It’s dedicated to Indra, the Hindu god of rain, and features a 36-foot ceremonial pole. There is also a chariot procession of the living goddess Kumari through the old city, masked dances, and the ritual drinking of rice liquor from the Swet Bhairab deity. One of the most spectacular festivals in all of Nepal.
Practical Essentials: What You Need to Know Before You Go
Time your day around the rain.
Sightseeing and trekking in the morning. Museums, restaurants, and cultural sites in the afternoon. The 2–4 hour afternoon rain window is predictable enough to plan around.
Build flight buffer days.
Domestic flights to mountain airstrips (Jomsom, Lukla, Juphal) are routinely delayed or cancelled in monsoon weather. Never connect a mountain flight to an international departure without at least two buffer days in Kathmandu.
Get proper travel insurance.
Medical evacuation insurance is non-negotiable in Nepal’s mountains. Helicopter rescue costs can run into the thousands. Get it before you arrive.
Use a licensed guide.
In monsoon conditions, a licensed local guide is a safety asset, not a luxury. They monitor trail conditions, know landslide risks, and can redirect when situations change. TAAN-registered agencies are the reliable standard, like Far Out Nepal.
Negotiate your rates.
Hotels, trekking agencies, and transport providers are in off-season mode. Discounts of 30–50% vs peak season are standard.
Stay informed on trail conditions.
Check with TAAN and local operators before each leg of a trek. Landslide conditions can shift within 24 hours.
Gear checklist:
- Waterproof jacket (not water-resistant, but waterproof)
- Waterproof trekking boots with ankle support
- Leech gaiters and leech-repellent salt
- Quick-dry clothing (no cotton)
- Trekking poles as they’re essential on wet slopes
- Dry bags for electronics, documents, and cash
- Backpack rain cover
- DEET-based insect repellent
- Extra socks (wool or synthetic, never cotton)
- Basic first aid: ibuprofen, stomach meds, blister kit
- Water purification tablets or a filter
- Lightweight down or fleece for evenings at altitude
Most gear is available cheaply in Kathmandu’s Thamel district. For boots and rain jackets, bring your own tested equipment.
The travelers who’ve been coming to Nepal during the monsoon for years have learned something simple: the season isn’t a problem to be managed. It’s a filter. It removes the tour buses, the overcrowded viewpoints, and the traveler who needs constant sunshine to have a good time. What’s left is Nepal in an unhurried, lush, and honest form.
June through October. The shoulder months, especially. Go when everyone leaves. That’s when Nepal belongs to you. So, book your Nepali Monsoon Trip the best way with Far Out Nepal →
How Hard Is The Gokyo Lakes Trek for Trekkers?
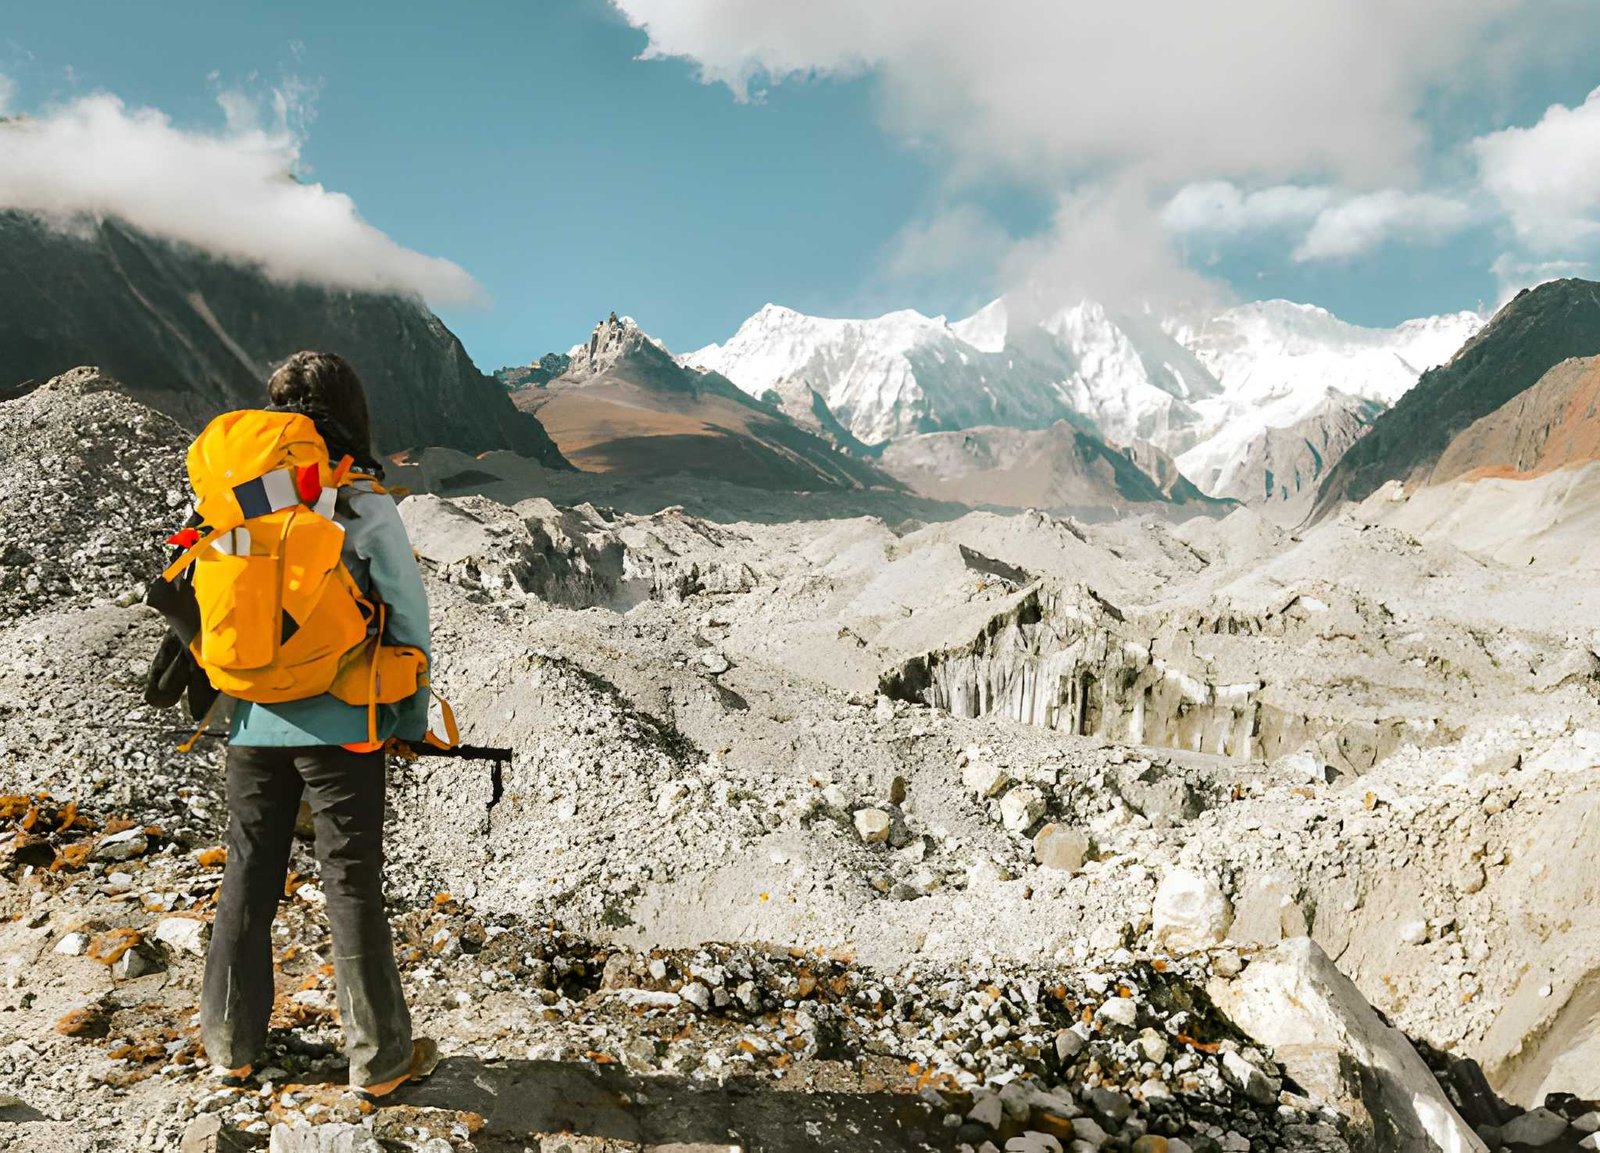
Is the Gokyo Lakes Trek Difficult?
The Gokyo Lakes trek is moderately difficult. It’s not that the trails are technical, but because altitude is relentless. You will reach over 5,000m, and at that elevation, even a simple walk demands more from your body than you might expect. Trekkers with reasonable fitness and proper acclimatisation complete it successfully every season.
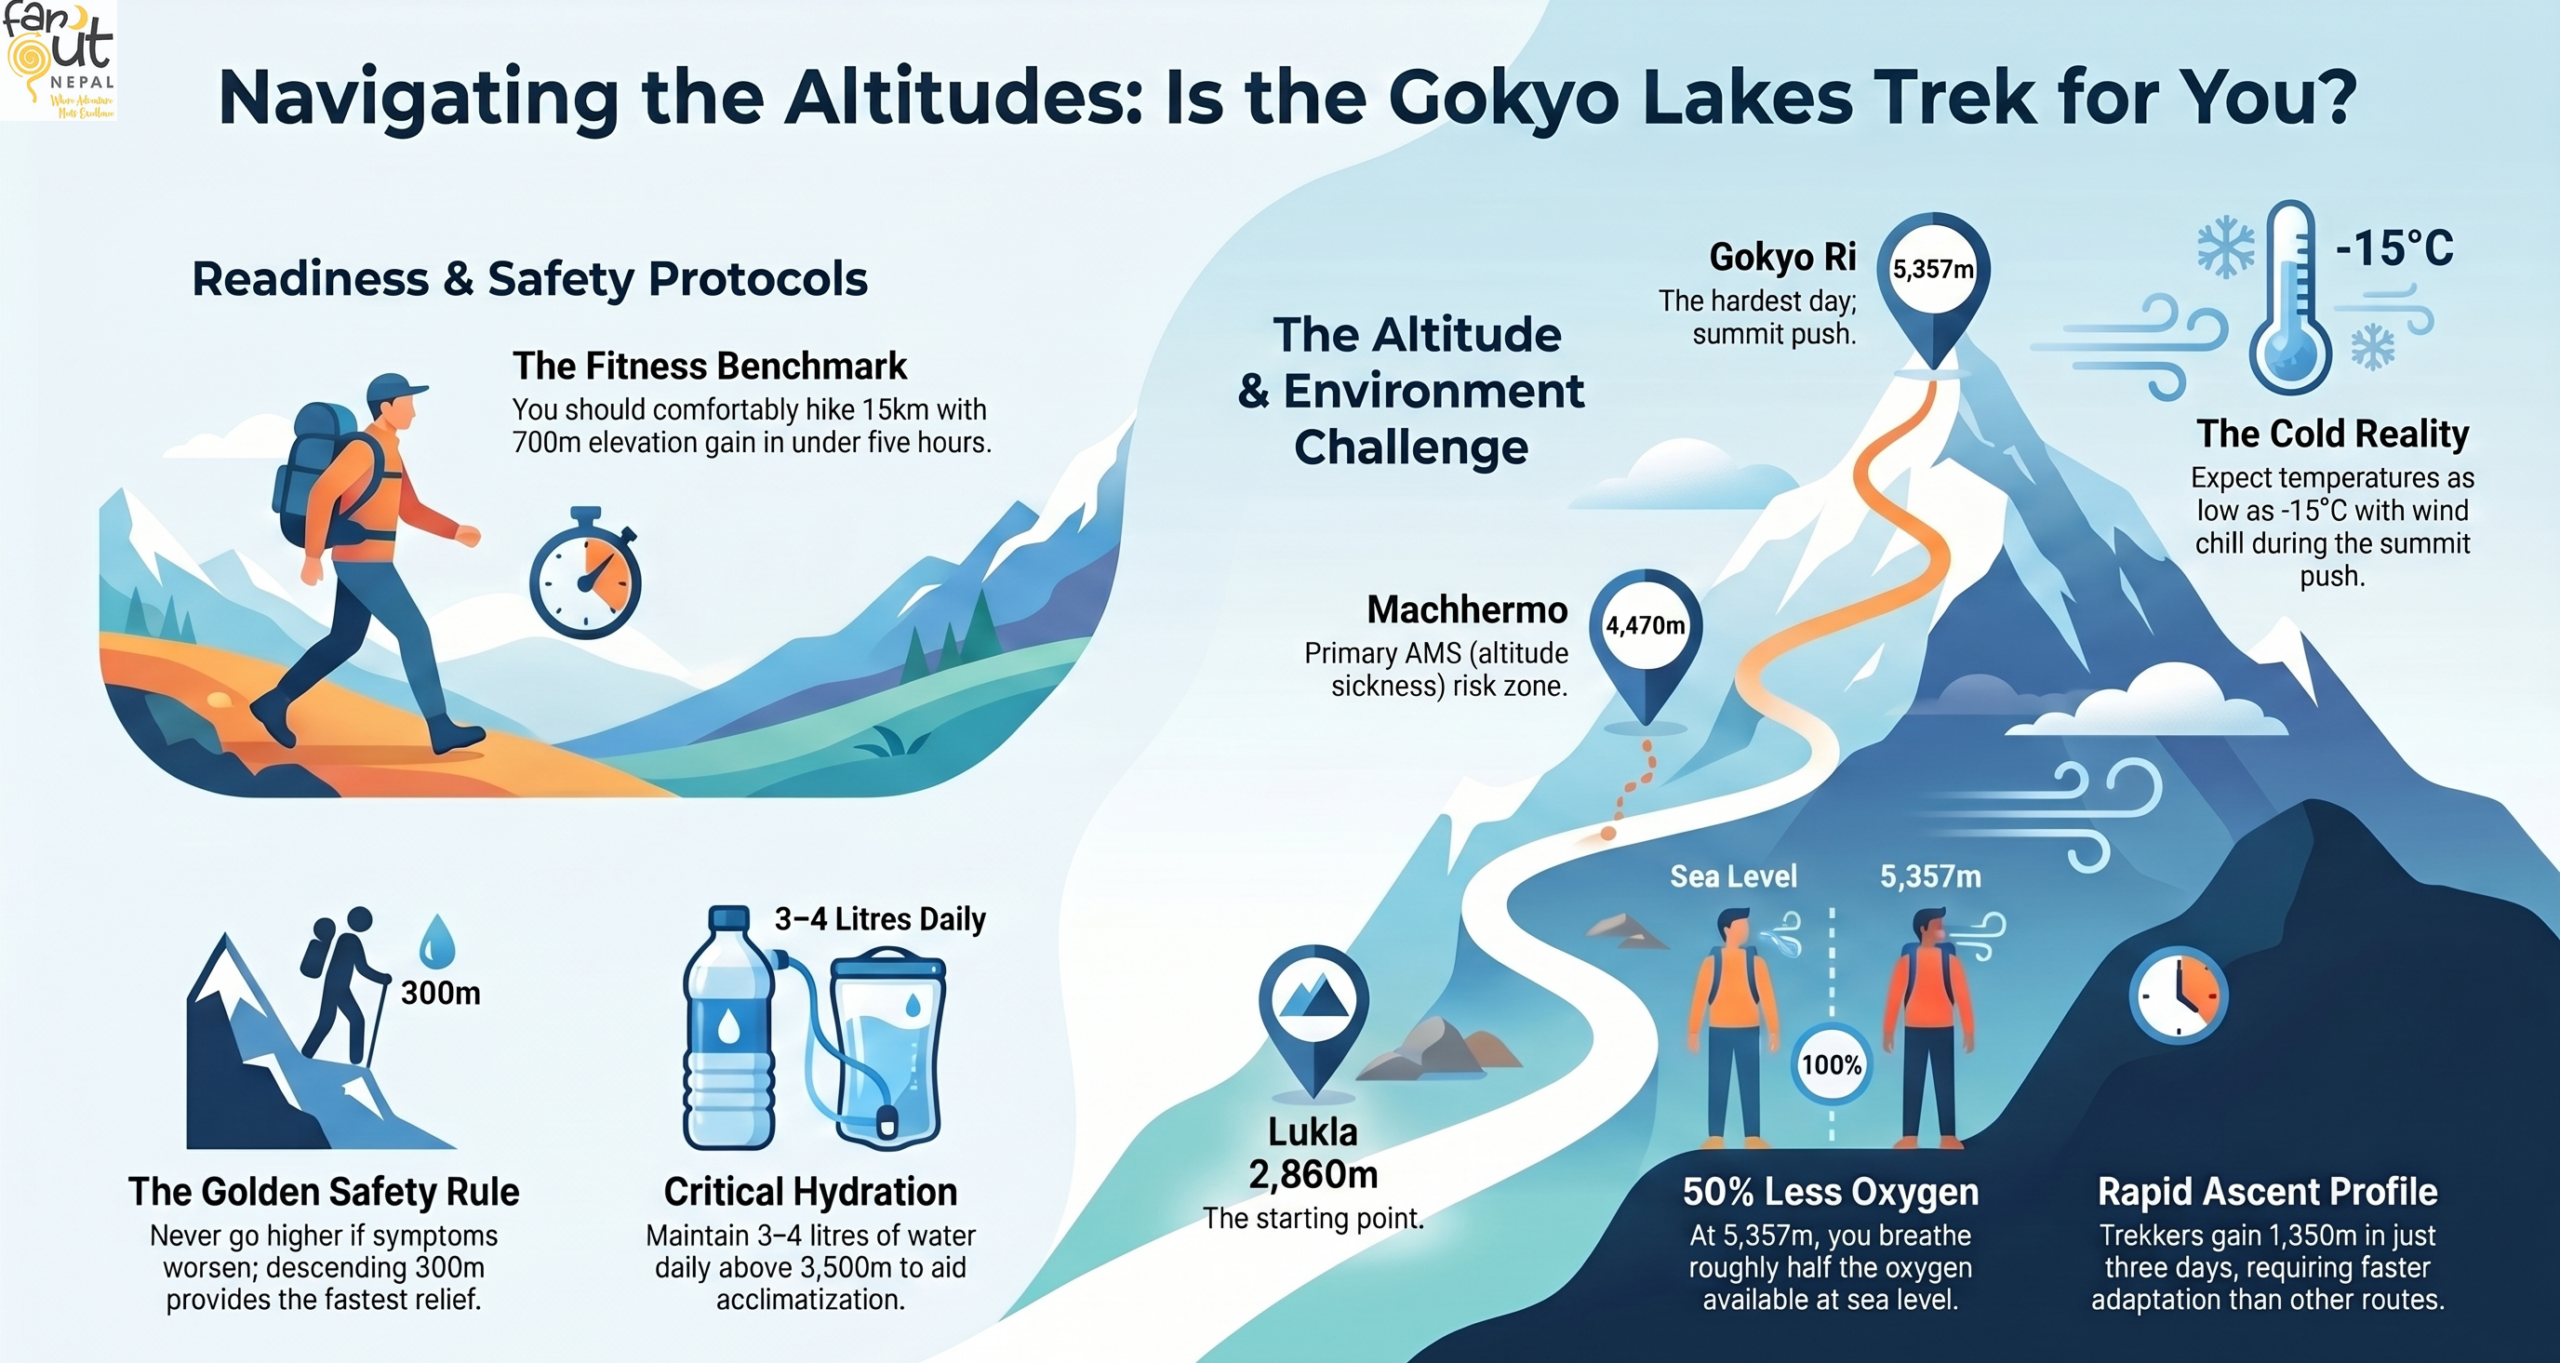
At a glance:
- The main challenge is altitude, not terrain. There are no ropes, ladders, or scrambling on the standard route
- Gokyo Ri summit (5,357m) is the hardest single day, requiring an early pre-dawn start
- Expect 5–7 hours of trekking per day on established trails through forest, alpine meadow, and glacial moraine
- Nights in Gokyo drop below freezing even in peak season
- Adding the Cho La Pass raises the difficulty to strenuous and introduces genuine technical terrain
- Best suited for trekkers with prior multi-day hiking experience
Wandering about the itineraries and logistics? Browse the main page: Gokyo Lakes and EBC via Gokyo→.
What Makes the Gokyo Lakes Trek Difficult?
Every year, thousands of trekkers reach Gokyo, and a meaningful number turn around before they get there. The reason is rarely the trails. It is the altitude. Understanding why this actually makes this trek hard will tell you more about your readiness than any difficulty label.
High Altitude and Acclimatisation
The Gokyo Lakes sit at 4,790m above sea level. Gokyo Ri, the viewpoint peak above the lakes, reaches 5,357m. At these elevations, you are breathing air that contains roughly 52–54% of the oxygen available at sea level, about half of what your lungs are used to.
That number sounds abstract until you feel it. A short walk to the teahouse bathroom leaves you slightly breathless. Your resting heart rate runs 15–20 beats higher than normal. Sleep is shallow and often interrupted. None of these indicates that something has gone wrong. It is simply how the human body responds when oxygen is scarce.
You also need to understand that from Namche Bazaar (3,440m), you reach Gokyo (4,790m) in roughly three days, gaining 1,350m in a very short window. This is a faster ascent profile than the classic Everest Base Camp route, which stages more gradually through Tengboche and Dingboche. Your body has less time to adapt.
This is why the acclimatisation day in Namche is non-negotiable, and why Machhermo (4,470m) is often where altitude sickness first announces itself.
Know the signs: Above Dole (4,038m), watch for persistent headache, loss of appetite, nausea, and disrupted sleep. These are early AMS signals, and resting should be prioritised.
The golden rule: Never go higher if you feel worse. Descending 300–500m brings faster relief than any medication.
Elevation profile of the standard Gokyo route:
| Checkpoint | Altitude | Notes |
| Lukla | 2,860m | Start |
| Namche Bazaar | 3,440m | Acclimatization stop |
| Dole | 4,038m | Watch for early symptoms |
| Machhermo | 4,470m | AMS risk zone |
| Gokyo Lakes | 4,790m | Base for Gokyo Ri |
| Gokyo Ri | 5,357m | Summit day |
Trekking Duration and Daily Distance
The standalone Gokyo Lakes trek covers around 100–110km over 12–14 days, including acclimatisation days.
On active trekking days, you walk 5–7 hours, covering 10–16km depending on the stage. Distance is a poor measure of effort here. A 10km day across glacial moraine at 4,700m is far harder than a 14km day on the forest trail below Namche.
Cumulative fatigue is real. By day eight or nine, your legs carry tiredness from every previous day. Trekkers who pace themselves conservatively in the lower sections consistently find the higher stages more manageable.
Terrain and Trail Conditions
The Gokyo route is not technically difficult, but it moves through four distinct terrain zones:
- Forest and lower valley (Lukla → Namche, 2,800–3,440m): Well-maintained stone-paved trail with a steep initial descent from Lukla, then a sustained 600m climb through pine and rhododendron forest. Suspension bridges over the Dudh Koshi gorge are narrow but solid.
- Alpine meadow (Namche → Machhermo, 3,440–4,470m): Open, exposed ridgeline walking with wide trails and sweeping views. Wind exposure increases noticeably. This is where altitude begins affecting your breathing on uphills. Steady pacing matters more than pace itself.
- Glacial moraine (Gokyo valley, 4,470–4,790m): The trail changes character significantly here. Walking across the rocky debris deposited by the Ngozumpa Glacier demands ankle stability and constant attention to footing. Rocks shift underfoot. Trail marking is less consistent. Trekking poles earn their place here.
- High-altitude summit (Gokyo Ri, 4,790–5,357m): Steep, loose, and unrelenting. Roughly 560m of vertical gain in about two hours. No technical equipment required, but mental resilience matters as much as physical fitness at this altitude.
Weather and Cold Conditions
The Gokyo Valley sits in a high mountain bowl that funnels wind and traps cold air. In peak season, daytime temperatures at the village run between 0°C and 10°C in sunshine. After dark, they drop to -10°C or colder. On Gokyo Ri before sunrise, expect -15°C with wind chill.
Afternoon cloud cover arrives reliably from mid-morning onward (target a pre-dawn summit). The weather can shift from clear to whiteout within two hours. Building contingency days into your schedule is sound planning, not pessimism.
Best seasons: Mid-October to November for clearest skies and stable weather. Mid-March through April for warmer conditions and rhododendron on the lower trails. Avoid monsoon (June–September) and deep winter (December–February).
Gokyo Ri Ascent: The Hardest Day
The Gokyo Ri summit push is the day that separates well-prepared trekkers from underprepared ones. The summit sits at 5,357m, roughly 560m above the village where you sleep the night before. The distance (3–4km) tells you almost nothing about the effort.
Most trekkers leave by 5:00–5:30 am to summit at sunrise before cloud builds. That means starting in darkness and cold, on legs already tired from several hard days. The gradient is steep and continuous, with no comfortable mid-section to recover your breathing. At 5,200m, your pace will be roughly a third of what it is at sea level for the same physical output. That is physiology, not weakness.
The reward is a 360° panorama of Everest, Cho Oyu, Lhotse, and Makalu rising above the Ngozumpa Glacier and the turquoise lakes below. For many trekkers, this is the finest mountain viewpoint in the Himalayas.
Cho La Pass: When the Trek Turns Technical
The Cho La Pass (5,420m) is not part of the standard Gokyo Lakes trek. It is an optional crossing connecting the Gokyo Valley to the Khumbu region, done by trekkers extending their route toward Everest Base Camp. The standard Gokyo route has no technical terrain, but Cho La changes the difficulty category entirely.
The 5-7 hours crossing involves glacier travel with potential ice and snow, loose scree, and a steep descent requiring careful footing. Crampons are sometimes necessary.
Who should skip Cho La: First-time high-altitude trekkers; anyone who experienced significant AMS symptoms on the approach to Gokyo; solo trekkers without a guide; anyone travelling between December and February.
Safe season window: Mid-October through November and late March through May. The pass can close without warning after snowfall at any time of year. So, check conditions with local guides the evening before.
Difficulty Level Explained: Who Is This Trek For?
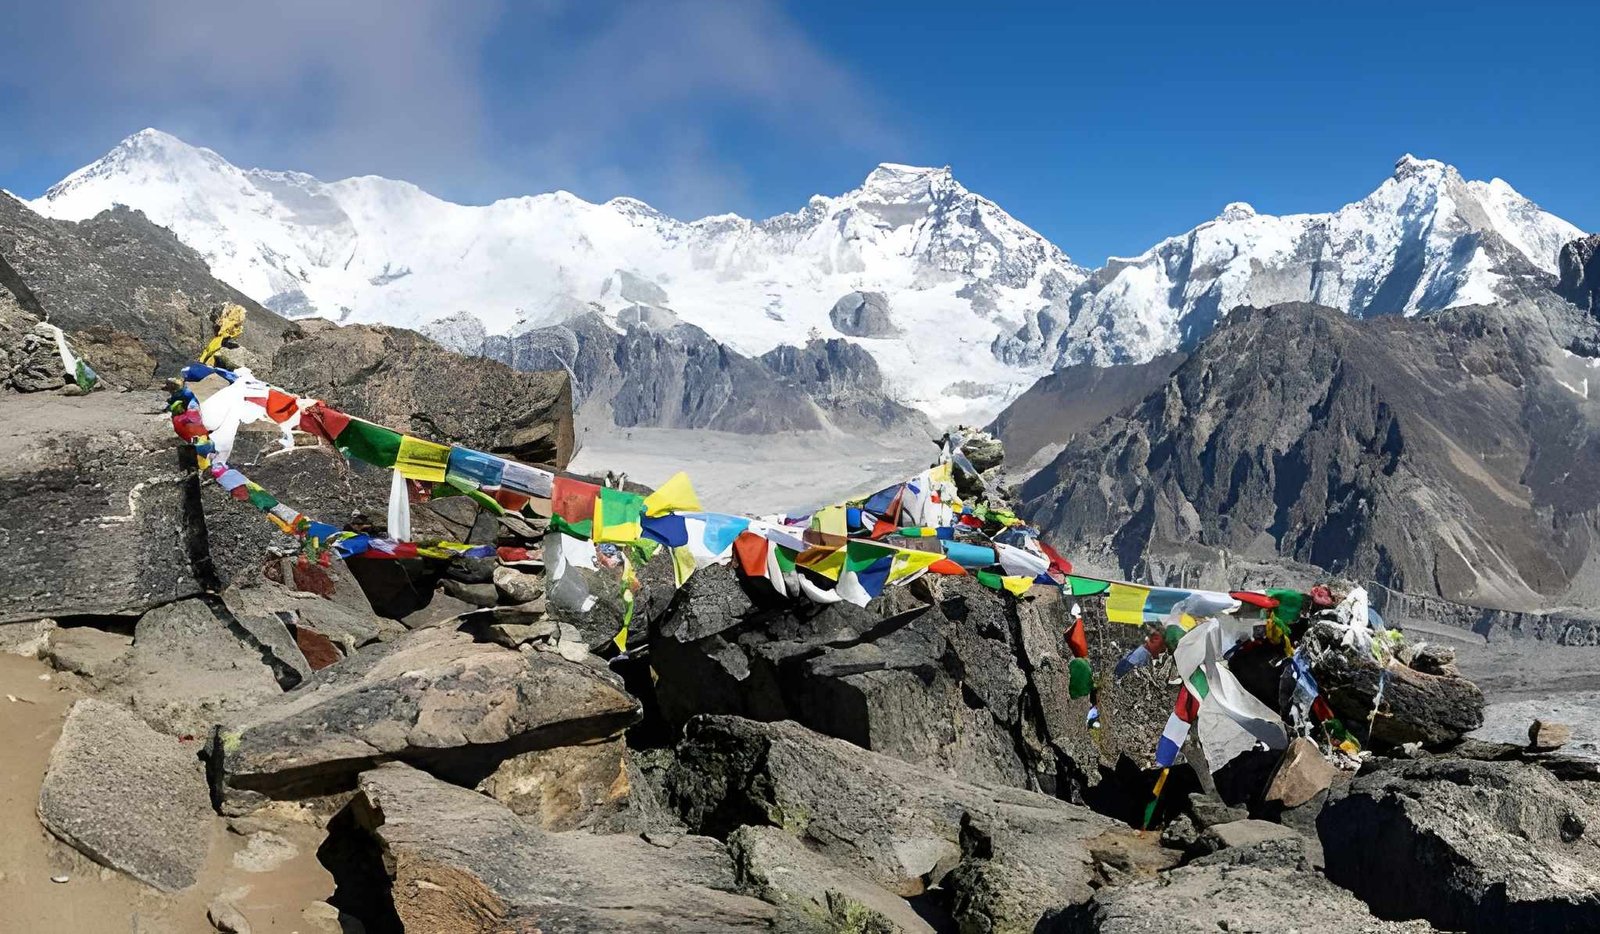
The “moderately difficult” label is accurate but incomplete.
So, can Beginners Do the Gokyo Lakes Trek?
If you have never hiked a multi-day trail before, Gokyo is not the right starting point. Altitude magnifies every physical weakness you may have, and managing your body across multiple consecutive hard days requires experience.
If you have done multi-day hikes, are generally active, and are willing to invest in genuine preparation, the Gokyo Lakes route (without Cho La) is achievable. The critical factor is not just fitness, but the mental framework to pace yourself. Listen to your body at altitude, and choose rest over pushing.
Not suitable as a first trek for: Anyone who has never hiked with a loaded pack over multiple days; anyone with untreated cardiovascular conditions; anyone planning to complete it in under 12 days without prior altitude experience.
Required Fitness Level
The trek rewards aerobic endurance above raw strength.
The benchmark: If you can comfortably complete a 15km hike with 700m of elevation gain in under 5 hours, you have the base fitness required. Comfortably means finishing tired but not spent. If it takes everything you have, train for another six weeks first.
Cardiorespiratory fitness matters most above Namche. Trekkers who smoke, have asthma, or have any respiratory history should consult a doctor before departure.
Difficulty Scale: Where Do You Fit?
| Trekker Profile | Experience | Gokyo Suitability |
| First-time trekker | No multi-day hiking; new to altitude | Not recommended without significant prep. Consider the Everest Panorama Trek first. |
| Prepared beginner | Some multi-day hiking, 3–4 months specific training; never above 3,000m | Achievable on standard route with careful acclimatisation and 13–14 day schedule. Skip Cho La. Use a guide. |
| Intermediate trekker | Multi-day experience; comfortable at 6+ hours/day; some altitude exposure | Ideal. Challenging and rewarding without being overwhelming. Cho La is worth considering if the approach to Gokyo feels manageable. |
| Experienced trekker | Previous Himalayan trekking, above 4,000m before | Comfortable. Many combine Gokyo with EBC on the full circular route. |
Gokyo Lakes vs Everest Base Camp: Which Is Harder?
Neither is dramatically harder, but they are different kinds of difficult. EBC reaches a marginally higher maximum (5,545m at Kala Patthar vs 5,357m at Gokyo Ri) with a more gradual ascent profile, giving your body slightly more time to adapt. The Gokyo approach gains altitude faster from Namche, demanding quicker acclimatisation.
Without Cho La, the two routes sit at comparable overall difficulty. With Cho La, Gokyo is clearly the harder undertaking.
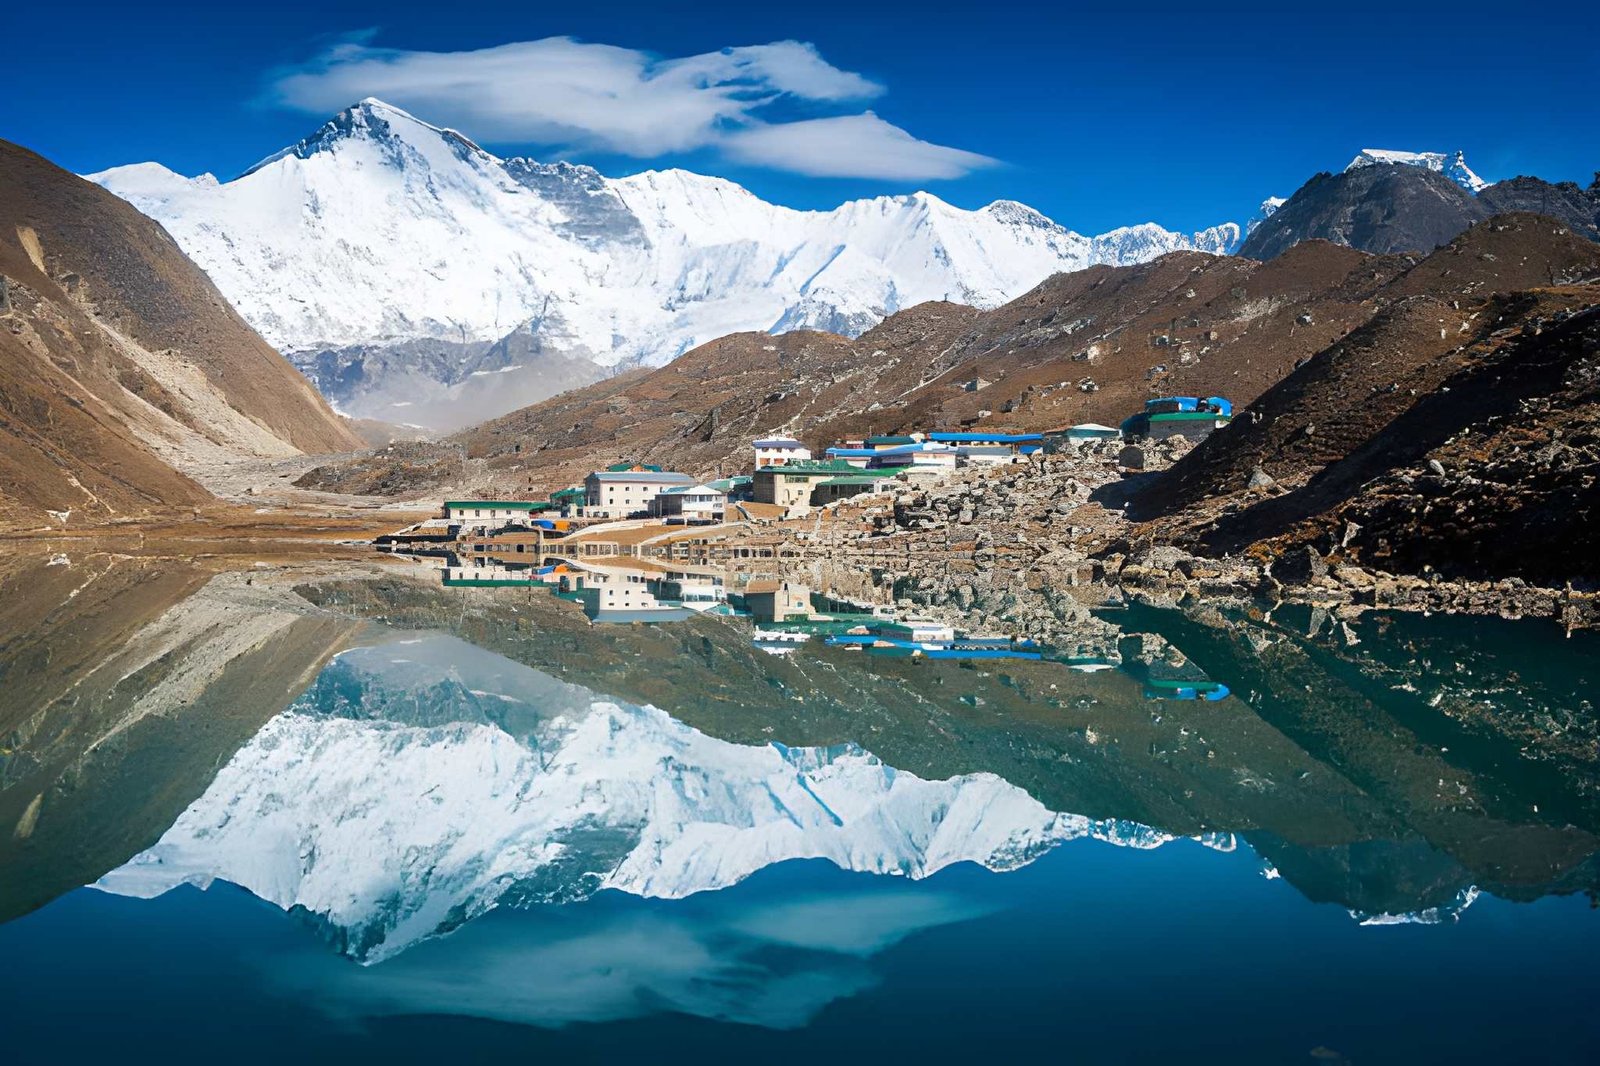
See our full Gokyo vs EBC route comparison → for a clear breakdown across scenery, crowds, and best-fit trekker profiles.
How to Make the Gokyo Trek Easier
Acclimatization Tips
Treat acclimatisation days as the trek working correctly, not as downtime. The two non-negotiable stops: two nights in Namche (with a day hike to 3,800m+ on the rest day) and one rest day at Machhermo or Gokyo before attempting Gokyo Ri.
Aim for 3–4 litres of water per day above 3,500m, while avoiding alcohol. Diamox (acetazolamide) is used by some trekkers as a prophylactic; consult your doctor before departure.
Training Before the Trek
Start at least 10–12 weeks before departure. The most effective training is also the most obvious: walk uphill with a loaded pack, repeatedly. Gym fitness helps but does not substitute for trail-specific endurance.
You can check out our “Training For the EBC Trek” to get a complete preparation guide for the Himalayas.
Packing for High Altitude
Target a daypack of 7–9kg; your main bag with a porter under 15kg. Non-negotiables: a down jacket rated to -15°C, a sleeping bag rated to -10°C minimum (teahouse blankets above Namche are unreliable), waterproof layers, and adjustable trekking poles with carbide tips. Carry altitude medication, blister care, and electrolytes. Everything else is negotiable.
Final Thoughts
The Gokyo Lakes trek is hard. That is part of its value. But “hard” means sustained effort at altitude across multiple days. No technical climbing, no life-threatening terrain, nothing that genuine preparation cannot overcome.
What it asks of you is honesty: about your fitness, your timeline, and your willingness to prepare in the months before you go. Trekkers who take that preparation seriously have a profoundly different experience from those who do not.
If Gokyo has been on your list, the question is not is this too hard for me? It is am I willing to prepare properly? If the answer is yes, the lakes are waiting.
Ready to plan your trek? Browse our Everest Via Gokyo package today.
How Hard Is It to Climb Lobuche East Peak Realistically?
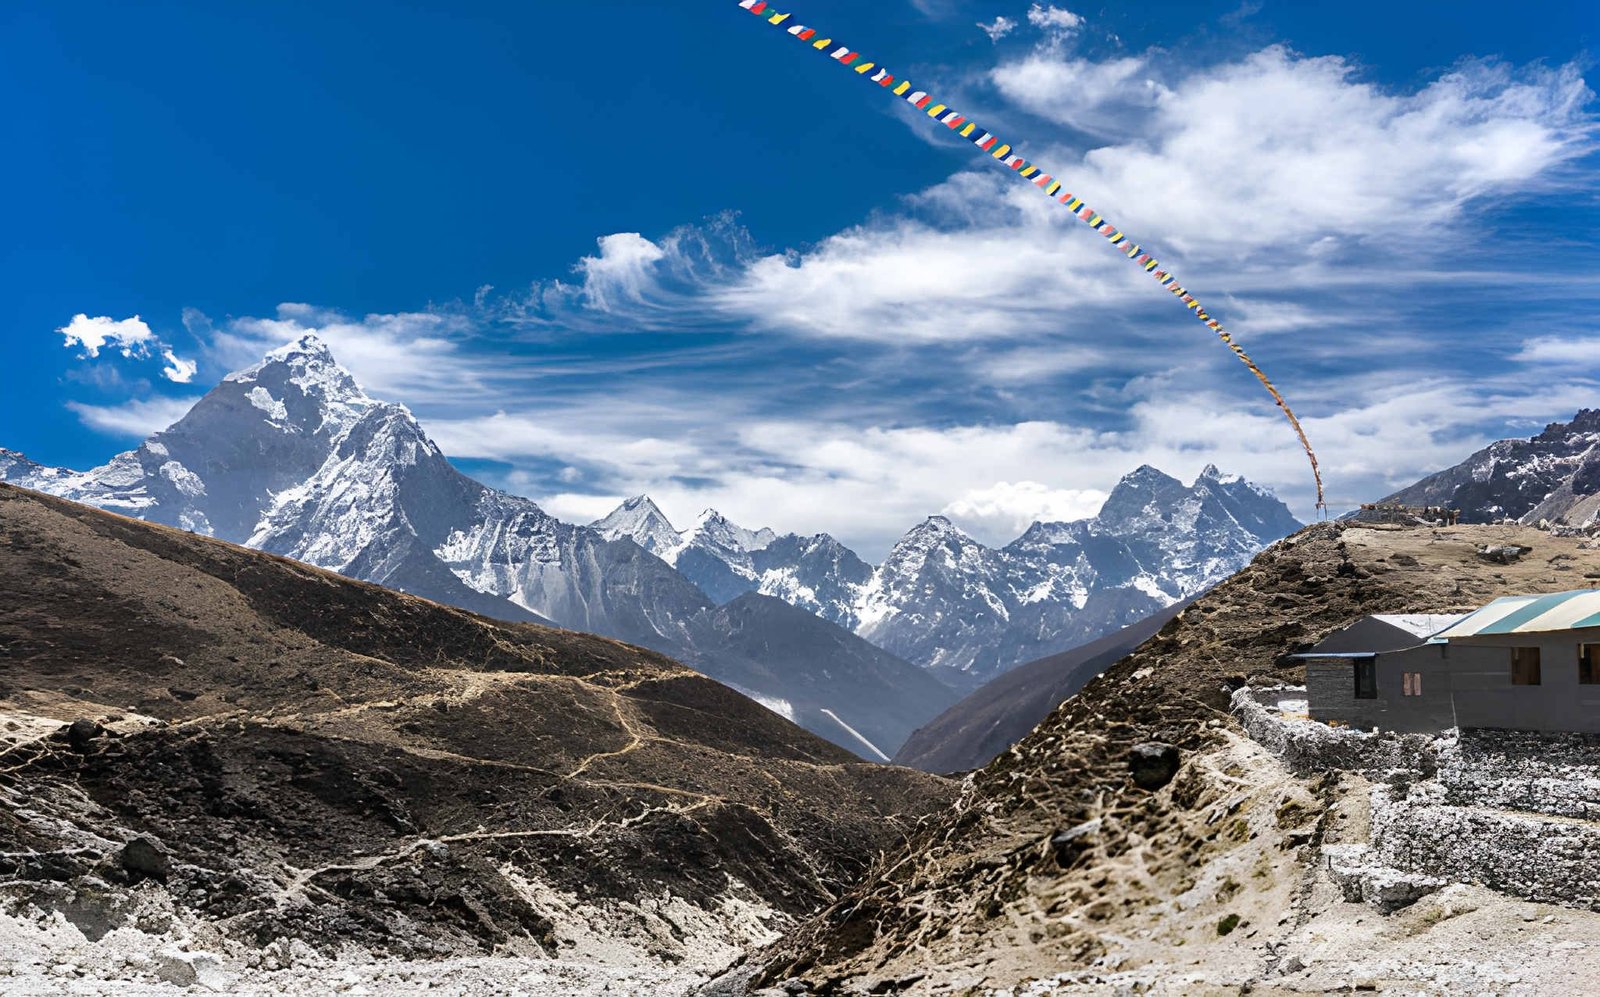
An Overview of Lobuje East Peak
Lobuche East Peak sits at 6,119 metres in Nepal’s Khumbu region. This makes it close enough to Everest Base Camp that many climbers add it as a side objective. But “close to EBC” does not mean easy. Every year, fit and motivated climbers underestimate this mountain and pay for it on summit day.
This guide breaks down the Lobuche East difficulty honestly: what it actually feels like on your body, your lungs, and your mind at 5 am in the dark. Lobuche (sometimes spelled Lobuje) is a peak that looks approachable on paper and earns your respect on the ground.
Lobuche East Height and Altitude in Context
- Summit elevation: 6,119m / 20,075 ft
- High Camp elevation: 5,200–5,400m / 17,060–17,717 ft
- Oxygen at the summit: approximately 47% of sea level
- Minimum acclimatization recommended: 12–14 days on approach before summit attempt
Every 1,000 metres above 3,000m meaningfully reduces aerobic capacity. By the time you reach high camp, you are already operating at significantly reduced output before you take a single step toward the summit.
If you are looking to actually climb the Lobuche East, visit our main Lobuche East Peak climbing page to book your next peak climbing adventure now →
How Difficult Is Lobuche East Peak?
Lobuche East Peak is a moderately difficult trekking peak, graded PD+ under the Alpine Grading System. Here is what that means in practice:
- The climb is physically demanding and altitude-heavy, not extremely technical
- Most climbers ascend the fixed rope sections using a jumar and basic crampon technique
- Summit day runs 8–12 hours from high camp, starting before midnight
- With proper acclimatization, training, and a guide, it is achievable for fit trekkers with no prior summit experience
That said, “achievable” is not the same as “easy.” The altitude alone puts Lobuche East in a category that demands serious preparation.
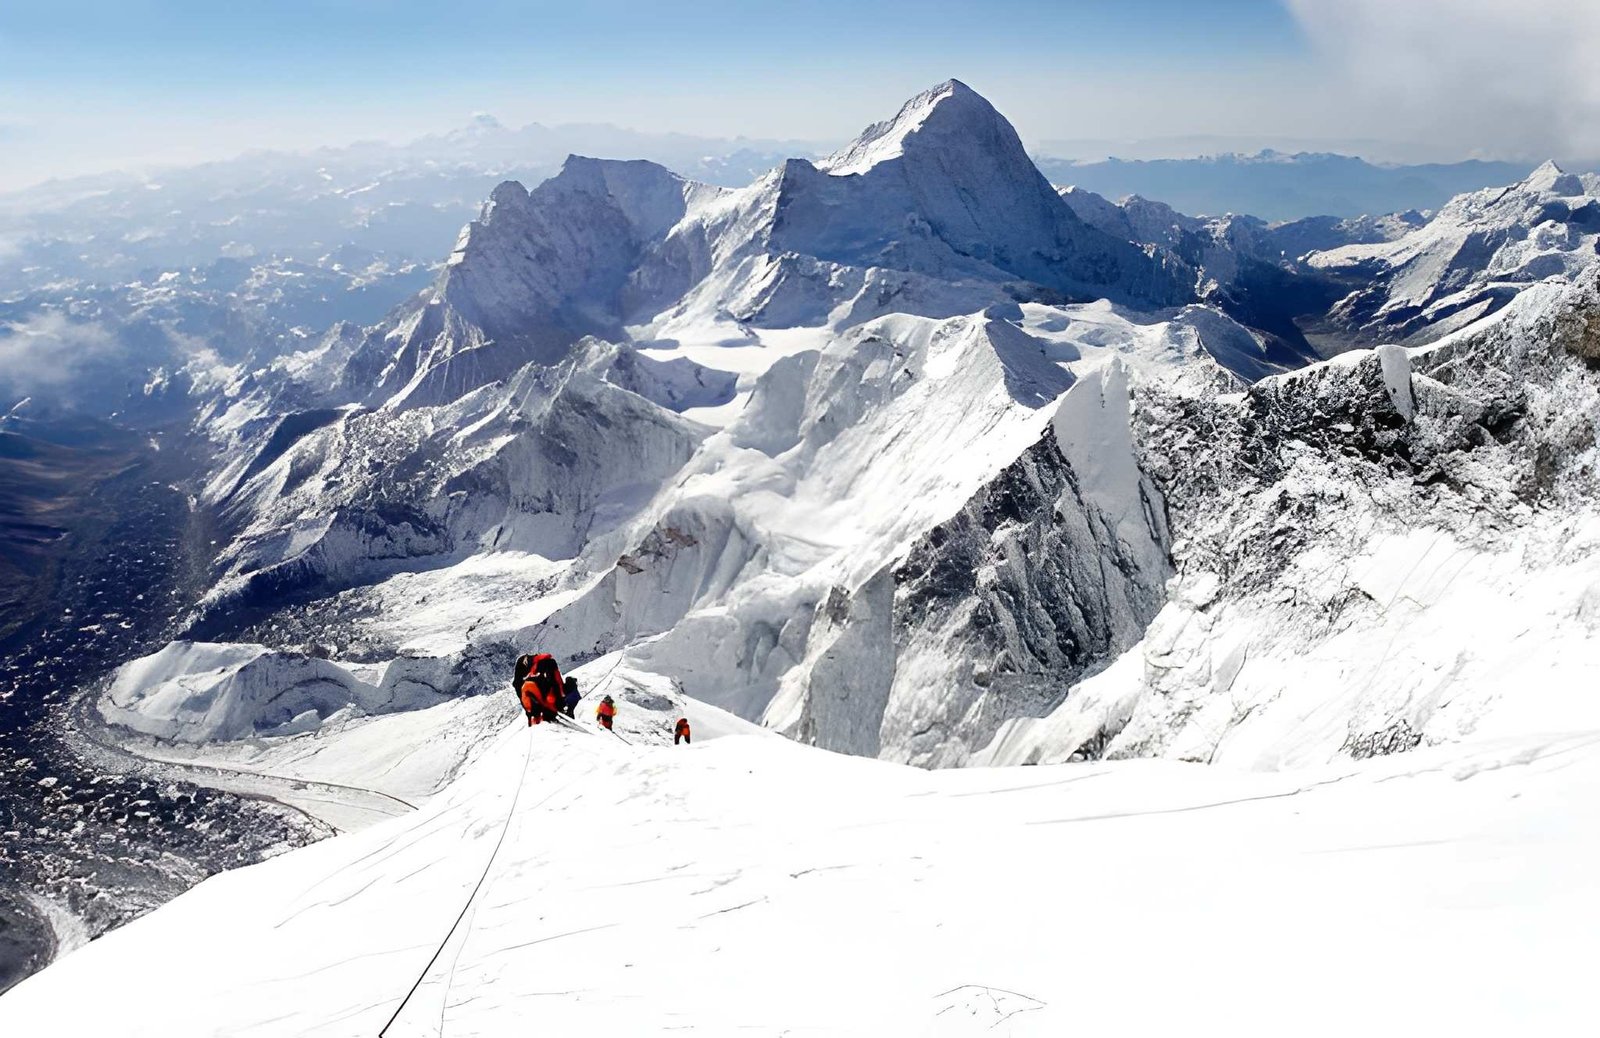
What Does “Moderately Difficult (PD+)” Actually Mean?
Most often, you see Lobuche East rated as PD+ without explanations. That number means nothing to someone planning their first Himalayan climb. Here is what it actually translates to.
What PD+ Means in Plain Terms?
The Alpine Grading System runs from F (Facile, easy) through PD, AD, D, TD, and ED. PD+ sits just above the entry-level range. In real terms:
- It is not a casual trek. You cannot walk to the summit in hiking boots.
- It is not extreme mountaineering. You do not need years of technical climbing experience.
- It sits in the middle ground: demanding enough to require mountaineering gear and real fitness, accessible enough that guided, well-prepared beginners can summit.
Think of it this way: a Himalayan trekking peak is a step above a high-altitude trail and a step below a genuine alpine expedition. Lobuche East is toward the harder end of that trekking peak category.
What a 45–50° Slope Actually Feels Like?
The crux of the Lobuche East climb is a steep slope near the summit, typically around 45–50°. That number might sound abstract, so here is a reference point: a standard staircase runs at about 35–40°. The Lobuche East summit headwall is steeper than a staircase, covered in snow and ice, and you are climbing it at over 6,000 metres above sea level.
The good news: this section is short, and fixed ropes are in place throughout the season. You ascend with a jumar, not free-climbing. The difficulty is real, but the systems are designed to get guided climbers through safely.
Breaking Down Lobuche East Difficulty
Lobuche East’s difficulty is not one thing. It has three distinct layers, and understanding which one will challenge you most is the key to honest preparation.
| Factor | Difficulty Level | What It Means for You |
| Altitude | High | Thin air forces slow movement and drains energy fast |
| Physical Endurance | High | Long summit day on a fatigued body |
| Technical Climbing | Moderate | Fixed ropes and crampons, which are manageable with guidance |
Altitude: The Hardest Part of Lobuche East
This needs to be said clearly: altitude is the primary difficulty of Lobuche East, not the technical climbing.
At 6,119 metres, the available oxygen is roughly 47% of what you breathe at sea level. Your body is working nearly twice as hard to do anything. Even walking, thinking, and staying warm feels tough. The symptoms creep up: a persistent headache, legs that feel heavier than they should, and a sleep that never quite feels restful.
Most summit failures on Lobuche East do not happen because the technical sections are too hard. They happen because climbers reach high camp already depleted by altitude and cannot physically push through an 8-hour summit push on half the normal oxygen. Acclimatization is not optional here; it is the climb.
Physical Endurance: Long and Demanding Days
Even before the technical sections, Lobuche East demands sustained physical output over multiple weeks of trekking. Approach days run 5–7 hours of walking at altitude. Summit day starts between midnight and 2 am and runs 8–12 hours round-trip from high camp.
Cold compounds everything. Pre-dawn temperatures at summit altitude can drop to -15°C or lower. Your core is fighting to stay warm while your legs fight the slope and your lungs fight the altitude. Physical conditioning before the trip, not just on it, is the difference between people who summit and people who turn around.
Technical Difficulty: Manageable With the Right Support
This is where Lobuche East earns its reputation as accessible. The technical sections: glacier approach, crampon walking, & fixed rope headwall, are manageable for a physically fit person who has received basic mountaineering training.
You will need to know how to use crampons, operate a jumar on a fixed line, and move between anchor points. Most guided peak expeditions include a training day at base camp for exactly these skills. The gear does significant work on the technical sections. What it cannot do is compensate for altitude unpreparedness or poor fitness.
What Lobuche East Actually Feels Like on Summit Day
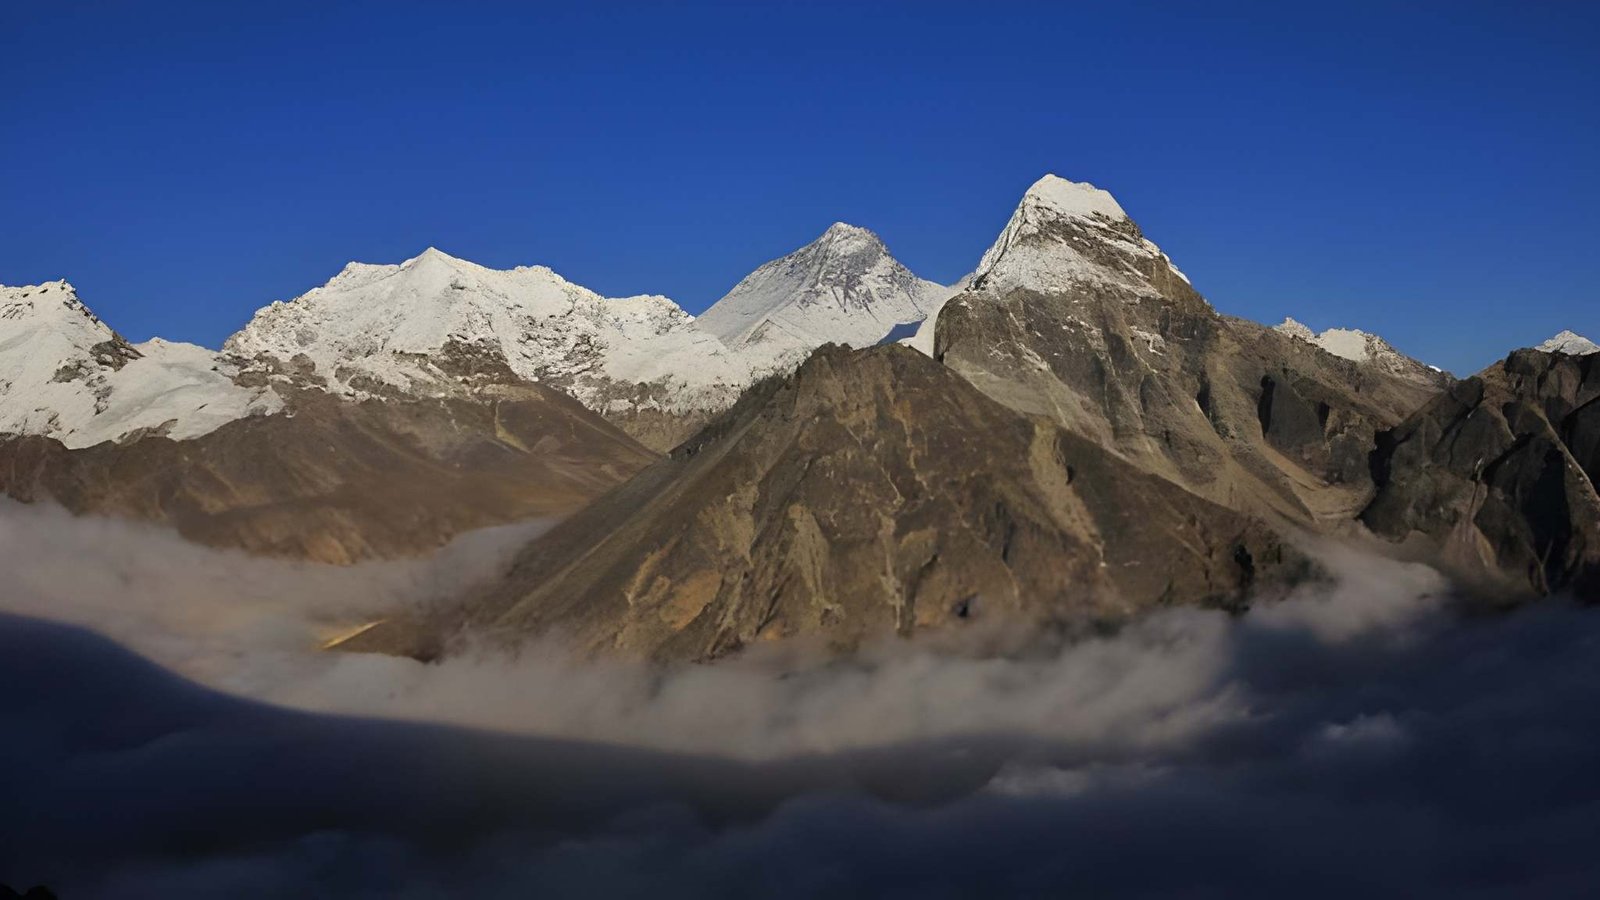
You leave High Camp in total darkness, typically between midnight and 2 am. It is cold in a way that registers in your chest, not just on your skin. The headlamp pool is your entire world as you see the ice, rock, and the back of the person ahead of you.
The early section is a slog. Every step costs more than it should at altitude. Your breathing is audible. Your pace is slower than you expect. The mental challenge begins here, before the technical sections even arrive: convincing yourself that slow and steady is still progress.
The fixed rope sections require focus at a point when your brain is operating on reduced oxygen. Climbers describe a narrowing of attention, thinking about just the next metre of rope, the next anchor, the next breath.
The summit ridge delivers some of the most dramatic views in the Himalaya: Everest, Lhotse, Nuptse, and Pumori are all visible from a single vantage. The descent back to high camp is where exhaustion fully arrives, and where most accidents on alpine climbs happen.
Who Will Find Lobuche East Hard?
Based on our Lobuche peak climbing expeditions with a lot of trekkers, here are the groups we have categorized on the basis of fitness and experience.
Trekkers with No Altitude Experience
If your highest point is a 4,000-metre pass, Lobuche East is a serious step up. The body’s response to altitude changes significantly above 5,000 metres, which is not a linear progression. This group needs a longer acclimatization schedule and should consider Kala Patthar as a preparatory altitude marker before committing to a summit attempt.
Fit Trekkers with EBC or Similar Experience
This is the natural target audience for Lobuche East. People who have walked the EBC trail have already acclimatized through the approach villages. The key question is summit-day fitness: 10 hours of sustained output at altitude is a different demand from multi-day trekking.
Experienced Trekkers or Amateur Climbers
The technical sections will feel manageable. The altitude and endurance demands remain real regardless of experience level. Lobuche East does not become easy; it becomes more predictable.
Is Lobuche East Difficult for Beginners?
Yes, but “difficult” does not mean impossible with proper preparation. Lobuche East has a meaningful success rate for guided first-time climbers who arrive fit, acclimatized, and realistic about the challenge.
The non-negotiables for beginners: a minimum of 2–3 weeks on the approach for proper acclimatization, a qualified climbing guide (not a trekking guide), and pre-trip training that includes cardiovascular conditioning and weighted hiking.
For a full breakdown of what beginners need to prepare for Lobuche East, read our complete beginner’s guide to Lobuche East Peak climbing.
Lobuche East vs Other Peaks: A Quick Difficulty Reference
| Peak | Altitude | Alpine Grade | Vs. Lobuche East |
| Mera Peak | 6,476m | PD | Easier: more trekking, less technical |
| Island Peak | 6,189m | PD | Slightly easier: shorter technical sections |
| Lobuche East | 6,119m | PD+ | The reference point |
| Ama Dablam | 6,812m | TD | Significantly harder with a genuine technical climb |
The headline: Lobuche East is harder than both Mera and Island Peak, and that difficulty gap is larger than the altitude numbers suggest.
Where the Difficulty Happens: Route Overview
Understanding the route structure helps locate where the Lobuche East climb difficulty is actually concentrated.
Lobuche Village to Base Camp (4,950m): A straightforward approach following the EBC trail. No technical gear required.
Base Camp to High Camp (5,400m): A 3–4 hour climb over rocky moraine and glacier. Crampons may be used here depending on conditions. This is where your body gets its first real taste of what the altitude feels like under load.
High Camp to Summit (6,119m): The summit push. This section contains the fixed rope headwall, the steep snow slopes, and the exposed summit ridge. It is the shortest section in distance and the hardest section in every other measure.
The route follows the Southeast Ridge as the standard line. Most guided groups fix ropes from high camp through the technical sections above.
How to Make Lobuche East Easier
No preparation eliminates the difficulty. But the right approach significantly improves your summit odds.
Acclimatize properly. Build in rest days at Namche Bazaar (3,440m) and Dingboche (4,410m). Do not rush the approach to hit an arbitrary schedule.
Train before you arrive. Three to four months of cardiovascular conditioning and weighted hiking build the base that the summit day requires. The trek alone is not enough preparation.
Climb with a qualified guide. A certified Himalayan climbing guide manages route conditions, weather windows, and the technical sections. He also knows when to call a turn-around. This is not a mountain to navigate with an underqualified team.
Is Lobuche East Worth the Challenge?
For the right person with the right preparation, genuinely yes.
Lobuche East delivers something most trekking peaks do not: a real mountaineering experience at one of the most visually dramatic locations on earth. Standing on that summit ridge with Everest, Lhotse, and Nuptse in your eyeline is not a view you forget.
The difficulty is real. The altitude will test you, the summit push will push you, and the descent will remind you that mountains ask for everything. But that is precisely what makes the summit mean something.
Visit our main Lobuche East Peak climbing page for full itinerary options, permit information, and guided expedition details.
Complete Guide to Tiger’s Nest Monastery (Paro Taktsang) Hike in Bhutan
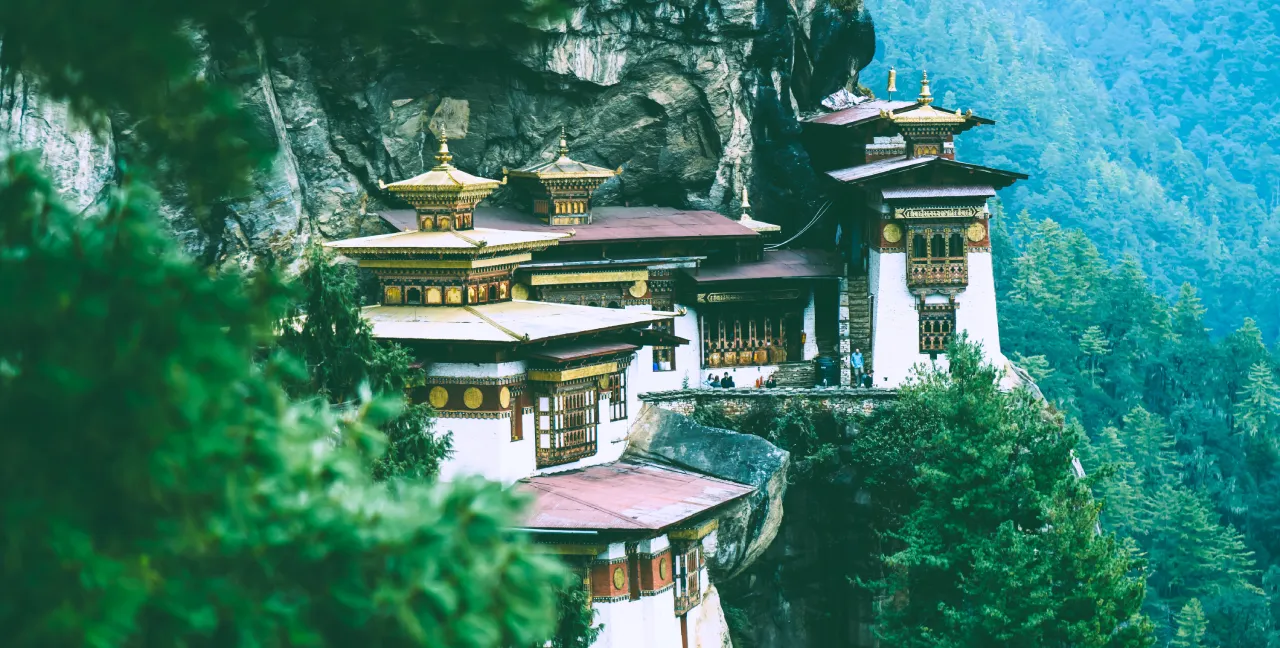
Introduction
Paro Taktsang Monastery (popularly known as Tiger’s Nest) is not just Bhutan’s most iconic landmark. It is the hike that most visitors to Bhutan will remember long after the country’s dzongs, festivals, and mountain vistas fade from memory.
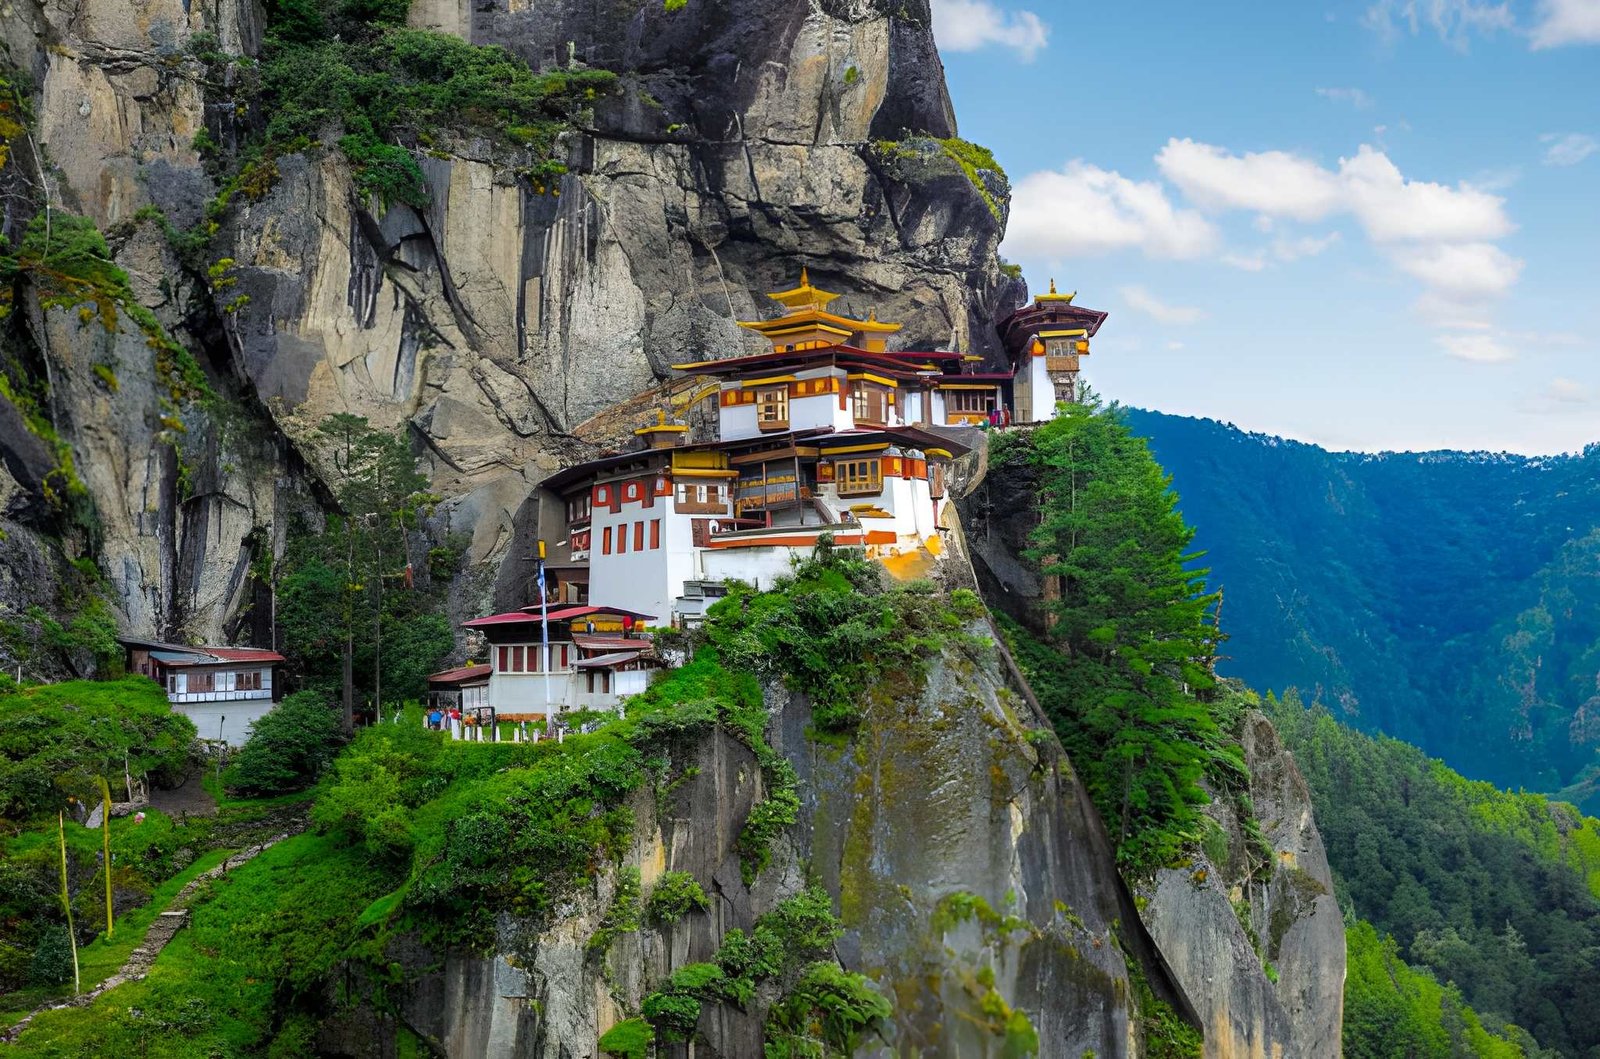
Tiger’s Nest is one of the few places in the world that has earned its reputation. One of the reasons for said reputation is the fact that the monastery is perched 900 metres above the floor of Paro Valley on a sheer granite cliff.
But here’s what most travellers won’t tell you upfront: Tiger’s Nest is as much a physical experience as it is a cultural one. The altitude is real, the trail is steep, and the final reward is nothing short of extraordinary. This guide exists to help you prepare honestly, so that you can hike with confidence, not guesswork.
Ready to hike Tiger’s Nest? Far Out’s Bhutan tour packages include a guided Tiger’s Nest hike with expert local guides who know every step of the trail, and every story behind it.
About Tiger’s Nest Monastery (Paro Taktsang)
This is one of Buddhism’s Most Sacred Cliffside Monasteries. Paro Taktsang is a 17th-century Buddhist monastery complex built into a vertical cliff face at 3,120 metres (10,240 feet) above sea level, in the Paro district of western Bhutan.
According to Bhutanese religious tradition, Guru Rinpoche (the saint credited with introducing Vajrayana Buddhism to Bhutan) arrived on the back of a tigress and meditated in a cave at this very site in the 8th century CE. The cave, and later the monastery built around it, became one of the holiest pilgrimage sites in the Himalayan Buddhist world.
Today, Paro Taktsang is both a living monastery and a UNESCO tentative list site. Monks reside and pray within its walls. Pilgrims from across Bhutan and the world make the climb not just as a hike, but as an act of devotion. For travellers, it is the single most-visited site in the country.
Why It’s Unmissable on Any Bhutan Tour
No other site in Bhutan combines natural drama, spiritual depth, and physical achievement the way Tiger’s Nest does. The monastery clings to a rockface so steep that it seems impossible by any pre-modern standard of construction.
Its white-walled temples, golden rooftops, and prayer flag-draped cliffs appear almost suspended in midair. The view from the wide ledge roughly halfway up the trail (or the main viewpoint) is one of the most photographed images in all of Asia.
It is, simply, the kind of place that changes how you see a country.
Where Is Tiger’s Nest Located?
Paro Taktsang sits above Paro Valley in the Paro district, which is about 10 km north of Paro town in Western Bhutan. The valley itself sits at roughly 2,200 metres (7,218 feet), making the climb to the monastery a consistent elevation gain of approximately 900 metres. The surrounding landscape is a mix of blue pine forest, alpine scrub, and open ridgelines with sweeping views of the valley below.
Paro is also home to Bhutan’s only international airport, making it the entry and exit point for most visitors. This geographical convenience means Tiger’s Nest is accessible from day one of most Bhutan itineraries, though allowing a day of acclimatisation first is strongly recommended.
Getting to the Trailhead
The hike begins at a car park at the base of the mountain, about a 10-minute drive from Paro town. Your tour operator or hotel can arrange transport. Entry requires a valid Bhutan Sustainable Development Fee (SDF) clearance, which your licensed tour operator will handle. Solo independent hiking is not permitted in Bhutan as all visits must be arranged through a licensed Bhutanese tour operator.
Tiger’s Nest Altitude & Elevation
| Metric | Detail |
| Monastery elevation | 3,120 m (10,240 ft) |
| Paro Valley base (trailhead) | ~2,400 m (7,874 ft) |
| Total elevation gain | ~720 m (2,362 ft) |
| Paro town elevation | ~2,200 m (7,218 ft) |
| Highest point on the trail | ~3,140 m before final descent |
The altitude of Tiger’s Nest (3,120 metres above sea level) is high enough to cause mild altitude-related discomfort in visitors who are not acclimatised. However, it is not at the level that poses a serious altitude sickness risk for most healthy adults who ascend at a reasonable pace.
Elevation Gain on the Hike
From the car park at roughly 2,400 metres, the trail climbs steadily through pine forest, ascending approximately 720 metres before reaching the monastery. This is a sustained uphill effort, not a stroll. The elevation gain occurs primarily in the first two-thirds of the trail, with a short descent followed by a steep stone staircase for the final approach.
The trail does not have sharp altitude spikes. Instead, it is a long, consistent climb that rewards a steady pace over a rushed one.
How Altitude Affects Your Hike
Altitude Awareness: If you are flying directly from sea-level cities (Bangkok, Delhi, Singapore, Kathmandu) into Paro, your body has had very little time to adjust. Even if you feel fine the first morning, your oxygen efficiency is reduced. This matters on the climb.
At 3,000+ metres, the air holds roughly 30% less oxygen than at sea level. For most people, this manifests as slightly heavier breathing and a slower pace, but no dramatic illness. However, if you rushed your journey into Bhutan or are particularly sensitive to altitude, you may experience headaches, fatigue, or mild nausea on the upper section of the trail.
The practical fix is simple: Go slow. The monks who climb this trail regularly do not rush. Neither should you.
- Spend at least one night in Paro before attempting the hike
- Drink 2–3 litres of water the day before and the morning of
- Avoid alcohol the night before. This accelerates dehydration at altitude
- Carry a light snack for energy on the upper section
Tiger’s Nest Hike: Overview
| Factor | Details |
| Total distance | ~9–10 km (round trip) |
| Average hiking time | 4–6 hours (up and back) |
| Ascent time | 2–3 hours |
| Descent time | 1.5–2 hours |
| Difficulty rating | Moderate to Moderately Challenging |
| Trail surface | Dirt path, stone steps, forest trail |
The hike is classified as moderate, not beginner, but far from technical. There are no ropes, no scrambling, and no elevation zones that require mountaineering experience. What it does require is sustained cardio fitness and the willingness to go at a deliberate pace.
Who Can Complete the Tiger’s Nest Hike?
This is the question most guides skip past. Here’s an honest answer:
- Healthy adults of most fitness levels can complete this hike if they pace themselves and take breaks
- Children aged 8 and above with reasonable fitness regularly complete it
- Older adults (60s and 70s) successfully hike Tiger’s Nest. Many old people trek with trekking poles
- Visitors with heart or lung conditions should consult a doctor before attempting
- Those with severe knee problems may find the descent challenging due to the stone stair sections
Horses are available for the lower section of the trail (up to the viewpoint café) for an additional fee. This is a really good practical option for those with mobility concerns or who want to conserve energy for the upper trail.
Step-by-Step Hiking Route
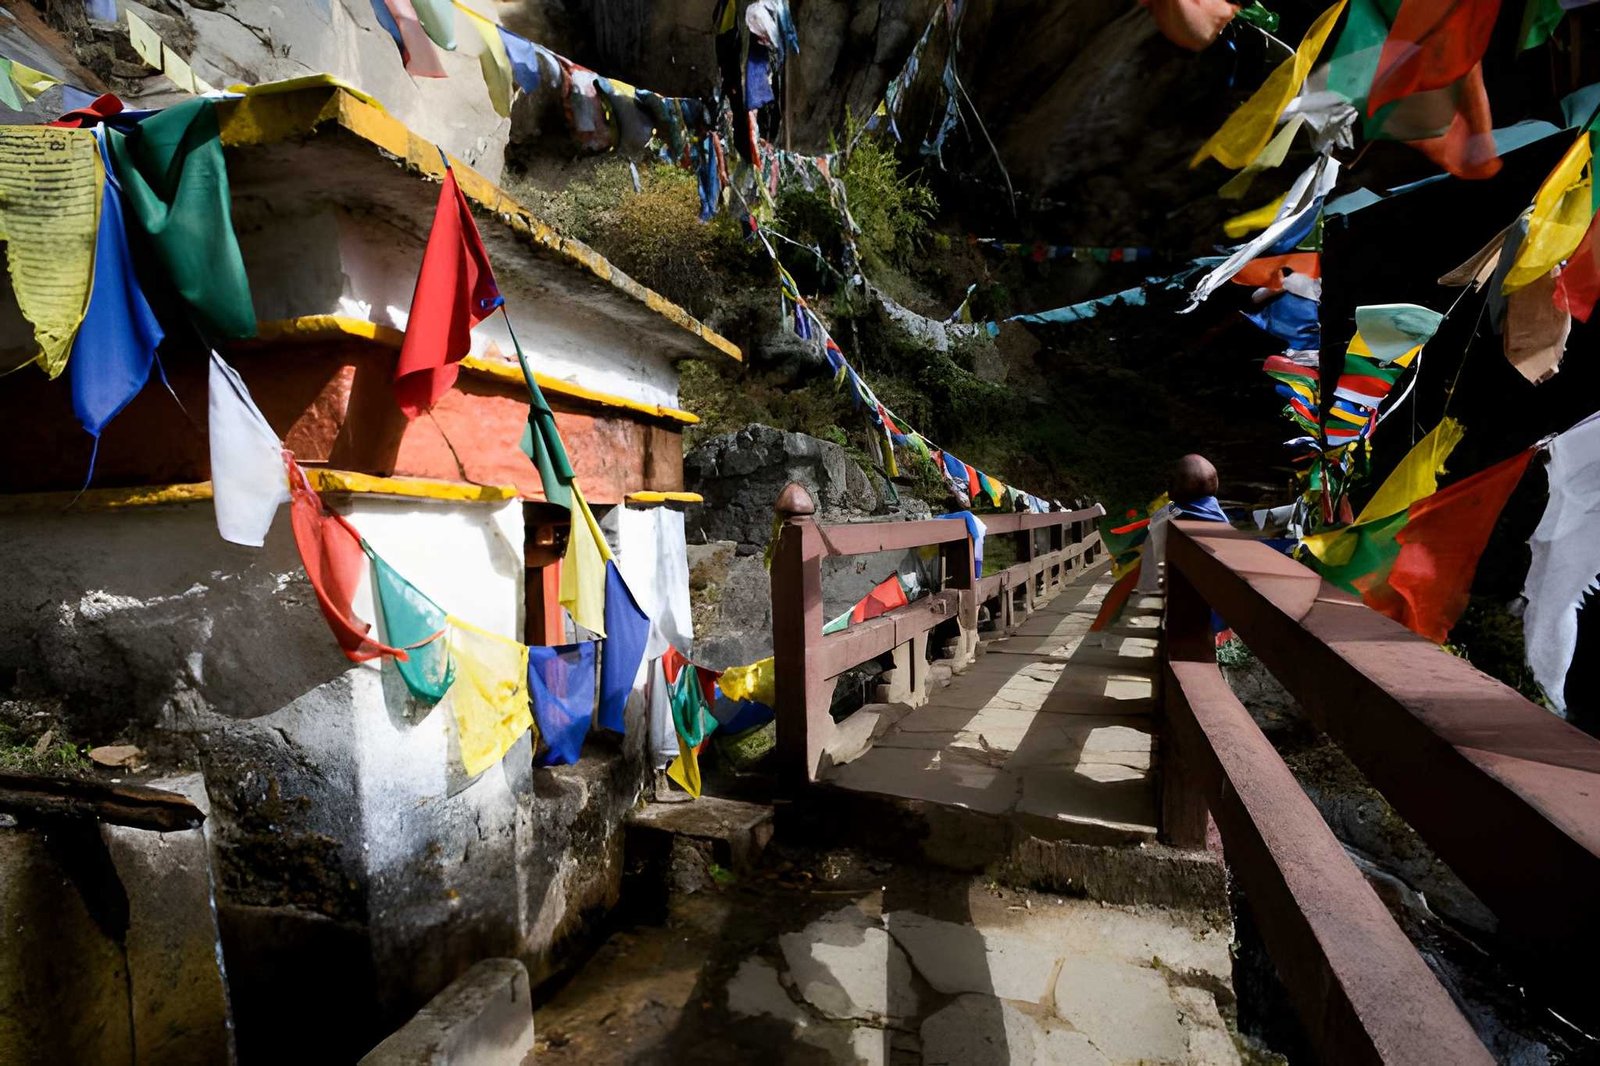
Stage 1: Trailhead to Viewpoint Café (The Main Climb)
The hike begins through a dense forest of blue pine and rhododendron. The trail is wide and well-maintained, switchbacking steadily upward. This section takes most walkers 1.5 to 2 hours. It’s consistent but manageable. It’s the kind of climb where a slow, steady rhythm carries you further than bursts of speed.
As you ascend, the trees thin and you begin catching glimpses of the valley below. Paro town appears as a patchwork of rooftops and paddy fields far beneath you. Then, as you crest a ridgeline, Tiger’s Nest comes into full view for the first time. You will see the monastery plastered impossibly to the cliff face across a narrow gorge. Most people stop here involuntarily. It has that effect.
Stage 2: The Viewpoint Café
At roughly the halfway point (elevation ~2,900 m), a small café offers tea, light snacks, and a bench with what is arguably Bhutan’s finest single view. This is your natural rest stop. Take 20–30 minutes here. Drink water, eat something, take your photographs, and let your legs recover.
The monastery visible from here looks close. It is not. At least not in terms of effort. The trail ahead descends sharply into the gorge before climbing again via several hundred stone steps.
Stage 3: The Final Descent and Stone Staircase
From the viewpoint café, the trail drops steeply into a gorge where a waterfall cascades beside the path. This descent is the steepest section of the entire hike, and your knees take the load here. Cross the bridge at the bottom, and you face the final climb: a long series of stone stairs carved directly into the cliffside, leading up to the monastery entrance.
This final push is the hardest 20 minutes of the hike. It is also the most dramatic. By the time you pass through the monastery gate, the physical effort and the sheer improbability of what you are standing inside combine into something difficult to describe.
Inside Paro Taktsang Monastery
Entry requires removing your shoes and leaving bags (including camera bags) at the entrance. You should also know that photography is not permitted inside the monastery complex. The interior is a series of interconnected temples and shrines, some built directly into the cave where Guru Rinpoche is said to have meditated. Monks may be present and in prayer. Dress respectfully: covered shoulders and legs are required.
Allow 30–45 minutes inside before beginning the descent.
Best Time to Visit Tiger’s Nest
Tiger’s Nest can be visited year-round, but two seasons stand out:
- Spring (March–May): Rhododendrons bloom along the trail in vivid reds and pinks. Skies are generally clear. This is peak season, expect other hikers on the trail.
- Autumn (September–November): Post-monsoon clarity delivers the sharpest mountain views. Cool temperatures make for ideal hiking conditions. Equally popular.
- Winter (December–February): Quieter, with occasional snow on the upper trail and monastery roof. Cold but strikingly beautiful. Fewer tourists. The hike remains doable on snow-free days.
- Monsoon (June–August): Rain makes the trail muddy and slippery. Visibility is reduced. Not recommended unless you don’t mind wet hiking.
Essential Tips for the Tiger’s Nest Hike
You should wear and carry the following:
- Footwear: Sturdy trail shoes or light hiking boots with grip. The stone stairs and forest path require ankle stability.
- Layers: Mornings start cool at altitude; temperatures rise mid-hike. A removable layer is essential
- Water: Carry at least 1.5 litres from the trailhead. The café sells water, but at altitude you’ll need more than you think
- Trekking poles: Optional but genuinely useful, particularly on the steep descent
- Snacks: Energy bars, nuts, or fruit for the upper section
- Sun protection: Hat and sunscreen as UV intensity increases significantly at altitude
Mistakes to Avoid
- Starting too fast: The first section feels easy. Burning energy early means struggling on the staircase
- Skipping the café stop: Even 20 minutes of rest changes the experience of the upper section entirely
- Underestimating the descent: Many hikers report that tired legs on the steep return trail are harder than the climb. Pace your energy accordingly.y
- Leaving too late: Start by 8–9 AM. Early starts mean cooler temperatures, better light for photography, and quieter trails
- Ignoring acclimatisation: This is the most common mistake for travellers on tight itineraries. One night in Paro before the hike makes a measurable difference
Is Tiger’s Nest Worth It? (Honest Answer)
Yes. Without reservation.
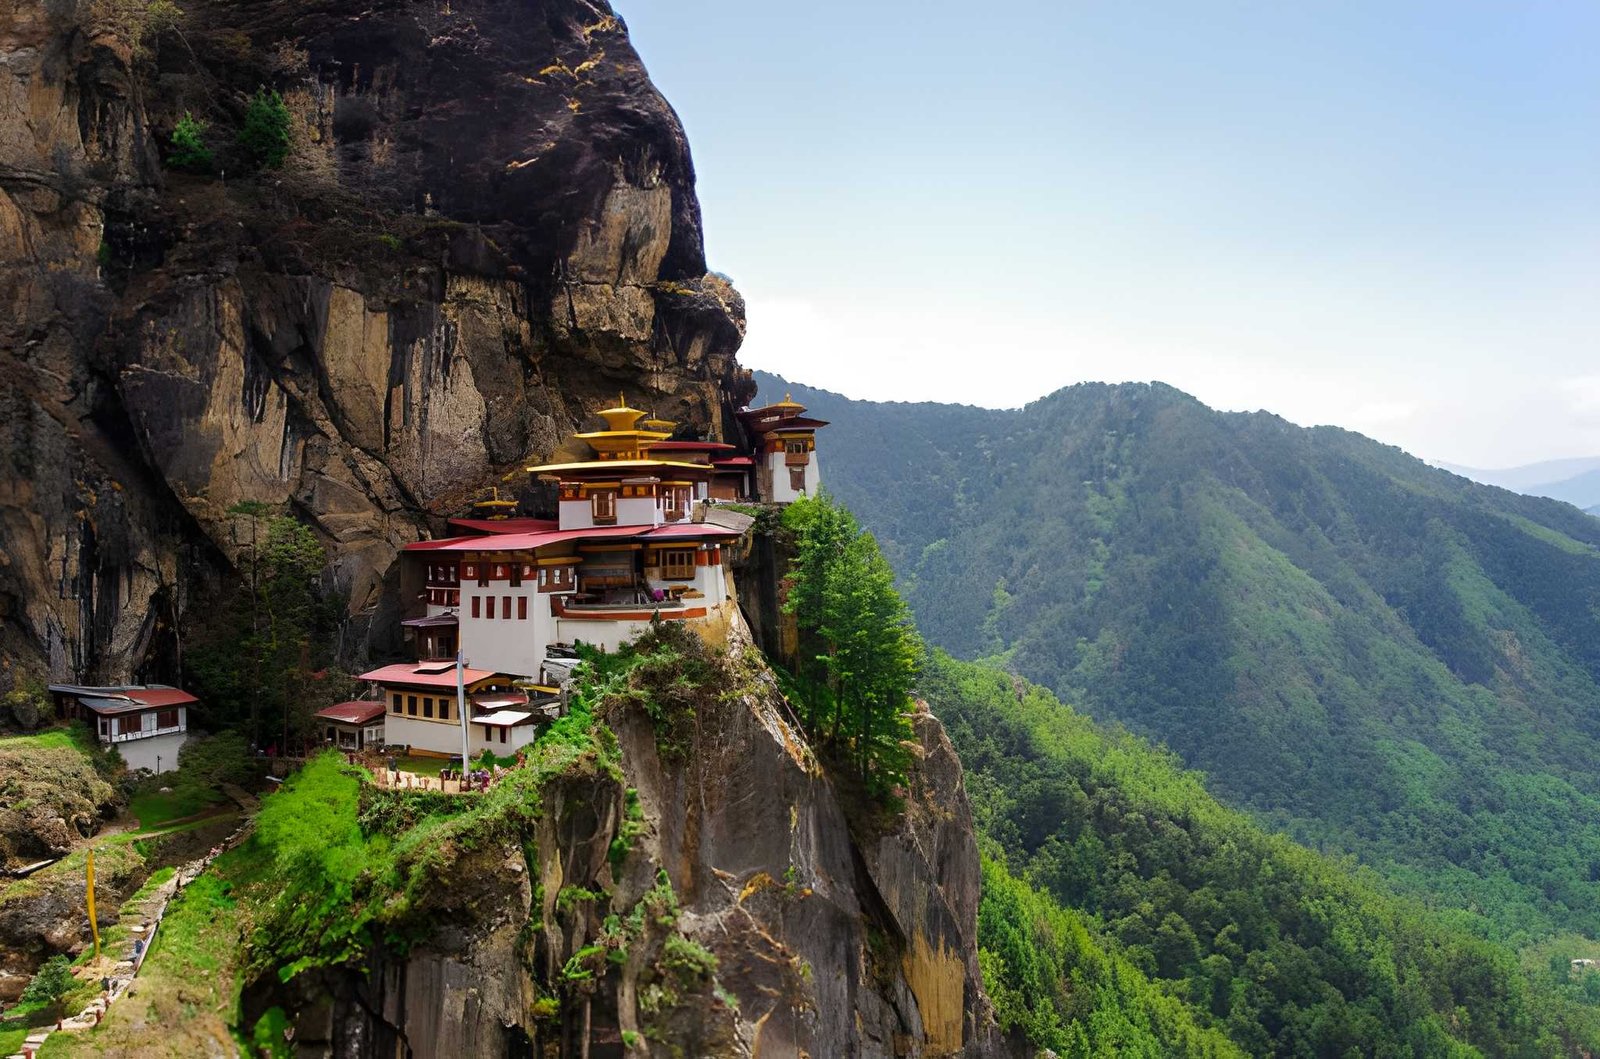
Tiger’s Nest is the kind of place that outlasts the trip it belongs to. The physical effort (a few hours of steady climbing) is entirely within reach for most travellers who pace themselves. The reward is not just a view or a photograph. It is the cumulative experience of earning your way up to a place that has no business existing where it does, and finding that it is every bit as extraordinary as promised.
Whether you are planning your first visit to Bhutan or building an itinerary for guests, the Tiger’s Nest hike belongs at the centre of any Paro itinerary. Not as an add-on. As the point.
Contact us to start planning your Bhutan journey. We offer the best guidance for logistics and itineraries with 25+ years of experience exploring the Himalayas.
Altitude Sickness Prevention: How to Stay Safe on High-Altitude Treks
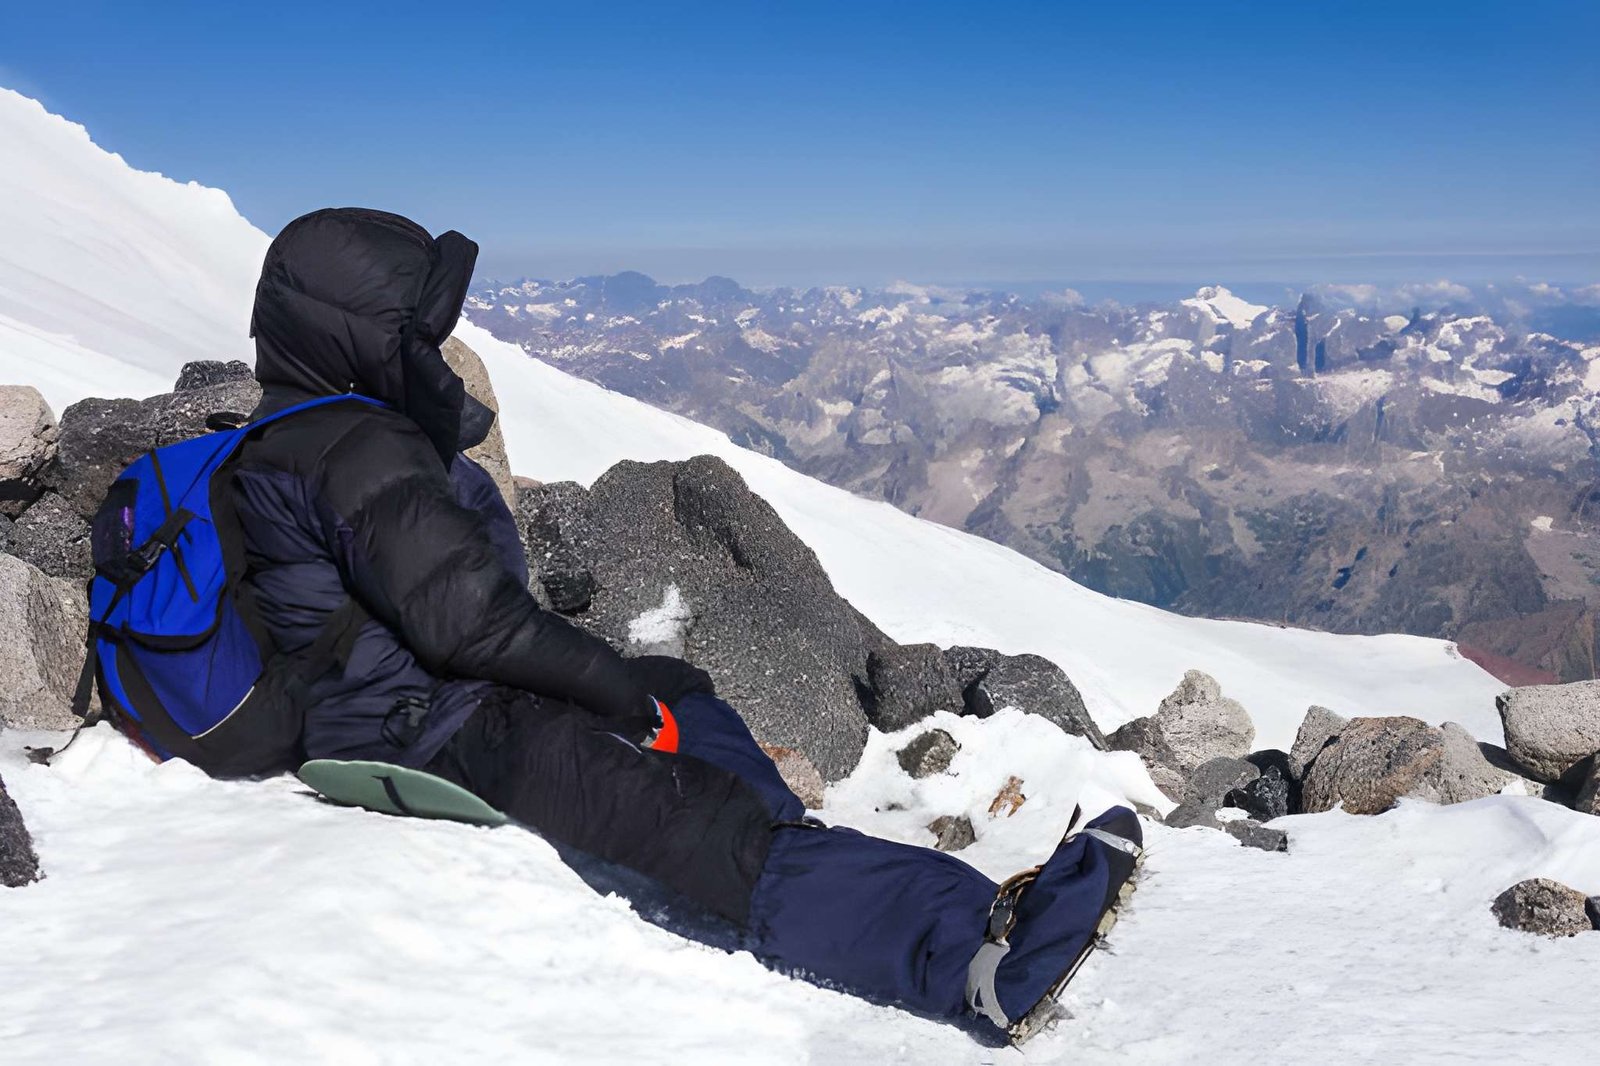
Why AMS Happens To Most Trekkers
Most people who develop altitude sickness on a trek did not get unlucky. They got ahead of their body.
Acute Mountain Sickness (AMS) affects an estimated 25–40% of trekkers above 3,500 m, and up to 75% above 5,000 m on rapid ascent profiles. It is not a sign of weakness or low fitness. It is a physiological response to ascending faster than your body can adapt. The good news: it is largely preventable. At 3,500 m, available oxygen is roughly 65% of sea level. Your body can still adapt fully, but only if you give it time.
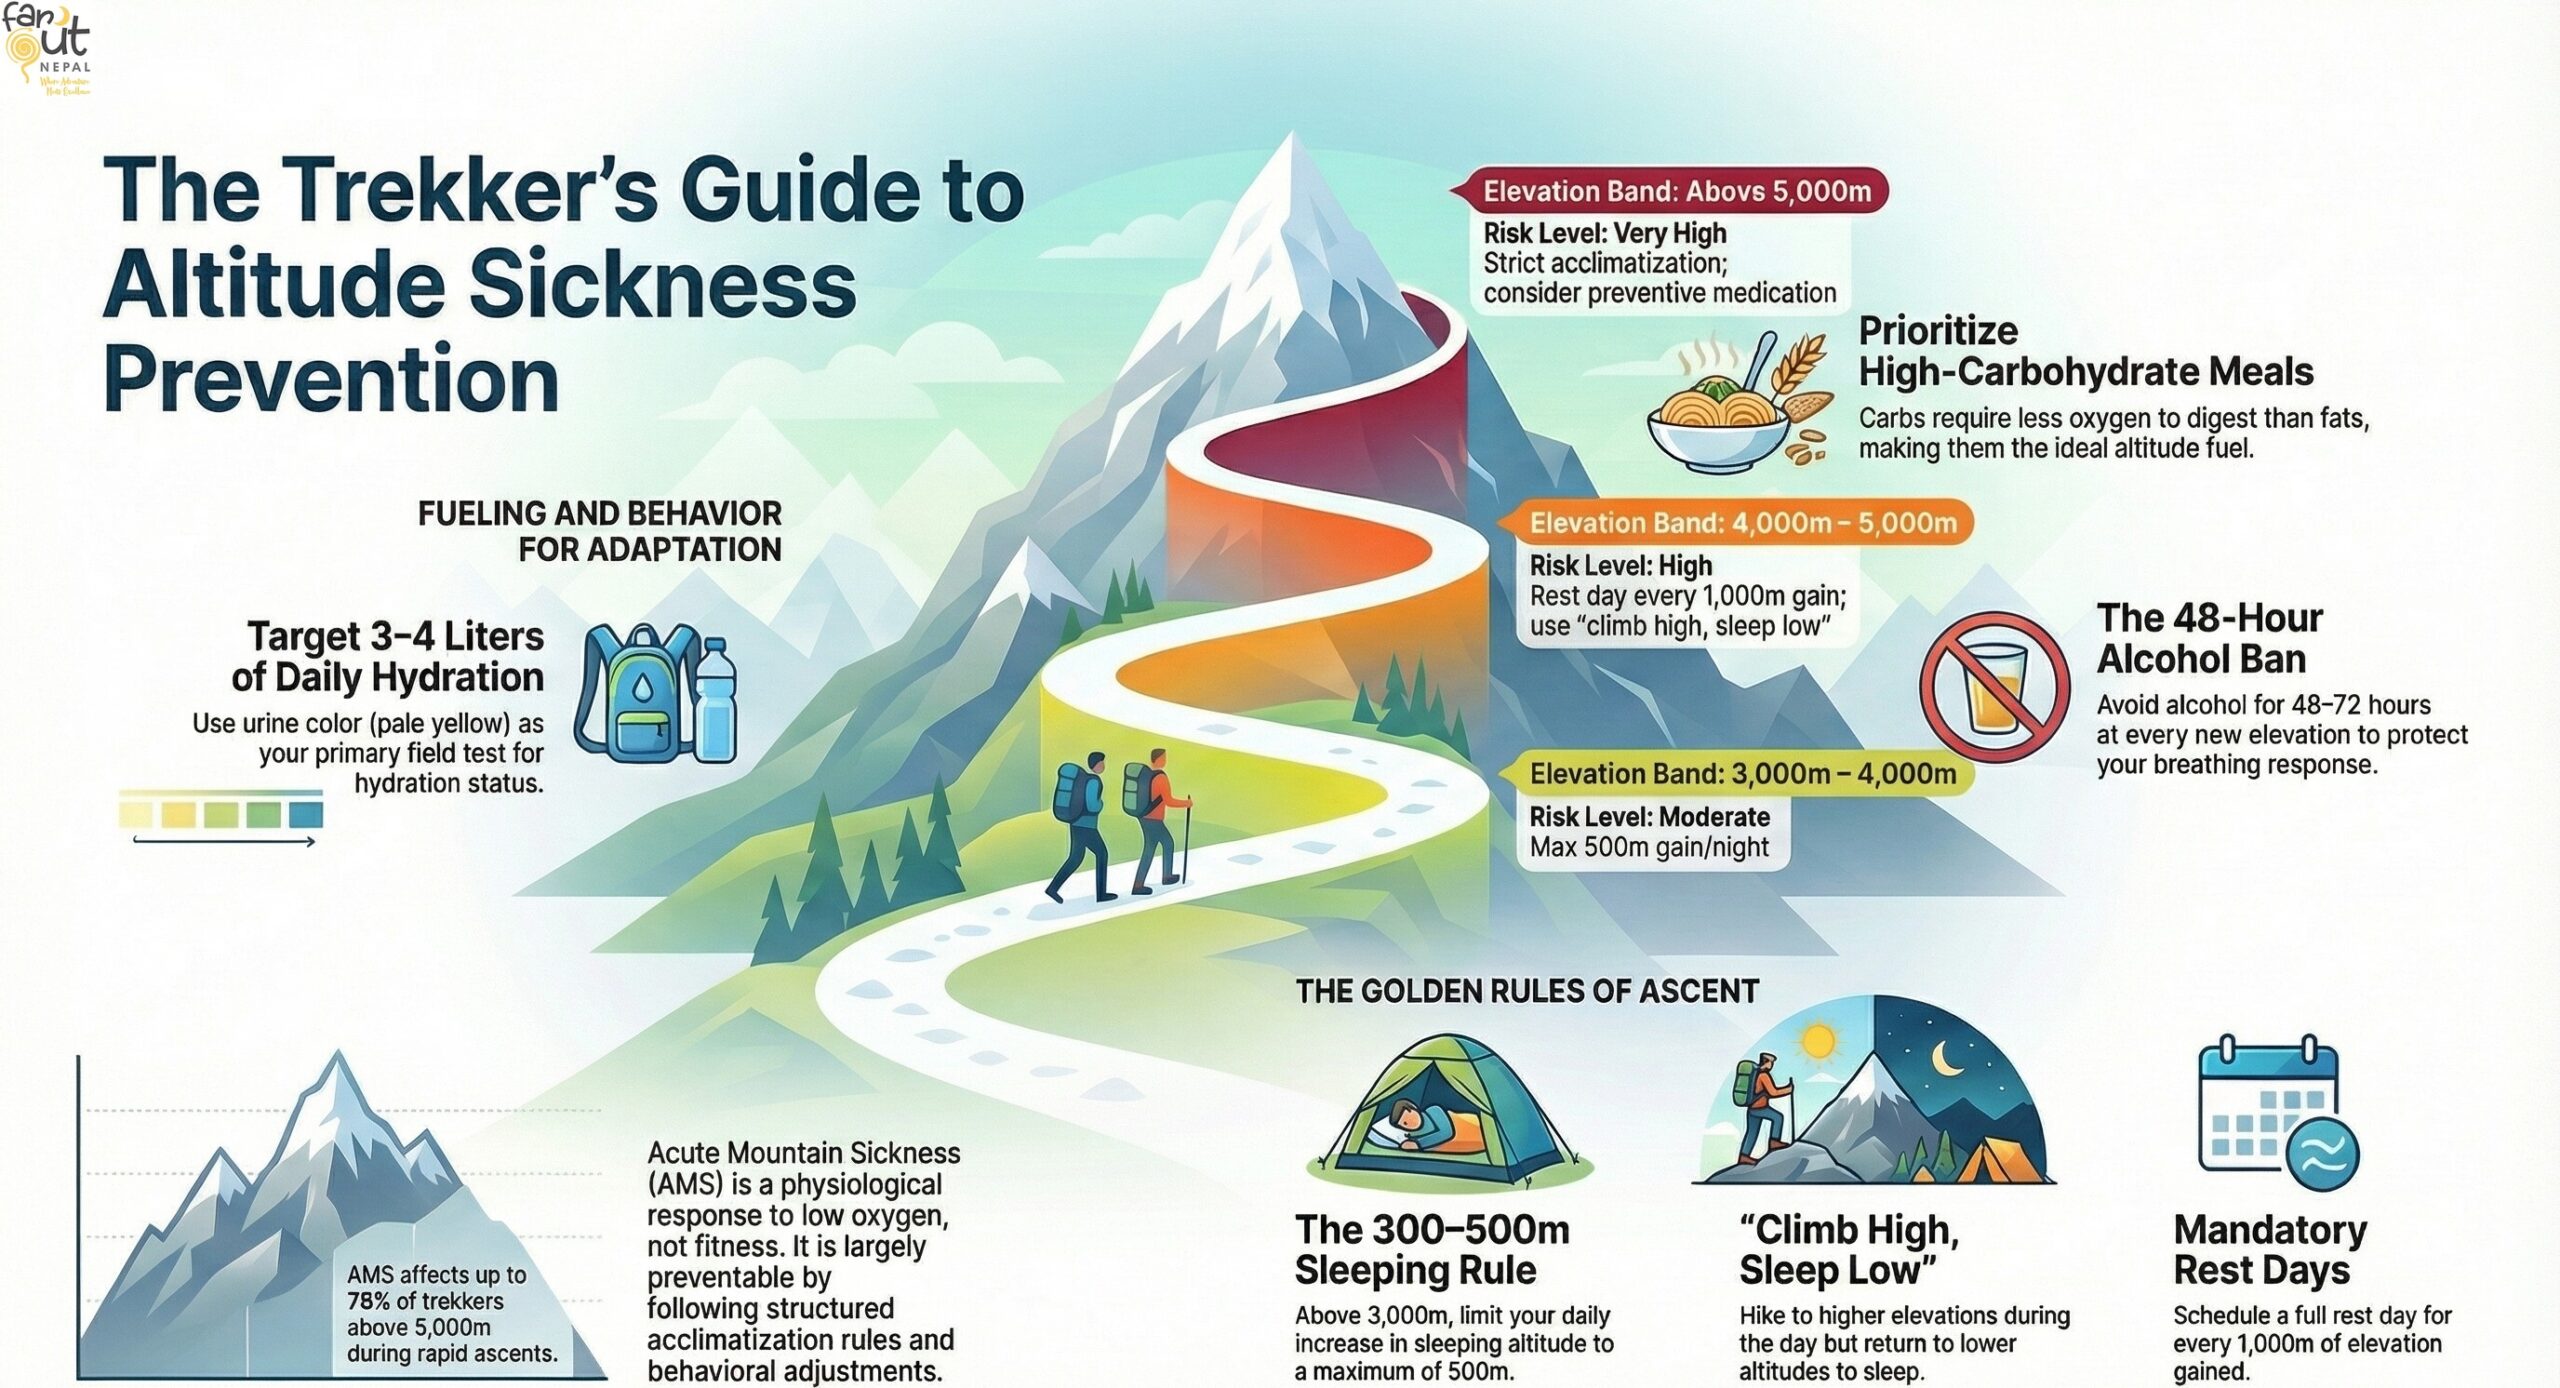
This guide covers everything that actually works. For a full clinical overview of AMS, HAPE, and HACE, see our complete altitude sickness guide.
Medical Disclaimer: This guide about AMS prevention is for general educational purposes only and is not a substitute for professional medical advice. Always consult a qualified physician before your high-altitude trek.
The One Rule That Prevents Most Cases of AMS
Ascend gradually. Limit sleeping altitude gain to 300–500 m per night once you are above 3,000 m.
That single rule, when applied consistently, eliminates the majority of AMS risk. Everything else in this guide supports it or fills the gaps around it. The Wilderness Medical Society and CDC both cite this as the most consistently supported guideline in altitude medicine.
The companion principle: Climb high, sleep low. Go for day hikes to higher elevations, followed by sleeping lower to accelerate acclimatization, while preventing overnight hypoxic stress simultaneously. This is why Namche Bazaar rest days on the EBC route include a hike up to the Everest View Hotel (3,880 m) before sleeping back at 3,440 m. It is not scenic padding; it is physiology.
Trek-Specific Acclimatization: What the Routes Actually Require
Generic advice says “go slow.” Here is what that means on some of the most popular trails.
Everest Base Camp (EBC)
The EBC route is well-designed for acclimatization when followed correctly. The mandatory rest days at Namche Bazaar (3,440 m) and Dingboche (4,360 m) are not optional stops. They are where your body does the physiological work that allows you to reach 5,364 m safely.
The most common mistake: shortening the Dingboche rest day because you feel good. Feeling fine at 4,360 m is the acclimatization working. Protect the rest days.
Annapurna Base Camp (ABC)
The ABC route has a steeper altitude gain profile than EBC and less built-in acclimatization time. Trekkers gain significant elevation quickly from Chhomrong (2,170 m) to ABC (4,130 m) in relatively few days, with limited descent options along the way.
The key mitigation: do not rush the lower sections. Time spent at Chhomrong (2,170 m) and Himalaya Hotel (2,900 m) pays dividends at ABC. A slower lower section beats a forced rest day at 3,500 m with symptoms already developing.
Manaslu Circuit
The Manaslu Circuit crosses Larkya La Pass at 5,106 m in a remote area where helicopter evacuation is far more difficult than on EBC. Rest days at Samagaun (3,530 m) and Samdo (3,875 m) are non-negotiable before even reaching the pass. The remoteness raises the stakes. So, be careful and plan accordingly.
Altitude Thresholds at a Glance
| Elevation Band | Typical Risk | Acclimatization Action Required |
| Below 2,500 m | Minimal | None |
| 2,500–3,000 m | Low–mild | Begin monitoring; no rushing |
| 3,000–4,000 m | Moderate | Max 500 m sleeping gain/night; rest days every 3rd day |
| 4,000–5,000 m | High | Rest day every 1,000 m gain; climb high, sleep low |
| Above 5,000 m | Very high | Strict acclimatization; medication consideration warranted |
Behavioural Prevention: The Habits That Move the Needle
Hydration and the Myths Around It
Target 3–4 litres of water per day at altitude. At high elevation, you lose water faster than you realise, through increased respiration rate and dry mountain air. Dehydration mimics and worsens AMS symptoms, particularly headache and fatigue.
The myth to dispel: More is not always better. Excessive water without electrolytes can cause hyponatremia, a condition that mimics AMS and can be serious. Plain water is fine; electrolyte tablets are a practical supplement on heavy days. Herbal teas in Nepal’s teahouses count toward your fluid target.
Urine colour is your simplest field test. Pale yellow is acclimatized and hydrated. Dark yellow means drink more. Clear throughout the day may mean you are overdoing it.
Alcohol: Leave It at Kathmandu
Avoid alcohol for the first 48–72 hours at every new elevation. This is not a general wellness tip, but specific physiology. Alcohol suppresses the hypoxic ventilatory response. It’s the mechanism by which your brain signals your lungs to breathe harder in low-oxygen conditions. At altitude, that mechanism is the entire acclimatization process. Blunting it during the most critical adaptation window significantly increases AMS risk.
One night of drinks at Namche before your rest day hike is not worth the next 36 hours of impaired adaptation. After your acclimatization is established at a given elevation, moderate consumption is less critical, but the first nights at each new altitude band are when it matters most.
Caffeine: More Nuanced Than You Think
Caffeine is not straightforwardly harmful at altitude. In fact, for regular coffee drinkers, stopping caffeine abruptly before a trek is a mistake. And caffeine withdrawal headache is clinically indistinguishable from an AMS headache and creates confusion at exactly the wrong moment.
The sensible approach: Maintain your normal caffeine intake. Do not dramatically increase it, as stimulants can disrupt sleep quality at altitude. But do not cut it out cold either. Nepal’s teahouses serve excellent tea and coffee. So, your morning cup is fine.
Sleep: The Underrated Prevention Tool
Most acclimatization happens during sleep. Specifically, the adjustments in ventilation, blood chemistry, and circulation that your body makes overnight. Poor sleep at altitude is both a symptom and a driver of AMS progression.
At higher elevations, Cheyne-Stokes respiration (an irregular stop-start breathing pattern) is nearly universal and disrupts sleep quality significantly. Acetazolamide reduces this substantially if you are already taking it. For those not on medication: avoid sleeping aids, alcohol, and sedatives at altitude, all of which suppress the breathing patterns your body is working hard to regulate.
Good sleep hygiene at altitude: Warm, well-ventilated room, consistent sleep schedule, and take poor sleep seriously as it can compound over days.
Overexertion: The Most Preventable Mistake
Fit trekkers are statistically just as susceptible to AMS as unfit ones. Sometimes, even more than average trekkers, because fitness breeds confidence and confidence leads to overexertion. Move at a conversational pace on ascent days. If you cannot speak comfortably while walking, slow down. On rest days, a short uphill walk and return beats complete inactivity, but it should feel easy.
Nutrition and Natural Remedies
What to Eat for Acclimatization
High-carbohydrate, lower-fat meals are physiologically sound at altitude. Carbohydrates require less oxygen per unit of energy produced than fats or proteins. This can be a real, if modest, advantage when oxygen is the limiting factor. Nepal’s dal bhat (rice, lentils, vegetables) is genuinely well-suited to altitude nutrition: high-carb, warm, easy to digest, and calorie-dense.
Practical guidance for the trail:
- Eat regularly even when your appetite drops. Reduced appetite is normal at altitude, but skipping meals impairs recovery.
- Prioritise warm, easily digestible food over heavy or fatty meals.
- Avoid large meals before sleep, which worsens the periodic breathing that disrupts rest at altitude.
Natural Remedies: What the Evidence Actually Says
This is an area where trekker culture and clinical evidence part ways. Here is an honest assessment:
Ginger — Has reasonable clinical evidence for reducing nausea, which is a common AMS symptom. It will not prevent AMS but may make mild symptoms more manageable. Ginger tea is widely available in Himalayan teahouses and is worth including.
Garlic — Traditional use in Sherpa and high-altitude communities is well-documented. Clinical evidence for AMS prevention is limited, but there is no downside to including it in meals. Garlic soup is a staple on most EBC teahouse menus.
Rhodiola rosea — An adaptogenic herb with some research interest for altitude adaptation. Early studies are inconclusive; it is not a substitute for acclimatization.
The honest summary: Natural remedies are supplements, not cures. None replaces acclimatization. Some (ginger, garlic) are worth including for comfort. None should change your itinerary decisions.
Pre-Trek Training: What Helps and What Doesn’t
Fitness does not prevent AMS: This is the most important myth to dispel. Elite athletes get AMS at the same rate as casual trekkers. Neither prior success at altitude nor cardiovascular conditioning acclimatizes your respiratory system to hypoxia. What training does is it makes the trek less exhausting, which reduces the risk.
Practical pre-trek preparation (8–12 weeks out):
- Cardiovascular base: Regular aerobic exercise, such as hiking, stair climbing, cycling, etc. Three to four sessions per week at sustained moderate intensity is the best.
- Load-bearing practice: Train with a loaded pack on hills or stairs. Descent conditioning and ankle stability matter as much as uphill strength.
- Altitude exposure if accessible: A weekend at 2,000–3,000 m in the weeks before departure is genuinely useful, though not essential.
- Sleep: Consistent quality sleep in the build-up period supports recovery capacity on the trail.
Preventive Medication
Acetazolamide (Diamox) is the most commonly prescribed preventive medication for AMS. Taken the day before ascending above 3,000 m, it compresses the acclimatization process and reduces risk, particularly for trekkers with prior AMS history or compressed itineraries. It supports the prevention principles above; it does not replace them.
For dosage, side effects, and the CDC risk framework, see our altitude sickness medication guide.
Prevention Checklist
Before you leave:
- Book an itinerary with acclimatization days built in
- See a travel medicine physician 4–6 weeks out
- Discuss acetazolamide if indicated
- Complete 8–12 weeks of cardio conditioning
- Pack electrolyte tablets and a reliable hydration system
On the trail:
- Max 300–500 m sleeping altitude gain per night above 3,000 m
- Never ascend with active AMS symptoms
- 3–4 litres of water daily, monitor urine colour
- No alcohol for 48–72 hours at each new elevation
- Maintain normal caffeine intake
- High-carb warm meals; avoid heavy meals before sleep
- Rest days should include a short uphill walk, not full inactivity
- Know the early symptoms: headache, nausea, fatigue, disturbed sleep
The Bottom Line for AMS Prevention
Altitude sickness is not a lottery. The AMS symptoms follow predictable patterns and respond to predictable interventions. The trekkers who reach Everest Base Camp, Annapurna Base Camp, or the top of Larkya La without incident are not usually tougher or fitter, but are better prepared and better paced. Plan your ascent. Protect your rest days. Trust the process.
Planning a high-altitude trek in Nepal? Our itineraries are designed with acclimatisation built into every elevation gain — not as an afterthought, but as the foundation of a safe and successful trek. → Browse our Nepal trekking trips